

Gravlax, also known as Scandinavian cured salmon, is a truly exquisite dish that belies its simple preparation. Achieved by dry-brining salmon fillets with a mixture of salt, sugar, and aromatic seasonings, the process primarily demands one key ingredient: patience. The salmon meticulously cures in the refrigerator for a period of 3 to 4 days, transforming its texture and infusing it with a delicate flavor profile, ready to be thinly sliced and enjoyed. This culinary gem, once reserved for gourmet delis and upscale restaurants, is surprisingly straightforward to create in your own kitchen, making it an accessible luxury item for any home cook.
Imagine the delight and admiration from your guests when you proudly unveil this stunning, perfectly sliced dry-brined salmon, announcing that it was prepared entirely by you. It’s a sophisticated appetizer or brunch centerpiece that promises to elevate any gathering. Learn how to make gravlax and impress your next breakfast or brunch guests with this impressive, homemade Scandinavian delicacy.

Why You Must Master Homemade Gravlax
Making gravlax at home is a rewarding culinary endeavor that offers numerous benefits beyond just a delicious meal. Here’s why this recipe should be on your must-make list:
- Effortless Preparation with Minimal Ingredients: Despite its gourmet appearance, the actual hands-on time for gravlax is surprisingly minimal. The recipe relies on a few core ingredients – fresh salmon, salt, sugar, and dill – which work their magic over time. The “curing” process, while requiring several days, is largely passive, making it an ideal project for busy individuals who appreciate quality.
- Complete Control Over Seasonings and Flavor: When you prepare gravlax from scratch, you have the freedom to customize the flavor profile to your exact liking. Adjust the balance of salt and sugar, experiment with different herbs beyond traditional dill, or introduce unique spices. This level of personalization is simply not possible with store-bought options, allowing you to create a truly signature dish.
- A Guaranteed Showstopper That Will Amaze Your Guests: There’s an undeniable “wow” factor associated with serving homemade gravlax. Its vibrant color, silky texture, and delicate flavor immediately convey sophistication and culinary prowess. Guests are often astonished to learn that such a luxurious item was created in a home kitchen, making you the star of any brunch or appetizer spread.
- Cost-Effective Gourmet Dining: While high-quality cured salmon can be quite expensive at specialty stores, making it yourself offers significant savings. Purchasing a good salmon fillet and a few basic curing ingredients is far more economical than buying pre-packaged gravlax, allowing you to enjoy this delicacy more often without breaking the bank.
- The Satisfaction of a Culinary Achievement: There’s immense satisfaction in preparing a dish that is both delicious and visually stunning. The transformation of raw salmon into tender, flavorful gravlax through a simple curing process is genuinely fascinating and deeply gratifying. It’s an approachable way to explore traditional food preservation techniques and expand your culinary repertoire.
The inspiration for venturing into this Scandinavian delight often comes from unexpected places. For instance, our 4th of July menu, typically centered around classic Americana, took an adventurous turn. We found ourselves celebrating Independence Day with a global fusion of flavors: vibrant Brazilian cocktails, elegant Scandinavian cured salmon, a whimsical grasshopper pie, and a classic grill item. This eclectic mix, while unconventional, served a purpose. Our annual tradition of gathering with neighbors for a pitch-in dinner and fireworks provides the perfect informal setting to test new recipes for the blog, and gravlax was a prime candidate.
Unlike my immediate family, who can be discerning critics, my friends are wonderfully adventurous eaters and offer invaluable, quotable reviews. Their feedback is a welcome improvement over the usual “it’s good stuff” or “you don’t have to make this again.” Moreover, they express genuine interest in the *process* of how to make gravlax, not just in consuming it, which fuels further culinary experimentation and sharing.
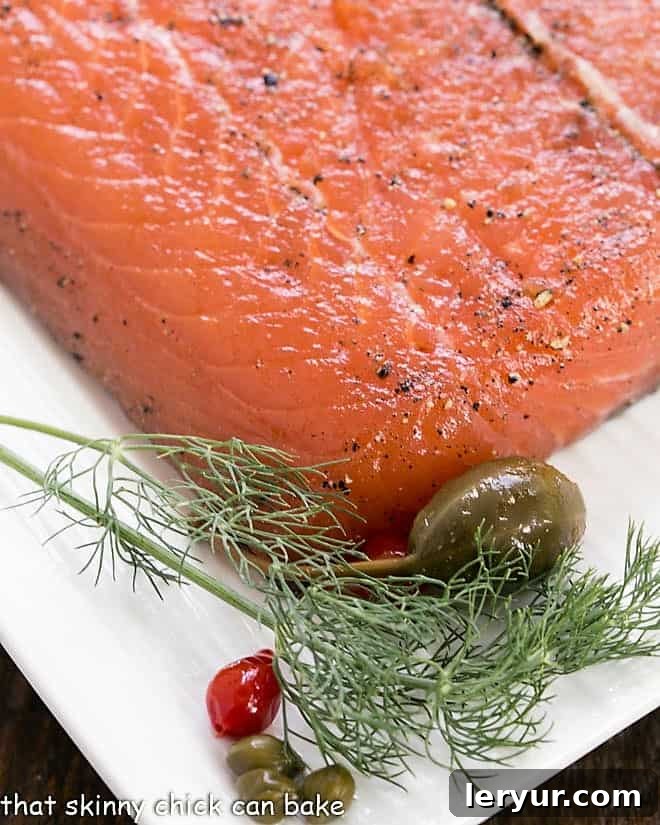
How to Make Gravlax AKA Cured Salmon: A Step-by-Step Guide
The art of curing salmon, known as gravlax, boasts a rich history stretching back to the Middle Ages. Historically, fishermen would salt their catch and bury it in the sand above the high-tide line to ferment – hence the name “gravlax,” meaning “grave salmon.” Today, the process is far more refined and hygienic, involving a dry brine of salt and sugar, often enhanced with fresh dill and other aromatics. The fundamental principle, however, remains the same: drawing out moisture to preserve and flavor the fish.
Here’s a detailed breakdown of the modern gravlax-making process:
- Prepare Your Workspace and Salmon: Begin by lining a rimmed baking sheet generously with plastic wrap. This is crucial for containing the brine and juices that will be drawn from the salmon during curing. Place your high-quality salmon fillet, skin-side down, on the prepared baking sheet. Carefully inspect the fillet for any pin bones, and remove them using tweezers or small pliers. While skin-on is traditional and helps hold the fillet together, you can also cure skinless salmon.
- Craft the Dry Brine Mixture: In a small bowl, combine your dry brine ingredients: typically a mix of kosher salt and granulated sugar. Some recipes may include black pepper, juniper berries, or other spices at this stage. This salt-sugar combination is the heart of the cure; salt draws out moisture and inhibits bacterial growth, while sugar balances the saltiness and contributes to a smoother texture and nuanced flavor. Evenly sprinkle this mixture over the entire flesh side of the salmon fillet.
- Infuse with Aromatics and Optional Enhancements: Generously arrange fresh dill sprigs over the salmon, pressing them gently into the cure mixture. Dill is the classic herb for gravlax, imparting its distinctive fresh, slightly anisy aroma. For an added layer of complexity and flavor enhancement, drizzle a tablespoon or two of a spirit like Cognac, vodka, gin, whiskey, or traditional aquavit over the dill. The alcohol, much like salt, helps to enhance the flavors and contributes to the curing process without significantly altering the texture.
- Compress and Refrigerate: Once the salmon is seasoned, cover it completely with another layer of plastic wrap, ensuring a tight seal to prevent any air exposure. Then, place a second baking sheet (or a sturdy flat board) directly on top of the wrapped salmon. To facilitate the curing process and ensure constant contact between the brine and the fish, weigh down the top baking sheet with heavy objects. Cast iron skillets, several cans of food, bricks wrapped in foil, or even heavy books are excellent choices. This pressure helps expel moisture more efficiently and firms the fish’s texture.
- The Patient Curing and Flipping Ritual: Place the entire weighted assembly into the refrigerator. The curing process typically takes 3 to 4 days, depending on the thickness of your salmon fillet and your desired texture. Critically, every 12 hours (morning and evening), you must flip the salmon. Unwrap it, gently turn the fillet over, drain any accumulated liquid (which will be considerable as moisture is drawn out), and then re-wrap it with *new* plastic wrap before reapplying the weight. This consistent flipping and draining ensure even curing and prevents spoilage. This periodic attention is the “patience” the recipe truly demands.
Expert Tips for Crafting Perfect Gravlax Every Time
While the gravlax recipe is undeniably simple, a few key techniques and considerations can elevate your homemade cured salmon from good to truly exceptional. The primary requirement, as always, is patience, as the full flavor and texture will develop over 3-4 days in the refrigerator.
- Prioritize High-Quality Salmon: The foundation of excellent gravlax is undoubtedly the salmon itself. Always opt for the freshest, highest-quality salmon you can find. Visiting a reputable fishmonger is often preferable to a standard grocery store, as they typically offer superior, often sushi-grade, fillets. Look for vibrant color, firm flesh, and a fresh, oceanic scent. Avoid salmon that appears dull, bruised, or has any “fishy” odor, as inferior quality can lead to a mushy texture or undesirable flavors in the final product. Wild-caught varieties like Sockeye or King salmon are excellent choices for their rich flavor and firm texture.
- Balance the Dill Flavor: Fresh dill is the iconic herb for gravlax, imparting a distinctive, aromatic freshness. However, moderation is key. A subtle dill flavor enhances the salmon without overwhelming its natural taste. While generously covering the salmon is good, avoid excessive amounts that could become bitter or dominant. Beyond dill, you can experiment with other complementary herbs and spices. Fennel seeds, anise, coriander, caraway, or a hint of citrus zest (lemon or orange) can introduce intriguing depth and complexity to your cure, offering a personalized touch.
- PRO-Tip: The Optional Alcohol Boost: Adding a spirit like Cognac, vodka, gin, whiskey, or the traditional aquavit is entirely optional but highly recommended for those seeking a more complex flavor profile. Alcohol acts as a powerful flavor enhancer, much like salt, and can also contribute to the curing process. It won’t cook the fish but rather infuse it with subtle boozy notes that complement the salmon beautifully. Choose a spirit you enjoy drinking, as its characteristics will transfer to the gravlax.
- Embrace the Virtue of Patience: This is arguably the most crucial tip. The salt and sugar mixture needs ample time to perform its osmotic magic – penetrating the seafood, drawing out moisture, and transforming the fish’s texture and flavor. Rushing the process will result in under-cured, potentially unsafe, and certainly less delicious gravlax. The waiting period is integral to achieving that signature firm yet tender texture and rich, cured taste. It is unequivocally worth every minute of the wait!
- PRO-Tip: Schedule Your Flips Religiously: To ensure uniform curing and prevent forgetting crucial steps, set reminders on your calendar or phone to flip your salmon every 12 hours. This discipline is essential for even moisture extraction and brine distribution. Especially if you’re curing in an out-of-sight location like a basement refrigerator, these reminders become indispensable for maintaining consistency and peace of mind.
- Utilize Consistent Weight for Optimal Curing: The application of consistent pressure is vital for successful gravlax. The weight helps to compress the salmon, ensuring intimate contact between the cure mixture and the fish, and efficiently expelling moisture. You can use almost any heavy, flat object: bricks wrapped in foil, multiple cast-iron skillets, a stack of heavy books, or even several large cans of food. The key is even distribution of weight across the entire surface of the salmon.
- Master the Art of Thin Slicing: Proper slicing is fundamental to the gravlax experience. For the best presentation and melt-in-your-mouth texture, use a very sharp, thin-bladed knife (like a salmon knife or a long carving knife). Slice the gravlax as thinly as possible, working from the long end to the long end, at a slight diagonal angle. This technique maximizes the surface area, allowing the delicate flavors to truly shine. If your slices aren’t as thin as you’d like initially, don’t worry—practice makes perfect!
- Proper Storage for Longevity: Once cured and sliced, gravlax should be stored in an airtight container in the refrigerator. It typically remains fresh and delicious for 5-7 days. For longer storage, gravlax freezes exceptionally well. Wrap individual portions tightly in plastic wrap, then foil, and freeze for up to 1-2 months. Thaw slowly in the refrigerator before serving.
I distinctly remember the moment I knew this recipe was a triumph. One of my guests, mid-bite, exclaimed, “This is magnificent smoked salmon!” Bill, notoriously picky, quickly chimed in with, “I hope there’s more of this.” Hearing Mr. Picky Pants rave about raw, cured salmon was a revelation. A small victory, perhaps, hinting that one day he might even reconsider fennel, or mint, or nuts, or even pineapple. A cook can dream, can’t they? This recipe also complements other gravlax preparations beautifully, such as the terrific canapés I once made using Dorie Greenspan’s renowned gravlax recipe, which inspired some of my own adaptations.
Frequently Asked Questions About Gravlax
Gravlax is a traditional Scandinavian (primarily Swedish) dish consisting of raw salmon that has been cured, not cooked or smoked. The curing process involves covering fresh salmon fillets with a dry brine mixture of salt, sugar, and often fresh dill, sometimes augmented with black pepper or spirits like Cognac or aquavit. The salmon is then pressed and refrigerated for several days, allowing the brine to draw out moisture and gently “cook” and flavor the fish. The result is a tender, silky texture and a distinctively savory-sweet flavor, typically sliced paper-thin for serving.
While both gravlax and lox are cured salmon, their preparation methods and origins differ. Gravlax is a Scandinavian dish, traditionally dry-brined with a mixture of salt, sugar, and dill (and sometimes alcohol or other spices), and is never smoked. It has a firm texture and a fresh, herbal flavor. Lox, on the other hand, typically refers to brined (salt-cured) salmon belly, often without the addition of sugar or extensive seasonings like dill. Crucially, traditional lox is also not smoked. It originates from a Yiddish word, “Laks,” meaning salmon. The term “smoked salmon” (which is salmon that has been cured and then cold-smoked) is distinct from both gravlax and lox, though all are delicious forms of cured salmon.
Preparing gravlax involves a few straightforward steps over several days. First, a fresh salmon fillet is placed on a plastic-lined, rimmed baking sheet, skin side down. It’s then generously topped with a mixture of salt, sugar, and fresh dill, sometimes with a drizzle of alcohol. The salmon is covered with more plastic wrap, followed by a second baking sheet and a heavy weight (like a cast-iron skillet or cans) to press the fish. This assembly is refrigerated. Every 12 hours, the salmon is flipped, drained of accumulated liquid, re-wrapped with fresh plastic, and re-weighted. This process continues for 3-4 days. Before serving, the dry brine and dill are gently scraped off, and the salmon is patted dry and sliced very thinly on the diagonal.
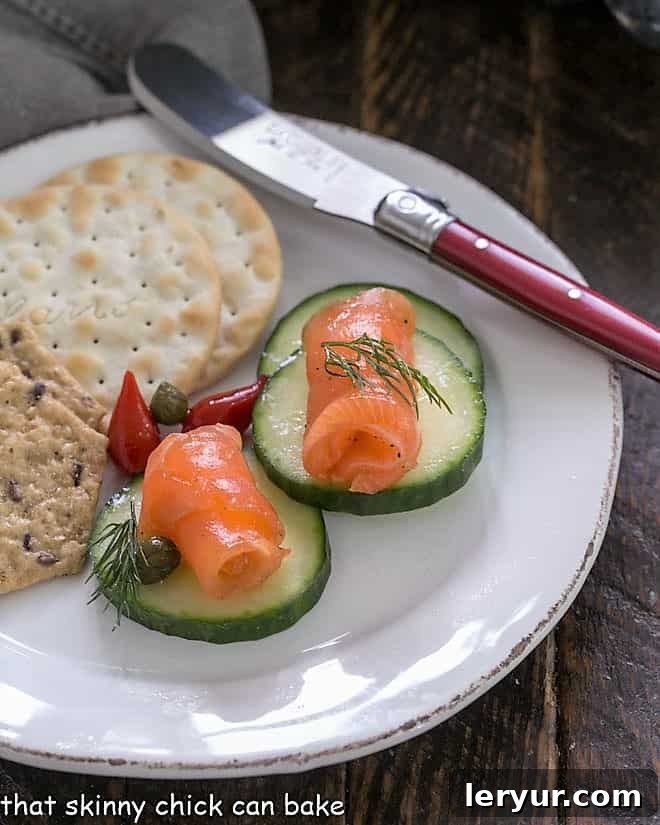
Gravlax is incredibly versatile and can be enjoyed in numerous ways. The classic Scandinavian presentation involves thinly slicing the gravlax on a slight angle and serving it as part of a breakfast, brunch spread (smorgasbord), or appetizer. It’s traditionally paired with dark rye bread (like pumpernickel), crispbread, and a creamy mustard-dill sauce (hovmästarsås). For a popular American twist, it’s delicious on a toasted bagel with a generous smear of cream cheese, finely diced red onions, and capers. Gravlax also makes an elegant topping for blinis or cucumber slices, a sophisticated addition to green salads, or a flavorful component in open-faced sandwiches.
Explore More Delicious Salmon and Seafood Recipes:
- Rainbow Salmon Skewers from The View from Great Island
- Easy Glazed Salmon
- Pesto Potato Salmon
- Easy Smoked Salmon Dip
- Paleo Roasted Salmon
- Discover more delectable Seafood and Easy Salmon Recipes
Stay connected with us and never miss a recipe! Follow us on social media @ Instagram, Facebook, and Pinterest. Don’t forget to tag us when you try one of our delicious recipes! And if you absolutely love the results, we’d be thrilled if you could give it a 5-star rating in the recipe card below.

Homemade Gravlax: Scandinavian Cured Salmon
15 minutes
3-4 days (curing)
20 servings
Discover how to cure salmon effortlessly at home with a simple salt and sugar mixture, transforming it into exquisite gravlax. This Scandinavian delicacy is perfect for impressing guests or enjoying a luxurious treat yourself!
Ingredients
- 4 pounds fresh boned salmon fillets, skin on (preferably sushi-grade)
- 1 tablespoon freshly ground black pepper
- ½ cup granulated sugar
- ¼ cup kosher salt (or sea salt)
- 3 bunches fresh dill, roughly chopped or in sprigs
- 2 tablespoons Cognac (optional, or other spirit like vodka/aquavit)
Instructions
- Prepare the Curing Station: Line a large, rimmed baking sheet with several layers of plastic wrap, ensuring it extends well beyond the edges to fully envelop the salmon later. For added protection, you can also line it with parchment paper. Place the salmon fillets, skin side down, on the prepared baking sheet. Carefully inspect and remove any remaining pin bones with tweezers.
- Apply the Dry Brine: In a small bowl, combine the freshly ground black pepper, granulated sugar, and kosher salt. Mix thoroughly. Evenly sprinkle this dry brine mixture over the entire flesh side of the salmon fillets, making sure every part is coated.
- Add Aromatics and Weight: Generously arrange the fresh dill sprigs or chopped dill over the brine-coated salmon. If using, drizzle the Cognac (or other spirit) evenly over the dill and salmon. Cover the salmon completely with another layer of plastic wrap, pressing it down to ensure good contact. Place a second baking sheet (or a sturdy flat board) directly on top of the wrapped salmon. Weigh it down with heavy objects such as cast-iron skillets, several cans of food, or bricks, ensuring even pressure across the fillets.
- Cure and Flip: Transfer the entire weighted setup to the refrigerator. Allow the salmon to cure for a total of 3-4 days. Crucially, every 12 hours (twice a day), remove the weights, unwrap the salmon, gently flip the fillets, drain any liquid that has accumulated in the baking sheet, and then re-wrap with fresh plastic wrap before re-applying the weights. This ensures even curing and consistent moisture extraction.
- Serve with Perfection: Once the curing time is complete, remove the salmon from the refrigerator. Scrape off all the dill and spices from the surface of the fillets. Pat the salmon dry with paper towels to remove any residual moisture or brine. Using a very sharp knife, slice the gravlax as thinly as possible on the diagonal, from the long end to the long end. Serve immediately or store in an airtight container in the refrigerator for up to 5-7 days.
Notes
This recipe is inspired by classic gravlax preparations, drawing elements from culinary masters like Emeril Lagasse and Julia Child. Their foundational techniques for cured salmon have guided this home-friendly version.
Please note that the “Total Time” listed in the recipe card accounts for the active preparation (15 minutes), but the crucial curing period in the refrigerator extends for 3-4 days. This extended time is essential for the salmon to achieve its characteristic texture and flavor.
If you prefer to make a smaller batch, you can easily halve the amount of salmon and proportionally reduce the other ingredients. The curing time, however, will remain the same regardless of the fillet size, as it’s determined by the thickness of the fish and the osmotic process.
For best results, use a high-quality, fresh salmon fillet. “Sushi-grade” or “sashimi-grade” is often recommended for raw preparations to ensure safety and superior texture.
Recommended Products
As an Amazon Associate and member of other affiliate programs, I earn from qualifying purchases.
- Smithcraft Stainless Steel Measuring Cups Set
- 16-inch Grilling Tongs
- USA Pan Bakeware Half Sheet Pan
Nutrition Information:
Yield:
20
Serving Size:
1
Amount Per Serving:
Calories: 210Total Fat: 11gSaturated Fat: 2gTrans Fat: 0gUnsaturated Fat: 8gCholesterol: 57mgSodium: 1470mgCarbohydrates: 5gFiber: 0gSugar: 5gProtein: 20g
HOW MUCH DID YOU LOVE THIS RECIPE?
Please leave a comment on the blog or share a photo on Pinterest