
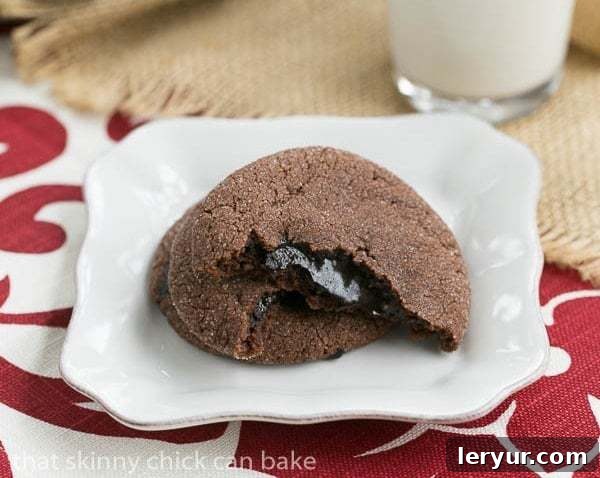
You’ve delighted in countless lava cake recipes, but are you ready for an even more irresistible treat? Prepare to be amazed by these incredible Chocolate Lava Cookies! They are unbelievably tasty, boasting a rich flavor and a magical molten center that will surely crown them your new favorite dessert.
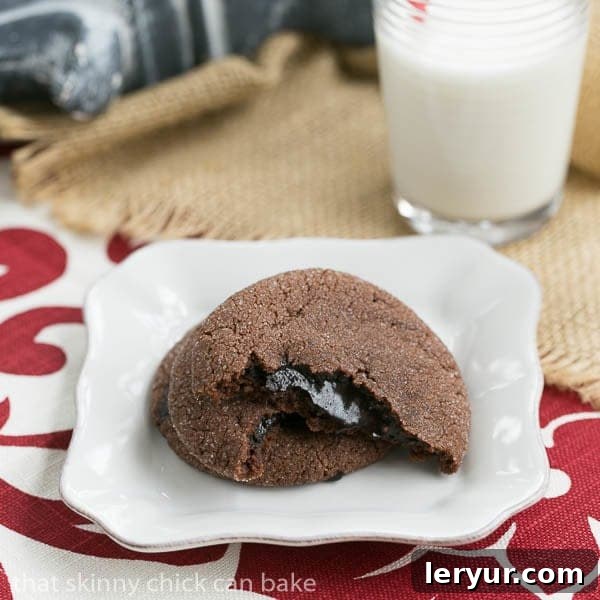
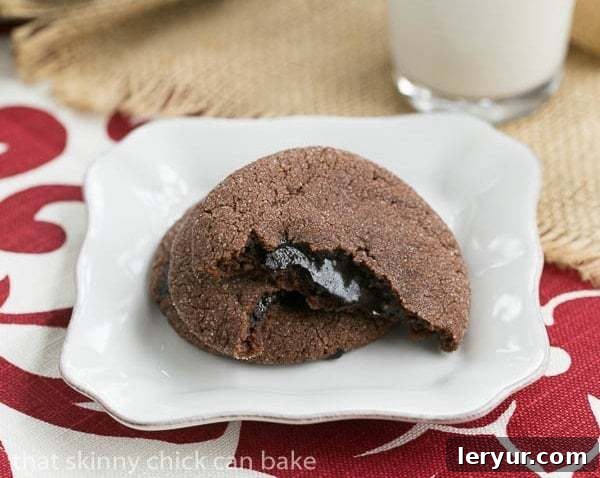
Imagine a perfectly baked, deeply cocoa-flavored cookie dough lovingly embracing a hidden core of luscious, warm hot fudge sauce. These Chocolate Filled Cookies don’t just offer a single chocolate sensation; they deliver a double dose of pure bliss with every bite. The moment you break one open, the rich, hot fudge oozes out, creating a captivating “lava” effect that is as visually stunning as it is delicious. This unique combination elevates a simple cookie into an extraordinary, indulgent experience, rivaling even the most decadent lava cakes.
Why These Chocolate Lava Cookies Are an Absolute Must-Try
The journey to creating these phenomenal Chocolate Lava Cookies began with a spark of inspiration, a common thread among passionate bakers. Seeing a friend’s innovative recipe ignited a desire to craft the ultimate chocolate cookie, one that held a glorious secret: a sumptuous, molten fudge center. The result surpassed all expectations, offering a truly revolutionary cookie experience that promises pure delight in every mouthful.
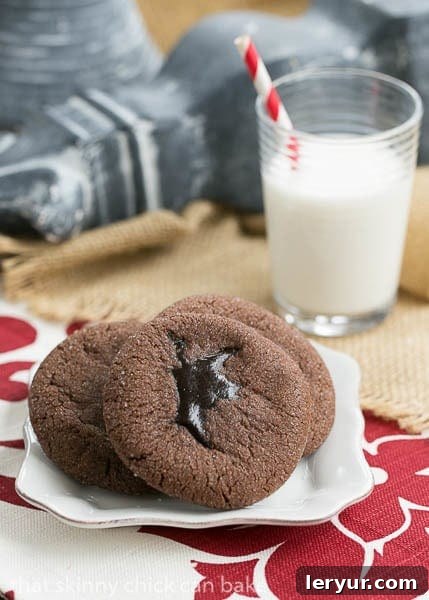
Unlike many cookie recipes that rely on shortening, my culinary exploration led to a butter-based dough. This decision ensures a superior flavor profile and a wonderfully tender texture, setting these cookies apart. As each batch emerged from the oven, the intoxicating aroma of rich brownies would envelop the kitchen, building an anticipation that was almost as satisfying as the first bite. Interestingly, some cookies would playfully “spring a leak,” revealing a tempting glimpse of their gooey treasure, while others maintained their perfectly spherical disguise. Regardless of these minor adventures, one truth remained constant: every single cookie was incredibly tasty, proving that the pursuit of homemade indulgence is always worthwhile.
Here’s an even deeper dive into why these fudge-filled cookies will become a staple in your baking repertoire:
- An Explosion of Chocolate Flavor: Beyond just a chocolate cookie, the core of hot fudge amplifies the cocoa notes, delivering an intense, multifaceted chocolate experience that satisfies even the most ardent chocoholic.
- Irresistible Texture Contrast: Enjoy the delightful chewiness of the rich cookie exterior, perfectly contrasted with the smooth, warm, and flowing molten fudge center. This play on textures is a hallmark of truly great desserts.
- A Stunning Dessert with Minimal Effort: Breaking open one of these cookies to reveal the “lava” is a showstopper, making them ideal for impressing guests, delighting your family, or simply elevating an ordinary evening into something special. They offer the gourmet appeal of a lava cake in a convenient, handheld format.
- Aromatic Bliss: The baking process itself is an experience. The warm, comforting scent of rich chocolate will fill your home, creating an inviting atmosphere that promises a delightful treat is on its way.
- Simple Yet Sophisticated: While the concept might seem intricate, the process of making these cookies is straightforward, making them accessible to bakers of all skill levels. With a few key tips, you’ll be creating masterpieces in no time.
What Exactly Are Chocolate Lava Cookies? Unpacking the Molten Magic
Chocolate Lava Cookies are a brilliant culinary innovation, fusing the beloved characteristics of a classic chocolate cookie with the thrilling surprise of a molten lava cake. At their core, these are decadently cocoa-flavored cookies, meticulously designed to encapsulate a warm, flowing reservoir of rich chocolate or hot fudge sauce. The true enchantment unfolds when these cookies are warm: take a bite, and the heated fudge gently “erupts” from the center, creating a mesmerizing flow that instantly brings to mind molten volcanic lava.
This unique confection transcends a typical cookie by offering an unexpected journey for your taste buds. The cookie’s exterior provides a robust chocolate foundation, a soft and chewy texture that’s comforting and familiar. But it’s the contrast with the unexpected liquid core—a burst of warmth, richness, and intense chocolate flavor—that sets these cookies apart. They embody the perfect balance between a satisfyingly chewy outer layer and an exquisitely gooey, molten interior, making them utterly addictive and a truly memorable dessert experience. Essentially, they are your personal, portable molten cake, designed for maximum indulgence with every delightful bite.
Mastering the Art of Stuffing Your Molten Chocolate Cookies
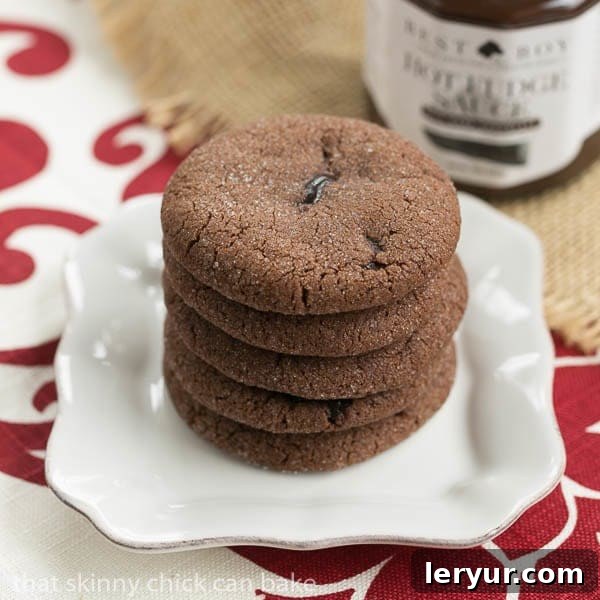
The unique allure of Chocolate Lava Cookies lies entirely within their molten, surprise center. You might be pondering how to successfully encase that glorious fudge within a cookie without it making an untimely escape during baking. The technique, while requiring a touch of precision and gentle handling, is remarkably achievable. The fundamental principle is to begin with a slightly larger portion of cookie dough than you typically would for an average cookie, providing ample material to cradle your gooey filling.
A Detailed Step-by-Step Guide to Filling Your Cookies Flawlessly
- Prepare Your Cookie Dough Portions: Begin by scooping out generous, uniform balls of your rich chocolate cookie dough. A medium cookie scoop, which conveniently holds approximately 2 tablespoons of dough, is ideal for achieving consistent sizing. As you prepare these, ensure your baking sheets are already lined with parchment paper. This crucial step prevents sticking and guarantees effortless removal of your baked masterpieces.
- Craft the Dough Discs: Once scooped, gently flatten each ball of dough onto your prepared parchment-lined baking sheets. Use the palm of your hand to create uniform discs. The goal is to make them wide enough to comfortably accommodate a dollop of fudge filling, but not so thin that they become fragile and prone to tearing when handled. Think of creating a small, pliable cup for your delicious secret.
- Introduce the Molten Core: Now for the star of the show: the fudge. Carefully spoon about a half teaspoon of thick hot fudge sauce onto the precise center of each flattened dough disc. The key word here is “thick.” It is absolutely paramount to use a fudge sauce with a robust consistency. A runny, pourable chocolate sauce will almost certainly leak out during baking, compromising your lava effect. If your fudge seems a bit thin, a brief stint in the refrigerator can help it firm up.
- Seal the Indulgence Inside: This is arguably the most critical and delicate stage. Gently gather the edges of the dough disc from all sides and fold them meticulously up and over the fudge filling. Pinch all the seams firmly together, ensuring there are absolutely no gaps or openings. Imagine you are meticulously sealing a precious package; any small breach could lead to a molten escape. A tight seal is your best friend for a perfectly contained lava center.
- Form Perfect Spheres: Once the fudge is completely sealed within, gently roll each stuffed dough ball between your palms. This action serves multiple purposes: it smooths out any visible seams, further reinforces the seal, and creates a beautifully spherical cookie shape, ready for baking.
- The Optional Sweet Coating: For an additional layer of sweetness and a delightful textural contrast, consider rolling each cookie dough ball in granulated sugar before placing it back onto the parchment-lined baking sheet. This adds a lovely sparkle and a subtle crunch to the exterior.
- Bake with Precision: Carefully follow the specific baking instructions provided in the recipe card. The golden rule here is to avoid overbaking at all costs. Overbaking will solidify the fudge center, transforming your “lava” cookies into ordinary (though still tasty) chocolate cookies.
A crucial note for enjoying these delightful treats: they are truly at their pinnacle when served warm, fresh from the oven. At this stage, the “lava” is at its most perfectly molten and decadent. While these cookies remain incredibly delicious after cooling, the fudge filling does tend to absorb slightly into the cookie dough as time passes, becoming less liquid. However, based on the overwhelmingly positive feedback from my eager taste testers, this minor change in texture did not diminish their enjoyment or the overall deliciousness one bit!
Essential Tips for Baking Flawless Chocolate Lava Cookies Every Time
Creating the perfect Chocolate Lava Cookie is a rewarding culinary journey, and equipping yourself with a few expert strategies can significantly enhance your success. By paying close attention to these vital tips, you’ll consistently achieve that coveted molten center and bake a batch of cookies that are both visually appealing and incredibly delicious.
- Precision in Portioning is Paramount: Before you even think about introducing the fudge, take the time to divide your cookie dough into 24 uniform pieces. This meticulous attention to detail ensures that each cookie has an adequate amount of dough to fully and securely encase the fudge sauce without being either too thin (leading to leaks) or excessively bulky. This portion will typically be slightly more than what a single medium cookie scoop holds. Even distribution of dough prevents uneven baking and significantly reduces the risk of leakage.
- Exercise Restraint with the Filling: When it comes to the hot fudge filling, remember that less is often more. A carefully measured half teaspoon is usually the ideal quantity. Overfilling is the most common culprit for leakage. If you pack in too much fudge, it will inevitably seek and find a path to escape the cookie during the baking process, resulting in a slightly messy—though still undeniably tasty—outcome. Resist the temptation to go overboard for a clean, perfectly contained lava effect.
- Seal Those Seams with Diligence: After you’ve placed the precise amount of fudge in the center, the next critical step is to meticulously fold the cookie dough up and over the filling. The key here is to firmly pinch and seal all the seams together. Imagine you are delicately, yet securely, wrapping a precious gift; you want absolutely no gaps or openings for the fudge to escape. A well-sealed cookie is a testament to your patience and guarantees a beautifully contained molten center.
- Anticipate a Few Adventurous Leakers: Don’t be disheartened if, while you are gently rolling the folded dough into perfect balls, you notice some of the filling peeking through on a few of the cookies. This can occasionally happen, especially if your cookie dough is a little less pliable than ideal, or if your fudge has a slightly thinner consistency. The good news is, you can absolutely still bake these cookies! While they might not boast a perfectly concealed pocket of fudge, they will still taste utterly delicious. Consider these few “leakers” your personal taste testers during the baking process!
- The Impact of Dough Pliability: Through various experiments, I’ve found that while an all-butter dough yields an incredibly rich flavor, incorporating shortening can significantly improve dough pliability. I’ve successfully made these cookies with all butter, but also with a mix of half butter and half shortening. Adding shortening definitely makes the dough softer and much easier to manipulate and seal around the fudge. If you find yourself struggling with dough tearing or consistent leakage, a half-butter, half-shortening blend can be a game-changer.
- The Cardinal Rule: Do Not Overbake! This is perhaps the most paramount tip for ensuring that delightful “lava” effect. Overbaking is the arch-nemesis of a molten center. Excessive time in the oven will cause the fudge to solidify, transforming your exquisite creation into a regular (though still very pleasant) chocolate cookie, completely devoid of its signature molten core. Keep a close eye on your cookies: bake them just until the edges are set and the tops appear slightly puffed. The centers should still look distinctly soft. Typically, this takes between 8 to 12 minutes, but it’s crucial to know your oven.
Customization and Creative Variations for Your Lava Cookies
While the classic Chocolate Lava Cookie recipe is undeniably divine and satisfying, the beauty of baking lies in its endless possibilities for creative exploration! Don’t hesitate to personalize these treats and make them uniquely your own. Here are some inspiring ideas to customize your cookies:
- Alternative Chocolate Fillings: Step beyond traditional fudge! Experiment with other delightful molten centers. Try a generous dollop of creamy Nutella, a spoonful of salted caramel sauce, a rich peanut butter filling, or even simply tuck a square of your favorite chocolate bar—be it milk, dark, or white—into the center for a different kind of gooey surprise.
- Exciting Dough Add-ins: Elevate the cookie dough itself! Fold in miniature chocolate chips for extra texture, finely chopped nuts like walnuts, pecans, or almonds for a delightful crunch, or even a pinch of espresso powder to deepen the chocolate flavor and add a subtle sophisticated note.
- Flavor Enhancements for the Fudge: Infuse your fudge filling with intriguing flavor profiles. A pinch of ground cinnamon can add warmth, a dash of chili powder can introduce a subtle heat for a “Mexican hot chocolate” inspired feel, or a touch of peppermint extract can create a refreshing mint-chocolate dynamic.
- Creative External Coatings: Beyond the simple granulated sugar roll, consider other exciting coatings. Roll the dough balls in unsweetened cocoa powder for an extra dark, sophisticated finish, or in colorful sprinkles for a festive and playful touch.
- Mini Lava Cookies: For a delightful, bite-sized indulgence perfect for parties or portion control, use a smaller cookie scoop for the dough and a correspondingly tiny amount of fudge filling. Remember to adjust the baking time accordingly, as smaller cookies will bake faster.
Serving and Storage Suggestions for Optimal Enjoyment
To truly savor the molten magic and decadent experience that these fudge-filled cookies offer, serving them warm is not just recommended—it’s highly encouraged. The exquisite contrast between the warm, free-flowing fudge and the tender, soft cookie is an indulgence that simply cannot be replicated when cold.
- Serving Recommendations: For the ultimate treat, enjoy these cookies fresh from the oven, still wonderfully warm. Pair them with a tall, cold glass of milk for a classic combination, or elevate the experience with a scoop of creamy vanilla bean ice cream. A dollop of freshly whipped cream can also add a luxurious touch, and a light dusting of powdered sugar provides an elegant finish for special occasions.
- Storage Guidelines: Should you have any cookies left over (a rare occurrence!), allow them to cool completely before storing. Place the cooled cookies in an airtight container at room temperature. They will maintain their deliciousness for up to 3-4 days. While the fudge won’t be as molten as when freshly baked, they will still be incredibly flavorful.
- Reviving the “Lava” Effect: If you wish to bring back that molten center, simply reheat cooled cookies. A quick zap in the microwave for 10-15 seconds per cookie usually does the trick. Alternatively, you can gently warm them in a preheated oven at around 275°F (135°C) for 5-7 minutes. Be cautious not to overheat them, as this will solidify the fudge and defeat the “lava” purpose!
- Freezing Dough for Future Indulgence: For convenient future baking, you can prepare the stuffed cookie dough balls (even roll them in sugar) and freeze them. Arrange the dough balls on a baking sheet and freeze until they are solid. Once frozen, transfer them to a freezer-safe zip-top bag or airtight container. They can be stored in the freezer for up to 2-3 months. When ready to bake, simply place the frozen dough balls on a parchment-lined baking sheet and bake directly from frozen, adding a few extra minutes to the usual baking time, until the edges are set and the tops are slightly puffed.
Frequently Asked Questions (FAQs) About Chocolate Lava Cookies
- Can I use any type of fudge sauce for the filling?
- It is highly recommended to use a thick, scoopable hot fudge sauce. Runnier chocolate sauces or thin dessert toppings are prone to leaking out of the cookie dough during baking. If your fudge seems a bit too thin, try chilling it in the refrigerator for about 30 minutes to an hour to thicken its consistency before using.
- My cookies leaked during baking! What went wrong?
- Leaking is a common issue that typically arises from one of two reasons: either the cookie dough wasn’t sealed tightly enough around the fudge, or too much fudge was added to the center. Ensure you firmly pinch all the seams of the dough together and stick to no more than a half teaspoon of filling per cookie.
- How do I know when the Chocolate Lava Cookies are perfectly baked?
- Bake the cookies until their edges are just set and their tops appear slightly puffed. The key is that the centers should still look very soft and perhaps a little undone; this indicates that the fudge inside remains molten. The cookies will continue to set slightly as they cool on the baking sheet. Overbaking is the main cause of a solidified, rather than molten, fudge center.
- Is it possible to make these cookies gluten-free?
- Yes, you can experiment with making these cookies gluten-free by substituting the all-purpose flour with a high-quality 1:1 gluten-free all-purpose flour blend. Be aware that gluten-free doughs can sometimes be a bit more delicate or less pliable, so you might need to pay extra attention to ensuring the dough is well-sealed around the fudge to prevent leaks.
- What is the primary difference between a lava cookie and a lava cake?
- While both offer a delightful molten chocolate center, their formats differ significantly. Lava cakes are typically baked in individual ramekins and resemble a small, rich cake with a liquid core. Lava cookies, on the other hand, are portable, handheld cookies that encapsulate a gooey filling, providing a similar molten experience in a more casual, bite-sized form.
More Decadent Chocolate & Dessert Recipes You’ll Absolutely Love:
- Indulgent Chocolate Peanut Butter Lava Cakes from The Cookie Rookie
- Luxurious White Chocolate Lava Cakes
- Elegant Lava Cakes with Kahlua Whipped Cream
- Classic Rich Chocolate Lava Cakes
- Delightful Caramel Filled Chocolate Cookies
- Discover even more of the Best Homemade Chocolate Desserts
The Ultimate Recipe:
Chocolate Lava Cookies
20 minutes
12 minutes
32 minutes
24 cookies
Delectable chocolate cookies stuffed with a rich, gooey fudge sauce, creating a molten center with every bite.
Ingredients
- 1 cup (2 sticks) unsalted butter, softened to room temperature*
- 1 cup granulated sugar
- 1 cup packed light brown sugar
- 2 large eggs
- 1 teaspoon pure vanilla extract
- ¾ cup unsweetened cocoa powder
- 2 cups all-purpose flour
- 1 teaspoon baking powder
- 1 (8-ounce) jar thick hot fudge sauce (you’ll need about ¼ to ½ cup)
- Granulated sugar, for rolling (optional)
Instructions
- Preheat your oven to 350ºF (175ºC). Line several baking sheets with parchment paper; set aside.
- In a large mixing bowl, cream together the softened butter, granulated sugar, and brown sugar until light and fluffy.
- Beat in the eggs one at a time, ensuring each is fully incorporated before adding the next. Stir in the vanilla extract.
- Gradually add the cocoa powder, baking powder, and flour to the wet ingredients, mixing until just combined. Be careful not to overmix the dough.
- Scoop out cookie dough balls, approximately the size of a walnut or about 2 tablespoons each. Place them on the prepared baking sheets, leaving at least 2 inches between each.
- Using the palm of your hand, gently flatten each dough ball into a disc, ensuring it’s wide enough to hold filling but not too thin to tear.
- Spoon about a half teaspoon of thick fudge sauce onto the center of each flattened dough disc.
- Carefully fold the edges of the cookie dough up and over the fudge filling, pinching and sealing the seams thoroughly to enclose the fudge completely.
- Gently roll each sealed dough ball between your palms to smooth out the surface and create a perfect spherical shape.
- Roll each dough ball in granulated sugar (if using) for a delightful sugary crust. Place them back on the parchment-lined baking sheets.
- Bake for 8-12 minutes, or until the edges are set and the tops are slightly puffed. The centers should still appear very soft, indicating a molten interior. Do not overbake!
- Remove from oven and let cool on the baking sheets for a few minutes before transferring to a wire rack. These cookies are best served warm to enjoy the molten lava effect.
Recipe Notes
*Butter vs. Shortening: For a more pliable cookie dough that’s easier to seal around the fudge and potentially reduce leakage, you can substitute half of the butter with vegetable shortening (e.g., ½ cup butter and ½ cup shortening).
**Baking for Lava: It’s highly recommended to bake a test cookie first to determine the optimal baking time for your specific oven. Remember, overbaking is the main enemy of the molten center!
Recommended Baking Tools
As an Amazon Associate and member of other affiliate programs, I earn from qualifying purchases.
- USA Pan Bakeware Half Sheet Pan
- Reynolds Cookie Baking Sheets Non-Stick Parchment Paper
- OXO Good Grips Medium Cookie Scoop
Nutrition Information:
Yield: 24 cookies
Serving Size: 1 cookie
Amount Per Serving:
- Calories: 150
- Total Fat: 2g
- Saturated Fat: 1g
- Trans Fat: 0g
- Unsaturated Fat: 1g
- Cholesterol: 16mg
- Sodium: 61mg
- Carbohydrates: 31g
- Fiber: 1g
- Sugar: 19g
- Protein: 3g