
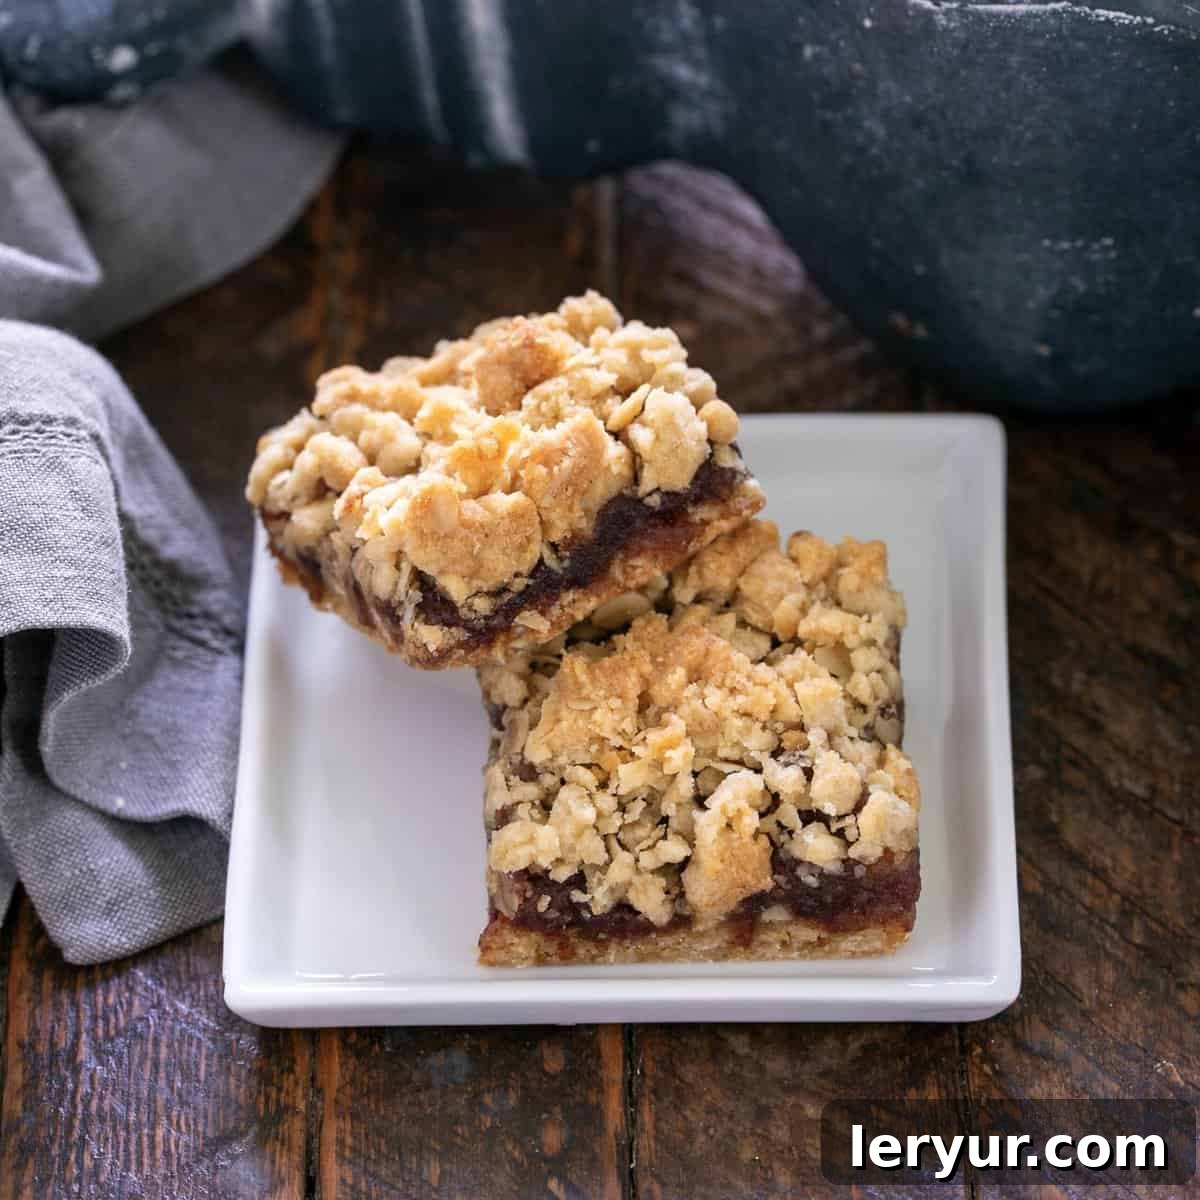
Delicious Streusel-Topped Date Bars: A Timeless Sweet Treat
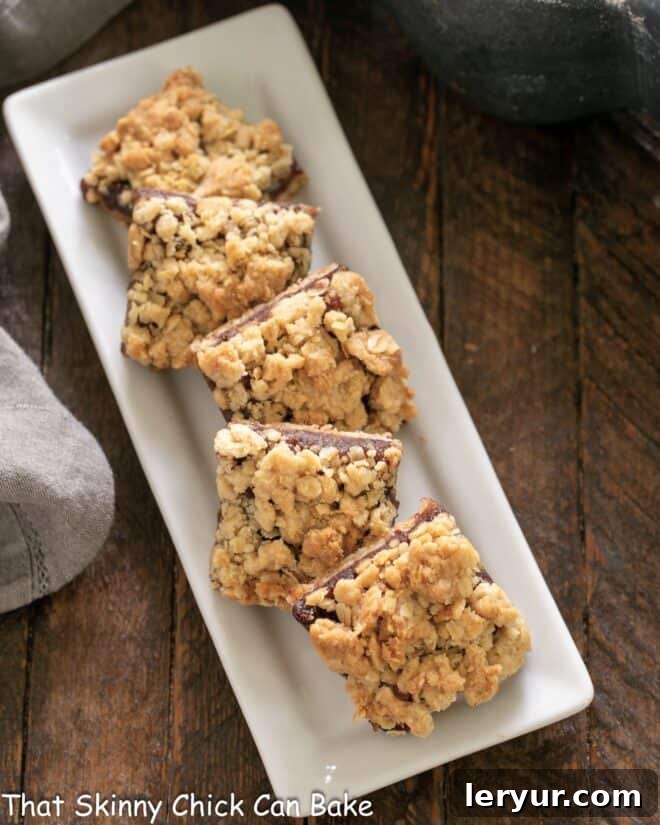
There’s something incredibly comforting and nostalgic about a perfectly baked bar cookie, and these Streusel-Topped Date Bars are no exception. Often known as Date Squares or even charmingly dubbed Matrimonial Bars due to their historical popularity at weddings, these delightful treats feature a rich, buttery crumb mixture that doubles as both the tender crust and the irresistible streusel topping. This versatile crumble beautifully complements the sweet, luscious date filling, creating a symphony of textures and flavors that has captivated palates for generations.
Imagine biting into a soft, chewy date bar with a crumbly, buttery crust, followed by a burst of naturally sweet date puree, all topped with a golden, slightly crunchy streusel. It’s a taste experience that transcends time, making these bars perfect for any occasion, from a simple afternoon snack to a festive holiday gathering. Whether you’re a long-time fan of date desserts or new to their unique charm, this recipe promises an easy and rewarding baking adventure.
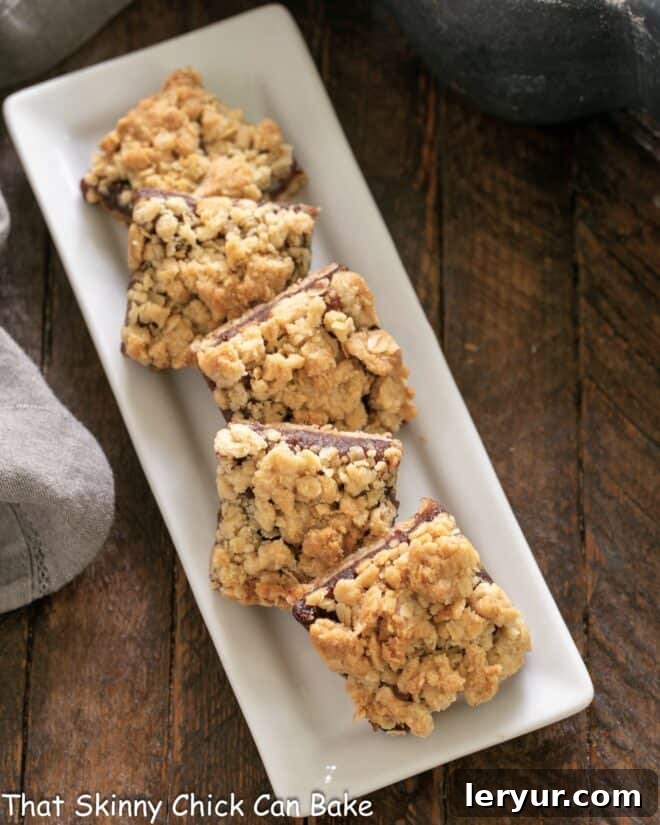
Why These Date Bars Deserve a Spot in Your Recipe Box
If you’re searching for a dessert that’s both easy to make and universally loved, look no further. These Streusel-Topped Date Bars offer a fantastic blend of convenience and classic appeal:
- Irresistible Flavor Profile: The harmonious blend of a sweet, slightly caramelized date filling with a rich, buttery, and slightly salty oat streusel creates an unforgettable taste that is deeply satisfying without being overly rich.
- A Versatile Treat for All Occasions: These bars are incredibly adaptable. They make a fantastic dessert for family dinners, a wholesome after-school snack, an elegant addition to a brunch spread, or a sturdy, travel-friendly option for picnics, potlucks, and bake sales. Their rich flavor also makes them a popular choice during holiday seasons.
- Simple & Straightforward Baking: Don’t let their gourmet taste intimidate you. This recipe is designed to be beginner-friendly, using common pantry staples and simple techniques. The same crumb mixture for both the crust and topping streamlines the process significantly.
- A Touch of History: Carrying the endearing moniker “Matrimonial Bars,” these treats have a heartwarming history of being shared at weddings, symbolizing sweetness and new beginnings. Bring a piece of that tradition into your home.
- Deliciously Wholesome: While certainly a treat, dates themselves offer nutritional benefits like fiber, antioxidants, and essential minerals, adding a touch of goodness to your indulgence.
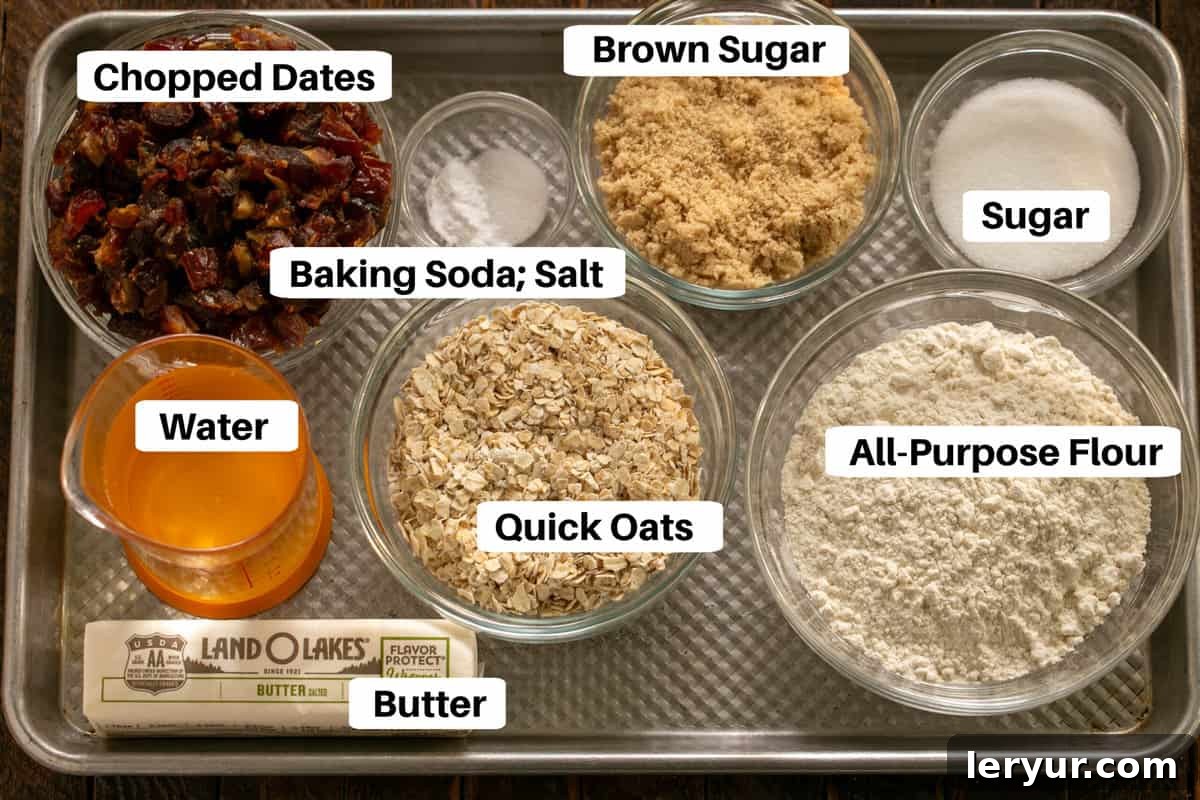
Ingredient Essentials for Perfect Date Bars
Crafting these delicious date bars requires just a few key ingredients. Quality matters, but most items are readily available in any grocery store. Here’s a closer look at what you’ll need and why specific choices make a difference:
- Dates: I highly recommend using Medjool dates. These dates are known for their large size, soft, chewy texture, and rich, caramel-like flavor, which is absolutely sublime in this recipe. If Medjool dates aren’t available, Deglet Noor dates can be used, but you might find them a bit firmer and less intensely sweet. Ensure they are pitted and finely chopped for the filling.
- Butter: Opt for good quality salted butter. The slight saltiness in the butter helps to balance the sweetness of the dates and enhances the overall flavor of the streusel. Make sure your butter is at room temperature for the crumb mixture, as this will help it blend smoothly with the sugars and dry ingredients.
- Quick Oats: The choice of oats significantly impacts the texture of your crust and topping. Quick oats (sometimes labeled instant oats) are ideal because they are cut finer and cook faster than old-fashioned rolled oats. This results in a more tender, less chewy crust and a delicate, satisfying crumble topping. Avoid steel-cut oats for this recipe.
- Sugars: Both granulated sugar and brown sugar are used. The granulated sugar contributes to the sweetness of the date filling, while brown sugar in the crumb mixture adds depth, moisture, and a lovely molasses undertone that pairs beautifully with the oats and dates.
- Flour: Standard all-purpose flour is perfect for providing the structure for your streusel crust and topping.
- Baking Soda: A touch of baking soda in the crumb mixture helps with a slight leavening, creating a lighter, more tender texture for the crust and topping.
- Salt: Even if using salted butter, a small amount of additional table salt is crucial. Its fine grains disperse evenly, ensuring a perfectly balanced flavor throughout the crumb. Salt is a flavor enhancer, bringing out the best in the sweet dates and rich butter.
- Water: Essential for cooking down the chopped dates into a smooth, thick, and spreadable filling.
Crafting Your Perfect Streusel-Topped Date Bars: A Step-by-Step Guide
Making these date bars is a straightforward process, broken down into preparing the date filling and assembling the crumb crust and topping. Follow these steps for delicious results:
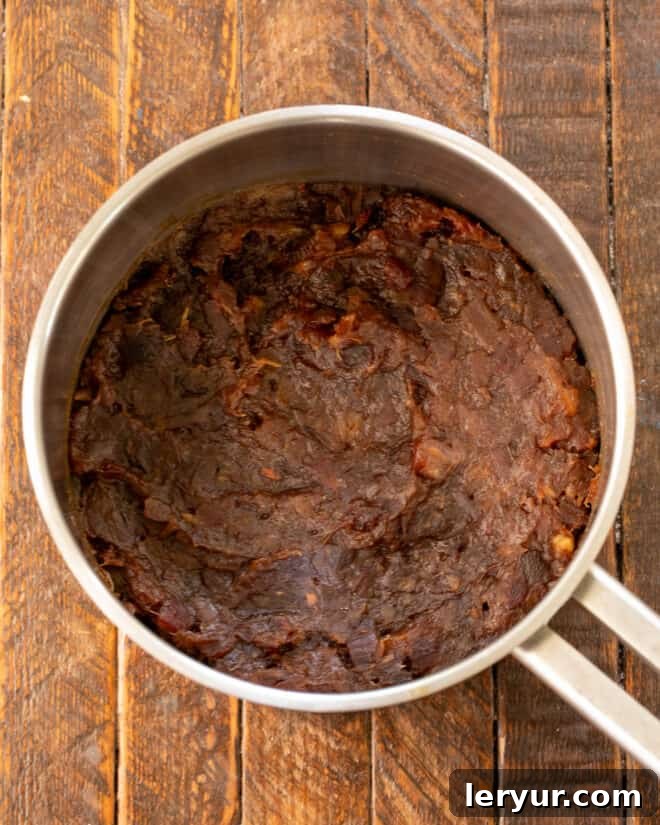
- Prepare the Date Filling: In a medium saucepan, combine the chopped dates, water, and granulated sugar. Cook this mixture over low heat, stirring frequently and breaking up the dates with a spoon or spatula. Continue cooking for about 8-10 minutes, or until the mixture thickens into a soft, spreadable paste. Remove it from the heat and allow it to cool for at least 5 minutes while you prepare the crumb mixture.
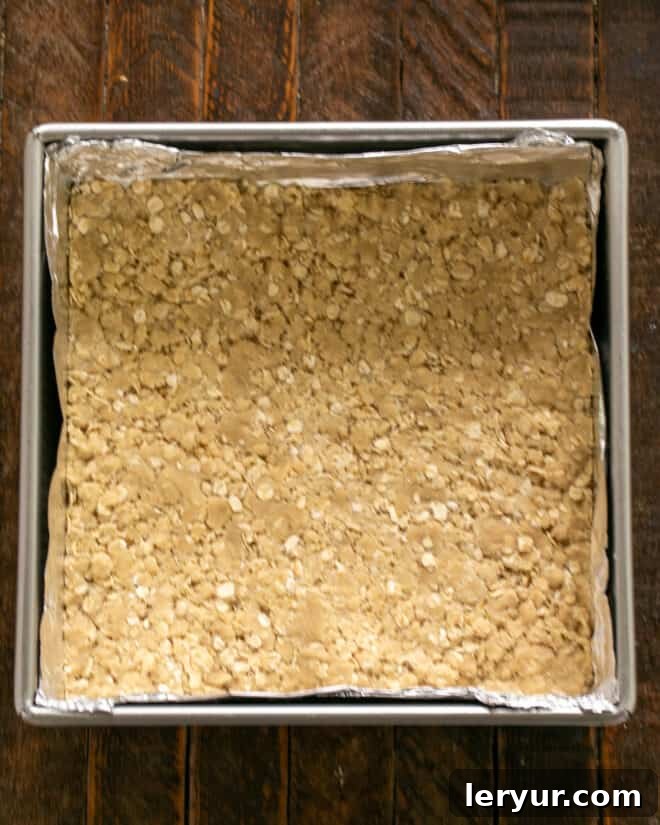
- Preheat Oven & Prepare Pan: Preheat your oven to 400°F (200°C). Line an 8×8-inch baking pan with nonstick foil or parchment paper, leaving an overhang on two sides. This overhang will serve as a convenient “sling” to easily lift the cooled bars out of the pan. If you don’t have nonstick foil, grease the pan well with cooking spray or butter.
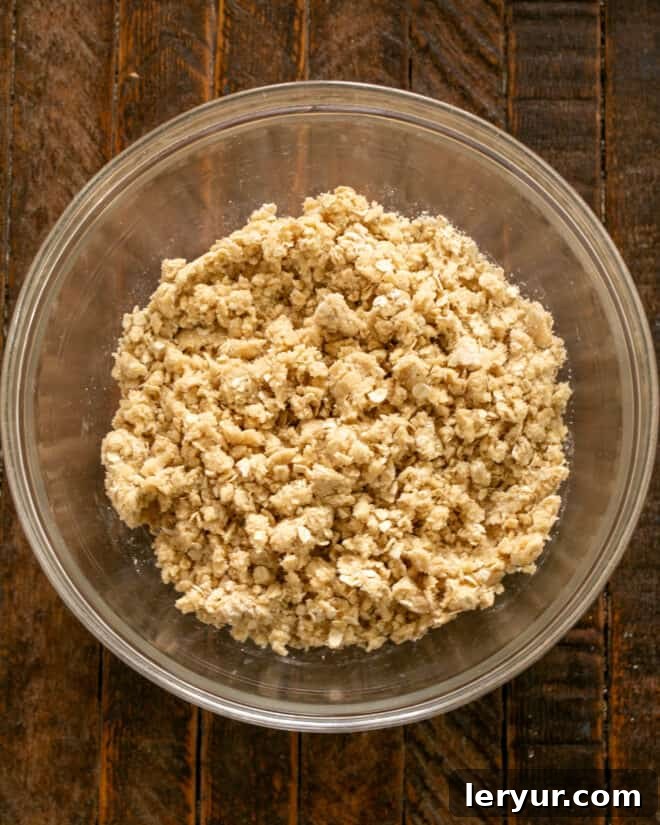
- Make the Crumb Mixture: In a large mixing bowl, cream together the softened butter and packed brown sugar until light and fluffy. Gradually add the all-purpose flour, quick oats, baking soda, and salt. Mix on low speed or by hand until the ingredients are just combined and form a coarse, crumbly mixture. Be careful not to overmix.
- Form the Crust: Take about half of the crumb mixture and firmly press it evenly into the bottom of your prepared baking pan. You can use your fingers or the back of a measuring cup to create a compact, even crust.
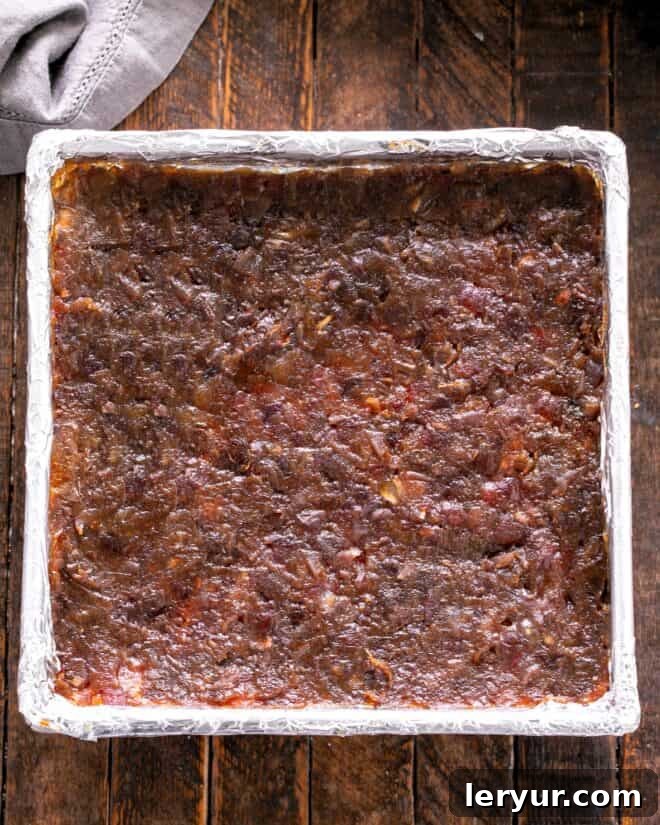
- Add the Date Filling: Carefully spread the cooled date mixture over the pressed crust. An offset spatula works wonderfully here to achieve a smooth and even layer without disturbing the crust below.
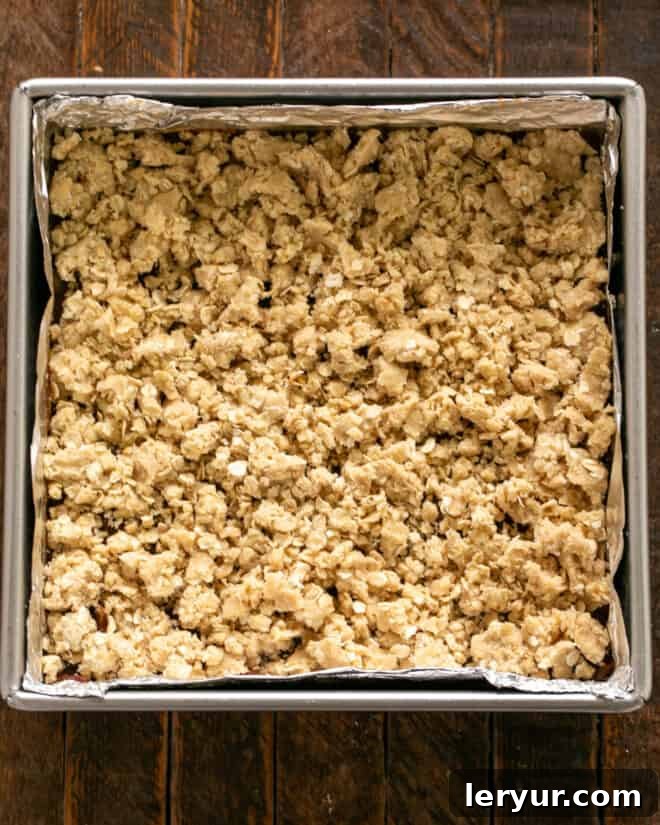
- Create the Streusel Topping: For the remaining crumb mixture, use your fingers to gently pinch and crumble it, creating larger, more distinct pieces. This technique yields a more rustic and appealing streusel topping. Distribute these crumbs evenly over the date filling. Gently press them down very slightly to adhere, but don’t compact them too much.
- Bake to Golden Perfection: Place the pan in the preheated oven and bake for 20-25 minutes, or until the streusel topping is a beautiful light golden brown and the edges are lightly crisp. The aroma filling your kitchen will be incredible!
- Cool Completely: This is a crucial step! Allow the date bars to cool completely in the pan on a wire rack before attempting to slice them. Cooling ensures the bars set properly, preventing them from crumbling when cut. Once cool, use the foil overhang to lift the entire slab out onto a cutting board, then slice into squares or bars of your desired size.
Expert Tips for Date Bar Perfection
Achieving bakery-quality date bars is easier than you think with these helpful hints:
- The Nonstick Foil Advantage: As mentioned in the steps, lining your baking pan with nonstick foil or parchment paper is a game-changer. It not only ensures easy removal of the cooled bars but also makes cleanup a breeze, saving you time and effort.
- Spreading the Date Puree: An offset spatula truly is your best friend when it comes to spreading the sticky date filling evenly. Its angled blade allows you to glide smoothly over the crust without tearing it. If you don’t have one, the back of a spoon can work in a pinch, but be gentle.
- Perfect Streusel Texture: Don’t just sprinkle the remaining crumbs. Take a moment to pinch them with your fingers. This creates varying sizes of crumbs, leading to a more appealing, textural topping that gets perfectly crisp and golden.
- Monitor Baking Closely: Bake until the streusel topping is just lightly browned. Overbaking can make the dates too firm and the crust dry. The internal filling will be bubbly and the edges slightly set.
- Cooling is Key: Patience is paramount here! Resist the urge to cut into the bars while they are still warm. Warm bars will be soft and crumble easily. Allowing them to cool completely (which can take an hour or two) ensures clean, neat slices and a perfectly set texture.
- Doubling the Recipe: This recipe scales beautifully! For a larger crowd or for meal prep, easily double all ingredients and bake in a 9×13-inch pan. You’ll need to increase the baking time slightly, typically to 25-30 minutes, or until the topping is golden brown. This larger batch will yield approximately 36 delicious bars.
- Flavor Boost: For an extra layer of flavor, consider adding a pinch of cinnamon or nutmeg to your date filling. A teaspoon of vanilla extract in the streusel mixture can also elevate the aroma and taste.
Frequently Asked Questions About Date Bars
What Kind of Dates Are Best for Date Bars?
Medjool dates are by far my top recommendation for date bars. They are famously plump, incredibly soft, and boast a rich, naturally sweet, caramel-like flavor that truly shines in baked goods. Their moistness also contributes to a more tender and flavorful filling. While other varieties like Deglet Noor can be used, Medjool dates offer a superior taste and texture experience.
Are Date Bars Healthy?
While date bars are a sweet treat and contain sugars and fats, they do offer some nutritional benefits due to the dates themselves. Dates are an excellent source of dietary fiber, which aids digestion, and they also contain essential minerals like potassium, magnesium, and iron, as well as antioxidants. They provide natural energy. So, while enjoyed in moderation, they can be a more wholesome alternative to some other processed desserts, offering natural fruit goodness.
How Long Will Date Bars Keep?
Proper storage is key to maintaining freshness. When stored in an airtight container:
- At room temperature: They will stay fresh for 3-4 days.
- In the refrigerator: They can last up to 1 week.
- In the freezer: For longer storage, freeze them for up to 2 months. To defrost, simply transfer them from the freezer to an airtight container in the refrigerator overnight. You can also let them come to room temperature for about 30 minutes before serving.
Can I make these Date Bars gluten-free or vegan?
Yes, with a few substitutions! To make them gluten-free, substitute the all-purpose flour with a 1:1 gluten-free baking flour blend that contains xanthan gum. For a vegan version, use a plant-based butter substitute (like a good quality vegan stick butter) in place of dairy butter. Ensure your quick oats are certified gluten-free if catering to strict dietary needs.
How do I know when my Date Bars are perfectly baked?
Look for a beautiful golden-brown color on the streusel topping. The edges of the crust should appear slightly set and lightly browned as well. The date filling underneath will be bubbly and appear thick, but it will firm up considerably as the bars cool. A slight wobble in the center is acceptable, as long as the topping is golden.
You May Also Enjoy These Other Streusel & Bar Delights
If you’re a fan of these Streusel-Topped Date Bars, you’ll likely adore these other fruity and crumbly treats:
- Strawberry Streusel Bars from The Recipe Critic
- Raspberry Streusel Bars
- Blueberry Streusel Bars
- Meyer Lemon Streusel Bars
- Caramel Apple Streusel Bars
- Plus, explore my full collection of the best Bar Cookie Recipes for more inspiration!
Don’t forget to check out my delightful Sticky Toffee Puddings and savory-sweet Bacon Wrapped Dates if you love dates as much as I do!
Stay connected with me through social media @ Instagram, Facebook, and Pinterest. I love seeing your creations, so don’t forget to tag me when you try one of my recipes! If you enjoyed this recipe, please consider leaving a 5-star rating and comment on the blog!
Date Bars Recipe
Description: Rich, buttery crumb-topped date bars, a classic treat perfect for any occasion.
Cook Time: 30 minutes
Additional Time: 1 hour (cooling)
Total Time: 1 hour 50 minutes
Yield: 16 bars
Ingredients
Date Filling
- 1 ½ cups chopped dates, Medjool recommended
- ¾ cup water
- 2 tablespoons sugar
Crust and Crumb Topping
- ½ cup brown sugar, packed
- ½ cup butter, at room temperature
- ¾ cup plus 2 tablespoons flour
- ¾ cup quick oats (not old-fashioned)
- ¼ teaspoon baking soda
- ¼ teaspoon salt
Instructions
- Cook the filling ingredients (chopped dates, water, granulated sugar) in a saucepan on low heat, stirring and breaking up the mixture for about 10 minutes, until thick.
- Remove from heat and let cool for 5 minutes.
- Preheat the oven to 400°F (200°C) and line an 8 x 8-inch baking pan with nonstick foil or parchment paper (or grease with cooking spray).
- In a large mixing bowl, mix butter and brown sugar until well combined and creamy.
- Add the flour, quick oats, baking soda, and salt to the butter mixture and mix until crumbly.
- Press half of the prepared crumb mixture firmly onto the bottom of the baking pan to form the crust.
- Spread the cooled date mixture evenly over the crust.
- Pinch the remaining crumbs with your fingers to form larger pieces for the topping. Spread these crumbs over the date filling, then press gently.
- Bake for 20-25 minutes until the topping is light brown and golden.
- Cool completely in the pan before slicing into bars for best results.
Notes
You may double the recipe and bake in a 9 x 13-inch pan. Add about 5 more minutes to the baking time or until light brown. This recipe is adapted from a classic Betty Crocker recipe.
Nutrition Information:
Yield:
16
Serving Size:
1
Amount Per Serving:
Calories: 133
Total Fat: 6g
Saturated Fat: 4g
Trans Fat: 0g
Unsaturated Fat: 2g
Cholesterol: 15mg
Sodium: 85mg
Carbohydrates: 20g
Fiber: 1g
Sugar: 16g
Protein: 1g
Nutritional information provided is an estimate only and may vary based on specific ingredients and brands used. This information is provided as a courtesy and should not be considered a substitute for professional nutritional advice. To obtain the most accurate representation, calculate the nutritional information with the actual ingredients used in your recipe.
HOW MUCH DID YOU LOVE THIS RECIPE?
Please leave a comment on the blog or share a photo on Pinterest and tag me!