
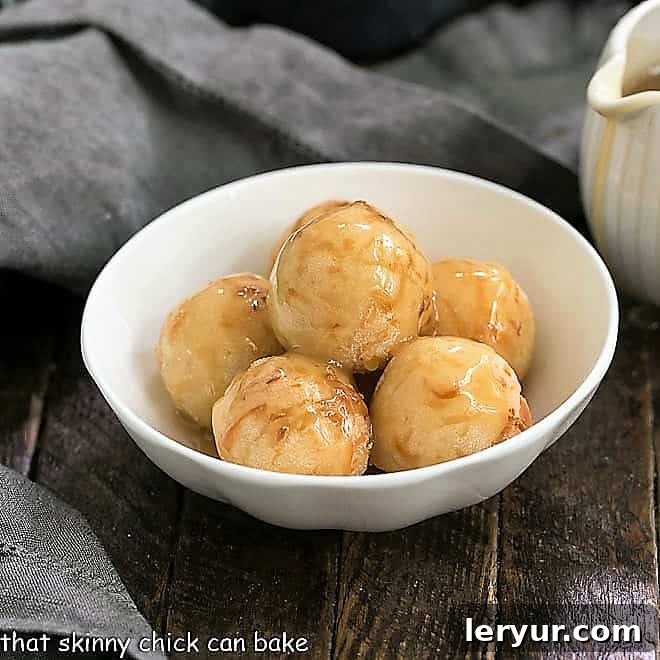
Experience the Irresistible Sweetness of Filipino Carioca: Fried Sticky Rice Balls with Decadent Coconut Caramel
Prepare your taste buds for an extraordinary culinary journey with Carioca, also known as Fried Sticky Rice Balls. These delightful Filipino treats are crafted from a chewy, coconut-infused dough, expertly fried to a golden perfection, and then generously coated with a rich, luscious coconut caramel sauce. Every bite offers a dense, wonderfully decadent texture bursting with tropical coconut flavor, making them an incredibly delicious and addictive snack or dessert. If you’re a lover of all things coconut, these sweet spheres are guaranteed to become your new obsession!
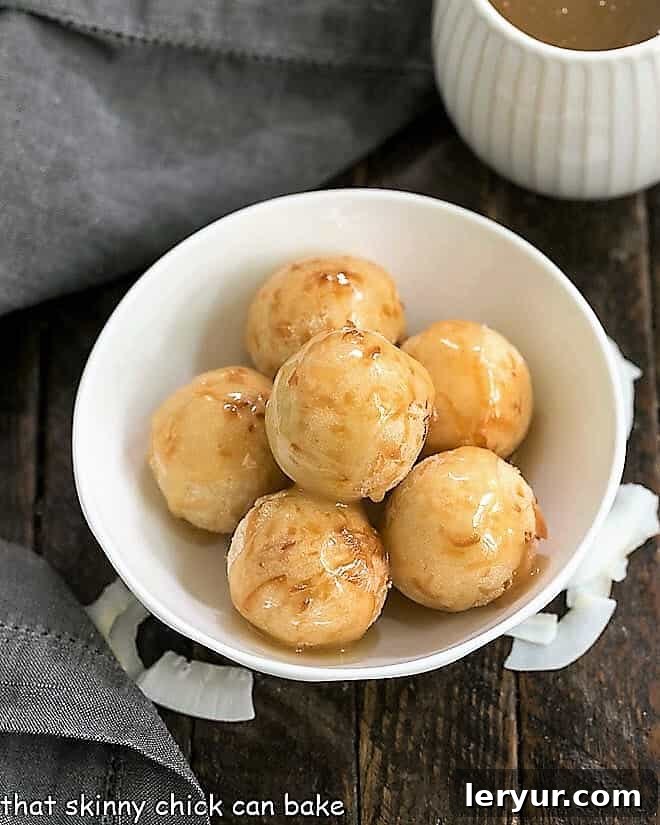
Discovering the Magic of Carioca: A Filipino Delicacy
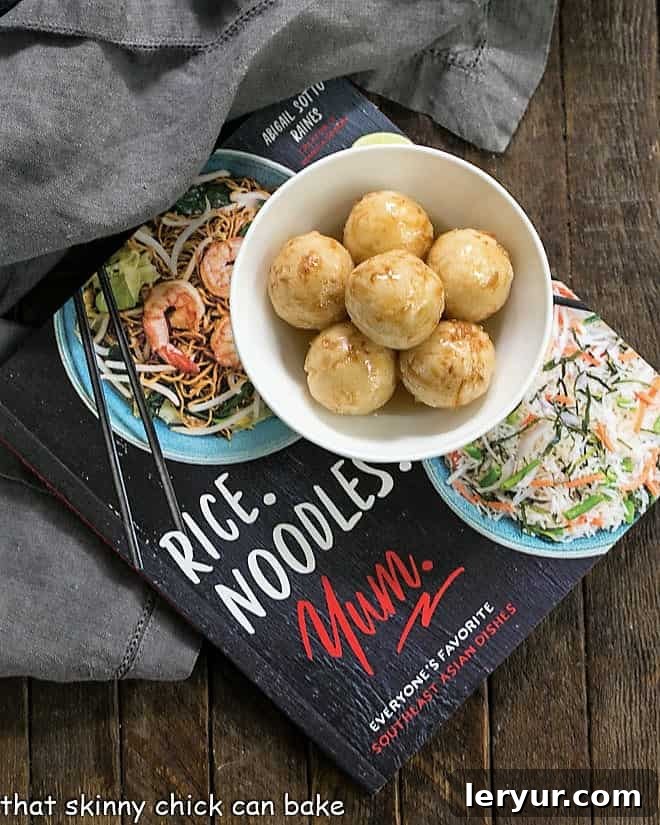
My first encounter with Carioca came through a friend, Abigail Raines, who graciously shared her new cookbook, Rice.Noodles.Yum: Everyone’s Favorite Southeast Asian Dishes. Eager to explore an unfamiliar yet enticing cuisine, I immediately gravitated towards these exquisite Fried Coconut Balls. The name itself promised something special, and they certainly delivered.
Abby’s philosophy revolves around noodles and rice being the “perfect canvas for the sweet, salty, and spicy flavors of Asian cuisine.” Carioca perfectly embodies this, transforming simple sticky or glutinous rice flour into something truly spectacular. Drizzled with a coconut cream-based caramel sauce, these fried sticky rice balls are not just a tasty snack or a fun dessert; they are also naturally gluten-free, making them a wonderful option for many dietary preferences.
Imagine the satisfying chewiness of a dense doughnut hole, but infused with the exotic sweetness of coconut and drenched in a rich, buttery caramel rather than a simple glaze. From my very first nibble, I was completely captivated. The combination of textures and the intense coconut aroma instantly transported me. For anyone who adores coconut, these amazing coconut balls are a must-try. They are truly an unforgettable Filipino treat that celebrates the versatility and richness of coconut in every form.
A Culinary Journey with Rice.Noodles.Yum.
Abby’s culinary background, rooted in growing up in Southeast Asia, highlights the abundance and diversity of rice and noodle dishes in the region. While many Americans are familiar with popular dishes like Pad Thai, Pho, and Nasi Goreng, Abby’s cookbook opens up a world of lesser-known but equally delicious treasures. Beyond these incredible fried coconut balls, several other recipes in her book caught my attention.
Her Moo Sarong, for instance, features visually impressive fried pork meatballs wrapped in delicate noodles, promising a delightful appetizer. Another tempting recipe is Beringhe, a Filipino take on paella, rich with turmeric, coconut milk, fish sauce, chorizo, and even raisins, offering a complex and satisfying flavor profile. In total, Rice.Noodles.Yum. presents 75 wonderful recipes, inviting both novice and experienced cooks to explore Southeast Asian cuisine with the guidance of an expert. Abby ensures that nothing is overly complicated, focusing instead on pure, unadulterated deliciousness. For more of her tried and true recipes from around the world, you can also visit her blog, Manila Spoon.
Crafting Your Own Fried Coconut Balls: A Simple Pleasure
Making these delectable fried coconut balls, or Carioca, is surprisingly straightforward, requiring just a handful of readily available ingredients. The most involved part of this tasty recipe is shaping the dough into perfectly round balls. As a devoted coconut enthusiast, I can wholeheartedly endorse these fried sticky rice balls. From my very first taste, I confess I was tempted to skip my planned lunch and simply feast on this delightful Carioca. It’s no wonder these were Abby’s favorite after-school snack during her elementary years – their comforting sweetness is truly irresistible!
Essential Ingredients You’ll Need:
- Sticky or Glutinous Rice Flour: This is the star ingredient that gives Carioca its signature chewy texture. I personally recommend Bob’s Red Mill Sweet White Rice Flour for consistent results.
- Shredded Sweetened Coconut: This adds a lovely texture and an extra layer of coconut flavor to the dough.
- Coconut Milk: Provides the necessary moisture and richness for the dough, contributing to its tender interior.
- Coconut Cream: The base for our luxurious caramel sauce, offering a thicker consistency and intense coconut flavor.
- Cooking Oil: For deep-frying the balls until they are golden and crispy on the outside. Canola oil is a good neutral choice.
- Brown Sugar: Sweetens the caramel sauce and contributes to its rich, molasses-like notes.
- Salt: A pinch of salt balances the sweetness in the caramel, enhancing its overall flavor profile.
Step-by-Step Guide to Perfection:
- Prepare the Dough: In a large mixing bowl, combine the sticky rice flour, shredded sweetened coconut, and coconut milk. Initially, you’ll need to stir the ingredients together, but don’t hesitate to use your hands to really work the mixture until it forms a cohesive, smooth dough. It might take a few minutes to come together, but persistence pays off.
- Shape the Balls: For consistent sizing, use a cookie disher or scoop (a medium one holding about 1.5 tablespoons works well). Scoop out portions of dough and then, between your palms, roll each portion into a nice, round ball. Ensure they are relatively uniform in size for even frying.
- Heat the Oil: In a deep saucepan or Dutch oven, heat your preferred cooking oil (such as canola oil) to 350°F (175°C). To test if the oil is ready without a thermometer, dip the end of a wooden skewer into the oil. If small bubbles immediately form around the skewer, the oil has reached the correct temperature.
- Fry in Batches: Carefully place a few coconut dough balls into the hot oil, ensuring not to overcrowd the pan. Fry them in batches for about 4-5 minutes, or until they turn a beautiful light golden brown all over. Make sure to gently roll the balls around in the hot oil to achieve even browning on all sides.
- Drain Excess Oil: As each batch finishes frying, use a slotted spoon to transfer the Carioca to a colander or strainer that has been lined with several layers of paper towels. This will absorb any excess oil, ensuring your sticky rice balls aren’t greasy. Once drained, transfer them to a paper towel-lined baking sheet and keep them warm while you prepare the caramel sauce.
- Make the Caramel Sauce: In a separate saucepan, combine the coconut cream, brown sugar, and salt. Bring this mixture to a boil over medium heat, stirring constantly to dissolve the sugar. Once boiling, reduce the heat slightly and continue to simmer for 5-8 minutes, stirring occasionally, until the sauce thickens to a luxurious, pourable consistency. It should coat the back of a spoon.
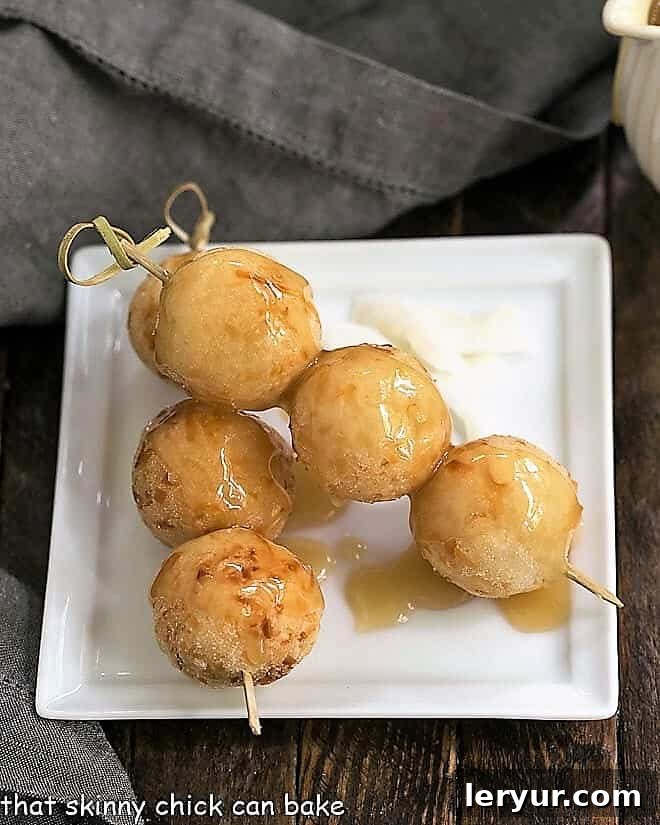
- Glaze and Serve: There are two delightful ways to glaze your Carioca. You can either dip each fried sticky rice ball directly into the warm caramel sauce, ensuring it’s thoroughly coated, then place it on a serving platter. Alternatively, for a more elegant presentation and to avoid sticky fingers, thread a few fried balls onto a wooden skewer and generously drizzle the coconut caramel sauce over them. Serve them warm and enjoy the explosion of flavors!
Pro Tips for Perfect Carioca Every Time:
- Dough Consistency is Key: If your dough feels too dry and crumbly, add a tiny bit more coconut milk, a teaspoon at a time, until it’s pliable. If it’s too sticky, add a little more glutinous rice flour.
- Oil Temperature Matters: Maintaining a consistent oil temperature of 350°F (175°C) is crucial. If the oil is too hot, the balls will brown too quickly on the outside and remain raw inside. If it’s too cool, they’ll absorb too much oil and become greasy. A kitchen thermometer is a valuable tool here.
- Don’t Overcrowd the Pan: Frying in small batches helps maintain the oil temperature and ensures the balls cook evenly.
- Freshness of Coconut: While sweetened shredded coconut is convenient, using freshly grated coconut if available can elevate the flavor even further.
- Caramel Sauce Thickness: The caramel sauce should be thick enough to cling to the balls but still pourable. If it becomes too thick as it cools, you can gently reheat it with a tablespoon of coconut milk until it reaches the desired consistency.
- Serving Warm: Carioca is best enjoyed warm, shortly after being fried and glazed, when the caramel is still gooey and the rice balls are at their chewiest.
Variations and Customizations:
- Sesame Seed Coating: For an extra layer of texture and nutty flavor, try rolling the fried sticky rice balls in toasted sesame seeds before drizzling with caramel.
- Ube Flavor: Incorporate a small amount of ube extract into the dough for a beautiful purple hue and a distinct, earthy sweetness.
- Ginger-Infused Caramel: Add a thin slice of fresh ginger to your coconut caramel sauce while it simmers for a subtle, warming spice.
- Fruit Dipping: Serve Carioca alongside fresh tropical fruits like mango or pineapple for a refreshing contrast.
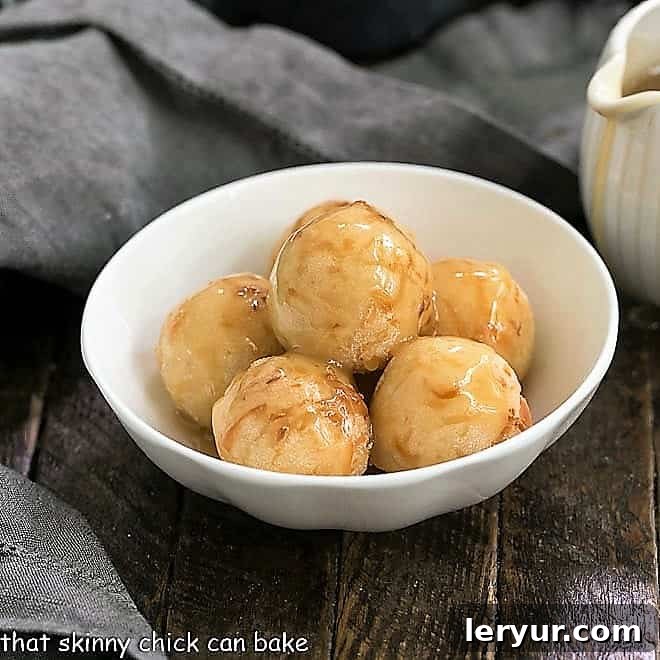
Fried Sticky Rice Balls (Carioca) Recipe
20 minutes
12 minutes
32 minutes
24 rice balls
A sweet, coconut Filipino after-school snack or dessert that’s easy to make and utterly delicious!
Ingredients
- 2½ cups (315 g) sticky or glutinous rice flour
- 2½ cups (250 g) shredded sweetened coconut
- 1¼ cups (300 ml) coconut milk
- 2 cups (480 ml) cooking oil for deep-frying, or more as needed
- 1 (13.5-oz [400-ml]) can coconut cream
- ½ cup plus 3 tablespoons (120 g) brown sugar
- ½ teaspoon salt
Instructions
- In a bowl, mix the sticky rice flour, sweetened shredded coconut, and coconut milk until a cohesive dough forms. You may need to use your hands to fully incorporate the ingredients.
- Scoop out about a tablespoon (15 g) of dough and shape it into a smooth ball between your palms. Repeat this process until all the dough is used up, aiming for uniform sizes. A cookie dough scooper can be very helpful here.
- Heat the cooking oil in a large saucepan or Dutch oven over medium heat to approximately 350°F (175°C). To verify the oil’s temperature, dip a wooden skewer into it; if small bubbles form around the skewer, the oil is ready for frying.
- Carefully fry the dough balls in small batches for 4 to 5 minutes, or until they achieve a light golden-brown color on all sides. Gently roll them in the hot oil to ensure even cooking and browning. Scoop the fried balls onto a strainer lined with paper towels to absorb any excess oil. Repeat with the remaining dough balls until all are cooked, then set them aside.
- In a separate saucepan, stir together the coconut cream, brown sugar, and salt. Bring the mixture to a boil over medium heat, stirring frequently. Once it begins to boil, reduce the heat slightly and continue to stir and cook for 5 to 8 minutes, or until the mixture has significantly thickened to a syrupy consistency.
- To glaze, you can either dip each individual fried sticky rice ball into the warm caramel sauce until thoroughly coated, or, for an easier and less messy approach, thread about four balls onto a wooden skewer and generously pour the coconut caramel sauce over them. Serve these delicious Carioca individually or presented beautifully on skewers.
Nutrition Information:
Yield:
12 Servings
Serving Size:
2 sticky rice balls
Amount Per Serving:
Calories: 197Total Fat: 8gSaturated Fat: 5gTrans Fat: 0gUnsaturated Fat: 3gCholesterol: 2mgSodium: 154mgCarbohydrates: 28gFiber: 2gSugar: 8gProtein: 3g
HOW MUCH DID YOU LOVE THIS RECIPE?
Please leave a comment on the blog or share a photo on Pinterest!
Frequently Asked Questions About Carioca:
- What is glutinous rice flour? Is it gluten-free? Yes, despite the name “glutinous,” glutinous rice flour (also known as sticky rice flour or sweet rice flour) is entirely gluten-free. The term “glutinous” refers to its sticky, glue-like texture when cooked, not to the presence of gluten.
- Can I use unsweetened shredded coconut for the dough? You can, but you might want to increase the amount of brown sugar in the caramel sauce or add a tablespoon of sugar to the dough to compensate for the lack of sweetness in the coconut. Sweetened shredded coconut provides a more balanced flavor for this recipe.
- How do I store leftover Carioca? Leftover Carioca can be stored in an airtight container at room temperature for up to 2 days, or in the refrigerator for up to 4 days. Reheat gently in a microwave or a warm oven to soften them up before serving. The caramel may re-harden, but will soften when warmed.
- Can I prepare the dough in advance? Yes, you can prepare the dough a day ahead and store it, tightly covered, in the refrigerator. Let it come to room temperature for about 15-20 minutes before rolling and frying.
- What if my caramel sauce is too thin or too thick? If the caramel is too thin, continue simmering it gently, stirring, until it thickens. If it becomes too thick after cooling, you can add a tablespoon or two of coconut milk and gently reheat it on the stove, stirring until it reaches your desired consistency.
Explore More Coconut-Inspired Delights:
If you’ve fallen in love with the rich, tropical flavor of coconut in these Carioca, you’ll be thrilled to discover a world of other coconut-centric recipes that promise to delight your palate. Dive into these irresistible treats:
- Luscious Coconut Zucchini Bread
- Decadent Coconut Brownie Cake with Chocolate Mousse
- Classic Chocolate Dipped Coconut Macaroons
- Sweet and Tangy Coconut Apricot Bars
- The Ultimate Creamy Coconut Cream Pie
- Irresistible Homemade Samoas Bars
- Exotic Coconut Macadamia Nut Bars
- Luxurious Coconut White Chocolate Truffles
- Crunchy Maple Coconut Granola
And for even more delightful sweet creations, explore our extensive collection of Best Dessert Recipes and Savory and Sweet Snack Recipes.
Final Thoughts on This Filipino Gem
Carioca, or Fried Sticky Rice Balls, are more than just a dessert; they are a delightful invitation to experience the warmth and richness of Filipino cuisine. With their perfectly chewy texture, profound coconut flavor, and a generous coating of sweet, sticky caramel, these treats offer a truly memorable indulgence. Whether you’re making them for a special occasion, an afternoon snack, or simply to satisfy a sweet craving, this recipe promises ease and exceptional results. So, gather your ingredients, follow these simple steps, and prepare to fall in love with these golden, coconut-laden spheres. Happy cooking, and enjoy every blissful bite!