
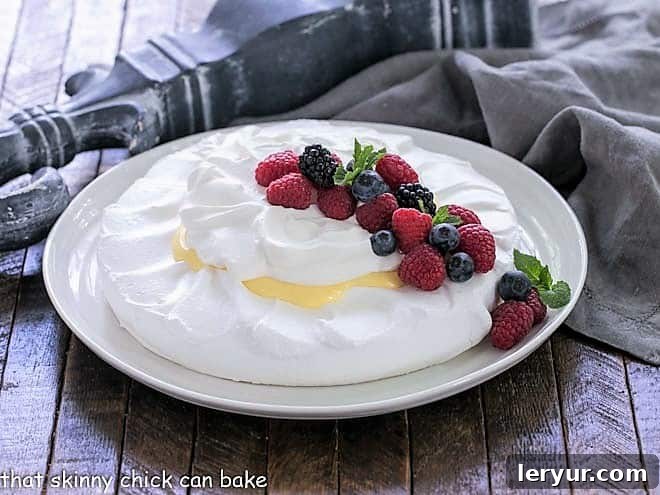
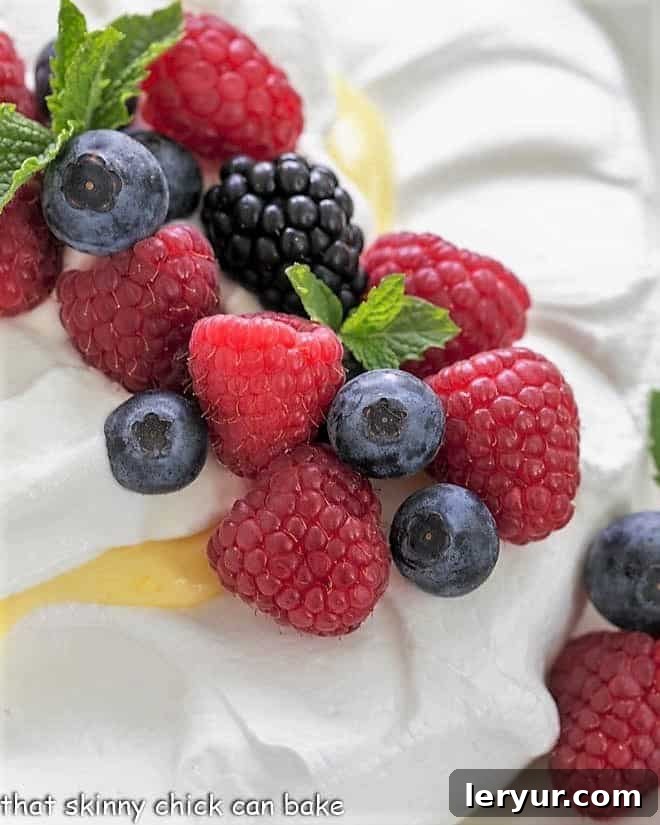
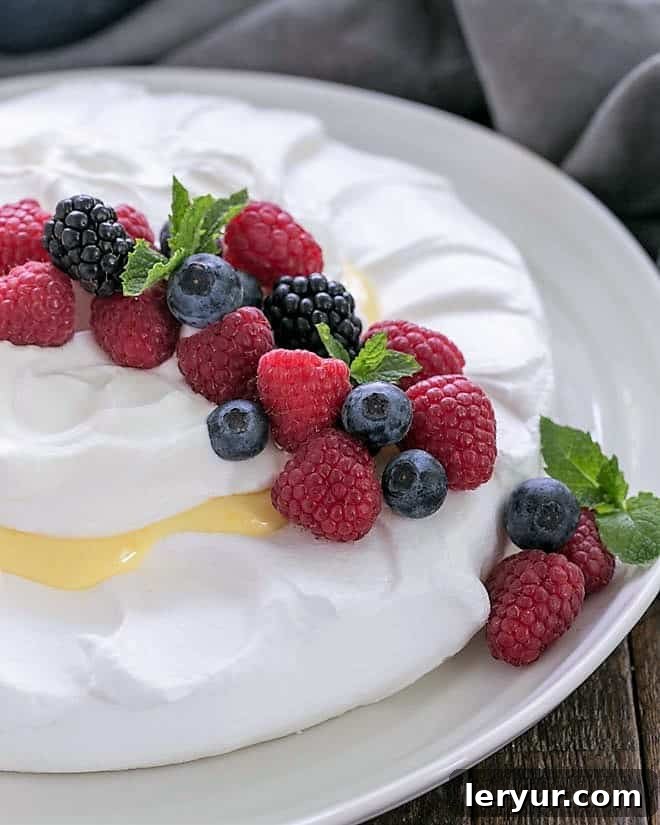
This heavenly Lemon Pavlova is a symphony of textures and flavors, featuring a crisp meringue shell, a velvety lemon curd, a generous swirl of whipped cream, and a vibrant medley of fresh berries. Every bite promises a delightful experience you’ll never forget!
Affectionately known as “Lemon on a Cloud” in our family, this dessert was a treasured specialty of my mother’s and undeniably one of my most cherished childhood treats. It’s an absolute dream for any citrus enthusiast, guaranteed to have everyone eagerly requesting second helpings and raving about its exquisite taste.
The Irresistible Allure of Lemon Pavlova: A Timeless Masterpiece
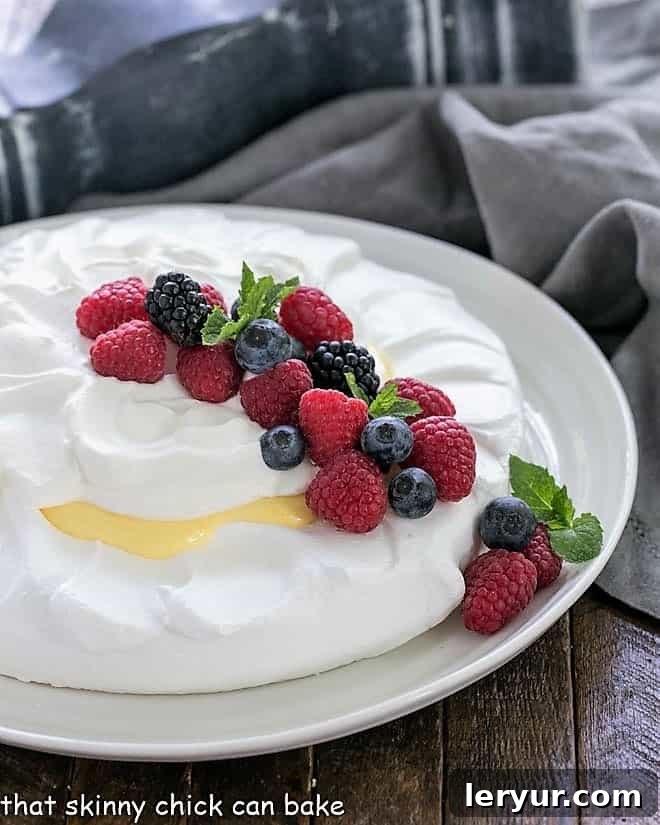
The Lemon Pavlova stands as a testament to simple elegance, offering a dessert that is both stunningly beautiful and wonderfully delicious. Its light-as-air meringue base, tangy lemon curd, and fresh fruit topping create a harmonious balance that appeals to all palates. This isn’t just a dessert; it’s an experience, a centerpiece that transforms any meal into a special occasion.
Why This Recipe Will Become Your Favorite
- A Cherished Family Legacy: This recipe has graced our family table since the 1970s, proving its enduring deliciousness and timeless appeal. It’s a taste of history, lovingly passed down.
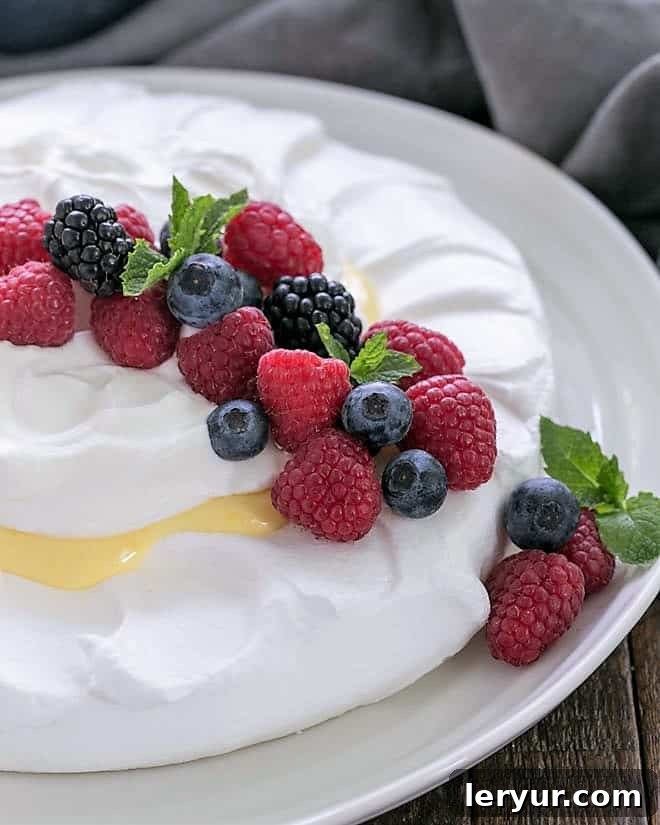
- A Show-Stopping Presentation: Imagine a pristine white meringue shell, crowned with a sunny yellow lemon curd, a billowy cloud of whipped cream, and a cascade of jewel-toned fresh berries. It’s a visual feast that will captivate your guests before they even take the first bite.
- The Ultimate Dinner Party Dessert: Light, refreshing, and incredibly elegant, this lemon pavlova is the perfect grand finale for any dinner party. It’s sophisticated without being overly complicated, leaving a lasting impression.
- Perfect Balance of Sweet and Tart: The delicate sweetness of the meringue beautifully complements the bright, zesty tang of the lemon curd, creating a perfect equilibrium that prevents it from being overly rich.
- Naturally Gluten-Free: For those with dietary considerations, this dessert is a fantastic naturally gluten-free option, ensuring everyone can enjoy a slice of heaven.
Essential Ingredients for Your Perfect Lemon Pavlova
Crafting a perfect Lemon Pavlova begins with high-quality ingredients and a keen understanding of their role. Here’s what you’ll need, along with some critical notes:
- Sugar: A kitchen staple, essential for both the meringue and the lemon curd. For the meringue, superfine sugar is ideal as it dissolves more readily, resulting in a smoother, more stable meringue. If you only have granulated sugar, ensure it’s fully dissolved during whipping to avoid a gritty texture.
- Egg Whites: These are the star of your meringue! Separate your eggs while they are cold, as this makes the yolks firmer and less likely to break. However, allow the egg whites to come to room temperature before whipping. Room temperature whites whip up to a much greater volume, creating a lighter, airier meringue. Crucially, ensure not even a speck of yolk contaminates the whites, and that your mixing bowl and beaters are impeccably clean and free from any grease. Any fat can prevent the whites from whipping properly.
- Egg Yolks: Reserved for the luscious lemon curd, providing richness and helping it to thicken beautifully.
- Lemon Juice: The source of that irresistible tangy flavor. Always use freshly squeezed lemon juice for the best, brightest, and most authentic taste. Bottled lemon juice simply won’t deliver the same vibrant quality. You’ll truly taste the difference!
- Whipping Cream: Opt for heavy whipping cream with a minimum of 36% butterfat. This ensures it will whip up to firm peaks and hold its shape well, creating that luxurious cloud-like topping.
- Pinch of Salt: While not listed explicitly in the original, a tiny pinch of salt in the egg whites can help stabilize the meringue and enhance its flavor.
A Sweet Journey Through Memory Lane: My Childhood “Lemon on a Cloud”
Growing up, our basement boasted a massive freezer – a true treasure chest perfect for holding bulk purchases, like a side of beef or the spoils from my parents’ trips to the Sara Lee outlet in Des Moines, which often meant boxes upon boxes of their delectable cheese danishes.
Amidst these frozen delights, a secret gem often lay hidden: my mom’s “Lemon on a Cloud.” She typically made a double batch of this glorious lemon meringue dessert, tucking one carefully into the freezer for a rainy day. But my sisters and I, with our keen sense of dessert detection, wouldn’t let it rest for long. As soon as we suspected its existence, a covert operation would commence. We’d sneak down to the slightly musty cellar, armed with a knife, and meticulously carve out illicit slivers of this citrus beauty. I can still recall the sticky fingers, the satisfied smiles, and the undeniable sugar rush that fueled our return upstairs, our sweet tooths thoroughly appeased.
Years later, a wave of nostalgia compelled me to recreate this iconic dessert. While my version, featuring more of a lemon curd topping rather than my mom’s suspected Cool Whip, was an instant hit with my own family, a part of me still yearns for the exact flavor of her original. Perhaps on my next visit to Iowa, I’ll embark on a quest to unearth that handwritten recipe card – the key to unlocking the precise taste of what I later learned was a lemon pavlova! It was truly my very first taste of this magnificent, ethereal dessert, igniting a lifelong love for its delicate charm.
Mastering the Meringue: Expert Tips for Pavlova Perfection
If you’ve ever tackled meringue cookies or a classic pie topping, making a pavlova recipe will feel like a natural progression. However, a few expert tips can elevate your dessert from good to absolutely spectacular. Following these guidelines will ensure your first pavlova dessert is a resounding success, earning you accolades from all who taste it!
- PRO-Tip: The Cleanliness Mandate: This is paramount! Before you even think about whipping your egg whites, ensure your mixing bowl (preferably glass or metal) and beaters are scrupulously clean and completely free of any grease or oil. Even a tiny speck of fat can act as a defoaming agent, preventing your egg whites from whipping up into the firm, voluminous peaks required for a stable meringue.
- Temperature Matters for Egg Whites: Eggs separate best when they are cold, as the yolk is firmer and less likely to break. However, for optimal whipping, bring your separated egg whites to room temperature (about 20-30 minutes on the counter, or a quick warm bath in hot water). Room temperature egg whites have less surface tension and whip up to a much greater volume, resulting in a lighter, more stable meringue.
- Creating Your Meringue Template: Line your baking sheet with parchment paper. Using a pencil, trace a circle on one side of the parchment to the desired size of your pavlova (this recipe suggests a 9-inch circle). Then, flip the parchment paper over so the pencil mark is on the underside. This prevents any lead from transferring to your meringue while still providing a clear guide.
- PRO-Tip: Sizing Your Pavlova: I often use a 9-inch round cake pan as my guide to draw the perfect circle on the parchment paper. Make sure your marking is dark enough to be visible when the paper is turned over. This ensures a uniform and beautifully shaped pavlova base.
- Gradual Sugar Addition is Key: Begin beating your room temperature egg whites until they become foamy and soft peaks begin to form. At this stage, slowly, gradually add the sugar, one tablespoon at a time, while the mixer is running. This allows the sugar to dissolve properly into the egg whites, creating a glossy, stable meringue. If you have superfine sugar, it will incorporate more quickly and result in an even smoother meringue.
- Achieving Stiff, Glossy Peaks: Continue beating the meringue mixture until it is very thick, billowy, and holds stiff, glossy peaks. When you lift the beaters, the meringue should stand up firmly without drooping. Once all the sugar is combined and the meringue is firm, gently fold in the lemon juice.
- PRO-Tip: The Role of Acid: The acid in lemon juice (or cream of tartar, another common meringue additive) helps to stabilize the egg whites, delays their coagulation, and contributes to a fluffier, more tender meringue. Fresh eggs are also naturally more acidic and can aid in creating a lighter texture.
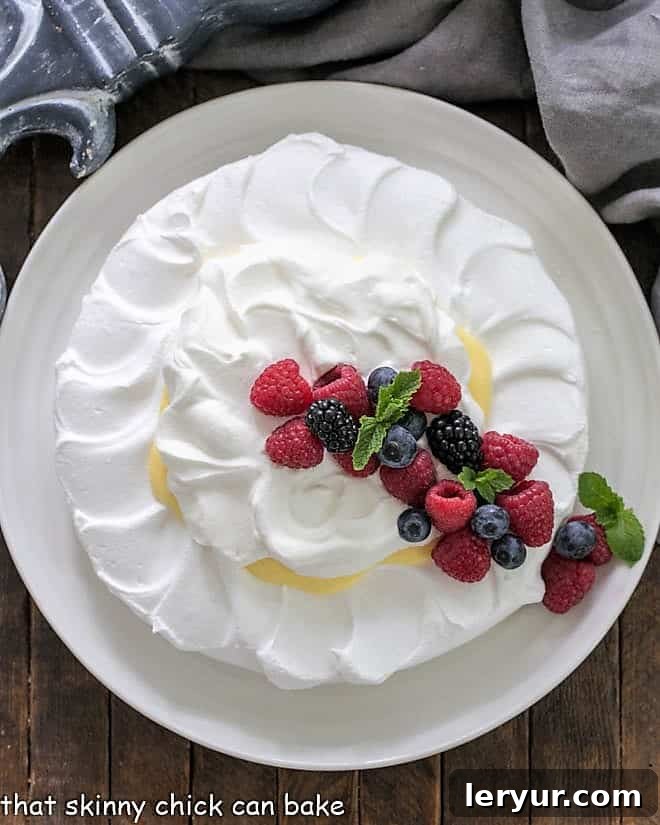
- Shaping Your Pavlova: Mound the whipped meringue mixture into the center of your traced circle on the parchment paper. Using an offset spatula or the back of a spoon, carefully spread and level the meringue into a flat-topped circle. This recipe specifically calls for creating a “well” or slight indentation in the center of the meringue. Make this well deep enough to generously accommodate your lemon filling later. Building up the edges slightly will create a beautiful, protective shell.
- Baking Low and Slow: Pavlovas and meringues are typically baked at a low temperature for an extended period. This low-and-slow baking process allows the meringue to dry out and crisp up without browning, preserving its pristine white color and delicate texture.
- The Critical Cooling Stage: Once baked, it is absolutely crucial to cool your meringue shell completely inside the oven (turned off, with the door slightly ajar) or at room temperature. This slow cooling prevents cracking and ensures the meringue remains crisp and doesn’t collapse. Patience here is key!
- Making the Lemon Curd: When cooking the lemon curd, whisk constantly over low heat. This prevents scorching and ensures a smooth, lump-free consistency. Cook until the curd thickens enough to coat the back of a spoon. Remember to cool it completely before assembling, as warm curd will melt the meringue and whipped cream.
Frequently Asked Questions About Lemon Pavlova
A Pavlova is an exquisite dessert featuring a large meringue shell, typically crisp on the outside and wonderfully soft and marshmallowy on the inside. It’s then generously topped with a cloud of whipped cream and an abundance of fresh fruit. Its intriguing origin is often the subject of friendly debate between Australia and New Zealand, both countries proudly claiming to have invented this dessert, which was named in honor of the renowned Russian ballerina, Anna Pavlova, during her tours in the region.
The meringue shell, if stored on its own, can be kept at room temperature in a cool, dry, and airtight environment. Humidity is the enemy of meringue, causing it to become sticky and chewy. However, once you’ve assembled your pavlova with the lemon curd, whipped cream, and fresh berries, it becomes a perishable dessert and must be refrigerated. Loosely cover it to prevent it from absorbing refrigerator odors.
For the absolute best texture and flavor, an assembled pavlova is truly at its peak and best enjoyed on the day it’s made. The meringue shell will gradually begin to soften once the moist toppings are added, and the fresh fruit will be most vibrant. While it’s safe to eat for a couple of days after assembly when properly refrigerated, the crispness of the meringue will diminish over time. If you want to prepare ahead, make the meringue shell and lemon curd in advance and assemble just before serving.
Absolutely! The meringue shell can be baked up to 2-3 days in advance and stored in an airtight container in a cool, dry place at room temperature. The lemon curd can also be made a few days ahead and refrigerated in a sealed container. Whip the cream and assemble the pavlova right before serving to ensure the meringue remains crisp and the cream and berries are fresh.
Explore More Lemon Desserts & Sweet Treats
If your heart beats for the bright and zesty flavor of lemon, you’re in for a treat! Here are some other delightful lemon-infused recipes and dessert inspirations you might also enjoy:
- Lemon Bar Cookie Cups from Barbara Bakes: A bite-sized burst of lemony goodness.
- Easy Lemon Bundt Cake: A moist and flavorful cake perfect for any occasion.
- Mile High Lemon Meringue Pie: The ultimate classic, with towering meringue and tangy filling.
- Lemon Cake with Lemon Curd: Layers of tender cake and rich lemon curd for an impressive dessert.
- Creamy Lemon Tart: A sophisticated and smooth tart with a delightful tang.
- Discover even more of the Best Dessert Recipes for every craving and celebration.
Stay connected and share your culinary creations with me through social media! Follow me on Instagram, Facebook, and Pinterest. Don’t forget to tag me when you try one of my recipes! If you love the results, please consider giving it a 5-star rating in the recipe card below – your feedback means the world to me.
Lemon on a Cloud Recipe
45 minutes
2 hours 20 minutes
3 hours 5 minutes
8 servings
A crisp meringue shell topped with zesty lemon curd and luxurious whipped cream, creating a dessert that’s truly heavenly.
Ingredients
- 4 large egg whites, at room temperature
- 1 cup granulated sugar (superfine sugar recommended for smoother meringue)
- 1 teaspoon fresh lemon juice (for meringue)
- 4 large egg yolks
- ½ cup granulated sugar (for lemon curd)
- ¼ cup fresh lemon juice (for lemon curd)
- 1 cup cold heavy whipping cream (minimum 36% butterfat)
- Fresh berries for garnish (e.g., raspberries, blueberries, strawberries)
- Optional: Fresh mint leaves for garnish
Instructions
- Prepare the Meringue Shell: Preheat your oven to a low 200°F (95°C). Line a large baking sheet with parchment paper. Using a 9-inch round cake pan as a guide, trace a 9-inch circle on the parchment paper with a pencil. Flip the paper over so the pencil mark is on the underside.
- In a very clean, large mixing bowl, beat the room temperature egg whites with an electric mixer until they become foamy and soft peaks begin to form.
- Gradually add 1 cup of sugar, one tablespoon at a time, continuously beating at high speed. Continue to beat until the mixture is very stiff, glossy, and holds firm peaks (when you lift the beaters, the meringue should stand up without drooping). The sugar should be completely dissolved.
- Gently fold in 1 teaspoon of lemon juice until just combined.
- Spoon the whipped meringue onto the center of your traced circle on the parchment paper. Using an offset spatula or the back of a spoon, spread the meringue into a flat-topped circle, building up the perimeter slightly to create a “shell” or well in the center to hold the filling.
- Bake the meringue for 2 hours. After 2 hours, turn off the oven, leave the oven door slightly ajar, and allow the meringue to cool completely inside the oven. This slow cooling helps prevent cracking. It’s crucial for the meringue to be completely cool and dry before adding toppings.
- Prepare the Lemon Curd: While the meringue is baking and cooling, prepare the lemon curd. In a medium saucepan, combine the egg yolks, ½ cup sugar, and ¼ cup fresh lemon juice.
- Cook the mixture over low heat, whisking constantly, until it thickens enough to coat the back of a spoon (it should be about 170°F or 77°C if you have a thermometer). Do not boil.
- Remove the saucepan from the heat and allow the lemon curd to cool completely at room temperature, then refrigerate until thoroughly chilled.
- Assemble the Pavlova: Once the meringue shell and lemon curd are cold, it’s time to assemble. In a clean, chilled bowl, beat the 1 cup of cold heavy whipping cream until stiff peaks form.
- Take ½ cup of the whipped cream and gently fold it into the chilled lemon curd until blended. This lightens the curd.
- Spoon the lemon curd mixture into the cooled meringue shell, filling the well you created.
- Reserve the remaining whipped cream in the refrigerator. Cover the assembled pavlova and chill for at least 2 hours before serving to allow the flavors to meld and for the meringue to slightly soften around the curd.
- Just before serving, top the pavlova with the reserved whipped cream and garnish generously with fresh berries and optional mint leaves, if desired. Slice and serve immediately.
Notes
- Ensure there is absolutely no egg yolk in your whites, or they will not whip properly.
- Superfine sugar works best for meringue as it dissolves more easily, leading to a smoother texture. However, regular granulated sugar is acceptable, just ensure it’s fully dissolved.
- The mixing bowl and beaters must be completely free of any oil or grease for the egg whites to whip well.
- Total time for this recipe, including all cooling periods, is closer to 5 ½ hours to ensure proper setting and crispness.
- For a perfectly stable meringue, avoid making it on very humid days if possible.
Recommended Products
As an Amazon Associate and member of other affiliate programs, I earn from qualifying purchases.
- USA Pan Bakeware Half Sheet Pan, Warp Resistant Nonstick Baking Pan
- KitchenAid 9-Speed Digital Hand Mixer
- Superfine Sugar
Nutrition Information:
Yield:
8
Serving Size:
1
Amount Per Serving (estimated):
Calories: 284
Total Fat: 13g
Saturated Fat: 8g
Trans Fat: 0g
Unsaturated Fat: 5g
Cholesterol: 126mg
Sodium: 42mg
Carbohydrates: 39g
Fiber: 0g
Sugar: 39g
Protein: 4g
(Nutritional information is an estimate and may vary based on specific ingredients and preparation methods.)