
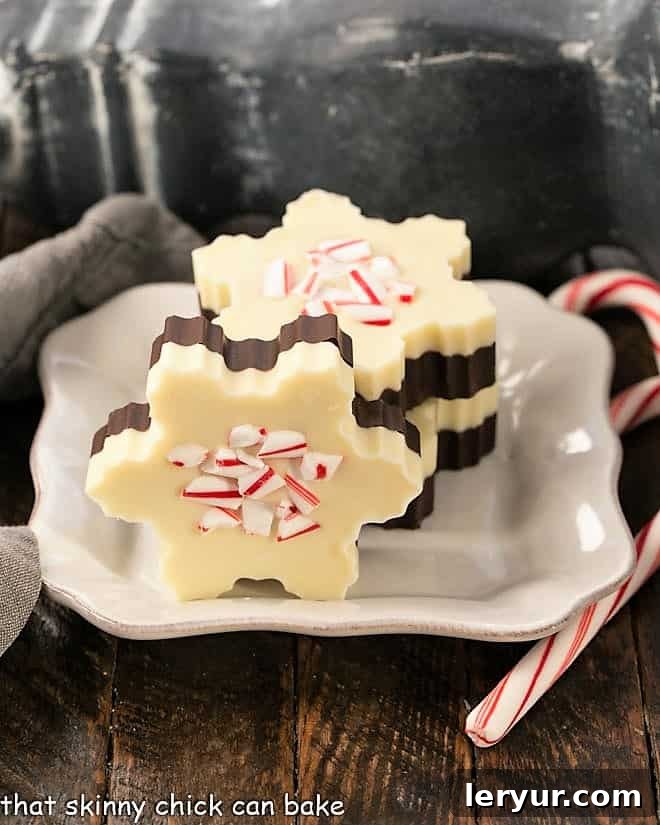
Transform your holiday celebrations into an enchanting winter wonderland with an exquisite twist on a beloved classic! These delightful **Peppermint Bark Snowflakes** are much more than just a sweet treat; they are miniature works of edible art, designed to captivate and charm. Imagine the sheer delight and gasps of admiration from your friends and family when they discover these beautifully intricate, homemade confections gracing your holiday table or tucked into festive gift baskets. The truly magical secret? Despite their impressive appearance, they are surprisingly simple to create, allowing you to exude culinary brilliance without any undue stress.
This uniquely shaped **Peppermint Bark Recipe** offers the ultimate solution for elegant, yet incredibly easy, hostess gifts. Forget the scramble for last-minute presents; with these charming snowflakes, you’re always prepared. Simply arrange a cluster of these frosty delights in a clear cellophane bag, tie it with a shimmering holiday ribbon – perhaps a deep crimson, forest green, or glittering gold – and you have a thoughtful, homemade present that’s guaranteed to leave a lasting impression. Move beyond the ordinary store-bought sweets and embrace the heartwarming charm and irresistible deliciousness of DIY holiday magic!
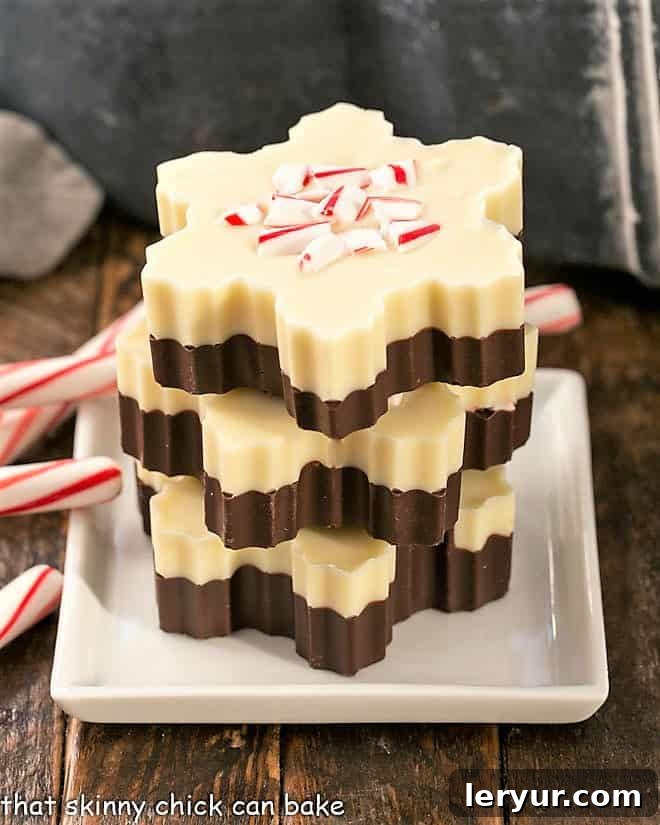
Why These Peppermint Bark Snowflakes Are Your Holiday Must-Make
The holiday season is an extraordinary time, brimming with warmth, laughter, and, of course, an abundance of delicious treats. Among the pantheon of festive sweets, peppermint bark holds a cherished place, a timeless classic that evokes comforting memories and effortlessly spreads cheer. But why settle for a traditional, often uninspired, slab of bark when you can create something truly extraordinary and visually stunning with minimal effort? There are compelling reasons why these Peppermint Bark Snowflakes absolutely deserve a prime spot on your holiday baking list this year:
- **A Dazzling Twist on a Beloved Classic:** Peppermint bark has long been a cherished tradition, a simple yet profound gesture of holiday giving, doled out to neighbors, colleagues, and loved ones. This inventive snowflake rendition takes the familiar rectangular pieces and transforms them into intricate, individual works of art. This adds an undeniable layer of visual sophistication and amplifies the holiday spirit, making each piece a special moment.
- **Effortless Elegance for Every Skill Level:** Do not be intimidated by their sophisticated, almost delicate appearance; these snowflakes are incredibly straightforward to master, regardless of your baking prowess. The process is remarkably foolproof: simply gather your premium dark or white chocolate (or both for a captivating layered effect), gently melt it to perfection, infuse it with vibrant peppermint extract, and then generously shower it with crushed candy canes. It’s truly a “no-brainer” dessert that consistently delivers impressive, professional-looking results every single time, even for the most novice of home chefs.
- **Unforgettable Presentation & Irresistible Charm:** The distinct snowflake shape isn’t merely “extra festive”; it dramatically elevates a humble candy into a show-stopping centerpiece for any holiday gathering or a highly coveted, personalized gift. Each peppermint bark snowflake is akin to a miniature edible sculpture, perfectly sized and exquisitely detailed for elegant holiday platters, dessert buffets, or charming individually wrapped favors. They beautifully capture the ethereal magic and crisp beauty of winter in every delightful, minty bite, leaving a lasting impression on anyone fortunate enough to receive or taste them.
My initial spark of inspiration for these beautiful snowflake barks ignited years ago when I stumbled upon a truly captivating image on Pinterest. I was instantly mesmerized by the creative concept of seamlessly merging the iconic, refreshing flavor of peppermint bark with such an elegant, undeniably festive shape. Mari, from the wonderful blog Once Upon a Plate, masterfully executed this vision, showcasing the incredible potential for such delightful seasonal creations. Even further encouragement came from my dear friend Rachel at Baked by Rachel, whose earlier, equally charming version spurred me to refresh and update my own original post from 2011 with these exciting, molded bark ideas! It’s genuinely heartwarming to witness how a simple yet brilliant idea can evolve, inspire, and spread so much festive joy.
PRO-Tip for Perfect Peppermint Bark Snowflakes: For a more universally enjoyable eating experience and, happily, a greater yield from your ingredients, **I highly recommend creating thinner chocolate layers. Aim to produce approximately 12 delicate snowflakes rather than the 6 thicker ones often depicted in older recipes or initial attempts.** While these more substantial snowflakes are undeniably beautiful and have a satisfying weight, their thickness can sometimes make them a bit cumbersome and challenging to eat gracefully. Thinner barks, by contrast, offer a more delicate crunch and are far easier to manage, making them even more appealing to a broader audience. You’ll find an abundance of excellent quality silicone snowflake molds readily available on popular online platforms like Amazon (note: this is an affiliate link), much like the fantastic finds I’ve previously discovered in the dollar bins at Target. They represent a small, worthwhile investment for a bounty of ongoing holiday cheer and delightful homemade gifts!
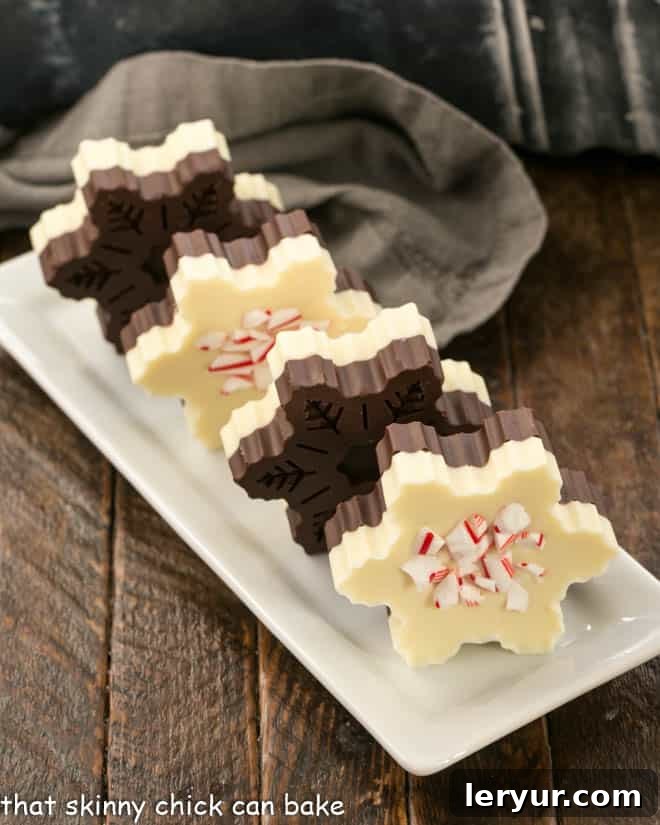
Ingredient Notes: Crafting Irresistible Peppermint Bark Snowflakes
The inherent beauty and undeniable deliciousness of peppermint bark stem from its elegant simplicity. However, the judicious selection and quality of your ingredients play a paramount role in achieving that exquisitely perfect festive flavor, delightful crunch, and smooth, glossy texture. Here’s an in-depth exploration of each essential component and some expert tips for making the best choices:
- **Kitchen Staples – Neutral Vegetable Oil:** A modest quantity of a neutral-flavored vegetable oil (such as canola, sunflower, or grapeseed oil) is an often-overlooked yet critical ingredient. It’s essential for achieving a luxuriously smooth, fluid, and pourable consistency when melting your chocolate. This subtle addition deftly helps prevent the chocolate from becoming overly thick, grainy, or, worst of all, seizing, thereby ensuring that your layered barks are perfectly even, beautifully glossy, and impeccably textured.
- **White Chocolate – Quality is Paramount:** For consistently superior results, I wholeheartedly recommend utilizing premium white chocolate bars. Brands like Ghirardelli are excellent choices due to their exceptional melting characteristics and their rich, velvety, creamy flavor profile. When selecting white chocolate, always scrutinize the ingredient list; prioritize brands that explicitly list cocoa butter as a primary component, rather than relying solely on sugar and various vegetable oils. Before melting, meticulously chop your chosen bars into small, uniformly sized pieces. This crucial preparation step facilitates easier and more even melting, significantly reducing the unfortunate risk of scorching the delicate chocolate.
- **Semisweet Chocolate – Richness and Smoothness:** mirroring the importance of quality in white chocolate, opting for premium semisweet chocolate bars, such as those from Ghirardelli, is my steadfast recommendation. Their expertly balanced sweetness and inherently smooth texture provide a perfect, harmonious complement to the vibrant, refreshing kick of peppermint. As with the white chocolate, finely chop the semisweet bars before proceeding with melting. This ensures a consistent, lump-free melt, which is vital for achieving the pristine, smooth finish that defines exquisite peppermint bark.
- **Peppermint Extract – Potency is the Watchword:** This tiny bottle holds the key to the signature, invigorating peppermint flavor that defines this holiday confection! **It is absolutely crucial to exercise extreme caution and begin with a very conservative amount, perhaps a mere ¼ teaspoon, then meticulously taste and adjust as you go.** Peppermint extract is incredibly potent, and its flavor can quickly become overwhelming, leading to an unpleasant, “toothpaste-like” taste. Remember the golden rule: you can always add a little more, but you can never remove it. Always opt for pure peppermint extract for the most authentic, clean, and vibrant flavor profile.
- **Candy Canes – The Essential Crunch and Sparkle:** The vibrant, festive red and white flecks of meticulously crushed candy canes serve a dual purpose: they not only infuse your bark with an unmistakable, cheerful pop of color but also contribute a wonderfully delightful, satisfyingly crunchy texture and an extra burst of quintessential peppermint flavor. Aim to crush them into uniform ¼-inch pieces. An effective and mess-free technique involves placing the candy canes in a sturdy zip-top bag and gently tapping them with a rolling pin or a meat mallet. **A critically important step often overlooked: after crushing, meticulously sift out and discard any fine “candy cane dust.”** This sugary dust has a tendency to dissolve into your warm chocolate layers, which can unfortunately result in a cloudy, dull appearance and a slightly gritty texture, rather than the desired distinct, vibrant, and crunchy candy pieces.
By investing in and utilizing high-quality ingredients, you are not merely preparing a dessert; you are ensuring that your Peppermint Bark Snowflakes will be as exquisitely delicious as they are visually stunning, guaranteeing they become a truly unforgettable highlight of your holiday season.
How to Make Layered Peppermint Bark Snowflakes: A Detailed Step-by-Step Guide
Crafting these stunning, layered peppermint bark snowflakes is an immensely rewarding culinary endeavor, and you’ll find the entire process to be far simpler and more enjoyable than you might initially imagine. I’ve thoughtfully adapted my cherished white chocolate peppermint bark recipe, a beloved annual tradition in my kitchen every Christmas, to bring you these uniquely shaped, festive treats. This particular recipe expertly utilizes half a batch of creamy white chocolate bark and half a batch of rich semi-sweet chocolate bark, precisely calibrated to achieve that gorgeous, visually appealing contrasting layer without overpowering the delicate balance of flavors. While the final yield will naturally vary slightly depending on the specific size and depth of your chosen snowflake molds, rest assured that the festive and utterly delicious results are consistently impressive, making every batch a triumph!
- **Thoughtful Preparation of Your Molds:** Begin by meticulously placing your clean, dry silicone snowflake molds onto a sturdy, flat baking sheet. This seemingly small but crucial step serves a dual purpose: it provides a stable base, making the molds effortlessly easy to transfer to the refrigerator later without any frustrating bending, wobbling, or potential spills. Ensure your molds are not only clean but also completely dry, as even a tiny drop of water can cause your melted chocolate to seize.
- **Melting the Luxurious Dark Chocolate Layer:** In a clean, microwave-safe bowl, gently combine your finely chopped semisweet chocolate with precisely one teaspoon of the neutral vegetable oil. Proceed to melt the chocolate using short, controlled 30-second intervals in the microwave. After each interval, remove the bowl and stir the chocolate thoroughly with a clean, dry spatula. Continue this process until the chocolate is perfectly smooth, velvety, and fully melted with no lumps remaining. Once melted, carefully stir in a small amount (starting with ¼ to ½ teaspoon) of pure peppermint extract, adjusting to achieve your preferred level of minty freshness. Always remember: peppermint extract is potent, so a little goes a long way!
- **Creating the Pristine First Layer:** With careful precision, pour a thin, even layer of the melted, mint-infused dark chocolate into the bottom of each snowflake mold cavity. Avoid overfilling at this stage; aim for approximately half the desired final thickness of your finished bark. Gently tap the baking sheet containing the molds on your countertop a few times. This simple action helps the chocolate spread uniformly and encourages any trapped air bubbles to rise to the surface and dissipate, ensuring a smooth, flawless initial layer.
- **Adding the Festive Candy Cane Sprinkles:** Immediately after pouring the dark chocolate layer, while it is still wet and pliable, generously sprinkle a portion of your meticulously crushed candy cane pieces over the surface of the chocolate in each mold. This prompt application is vital to ensure that the candy cane bits adhere beautifully and securely to the first layer, rather than simply sitting on top and falling off later.
- **Crucial Chilling for Firmness:** Carefully transfer the baking sheet with the filled molds to the refrigerator. Allow them to chill undisturbed for a solid 10-15 minutes, or until the dark chocolate layer is completely firm and cool to the touch. This chilling phase is absolutely critical; it prevents the warmer white chocolate from melting into and bleeding with the dark chocolate when applied, thereby maintaining perfectly distinct and visually appealing layers.
- **Preparing the Velvety White Chocolate Layer:** While your dark chocolate layer is chilling to perfection, proceed to prepare your white chocolate layer. In a separate, impeccably clean, and microwave-safe bowl, melt your finely chopped white chocolate with the remaining 1 teaspoon of vegetable oil. Follow the same controlled 30-second interval method, stirring diligently after each, until the white chocolate is silken and entirely smooth. Once melted, stir in the remaining peppermint extract to taste, ensuring it harmonizes with the dark chocolate layer’s mint intensity.
- **Mastering the Second Layer:** Once you’ve confirmed that the dark chocolate layer is firm and fully set, gently and carefully pour the melted white chocolate over it. Fill the molds to your desired total thickness, ensuring an even distribution. Once again, gently tap the baking sheet to help the white chocolate settle smoothly and evenly across the surface.
- **The Final Touch: Candy Cane Garnish:** Before the white chocolate layer has a chance to set and harden, liberally sprinkle the remaining crushed candy cane pieces over the top surface of each snowflake. This final flourish not only adds a striking contrasting texture but also delivers that extra, quintessential burst of holiday peppermint flavor and vibrant color.
- **The Grand Finale: Final Chill and Release:** Return the baking sheet containing your layered snowflakes to the refrigerator for a minimum of 30-60 minutes, or longer if necessary, until the entire peppermint bark snowflake is thoroughly firm and solid throughout. Once completely set, gently flex the silicone molds. The beautifully formed peppermint bark snowflakes should pop out with ease, ready to be savored, shared, or thoughtfully wrapped as exquisite homemade gifts!
Isn’t this layered peppermint bark truly festive? The stunning contrast between the deep, rich dark chocolate and the creamy white chocolate, brilliantly studded with those cheerful red and white candy cane pieces, transforms these delicate snowflakes into an undeniable holiday showstopper, destined to impress and delight everyone who encounters them.
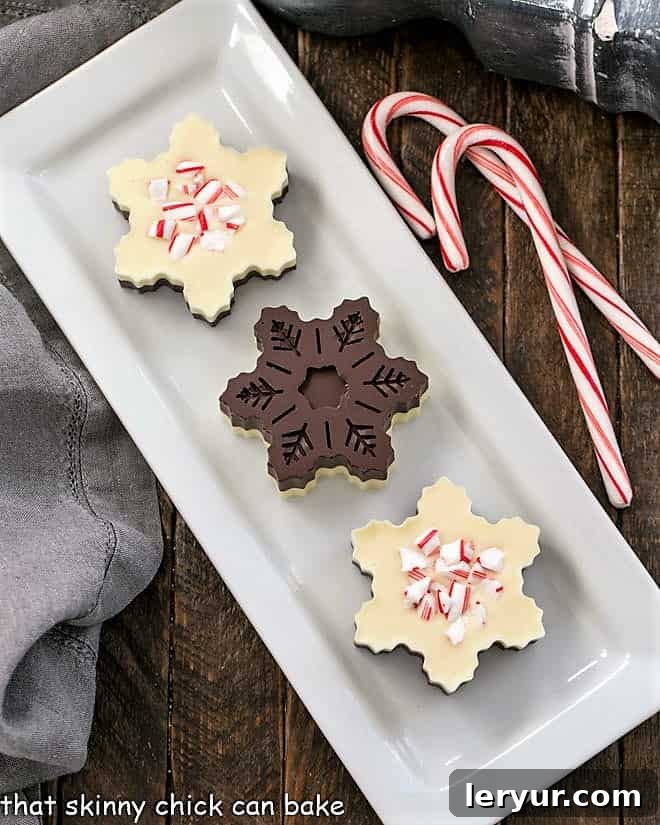
Recipe Tips for Achieving Perfect Peppermint Bark Snowflakes
Crafting perfectly formed, visually appealing peppermint bark snowflakes is an achievable goal with just a few expert tips and clever tricks up your sleeve. By following these tried-and-true guidelines, you can ensure that your homemade holiday treats consistently turn out beautifully, delighting both yourself and anyone lucky enough to receive them as gifts:
- **Optimize Your Yield and Thickness:** While this particular recipe, as initially presented, yields six generously thick peppermint bark snowflakes, it’s worth reiterating and strongly emphasizing: **I highly recommend opting for thinner layers.** This modification not only makes each snowflake considerably easier and more pleasant to eat but also significantly boosts your overall yield. More delicate barks mean you have more delightful treats to share and enjoy!
- **Achieve Uniform Portions with Ease:** **PRO-Tip: Incorporate a cookie disher (often referred to as an ice cream scoop, ideally a medium size) into your toolkit for dividing the melted chocolate.** This simple yet incredibly effective utensil is a game-changer for portioning consistent amounts of chocolate into each snowflake mold cavity. It guarantees uniform thickness and a polished, symmetrical appearance across all your barks, elevating their professional look.
- **Strategically Doubling Your Yield (for Thinner Snowflakes):** If your preference leans towards producing more, delicate snowflakes without substantially altering the core recipe, simply prepare the full recipe as instructed. Then, distribute the melted chocolates between two sets of snowflake molds (or utilize a larger quantity of molds if you have them available). This clever approach allows you to achieve a greater number of elegant, thinner barks from the same ingredient quantities.
- **Effortless Refrigerator Transfer:** **PRO-Tip: Always, without exception, place your flexible silicone molds onto a sturdy half-sheet pan (or any rigid, flat baking tray) *before* you begin pouring the chocolate.** This foundational step transforms the potentially tricky task of transferring the liquid-filled molds to and from the refrigerator into an incredibly easy, stable, and completely mess-free operation. It effectively prevents any unwanted spills or the unfortunate misshaping of your delicate snowflakes.
- **Cultivating Perfectly Smooth Layers:** After pouring each successive layer of chocolate into the molds, gently give the baking sheet a subtle shimmy or a few light taps against your countertop. This seemingly minor action plays a significant role in helping the chocolate spread uniformly across the mold’s surface and, crucially, encourages any lingering trapped air bubbles to rise and pop. The result is a beautifully smooth, unblemished, and professional-looking surface for your bark.
- **Patience with Chilling is a Virtue:** It is absolutely paramount to **chill each chocolate layer thoroughly until it is completely firm and cool to the touch** before you even consider adding the subsequent layer. Rushing this critical step will lead to disappointment; if the bottom layer isn’t fully set, the warmth from the newly poured top layer will cause it to melt and bleed, resulting in an unappealing marbled effect rather than beautifully distinct, defined layers. True patience here is generously rewarded with stunning, crisp results!
- **Timely Application of Candy Cane Pieces:** **PRO-Tip: Ensure you sprinkle the crushed candy cane pieces onto the chocolate layers *before* they have a chance to fully solidify and set.** The chocolate needs to retain enough wetness and tackiness for the candy fragments to properly adhere and slightly embed themselves within the surface. If you wait too long, the chocolate will harden, and the candy pieces will simply sit on top, prone to falling off once the bark is handled.
- **Elegant Gifting Presentation:** To transform your peppermint bark snowflakes into a truly impressive and memorable hostess gift or thoughtful holiday favor, once they are completely firm and released from the molds, carefully arrange a few pieces into a clear cellophane bag. Then, artfully tie the bag with a beautiful festive ribbon – classic red, deep green, shimmering silver, or lustrous gold hues work wonderfully – for a simple yet stunning presentation that speaks volumes.
- **Optimal Storage for Lasting Freshness:** To preserve their delightful freshness, satisfying crunch, and vibrant colors, store your finished peppermint bark snowflakes in an airtight container. Keep them either at cool room temperature (if your home is typically cool during the holidays) or, for extended freshness, in the refrigerator. Proper storage ensures they remain delicious for weeks.
By diligently applying these insightful tips, you are now exceptionally well-equipped to create batch after batch of gorgeous, utterly delectable peppermint bark snowflakes that are destined to be the crowning highlight of any holiday gathering or gift exchange!
Frequently Asked Questions About Peppermint Bark Snowflakes and Candy
The intriguing name “bark” for this type of confection is widely believed to originate from its rustic, typically irregular, and often thin appearance when traditionally prepared. When melted chocolate is spread onto a baking sheet and then broken into pieces, the resulting uneven edges and varied thickness were thought to strikingly resemble the natural texture of tree bark. In our elegant snowflake version, while the individual shapes are beautifully uniform due to the molds, the core concept of a thin, crisp, and delectable chocolate confection remains, carrying on the traditional nomenclature.
Peppermint bark is a beloved and iconic holiday confection that primarily consists of distinct layers of high-quality dark chocolate and creamy white chocolate. Both chocolate layers are generously infused with pure peppermint extract, which imparts its signature refreshing and invigorating minty flavor. The chocolate layers are then generously studded with brightly colored, crunchy crushed candy canes, which not only provide a delightful textural contrast but also add an undeniable festive visual appeal. While the most popular version features both dark and white chocolate layers, some simpler variations might utilize only one type of chocolate.
When stored meticulously and correctly, peppermint bark boasts a surprisingly generous shelf life, making it an excellent make-ahead holiday treat. If kept in an airtight container and placed in a cool, dry location (such as a pantry or a cool cupboard), it can retain its freshness, flavor, and texture for an impressive period of up to 6 months. However, once the container has been opened and the bark is exposed to air and moisture, it is advisable to consume it within 2 weeks to ensure you experience its optimal flavor and crisp texture. For individuals residing in warmer climates, or if you simply prefer extra assurance, storing it in the refrigerator can further extend its pristine condition.
Absolutely! While the traditional recipe most commonly calls for a combination of rich dark chocolate and creamy white chocolate, your culinary creativity is the only limit. Feel free to experiment with other delightful chocolate varieties, such as sweet milk chocolate for a milder, sweeter flavor profile, or even a nuanced blend of all three. The key to success, regardless of your choice, is to ensure you use high-quality chocolate chips or baking bars specifically designed for melting, as this will consistently yield the smoothest, most appealing results for your bark.
Chocolate seizing is a common and often frustrating issue where melted chocolate suddenly transforms into a thick, lumpy, and unworkable paste. This typically occurs if even a minuscule amount of water or steam comes into contact with the chocolate during the melting process, or if the chocolate is overheated. To prevent this, always ensure that your melting bowl and all utensils are completely dry. Melt chocolate slowly and gently, either over a carefully controlled double boiler or in very short, controlled 30-second bursts in the microwave, diligently stirring after each interval. If your chocolate does unfortunately seize, sometimes quickly stirring in a teaspoon of neutral vegetable oil or melted shortening can help to smooth it out, though in many cases, it is often best to simply start over with fresh chocolate for the best outcome.
You May Also Like: More Festive and Delightful Dessert Recipes
If you’ve thoroughly enjoyed the process of creating these enchanting Peppermint Bark Snowflakes, then you’re truly in for a sweet treat! I warmly invite you to explore these other equally delightful and impressive recipes, each perfectly suited for the festive holiday season or any moment when a craving for a comforting, sweet indulgence strikes. From exhilaratingly minty marvels to timeless, classic baked goods, I guarantee there’s something here that will undoubtedly satisfy every nuanced sweet tooth and bring a smile to your face:
- Thin Mint Cheesecake Brownie Cake from Inside BruCrew Life
- Mint Chocolate Fudge from Wine and Glue
- Pretty Peppermint Bark from Love from the Oven
- Swirled Peppermint Bark
- Grasshopper Pie
- White Chocolate Candy Cane Cookies
- Peppermint Patty Candy
- Explore even more of the Best Dessert Recipes
Stay wonderfully connected and eagerly share your delicious culinary creations with me! You can easily follow along and engage on Instagram, Facebook, and Pinterest. And please, don’t ever forget to tag me when you proudly try out one of my recipes! If you absolutely adore the delightful results, I would be incredibly grateful if you would consider leaving this recipe a glowing 5-star rating in the dedicated recipe card below, as your feedback genuinely helps other fellow food enthusiasts discover and enjoy it too.
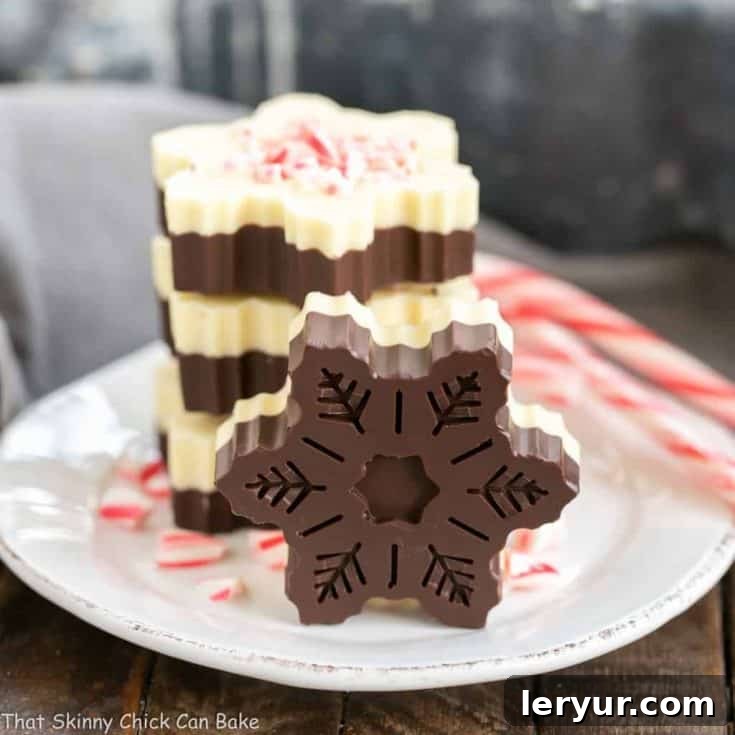
Peppermint Bark Snowflakes
20 minutes
2 hours (includes chilling time)
6-12 snowflakes (depending on desired thickness)
These beautiful Peppermint Bark Snowflakes are the ultimate no-bake holiday treat, incredibly easy to prepare and absolutely perfect for thoughtful gifting. Enjoy the harmonious and festive blend of rich dark chocolate and creamy white chocolate, adorned with crunchy peppermint candy cane bits!
Rated 4.9 out of 5 stars based on 41 user reviews.
Ingredients
- 8 ounces high-quality white chocolate, finely chopped
- 8 ounces high-quality semisweet chocolate, finely chopped
- 2 teaspoons neutral vegetable oil, divided (1 tsp for each chocolate type)
- ½ – 1 teaspoon pure peppermint extract, divided (¼-½ tsp for each chocolate type, adjusted to taste)
- 6 standard size candy canes, meticulously crushed into ¼-inch pieces (ensure all fine dust is removed)
Instructions
- **Prepare Your Workspace:** Begin by placing your clean, dry silicone snowflake molds onto a sturdy, flat baking sheet. This crucial step provides stability for easy transfer to the refrigerator.
- **Melt Dark Chocolate:** In a microwave-safe bowl, combine the chopped semisweet chocolate and 1 teaspoon of vegetable oil. Microwave in 30-second intervals, stirring thoroughly after each, until the chocolate is completely melted and smooth. Stir in ¼-½ teaspoon of peppermint extract (adjust to your taste).
- **First Chocolate Layer:** Carefully pour the melted dark chocolate evenly into the bottom of each snowflake mold, filling them to approximately half of your desired final bark thickness. Gently tap the baking sheet to evenly spread the chocolate and release any air bubbles.
- **Add Candy Cane Bits (Dark Layer):** Immediately sprinkle a portion of the crushed candy cane pieces over the wet dark chocolate in each mold, ensuring they adhere.
- **Chill First Layer:** Transfer the baking sheet to the refrigerator and chill for 15-20 minutes, or until the dark chocolate layer is completely firm and set. This prevents layers from blending.
- **Melt White Chocolate:** In a separate, clean, microwave-safe bowl, melt the chopped white chocolate and the remaining 1 teaspoon of vegetable oil using the same 30-second interval method until smooth. Stir in the remaining ¼-½ teaspoon of peppermint extract (adjust to taste).
- **Second Chocolate Layer:** Once the dark chocolate is firm, carefully pour the melted white chocolate over it, filling the molds to your desired total thickness. Gently tap the baking sheet again to smooth the white chocolate layer.
- **Final Candy Cane Garnish:** Before the white chocolate sets, generously sprinkle the remaining crushed candy cane pieces over the top of each snowflake.
- **Final Chill & Serve:** Return the baking sheet to the refrigerator and chill for at least 60 minutes, or until the entire bark is completely firm. Once solid, gently flex the silicone molds to release your beautiful peppermint bark snowflakes. Store in an airtight container and enjoy!
Notes
I initially found these silicone snowflake molds at Target, but similar high-quality molds are readily available online. For a more pleasant eating experience and to maximize your yield, I highly recommend creating thinner layers than those often depicted in images. This recipe is quite flexible; feel free to customize the amount of peppermint extract to match your preference for mint intensity, keeping in mind its potency.
Recommended Products
As an Amazon Associate and member of other affiliate programs, I earn from qualifying purchases, helping support the creation of more delicious recipes.
- Measuring Spoons
- Silicone Spatulas
- OXO Good Grips Medium Cookie Scoop
- OXO Good Grips 11-Inch Better Balloon Whisk
- Set of Glass Mixing Bowls
- Silicone Snowflake Molds
Nutrition Information:
Yield:
6-12
Serving Size:
1 snowflake
Approximate Amount Per Serving (for 6 servings):
Calories: 474Total Fat: 25gSaturated Fat: 14gTrans Fat: 0gUnsaturated Fat: 9gCholesterol: 8mgSodium: 45mgCarbohydrates: 65gFiber: 2gSugar: 55gProtein: 4g
HOW MUCH DID YOU LOVE THIS RECIPE?
Please leave a comment on the blog or share a photo on Pinterest