
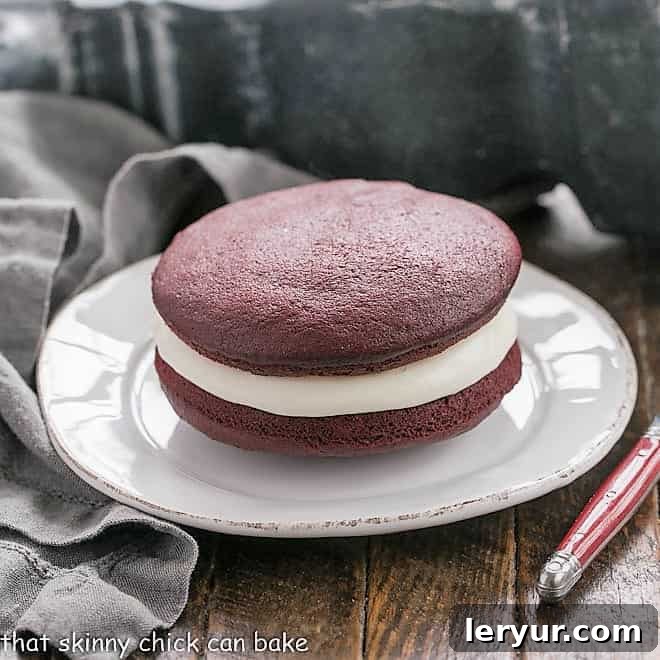
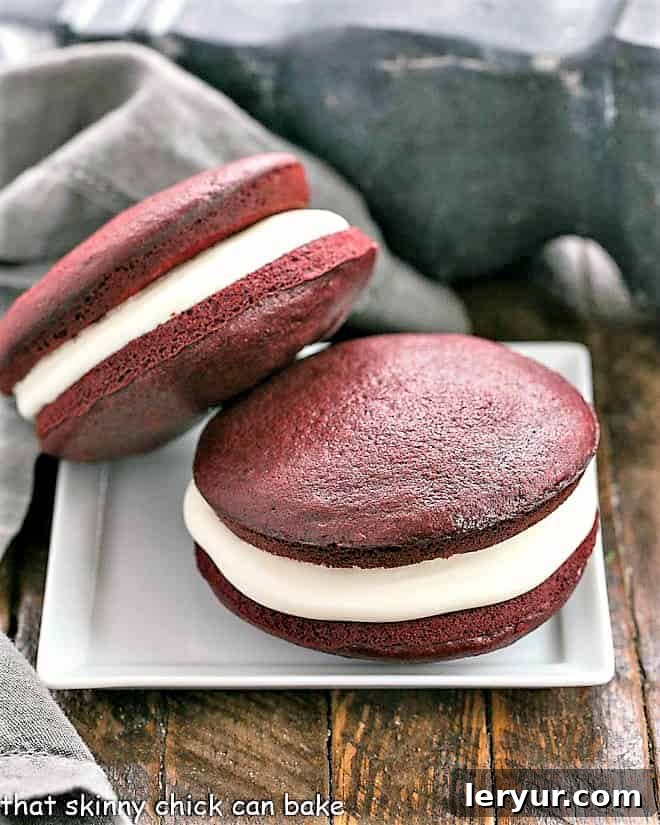
Red Velvet Whoopie Pies are a beloved dessert, featuring two exquisitely soft and tender cake-like cookies that embrace a rich, velvety marshmallow cream cheese filling. Each bite is a symphony of flavors and textures, so delightful you’ll want to exclaim “Whoopie!” after your very first taste. This classic American treat gets a vibrant, elegant twist with the iconic red velvet flavor, making it an irresistible indulgence for any occasion.
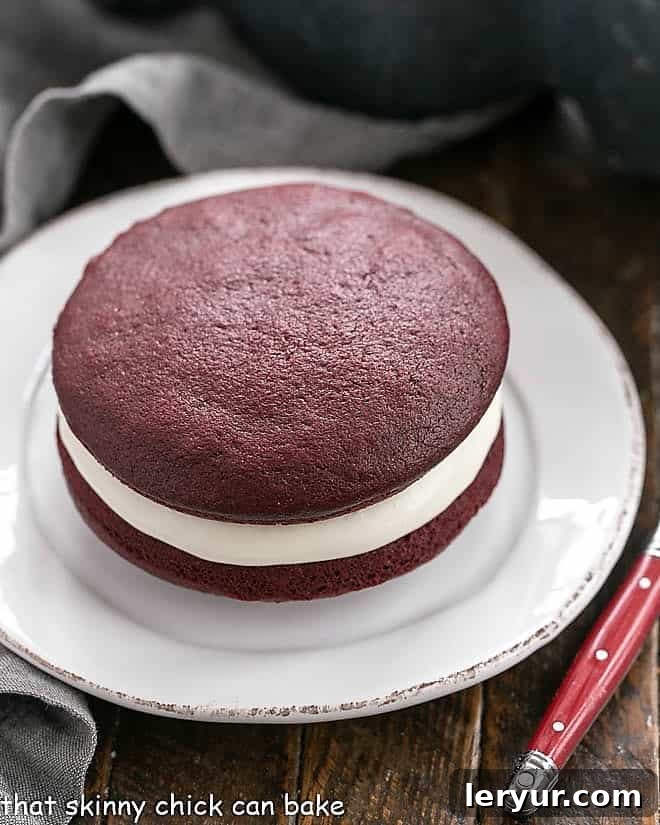
Whether you opt for the generously sized whoopie pies perfect for sharing or dainty, three-bite versions, these Red Velvet Sandwich Cookies are guaranteed to leave you smacking your lips and reaching for another. Our family has always held a special place in their hearts for whoopie pies, so it was only natural to explore beyond the traditional chocolate variant and create this spectacular red velvet rendition. The captivating color and unique flavor profile make these whoopie pies a standout dessert that guests will rave about.
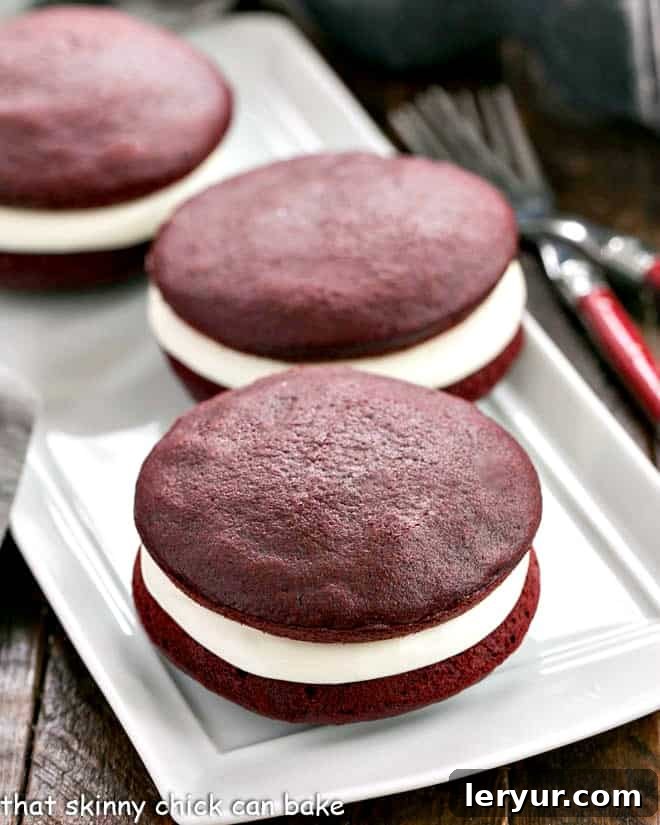
Why These Red Velvet Whoopie Pies Are a Must-Try
Prepare to fall in love with these charming desserts. Here are just a few reasons why our Red Velvet Whoopie Pies will become your new favorite:
- Irresistible Flavor Profile: If you’re a devoted fan of red velvet desserts, these whoopie pies will send your taste buds on an unforgettable journey. The subtle cocoa notes beautifully complement the tangy cream cheese and sweet marshmallow.
- Decadent Dual-Component Filling: The filling is truly a fabulous concoction, blending the rich tang of cream cheese with the airy sweetness of marshmallow cream. This dreamy combination results in a filling that is swoon-worthy, offering unparalleled depth and lusciousness that elevates the entire whoopie pie experience.
- Perfect for Festive Occasions: The vibrant red hue of these whoopie pies makes them an ideal dessert for special holidays and celebrations. They’re a showstopper for Valentine’s Day, a festive treat for Christmas, and a charming addition to any party spread. A sprinkle of edible glitter or themed sprinkles can add that extra touch of sparkle and fun!
- Delightfully Soft Texture: Unlike traditional cookies, whoopie pies boast a cake-like texture that is incredibly moist and tender. This softness perfectly contrasts with the smooth, creamy filling, creating a harmonious bite every time.
- Easy to Customize: While the classic red velvet is fantastic, these whoopie pies offer versatility. You can adjust the size, add different extracts to the filling, or even experiment with toppings to make them uniquely yours.
A Sweet Story: The Inspiration Behind the Recipe
The journey to perfecting these Whoopie Pies began over a decade ago when my daughter, Katie, stumbled upon them on Good Morning America in 2012. Renowned chef Emeril Lagasse was promoting his new sandwich cookbook, Kicked Up Sandwiches (affiliate link). I always appreciate how my children keep an eye out for interesting recipes for me to try – a habit that, while self-serving for them, certainly benefits my culinary adventures!
Coincidentally, a group of my friends was also promoting Emeril’s book at the time, and I was fortunate enough to win my very own copy. With the recipe literally in my hands, there was no reason not to dive into making this enticing red velvet whoopie pie recipe. The idea of combining the beloved red velvet flavor with the fun, handheld format of a whoopie pie was simply too good to pass up.
Beyond the initial task of locating my piping supplies – an endeavor that often comes with a slight sense of dread due to the cleanup involved – these whoopie pies proved to be quite straightforward to make. Katie, ever the eager taste-tester, gave them her immediate seal of approval, proclaiming them absolute winners. Her delight, however, quickly turned to incredulity when she discovered that a batch was destined for a tailgate party, meaning her brother and his friends would have access to her highly prized treats! Thankfully, her brother showed commendable restraint, not devouring all the leftovers, thus averting any potential family feud over these delectable desserts!
Baking Success: Visual Guide to Crafting Whoopie Pies
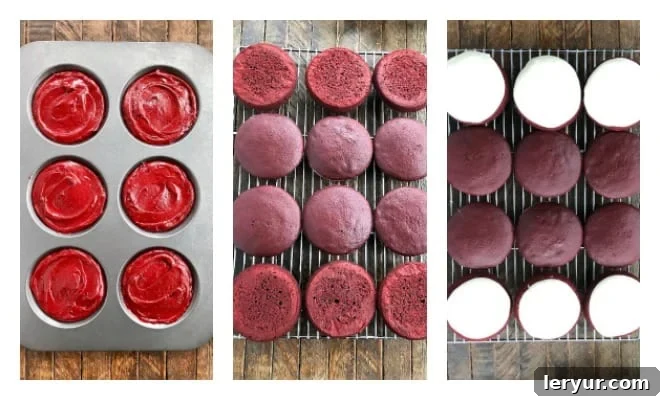
Step 1: Spread the vibrant red velvet batter into a muffin top pan. Step 2: Bake and Cool the cake-like cookies until perfectly tender. Step 3: Spread the luscious Marshmallow Cream Filling onto the flat side of half the cooled whoopie pie halves, ready for assembly.
Mastering the Art of Red Velvet Whoopie Pies
Creating perfect red velvet whoopie pies is simpler than you might think, and there are two primary methods you can employ to achieve these delightful treats:
- Method One: Classic Piped Whoopie Pies. This approach involves piping the cake batter into uniform circles directly onto a parchment-lined baking sheet. Once baked and cooled, two of these soft, cake-like cookies are then sandwiched together with a generous dollop of the rich, creamy filling in the middle. This method yields a more traditional, often smaller, whoopie pie.
- Method Two: Muffin Top Pan for Larger Whoopie Pies. For a larger, more substantial whoopie pie, you can utilize a muffin top pan (affiliate link). Simply spread the batter evenly into each well of the pan. After baking, you’ll have perfectly shaped, flat-topped cake rounds, ready to be filled. The flat surfaces are ideal for creating neat, generously filled sandwiches. Voila, a whoopie pie!
- Filling Quantity Tip: When I initially tested this recipe for my photos, I used a full 1/4 cup of filling for each whoopie pie made with the muffin top pan. While delicious, this was a bit excessive, leading to the filling oozing out once assembled. I highly recommend using slightly less – perhaps 2-3 tablespoons per pie – to ensure a neat presentation and prevent any messy overflows.
- PRO-Tip for Consistent Sizing: Achieving uniformly sized whoopie pies is key for both aesthetics and even baking. For free-form or piped whoopie pies, trace the outline of a 2 1/2-inch diameter biscuit cutter on one side of your parchment paper. Leave approximately 2 inches between each circle. Flip the parchment paper over, and use these markings as a precise guide for piping your batter. This technique ensures consistency and professional-looking results. When using the specialty muffin top pan, it naturally creates 6 larger whoopie pies, compared to the 12-18 smaller ones achieved with the piping method.
- Room Temperature Ingredients are Crucial: For the filling, ensure your butter and cream cheese are at room temperature. This is vital for achieving a smooth, lump-free, and perfectly incorporated filling that spreads beautifully. Cold ingredients can lead to a lumpy texture and make mixing much more difficult.
- The Power of Red Food Coloring: This recipe specifically calls for 2 full tablespoons of red food coloring. This substantial amount is absolutely essential to achieve that iconic, vibrant red hue that defines red velvet desserts. It essentially translates to two standard bottles of food coloring. While it may seem like a lot, remember that this is a special occasion dessert, not an everyday bake. If the quantity of food coloring is a concern, consider trying my classic chocolate whoopie pies, which I’ve linked to below, for a delicious alternative.
- PRO-Tip for Buttermilk Substitution: Don’t have buttermilk on hand? No problem! You can easily make your own. Take a one-cup liquid measuring cup, add 1 tablespoon of white vinegar or apple cider vinegar, then fill the rest of the cup to the 1-cup mark with milk. Let the mixture rest for a few minutes. You’ll notice it will curdle slightly, indicating it’s ready to use. For best results, use whole milk or 2% milk; skim milk won’t yield the same richness or texture.
- Baking Time Variability: Always keep in mind that oven temperatures can vary. The baking times provided are approximate. Keep a close eye on your whoopie pies and look for visual cues like puffiness and a set center. A toothpick inserted into the center should come out clean or with a few moist crumbs.
Picture-Perfect Indulgence: Stacked Red Velvet Whoopie Pies
Frequently Asked Questions About Whoopie Pies
Get answers to your most pressing questions about these delightful Red Velvet Whoopie Pies.
Originating in the culinary rich region of New England, whoopie pies are a unique dessert that defy simple categorization. They’ve been fondly described as a cake, a sandwich cookie, and even a pie! At their core, whoopie pies consist of two soft, domed mounds of cake-like cookie, generously filled with a creamy, sweet frosting. This frosting can be traditional buttercream, a tangy cream cheese frosting, or, as in our recipe, a luscious marshmallow creme concoction. The name “whoopie pie” is said to have come from the joyous exclamation (“Whoopie!”) made by those lucky enough to eat them. Across different regions, these treats are also known by other charming names such as black moons, gobs, black and whites, or even Big Fat Oreos (BFOs).
The world of whoopie pies is vast and exciting, offering numerous varieties from the classic chocolate to seasonal delights like pumpkin and even carrot cake whoopie pies. Correspondingly, there are countless filling recipes to explore. Options range from a simple, elegant vanilla buttercream frosting to a rich and tangy cream cheese frosting. However, for many, including myself, a marshmallow creme-based frosting stands out as the absolute best. Our recipe takes this a step further by incorporating both marshmallow creme and a touch of cream cheese into the mix, creating an unparalleled filling that delivers the best of both worlds – a perfect balance of sweetness, tang, and incredible lightness. It’s truly a filling that complements the moist cake rounds beautifully.
Due to the inclusion of cream cheese in our delicious filling, it is essential to store these whoopie pies in the refrigerator. They should not be left out at room temperature for longer than two hours to maintain their freshness and food safety. For optimal enjoyment, we always keep our whoopie pies chilled, though feel free to bring them out about an hour before serving to allow them to come closer to room temperature, which can enhance their flavors and soften the cake-like texture slightly. The key to keeping them fresh and moist is an airtight container. When stored correctly in the refrigerator, these whoopie pies are best enjoyed within 3-4 days of baking. For longer storage, whoopie pies also freeze exceptionally well!
Absolutely! Whoopie pies are excellent candidates for freezing, making them a fantastic make-ahead dessert. To freeze, individually wrap each whoopie pie tightly in plastic wrap, then place them in an airtight freezer-safe container or bag. They can be frozen for up to 2-3 months. When you’re ready to enjoy them, simply transfer them from the freezer to the refrigerator to thaw overnight, or let them sit at room temperature for an hour or two until softened. This is especially useful for holiday baking or preparing for unexpected guests.
For red velvet desserts, a high-quality unsweetened natural cocoa powder is typically recommended. Natural cocoa powder is slightly acidic, which reacts with the baking soda in the recipe to create a tender crumb and helps to bring out the red color when combined with food coloring. Dutch-processed cocoa powder, which is alkalized, can result in a darker, less vibrant red and may alter the texture. While the amount of cocoa in red velvet is small, its quality still contributes to the subtle chocolate flavor that makes red velvet so unique.
Explore More Delicious Desserts
If you’re anything like us, your sweet tooth is always looking for its next adventure. Dive into these other fantastic recipes that are sure to satisfy:
- Oreo Whoopie Pies from Tastes of Lizzy T: A fun, cookie-inspired take on the classic whoopie pie.
- Carrot Cake Whoopie Pies: Another delightful twist, perfect for fall or anytime you crave the flavors of carrot cake.
- Classic Whoopie Pies: Go back to basics with the beloved original chocolate whoopie pie recipe.
- Red Velvet Cheesecake Swirled Brownies: Indulge in the rich combination of red velvet and cheesecake in brownie form.
- Favorite Red Velvet Recipes: A collection of our top red velvet creations for every occasion.
- More of my Best Dessert Recipes: Discover a wide array of sweet treats from our kitchen to yours.
Stay in touch and share your baking triumphs! Follow us on social media @ Instagram, Facebook, and Pinterest. Don’t forget to tag me when you try one of my recipes! If you love the results as much as we do, please consider leaving a 5-star rating and a comment in the recipe card below. Your feedback truly helps our community of bakers!
Red Velvet Whoopie Pies Recipe
40 minutes
6 minutes
46 minutes
6-12 whoopie pies
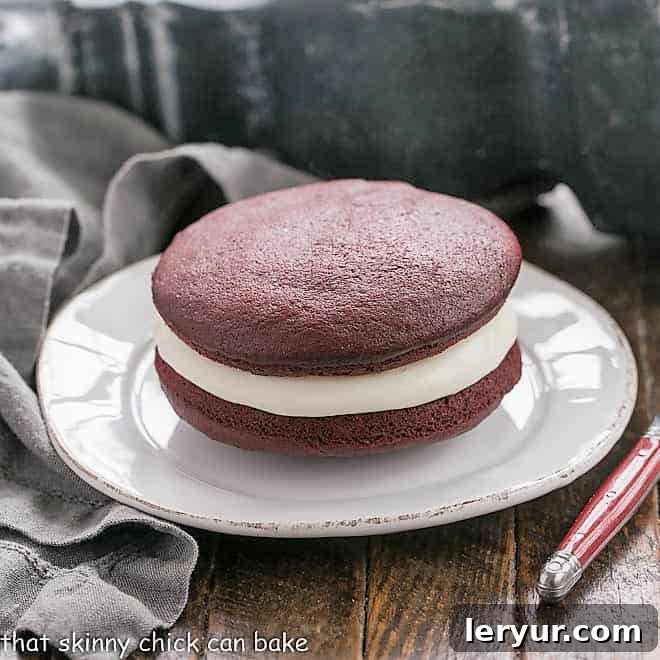
Experience a delightful red velvet twist on classic whoopie pies! This recipe features two tender mini red velvet cakes perfectly sandwiched together with a dreamy, homemade marshmallow cream and cream cheese filling.
Ingredients
For the Red Velvet Whoopie Pies:
- 2 cups all-purpose flour
- ½ cup unsweetened cocoa powder
- 1 teaspoon baking soda
- ¼ teaspoon salt
- 8 tablespoons (1 stick) unsalted butter, softened to room temperature
- 1 cup granulated sugar
- 1 large egg, at room temperature
- 2 tablespoons red food coloring (liquid or gel)
- 1 ½ teaspoons pure vanilla extract
- 1 cup buttermilk (DIY tip: add 1 tablespoon lemon juice or vinegar to 1 scant cup of milk and let sit for 5 minutes)
For the Luscious Cream Cheese Marshmallow Filling:
- 1 ½ cups powdered sugar, sifted
- 7-ounce jar marshmallow creme
- 4 ounces cream cheese, softened to room temperature
- 2 tablespoons unsalted butter, softened to room temperature
- 1 teaspoon pure vanilla extract
Instructions
- Prepare Your Oven and Pans: Preheat your oven. If making smaller, piped whoopie pies, preheat to 400°F (200°C). If using a muffin top pan for larger whoopie pies, preheat to 350°F (175°C).
- Prepare Dry Ingredients: Line two baking sheets with parchment paper or Silpat mats, or thoroughly spray your pans with non-stick cooking spray and set aside. In a medium bowl, whisk together the flour, cocoa powder, baking soda, and salt. Set this dry mixture aside.
- Cream Wet Ingredients: In a large mixing bowl, using an electric mixer, cream together the softened butter and granulated sugar until light and fluffy. Beat in the large egg until thoroughly combined.
- Add Color and Flavor: Incorporate the red food coloring and vanilla extract into the wet mixture. Beat until the color is evenly distributed and the ingredients are well blended.
- Combine Wet and Dry: Alternately add the buttermilk and the reserved flour mixture to the wet ingredients, beginning and ending with the flour. Mix until just combined, being careful not to overmix the batter.
- Method One (Smaller Whoopie Pies): For smaller, classic whoopie pies, pipe 2 ½-inch-diameter cookies onto the prepared baking sheets, ensuring they are spaced about 2 inches apart. If you don’t have piping equipment, a gallon-sized Ziploc bag with a corner snipped off works perfectly. Gently smooth the tops of each piped cookie with a damp finger. Bake for approximately 6 minutes, or until the cookies are puffy and their centers appear set. Allow them to cool on the baking sheets for about a minute before transferring them to a wire cooling rack to cool completely.
- Method Two (Larger Whoopie Pies): For larger whoopie pies, spray two muffin top pans generously with non-stick cooking spray. Divide the batter evenly among the wells, using about ¼ cup of batter for each. Spread the batter evenly within each well using an offset spatula. Bake for about 8 minutes, then rotate the pans in the oven and continue baking for another 6 minutes, or until the cakes are puffy and the centers are baked through. A toothpick inserted into the center should come out clean or with only a moist crumb or two. Let them cool completely in the pans before removing.
- Prepare the Creamy Filling: While the cake rounds are cooling, prepare the filling. In a clean mixing bowl, combine the sifted powdered sugar, marshmallow creme, softened cream cheese, softened butter, and vanilla extract. Beat everything together with an electric mixer until the filling is light, fluffy, and completely smooth.
- Assemble Your Whoopie Pies: Once the cake halves are completely cool, it’s time to assemble! For the small whoopie pies, spread about a tablespoon of the prepared filling onto the flat side of half the cookies. Top with another cookie of approximately the same size, pressing gently to form a sandwich. For the larger whoopie pies, use slightly less than a quarter cup of filling per whoopie pie to prevent overstuffing.
Yield: 6-18 whoopie pies, depending on the size you choose to make.
Recipe Notes & Tips
The calorie count provided is an estimate for a batch yielding 12 medium-sized whoopie pies. Adjust accordingly if you make larger or smaller quantities.
For the most vibrant red color, using gel food coloring often yields a more intense hue than liquid food coloring. Adjust the amount to your preference, but remember red velvet is known for its striking color!
If you find your batter too sticky for piping, you can chill it for about 15-20 minutes in the refrigerator. This will make it firmer and easier to handle.
When measuring flour, spoon it into your measuring cup and then level it off with a straight edge (like a knife). This prevents over-measuring, which can lead to dry whoopie pies.
Recommended Products for Baking Success
As an Amazon Associate and member of other affiliate programs, I earn from qualifying purchases, at no extra cost to you.
- Marshmallow Creme
- KitchenAid KSM150PSER Artisan Tilt-Head Stand Mixer with Pouring Shield, 5-Quart, Empire Red
- Muffin Top Pan
Nutrition Information:
Yield:
12
Serving Size:
1 whoopie pie
Approximate Amount Per Serving:
Calories: 327Total Fat: 6gSaturated Fat: 3gTrans Fat: 0gUnsaturated Fat: 2gCholesterol: 31mgSodium: 253mgCarbohydrates: 63gFiber: 1gSugar: 41gProtein: 5g
HOW MUCH DID YOU LOVE THIS RECIPE?
Please leave a comment on the blog or share a photo on Pinterest and tag us!