
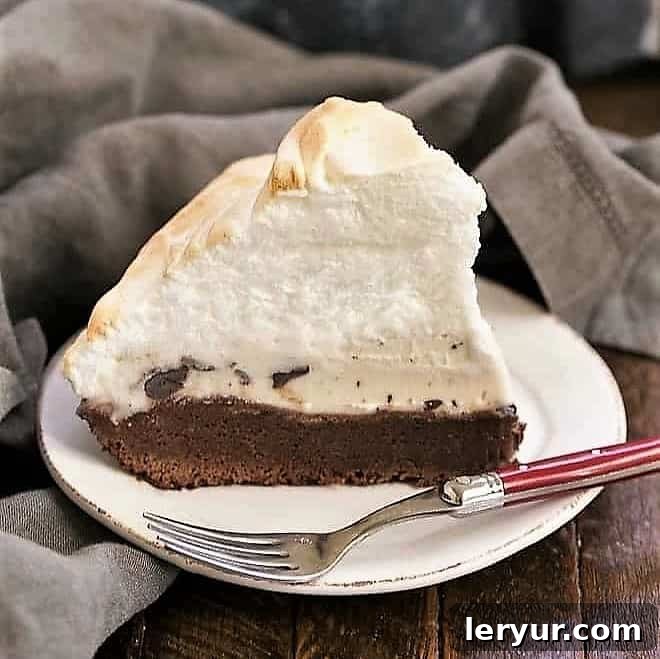
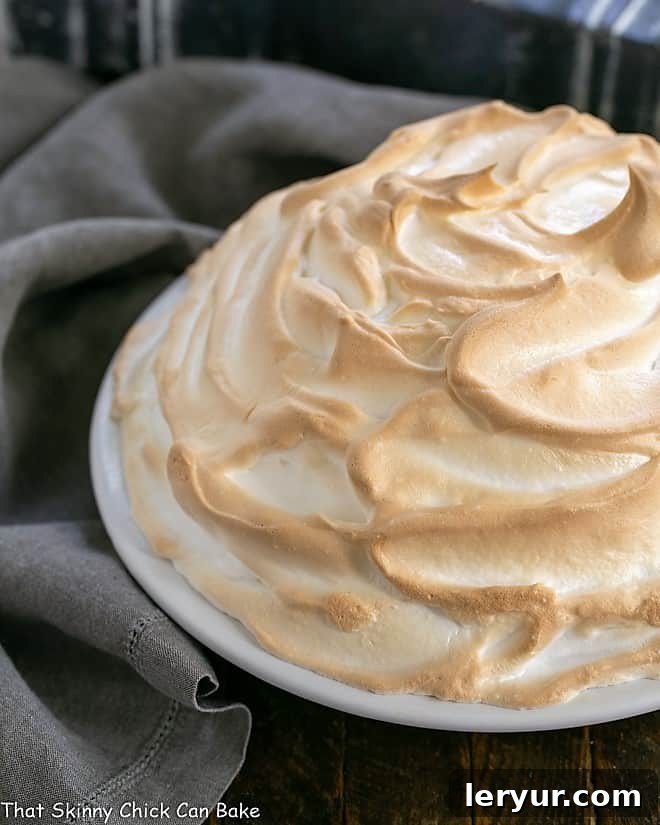
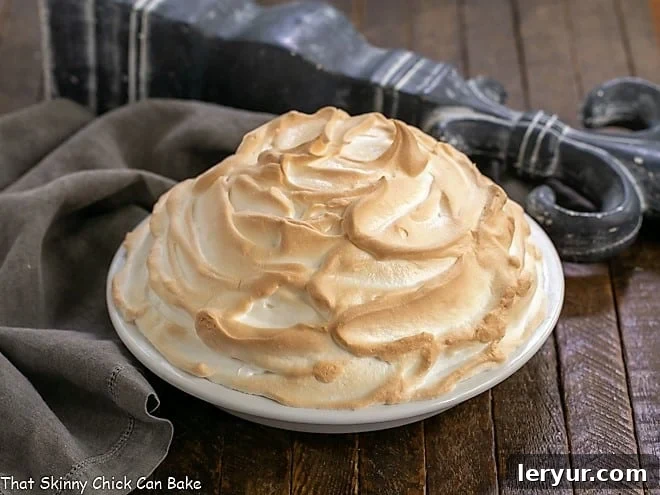
Indulge in a spectacular dessert that masterfully blends rich chocolate with a classic frosty treat: the Brownie Baked Alaska. This innovative recipe elevates the traditional meringue-topped dessert, celebrated for its dramatic presentation and delightful contrast of hot and cold, by introducing a fudgy brownie base. Forget the ordinary; prepare to impress with this truly out-of-the-ordinary Baked Alaska, crowned with a massive, perfectly toasted meringue topping.
Ultimate Brownie Baked Alaska Recipe: A Decadent Chocolate Twist
Why You Must Make This Brownie Baked Alaska
Transforming a classic into something even more extraordinary, this Brownie Baked Alaska recipe offers several compelling reasons to get baking. It’s more than just a dessert; it’s an experience that promises to delight every palate.
- A Chocolate Lover’s Dream: Unlike the traditional sponge cake, our version features a rich, fudgy brownie base. This chocolate twist is absolutely perfect for chocoholics, adding an irresistible depth of flavor and a wonderfully chewy texture that contrasts beautifully with the creamy ice cream.
- Endless Flavor Customization: The beauty of this dessert lies in its versatility. While classic vanilla is always a hit, you can easily shake things up with any of your favorite premium ice cream flavors. Imagine layers of peppermint stick ice cream for the holidays, rich coffee ice cream for an elegant touch, or even a double-chocolate fudge ripple for the ultimate cocoa indulgence. Toffee, cookie dough, or strawberry ice cream would also be incredibly delicious choices!
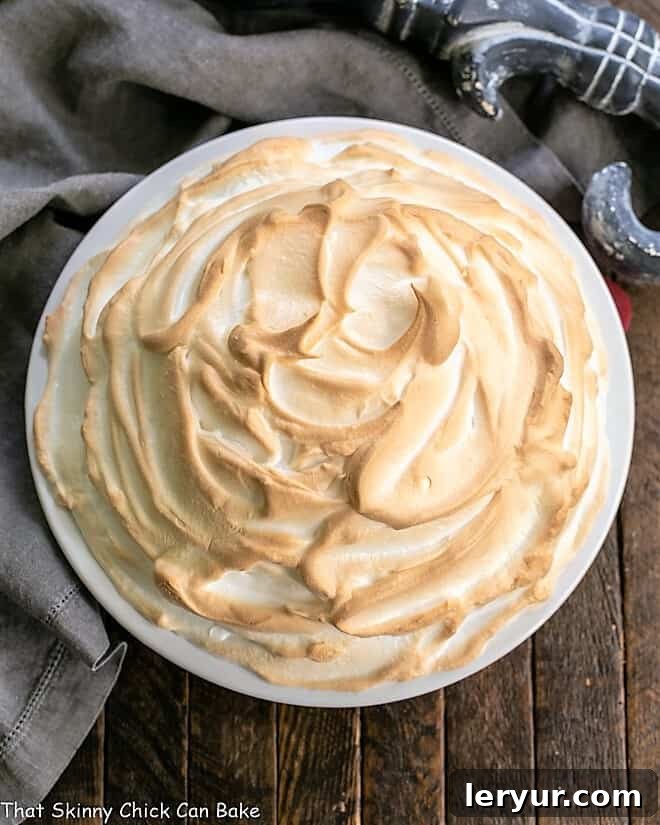
- The Ultimate Showstopper: This dessert isn’t just delicious; it’s a spectacle. The towering, toasted meringue creates a dramatic presentation that will undoubtedly be the centerpiece of any gathering. Prepare for gasps of delight and compliments galore when you bring this masterpiece to the table. As my son Tom once joked, “This can’t be good for you,” which, in dessert terms, is the highest compliment one can receive!
- Surprisingly Simple to Master: Despite its impressive appearance, creating a Brownie Baked Alaska is simpler than you might think. With clear steps and helpful tips, even novice bakers can achieve a stunning and successful dessert that looks like it came straight from a gourmet patisserie.
Ingredient Notes for the Perfect Brownie Baked Alaska
Crafting the perfect Brownie Baked Alaska begins with understanding the role of each ingredient. Quality and preparation are key to achieving those distinct, delightful layers.
- Brownie Base: You’ll need one recipe’s worth of brownies, baked in a pie dish and completely cooled. Whether you opt for a homemade fudgy brownie recipe (linked here for your convenience) or a high-quality box mix, ensure it forms a sturdy yet tender base. If using a box mix, you might not need all the batter, depending on the size of your pie plate. The key is a dense, delicious layer that can stand up to the ice cream.
- Premium Ice Cream: Two pints of your favorite premium ice cream are essential. The quality of your ice cream significantly impacts the final taste and texture. I highly recommend a rich, full-bodied vanilla with chocolate chips, like Graeter’s, for a delightful contrast with the brownie. However, don’t hesitate to experiment with flavors like coffee, mint chocolate chip, or even a berry swirl for a fruity twist. Just make sure the flavor complements the chocolate brownie.
- Egg Whites (for Meringue): You’ll need four large egg whites. For maximum volume and a stable meringue, it’s crucial to separate your eggs when they are cold. Cold eggs make it easier to separate the whites from the yolks without breakage. Once separated, allow the egg whites to come to room temperature (about 30 minutes) before beating. This allows them to whip up much higher and incorporate more air, resulting in a fluffier meringue.
- Sugar (for Meringue): Half a cup of granulated sugar is needed for the meringue. While regular granulated sugar works perfectly, superfine sugar (caster sugar) dissolves more easily into the egg whites, leading to a smoother, glossier meringue. This can be a beneficial choice if you’re new to meringue making.
- Cream of Tartar (for Meringue): A quarter teaspoon of cream of tartar is a secret weapon for meringue. It acts as a stabilizer, helping the egg whites whip up faster, achieve greater volume, and hold their peaks firmly without deflating. If you don’t have cream of tartar, an equal amount of fresh lemon juice (about 1/4 teaspoon) can serve as a good substitute.
How to Make Brownie Baked Alaska: Step-by-Step
Creating this stunning Brownie Baked Alaska is a rewarding process. Follow these detailed steps to ensure each layer is perfect, from the fudgy base to the airy meringue.
- Prepare the Brownie Base: Begin by baking your chosen brownie recipe (homemade or boxed mix) in a 9-inch pie plate. If you’re using a box mix, you might find you don’t need all the batter for a single layer in the pie plate; reserve any extra for another small treat. Once baked, if the top of the brownie isn’t perfectly level, gently press down on it with the back of a spoon or a piece of parchment paper while it’s still slightly warm but not hot. This creates a flat surface for your ice cream layer.
- Cool Completely: Allow the brownie base to cool completely to room temperature within the pie plate. This step is crucial to prevent the ice cream from melting prematurely when placed on top.
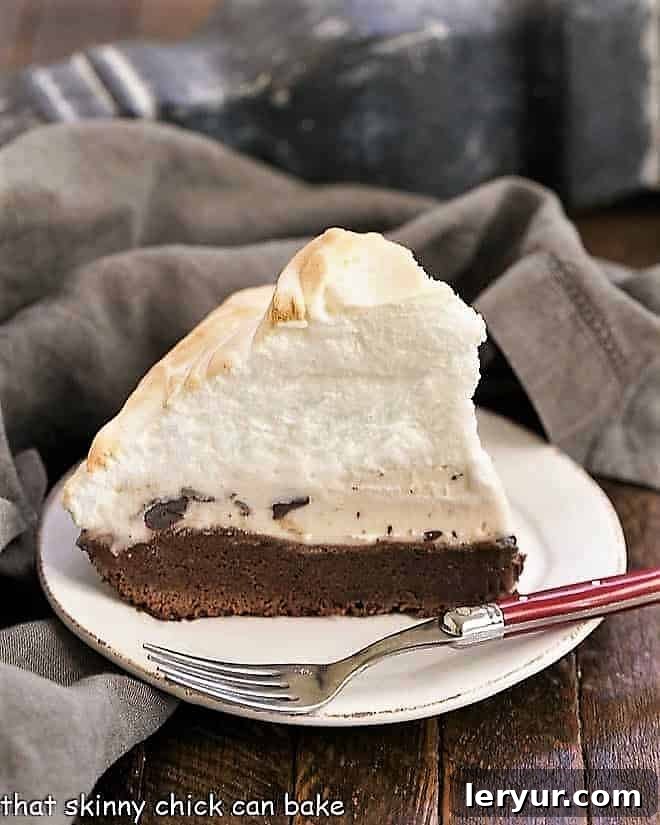
- Layer the Ice Cream: Remove the pints of premium ice cream from their containers. For easy layering, you can slice each pint into three even rounds. Arrange three of these ice cream rounds directly on top of the cooled brownie base in the pie plate. Take the remaining ice cream rounds and cut them into smaller wedges (about 6 per round). Use these wedges to fill any gaps or holes in the first layer of ice cream, then pile the remaining wedges high in the center of the pie plate, creating a domed shape. This generous mound will form the core of your Baked Alaska.
- Freeze Until Very Firm: Place the pie plate with the brownie and ice cream layers into the freezer. Freeze for at least 30-60 minutes, or until the ice cream is very firm and solid. This firm freezing is critical to prevent the ice cream from melting when the meringue is added and briefly baked. You can freeze it for up to 2 days at this stage if preparing ahead.
- Preheat Oven: About 10-15 minutes before you’re ready to add the meringue and bake, preheat your oven to 375°F (190°C).
- Make the Meringue: In a clean, grease-free mixing bowl, beat the room-temperature egg whites with a pinch of salt using an electric mixer until they become foamy. Add the cream of tartar (or lemon juice) and continue beating until the whites hold soft peaks. Gradually add the sugar, about a tablespoon at a time, while continuing to beat. Increase the mixer speed to high and beat until the meringue is glossy, forms stiff peaks, and the sugar has fully dissolved. You should be able to rub a small amount between your fingers without feeling any sugar granules.
- Cover with Meringue: Quickly remove the frozen brownie and ice cream base from the freezer. Immediately spoon the prepared meringue over the ice cream, spreading it carefully and completely to the very edges of the pie plate. Ensure the meringue forms a thick, billowy, and sealed layer over all the ice cream. This meringue layer acts as an insulator, protecting the ice cream from the oven’s heat. You can create decorative swirls or peaks with the back of a spoon or a spatula.
- Bake and Serve: Place the Baked Alaska into the preheated oven. Bake for approximately 5-10 minutes, or until the meringue topping turns a beautiful golden brown. Keep a close eye on it, as meringue can brown quickly. The goal is to toast the outside while keeping the inside soft. Once golden, remove from the oven and serve immediately to enjoy the incredible contrast of warm, toasted meringue and cold, creamy ice cream with the rich brownie base.
Recipe Tips for a Perfect Brownie Baked Alaska
Achieving a showstopping Brownie Baked Alaska is easier with these expert tips and tricks. From ingredient selection to prep techniques, these insights will ensure your dessert is a triumph.
- Choose Your Base Wisely: While the traditional Baked Alaska features a sponge cake, this recipe celebrates a fudgy brownie base, offering a delightful chocolatey richness. The base is typically baked in a pie plate for ease of assembly and serving, though you could adapt it for individual portions in ramekins. Feel free to experiment with different brownie flavors, such as espresso brownies for an extra kick or mint brownies for a refreshing twist.
- Brownie Batter Management: If you’re using a standard boxed brownie mix, be aware that you might not need all the batter for a single layer in a 9-inch pie plate. Aim for a thickness of about 1/2 to 3/4 inch for the base. Any leftover batter can be baked into mini brownies or brownie bites.
- Ice Cream Harmony: The ice cream layer is highly adaptable. Vanilla is a timeless choice, offering a classic contrast to the chocolate brownie. However, don’t shy away from creative pairings! Consider coffee ice cream for a mocha effect, raspberry sorbet for a tart counterpoint, or even peanut butter ice cream for a decadent combination. The key is to choose a flavor that complements, rather than competes with, your brownie base.
- The Meringue Shield: The meringue topping is added only after the cake and ice cream layers have been thoroughly frozen, typically for at least an hour. This crucial step prevents the ice cream from turning into a melted mess while the meringue is browning in the hot oven. The meringue acts as an insulating blanket, protecting the frozen core.
- Mastering the Meringue: A towering, billowy meringue is the classic finishing touch for this dessert. While the original Baked Alaska recipes often called for six or more egg whites for a truly massive topping, four egg whites still create a beautiful, fluffy mound that’s generous enough. If you’re new to making meringue, remember these essential tips:
- PRO-Tip: Room Temperature Egg Whites: Always use egg whites that have come to room temperature. Cold egg whites are more difficult to whip to full volume, resulting in a less airy and stable meringue.
- PRO-Tip: Pristine Equipment: Meringue is finicky about grease. Your mixing bowl, beaters, and any utensils that come into contact with the egg whites must be absolutely free from any grease, oils, or even the tiniest speck of egg yolk contamination. Even a minute amount can prevent the whites from beating properly. A good practice is to wash your equipment thoroughly with hot, soapy water, or even run them through the dishwasher, to ensure they are 100% clean and dry.
- Separate Eggs Carefully: It is highly advisable to separate each egg one at a time into a small, separate dish before adding the white to your main mixing bowl. This way, if a yolk accidentally breaks and contaminates a white, you only lose one egg white, not an entire bowlful.
- Make-Ahead Perfection: This dessert is perfect for entertaining as it can be prepared in advance. You can assemble the brownie and ice cream layers, cover the pie plate tightly with plastic wrap, and freeze it for up to two days. When you’re ready to serve, simply prepare the meringue, mound it over the frozen base, and bake as directed. You might need to extend the baking time by a few extra minutes if the dessert is deeply frozen.
- The Hot Knife Trick for Slicing: Cutting through a crisp meringue and a firm ice cream layer can be challenging. To achieve clean, beautiful slices, dip a sharp knife into very hot (ideally boiling) water, quickly wipe it dry, and then slice. Reheat and wipe the knife before each cut. Alternatively, you can use the sharp point of your knife to gently pierce a dotted line along where you plan to slice, which provides a guide for a cleaner cut.
Frequently Asked Questions About Baked Alaska
Traditionally, a Baked Alaska is composed of three distinct layers: a base of sponge cake, a generous layer of ice cream, and a dramatic topping of billowy meringue. The cake and ice cream layers are frozen solid before the whipped meringue is carefully applied and then briefly toasted in a hot oven until golden. Our Brownie Baked Alaska substitutes the classic sponge cake with a rich, fudgy brownie, adding a delightful chocolate dimension.
The name “Baked Alaska” is commonly attributed to Charles Ranhofer, a renowned chef at Delmonico’s Restaurant in New York City. He is said to have created the dessert in 1867 to commemorate the United States’ purchase of Alaska from Russia, an event spearheaded by Secretary of State William H. Seward. Initially, it was reportedly called “Alaska-Florida” to highlight the striking contrast between its hot exterior (meringue) and cold interior (ice cream). Over time, the name was simplified to simply Baked Alaska. While Ranhofer is widely credited, there are undocumented claims that Antoine Alciatore of Antoine’s restaurant in New Orleans may have also originated a similar dessert around the same time. This concept of baking ice cream was not entirely new to the world, known in Europe by names such as omelette norvégienne (Norwegian omelet), omelette surprise, or omelette sibérienne. If you add a theatrical touch by dousing your Baked Alaska in rum and igniting it just before serving, it then becomes known as a Bombe Alaska.
Slicing through the delicate, toasted meringue and the firm ice cream can be a bit tricky, as the meringue tends to stick to the knife, potentially ripping instead of cutting cleanly. For the cleanest slices, use a sharp, thin-bladed knife. A professional tip is to dip the knife into boiling water, wipe it completely dry (moisture can make the meringue sticky), and then make your slice. Reheat and wipe the knife before each cut. Alternatively, you can gently pierce along your desired cutting line with the sharp point of the knife to create a series of “dots.” This provides a controlled guide for your main slice, helping to prevent tearing.
Absolutely! While sponge cake is traditional and our recipe uses a brownie, you can experiment with various cake bases. Consider a rich chocolate cake, a delicate vanilla genoise, a lemon poppy seed cake for a zesty twist, or even a classic pound cake. Ensure the cake base is sturdy enough to hold the ice cream and meringue layers without crumbling.
To make a Brownie Baked Alaska, you’ll need a few essential kitchen tools. A 9-inch pie plate is ideal for baking the brownie base and assembling the dessert. An electric mixer (stand or hand-held) is crucial for whipping the egg whites into a voluminous meringue. You’ll also need mixing bowls, measuring cups and spoons, a spatula for spreading the meringue, and a sharp knife for slicing. Optional tools include an offset spatula for smooth meringue application and a kitchen torch for an even toast if you prefer not to use the oven.
You May Also Like
If you’re a fan of elegant, frozen desserts, explore these other delicious recipes from our collection:
- Frozen Chocolate Mousse Cake
- Frozen Grasshopper Pie
- No-Churn Ice Cream Cake
- Frozen Chocolate Peanut Butter Pie
- Individual Baked Alaskas
- More Decadent Dessert Recipes
Stay in touch through social media @ Instagram, Facebook, and Pinterest. Don’t forget to tag me when you try one of my recipes! And if you love the results, please give it a 5-star rating in the recipe card.
Brownie Baked Alaska Recipe Card
This detailed recipe provides all the information you need to create a magnificent Brownie Baked Alaska, from prep to serving. Yields 8 servings.
The Recipe:
Brownie Baked Alaska
30 minutes
45 minutes
1 hour 15 minutes
8 servings
A fudgy twist on a classic Baked Alaska, featuring a rich brownie base, creamy vanilla chocolate chip ice cream, and a perfectly toasted meringue topping.
Ingredients
- 1 recipe brownies, homemade or boxed, baked in a 9-inch pie dish and cooled. (My Fudgy Brownie Recipe works perfectly here.)
- 2 pints premium ice cream (such as Graeter’s Vanilla with Chocolate Chips, or your favorite flavor)
For the Meringue:
- 4 large egg whites, at room temperature
- ¼ teaspoon cream of tartar (or an equal amount of lemon juice)
- ½ cup granulated sugar (superfine sugar preferred for smoother results)
Instructions
- Bake the Brownies: Prepare and bake your brownie batter in a 9-inch pie plate. If using a box mix, you may not need all the batter. Once partially cooled, gently press down on the top if uneven to create a level surface.
- Cool Completely: Allow the brownie to cool entirely to room temperature in the pie plate.
- Layer the Ice Cream: Remove ice cream from cartons. Slice each pint into 3 rounds. Arrange 3 rounds on the cooled brownie base. Cut remaining rounds into 6 wedges each. Fill any holes in the ice cream layer with some wedges, then pile the rest high in the center to create a dome.
- Freeze Firm: Freeze the brownie and ice cream base for 30-60 minutes, or until very firm. This step is crucial for success.
- Preheat Oven: Preheat your oven to 375°F (190°C) about 10-15 minutes before you plan to bake.
- Prepare Meringue: Approximately 5 minutes before you’re ready to finish the dessert, beat room-temperature egg whites with a pinch of salt using an electric mixer until foamy. Add cream of tartar and continue beating until soft peaks form.
- Add Sugar: Gradually add the ½ cup sugar, beating until the whites hold stiff, glossy peaks and the sugar is fully dissolved.
- Cover with Meringue: Remove the frozen ice cream base from the freezer. Immediately mound the meringue over it, spreading it completely to the edges of the pie plate to fully encase the ice cream.
- Bake and Serve: Bake in the preheated oven for about 5-10 minutes, or until the meringue is beautifully golden brown. Serve immediately.
- Make-Ahead Option: You can prepare the brownie and ice cream base up to 2 days in advance. Cover and freeze. Then, prepare the meringue, top the frozen base, and bake as directed, potentially extending baking time by a few minutes if needed.
Notes
To cut through the meringue cleanly, use a hot, dry knife. Dip the knife into boiling water, wipe it completely dry, and then slice. Repeat for each cut.
For the brownie base, I highly recommend using my Fudgy Brownie Recipe for the best results.
Recommended Products
As an Amazon Associate and member of other affiliate programs, I earn from qualifying purchases.
- KitchenAid 9-Speed Digital Hand Mixer
- Ceramic Pie Plate
- Superfine Sugar
Nutrition Information:
Yield: 8 servings
Serving Size: 1 slice
Amount Per Serving:
- Calories: 461
- Total Fat: 14g
- Saturated Fat: 7g
- Trans Fat: 0g
- Unsaturated Fat: 6g
- Cholesterol: 38mg
- Sodium: 156mg
- Carbohydrates: 81g
- Fiber: 1g
- Sugar: 69g
- Protein: 5g
HOW MUCH DID YOU LOVE THIS RECIPE?
Please leave a comment on the blog or share a photo on Pinterest.