
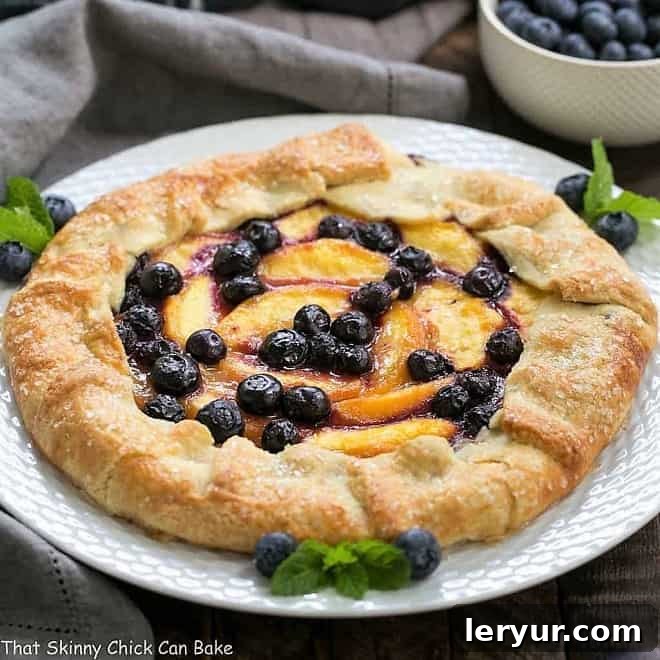
There’s an undeniable charm to a homemade pie, but let’s be honest – the journey to a perfect, flaky crust can often feel like a culinary marathon. For those who adore the rich, comforting flavors of pie but shy away from the intricate dance of dough rolling, fluting, and crimping, I have discovered the ultimate, stress-free indulgence: the rustic and utterly delightful Peach Blueberry Galette. This exquisite free-form tart captures all the marvelous essence of a classic fruit pie without any of the fuss. It’s a simple pleasure that delivers maximum flavor with minimal effort, making it a staple in my kitchen, especially during the vibrant summer months.
Imagine succulent, sun-ripened peaches, their natural sweetness perfectly complemented by a scattering of tart, juicy blueberries, all nestled within a tender, buttery crust that’s effortlessly folded around the fruit. This isn’t just a dessert; it’s a celebration of seasonal bounty, a testament to rustic elegance, and a true culinary hero for anyone seeking a sublime sweet treat without the complexity. Forget the endless quest for the flawless pie crust; with this Rustic Peach Tart, you embrace imperfection as part of its charm, yielding a dessert that is as beautiful to behold as it is delicious to devour.
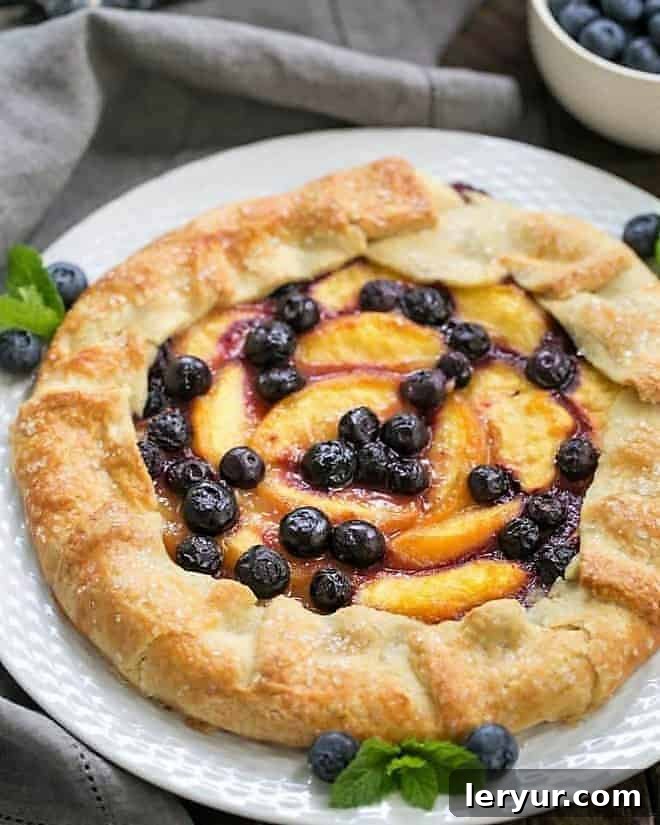
Why This Peach Blueberry Galette is Your Next Must-Make Dessert
For years, I’ve embarked on a personal quest to master the elusive pie crust. My dream crust is one that not only boasts incredible flavor but is also a breeze to manipulate—whether it’s artfully fluting edges, weaving intricate lattice patterns, or attempting any other whimsical design that inspires me. While traditional double-crust pies hold a special place in my heart, the reality is that sometimes, particularly on a humid summer afternoon when time is a precious commodity, the thought of wrestling with a fussy pie dough can be daunting. This is precisely where the magnificent Blueberry Galette steps in as a far more appealing and wonderfully less stressful alternative. It promises all the sensational flavors and comforting warmth of a classic fruit pie, delivered with a delightful rustic charm and significantly less effort.
- Effortless Elegance: The primary reason to embrace the galette is its inherent simplicity. Unlike traditional pies that demand precision in every step, a galette is forgiving. Its free-form, open-faced design means no crimping, no lattice work, and no elaborate shaping. You simply roll out the dough, pile on the fruit, and fold the edges inward, creating a beautifully rustic aesthetic that looks sophisticated without demanding hours in the kitchen. It truly offers all the beloved flavors of a pie without any of the associated stress or complexity.
- Unleash Your Creativity with Endless Variations: The versatility of a galette is truly remarkable. While peaches and blueberries create a heavenly combination, the possibilities for fillings are only limited by your imagination and the seasonality of fresh produce. I’ve experimented with a spectrum of delightful creations, from mixed berry galettes bursting with summer fruits, to comforting apple galettes perfect for autumn, and even luscious peach galettes. Combining peaches with raspberries is another personal favorite, and this particular rendition with peaches and blueberries strikes a perfect balance of sweet and tart. Beyond sweet, I’ve even ventured into savory territory with a delectable cheese and tomato galette, proving just how adaptable this humble pastry can be.
- The Quintessential Summer Dessert: This rustic tart shines brightest during the summer months. When ripe, seasonal fruits are abundant and at their peak flavor, there’s no better way to showcase their natural beauty than in a simple galette. It allows the freshness of the peaches and blueberries to truly take center stage, creating a light yet satisfying dessert that’s ideal for warm evenings. Furthermore, it’s a blessing for busy hosts or anyone who prefers to spend less time toiling over a hot oven and more time enjoying the beautiful weather and company.
Our Community’s Rave Reviews: What Readers Are Saying
The true measure of a recipe’s success often lies in the feedback from those who have baked it in their own kitchens. I’m always thrilled to hear how much joy this Peach Blueberry Galette brings to others. Here’s what some enthusiastic bakers have shared about their experience:
From Melisa: “I finally tried this recipe, and it came out absolutely perfect! The crust was the best-tasting I have ever made, and it was so incredibly easy to put together. We served it warm with a scoop of vanilla bean ice cream. Every last piece was gone; there were no leftovers at all!”
From Debi: “This was such an easy recipe to follow, and the results were simply delicious! The crust was wonderfully perfect and beautifully flaky – even better than traditional pie crusts. I loved it served with vanilla ice cream, too!”
From Pinterest: “Everyone’s raving about this recipe, especially the crust? It’s all true, true, true!! This galette is excellent! I followed the instructions to a T and received so many compliments. I usually pride myself on making my own pie crusts from scratch, but I’m so glad I opted for this recipe this time. Absolutely delicious!”
Mastering Your Galette: Expert Tips for Success
My passion for fresh, succulent summer peaches knows no bounds. Here in Indiana, we eagerly await imports from Georgia and South Carolina, which typically arrive in early July. This means that peach-centric desserts frequently grace our dinner table from July straight through early September. Among these delightful treats, an easy-to-make peach blueberry galette consistently stands out as an exceptional and always-welcomed choice. To help you achieve galette perfection, here are some invaluable expert tips:
- Prioritize Local and Seasonal Produce: The secret to an outstanding fruit galette begins with the quality of your ingredients. Always strive to source local produce when possible. Local fruits are typically picked at their peak ripeness, ensuring maximum flavor, sweetness, and juiciness, as they don’t endure long transportation journeys from state to state. For instance, I always look for Indiana Red Haven peaches when they become available in July, as their flavor is unparalleled.
- Butter Choice Matters: When crafting the galette dough, I consistently opt for salted butter. Its subtle saltiness enhances the overall flavor profile of the crust, providing a lovely counterpoint to the sweet fruit filling. If your preference is for unsalted butter, remember to compensate by adding a generous pinch (about ¼ teaspoon) of fine sea salt to your galette dough mixture to achieve that perfect balance.
- Homemade vs. Store-Bought Crust: While making a homemade crust from scratch offers a truly satisfying experience and allows you to control the ingredients, this particular pastry recipe is remarkably easy to roll into a beautiful round. For those days when time is of the essence, a high-quality store-bought pie crust is an absolutely acceptable and highly recommended shortcut. Don’t let the crust deter you from enjoying this delightful dessert!
- Flouring Your Workspace for Effortless Rolling: To prevent your dough from sticking and ensure a smooth rolling process, lightly flour your rolling pin and your work surface (whether it’s a countertop or a large pastry mat). Place your disk of dough in the center, and begin rolling from the center outwards. After each pass with the rolling pin, rotate your dough approximately 45 degrees. Continue this process of rolling and rotating until your dough forms an even 12-inch round. This technique helps to create a uniformly thick crust.
- Parchment Paper Precaution: Using parchment paper is essential for easy transfer and cleanup. If you’re using a brand of parchment paper that doesn’t have a slightly slick or shiny finish (I personally favor King Arthur brand for its reliability), I highly recommend lightly spraying it with a non-stick cooking spray like Pam or Baker’s Joy. This extra step will provide an additional layer of insurance to minimize any potential sticking of the dough to the paper, ensuring your galette lifts cleanly after baking.
- Embrace the “Messy” Aspect: Remember, the charm of a galette lies in its rustic nature. Don’t fret over achieving a perfectly symmetrical shape or flawlessly pleated edges. The beauty of this dessert is in its homemade, organic appearance. Embrace any slight imperfections; they only add to its artisanal appeal and highlight the fact that it was lovingly prepared in your kitchen.
Step-by-Step Guide: How to Craft Your Own Delightful Galette
Creating a beautiful and delicious Peach Blueberry Galette is a surprisingly straightforward process, making it an ideal baking project for both seasoned home cooks and novice bakers. Follow these simple steps to bring this rustic dessert to life:
- Prepare Your Crust with Precision (or a Smart Shortcut): Begin by rolling out your prepared galette dough. For those who desire a perfectly round crust, a clever trick is to use a large, 12-inch diameter mixing bowl as a template. Simply place the inverted bowl over your rolled-out dough round and carefully trim around its edge with a sharp knife or pastry wheel, discarding any excess scraps. If you’re using a store-bought crust, simply unroll it onto your parchment-lined baking sheet.
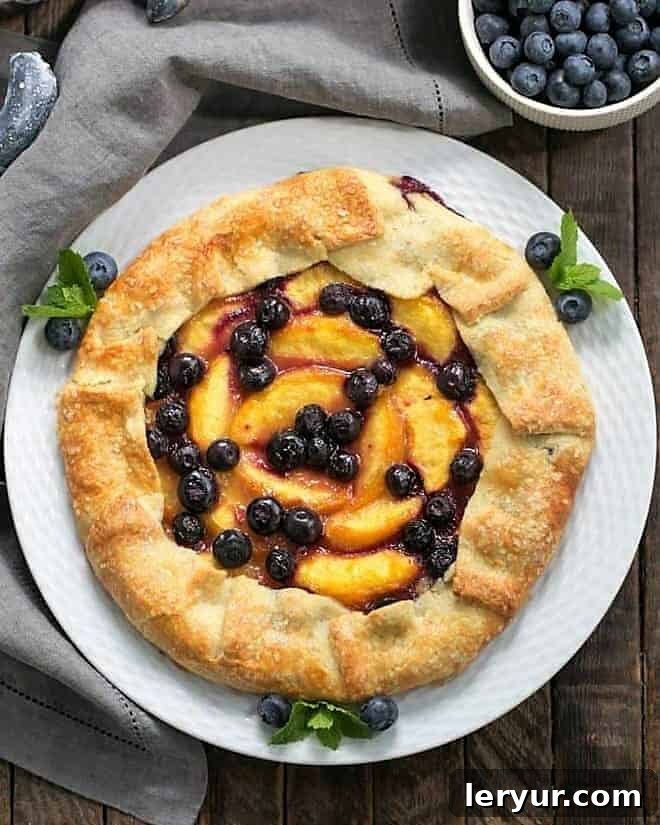
- Artfully Arrange the Fruit Filling: With your dough ready on a parchment-lined baking sheet, it’s time to layer the vibrant fruit. Begin by arranging the sliced peach pieces in a beautiful, concentric pattern on the circle of dough. Start from the center and work your way outwards, ensuring you stop approximately 1 to 1½ inches from the very edge of the dough. This crucial perimeter will be folded over to contain the luscious juices. Once the peaches are in place, generously sprinkle the fresh blueberries evenly across the peaches, filling any small gaps and adding bursts of color and flavor.
- Form the Rustic Edge: Now, it’s time to create the galette’s signature rustic border. Carefully lift and fold the exposed edge of the dough over the fruit filling. As you work your way around the circumference, you’ll need to create gentle pleats in the dough, overlapping them slightly to ensure the fruit is securely contained. This pleating not only provides structural integrity but also contributes to the galette’s charming, free-form aesthetic. Remember, the goal is to contain the juices, so make sure the fruit is not placed all the way to the dough’s very edge.
- Enhance with Glaze and Sparkle: For a beautiful golden sheen and a touch of extra crispness, lightly brush the exposed crust (the part that’s folded over the fruit) with a beaten egg white. This egg wash acts as a glaze, creating a lovely, slightly glossy finish as it bakes. If you desire, sprinkle both the exposed crust and the top of the fruit filling with granulated sugar, or coarse sugar for an added textural crunch and sparkling appearance. This extra touch of sugar will caramelize beautifully during baking.
- Bake to Golden Perfection: Place your prepared galette in the preheated oven and bake according to the recipe’s instructions. Keep an eye on it as it bakes; you’re looking for the crust to turn a rich, golden brown, and the fruit filling to be bubbling enticingly, indicating that the peaches are tender and the juices are perfectly cooked. The aroma that fills your kitchen will be absolutely irresistible!
- Serve and Savor: Once baked, carefully remove the galette from the oven and allow it to cool slightly on the baking sheet for about 10-15 minutes. This brief cooling period helps the fruit juices set and makes for easier slicing. The Peach Blueberry Galette is best served warm, either freshly out of the oven or at a comfortable room temperature. For an extra touch of indulgence, offer slices topped with a dollop of sweetened whipped cream or a scoop of creamy vanilla bean ice cream. The contrast of the warm fruit and cool cream is simply divine!
There are still more fragrant, and oh, so juicy peaches sitting on my counter, inspiring future culinary adventures! This particular peach blueberry galette effortlessly came together using just three ripe peaches and a half cup of fresh blueberries. The crust, as promised, was an absolute breeze to roll out and shape. After dinner, my husband, Bill, immediately went back for a second generous slice – a true testament to just how incredibly tasty and irresistible this galette is! It’s the kind of dessert that makes a memorable impression with minimal fuss.
Frequently Asked Questions About Galettes
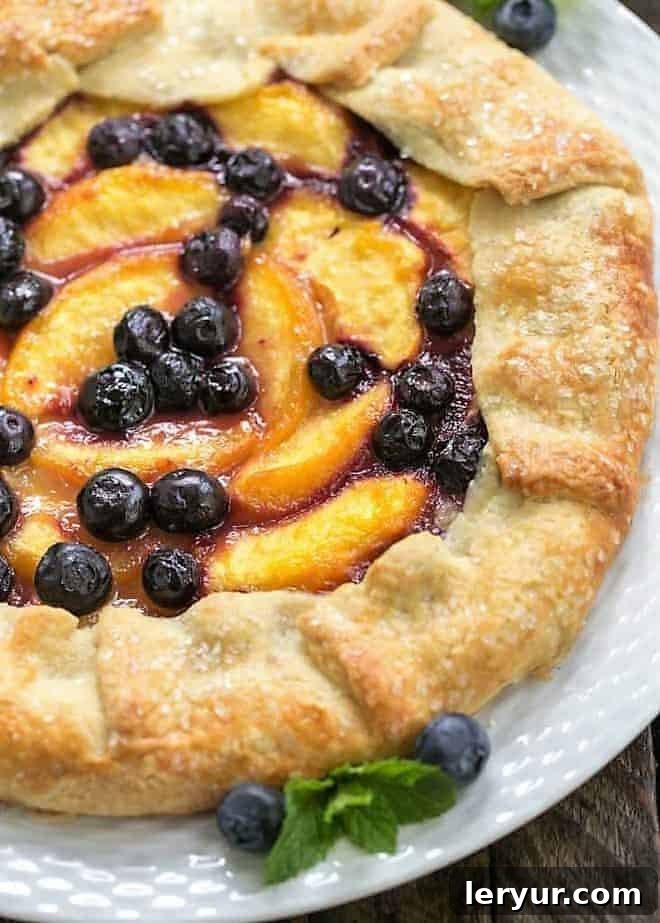
A galette is a wonderfully rustic, free-form, single-crust tart. It’s characterized by its open-faced design, where the edges of a round pastry dough are partially folded over a sweet or savory filling, leaving the center exposed. The Food Lover’s Companion aptly describes a galette as “a round, rather flat cake made of flaky-pastry dough, yeast dough, or sometimes unleavened dough.” Originating in France, galettes boast a rich history with various regional interpretations, and their versatility means they can be crafted with a wide array of sweet or savory ingredients, making them a perfect adaptable dish for any meal.
Essentially, a galette and a crostata refer to the same delicious, rustic, free-form tart. The difference lies purely in their linguistic origin: “Galette” is the French term for this delightful pastry, while “Crostata” is its Italian counterpart. Both terms describe an open-faced pie or tart with a crimped or folded edge, typically filled with fruit, jam, or savory ingredients, showcasing the culinary traditions of their respective cultures.
Shaping a galette is wonderfully simple and doesn’t require perfection, which is part of its charm. To shape one, you begin by rolling out your pastry dough into a roughly circular shape, typically about 12-14 inches in diameter, on a lightly floured surface. Then, place your chosen filling—be it fruit, jam, nuts, meat, or cheese—in the center of the round crust. It’s important not to pile the filling too high; a shallow, even layer works best to ensure even cooking. Leave a border of plain crust, usually about 2 to 3 inches wide, uncovered around the perimeter. Next, take a section of this outer edge and gently fold it over a portion of the filling. Repeat this process, folding and slightly overlapping the next section of crust over the fruit, continuing all the way around the tart. This creates a charming, pleated border that helps to contain the juices as the galette bakes, showcasing the vibrant filling in the center.
To ensure your galette crust remains beautifully crisp and avoids becoming soggy, especially with very juicy fruit fillings, there are a few effective strategies. One excellent tip is to lightly sprinkle the center of the crust with a thin layer of bread crumbs, semolina flour, or finely crushed plain cookies (like vanilla wafers or graham crackers) before adding the fruit. These dry ingredients act as a natural absorbent, soaking up excess fruit juices during baking and protecting the bottom crust from getting waterlogged. Additionally, ensure your oven is preheated to the correct temperature to allow for rapid crisping of the crust. Proper baking until the crust is golden brown and the filling is visibly bubbling also helps. Lastly, while galettes are best enjoyed fresh, consuming it within a day or two of baking helps maintain its ideal texture.
A galette is incredibly versatile when it comes to serving. It’s undeniably best when served warm, ideally fresh out of the oven, allowing the aromas to fill your home and the fruit to be perfectly tender. However, it also holds up beautifully and can be served at room temperature, making it an excellent choice for potlucks, picnics, or entertaining. For dessert galettes, cut them into generous wedges and elevate the experience by offering delightful accompaniments such as a scoop of rich vanilla ice cream, a dollop of freshly whipped cream, or a drizzle of crème fraîche. Savory galettes, on the other hand, can be served as an appetizer, a light lunch, or a side dish. Generally, a sweet galette will keep well at room temperature for about 2 days, while savory versions with meat or other perishable ingredients should be refrigerated and consumed within a similar timeframe.
Yes, a galette can absolutely be frozen, allowing you to enjoy this delightful dessert long after it’s been baked. For best results, first bake the galette completely and allow it to cool entirely to room temperature. Once cooled, wrap it thoroughly and tightly in several layers of plastic wrap, followed by a layer of aluminum foil, ensuring it is completely airtight. This protective wrapping helps prevent freezer burn. You can then freeze the galette for up to 3 months. To serve, simply defrost the wrapped galette overnight in the refrigerator. Once thawed, gently reheat it in a preheated oven at a low temperature (around 300°F or 150°C) until it is warmed through and the crust has re-crisped, typically about 15-20 minutes. This method allows for a quick and convenient dessert whenever the craving strikes.
Explore More Delicious Dessert Recipes
If you’ve fallen in love with the ease and deliciousness of this Peach Blueberry Galette, you’ll be thrilled to discover more delightful recipes that promise to satisfy your sweet tooth with seasonal ingredients and simple preparations. Dive into these other favorites:
- No Churn Strawberry Cheesecake Ice Cream from Big Bear’s Wife – A creamy, dreamy summer treat that requires no special equipment.
- Fresh Raspberry Crisp – Bursting with juicy raspberries and topped with a delightful oat streusel, perfect with a scoop of ice cream.
- Peach Blueberry Cobbler – Another wonderful pairing of peaches and blueberries in a comforting, bubbly dessert.
- Razzleberry Pie – A vibrant medley of berries baked into a classic pie, a true fruit lover’s dream.
- Easy Rhubarb Crisp – Tangy rhubarb balanced with a sweet, crunchy topping, a springtime delight.
- Cheesecake Ice Cream – Rich and indulgent, this ice cream captures the essence of a decadent cheesecake.
- Best Summer Dessert Recipes – A curated collection of my top picks for sweet treats perfect for warm weather.
- More Dessert Recipes – Explore my full archive of delightful sweet creations!
Stay connected and join our baking community through social media! Follow us on Instagram, Facebook, and Pinterest. Don’t forget to tag me when you try one of my recipes – I love seeing your creations! And if you absolutely adore the results of this Peach Blueberry Galette, please show your appreciation by giving it a 5-star rating in the recipe card below. Your feedback helps other bakers discover these delicious recipes!

Peach Blueberry Galette
30 minutes
50 minutes
1 hour 20 minutes
6 servings
A scrumptious dessert featuring a perfect blend of sweet peaches and tart blueberries nestled in a golden, buttery pastry crust!
Ingredients
For the Crust:
- 1 ½ cups all-purpose flour, plus additional for rolling
- 1 tablespoon granulated sugar
- ¼ teaspoon fine sea salt
- 11 tablespoons cold unsalted butter, cut into ½ tablespoon pieces (if using salted butter, omit the added salt in the dough)
- 1 large egg yolk (reserve the egg white for glazing the dough)
- 3 tablespoons cold milk (whole milk preferred)
For the Filling and Glaze:
- 2 cups peeled and thinly sliced fresh peaches (approximately 1 pound or 3 medium peaches)
- ½ cup fresh blueberries, picked over
- ¼ cup granulated sugar
- 2 tablespoons all-purpose flour (to thicken juices)
- Pinch of salt
- 1 reserved egg white, lightly beaten (for brushing the crust)
- 2 tablespoons coarse turbinado sugar or granulated sugar (for sprinkling)
Instructions
- Prepare the Dough: In the bowl of a food processor, combine the flour, 1 tablespoon sugar, and ¼ teaspoon salt. Pulse briefly to mix these dry ingredients. Add the cold butter pieces to the flour mixture and pulse repeatedly in short bursts until the butter is broken down into small, pea-sized pieces and the mixture resembles coarse cornmeal.
- Form the Dough: In a small bowl, whisk together the egg yolk and milk. Add this liquid mixture to the food processor with the flour and butter. Pulse until the dough just begins to come together and forms a shaggy ball. Do not overmix. Turn the dough out onto a piece of plastic wrap, gently press it into a flat disk, wrap it tightly, and chill in the refrigerator for at least 30 minutes to allow the gluten to relax.
- Preheat Oven and Prepare Pan: While the dough chills, preheat your oven to 350°F (175°C). Line a large, rimmed baking sheet with a sheet of parchment paper. This will prevent sticking and make cleanup much easier.
- Prepare the Fruit Filling: In a large bowl, gently combine the peeled and sliced peaches with the fresh blueberries. Add ¼ cup sugar, 2 tablespoons flour, and a pinch of salt. Carefully toss the fruit until it is evenly coated. The flour will help to thicken the fruit juices during baking.
- Roll and Assemble: On a lightly floured surface, roll out the chilled dough into a 12-inch round. Carefully transfer the rolled dough to the prepared baking sheet. Arrange the fruit mixture evenly in the center of the dough, leaving a border of approximately 1 to 1½ inches of plain dough around the perimeter.
- Fold the Edges: Gently fold the outside edge of the dough up and over the fruit filling, creating pleats as necessary to contain the fruit and its juices. The center of the fruit will remain exposed. Brush the exposed crust (the folded-over portion) with the lightly beaten egg white for a golden finish. Sprinkle the coarse sugar (or granulated sugar) generously over both the exposed crust and the fruit filling.
- Bake and Serve: Bake the galette in the preheated oven for approximately 50 minutes, or until the crust is beautifully golden brown and the fruit filling is bubbly and tender. Remove from the oven and let it cool on the baking sheet for at least 10-15 minutes before attempting to cut and serve. Serve warm or at room temperature, perhaps with a dollop of sweetened whipped cream or a scoop of vanilla ice cream, if desired. Enjoy!
Notes
Feel free to experiment with different fruit combinations! Raspberries can be used in place of blueberries, or nectarines can substitute for peaches for a slightly different flavor profile. Adjust sugar content based on the sweetness of your fruit.
Nutrition Information:
Yield:
6
Serving Size:
1 slice
Amount Per Serving (Estimated):
Calories: 409Total Fat: 23gSaturated Fat: 14gTrans Fat: 1gUnsaturated Fat: 7gCholesterol: 87mgSodium: 293mgCarbohydrates: 48gFiber: 2gSugar: 20gProtein: 6g
HOW MUCH DID YOU LOVE THIS RECIPE?
Please leave a comment on the blog or share a photo on Pinterest