
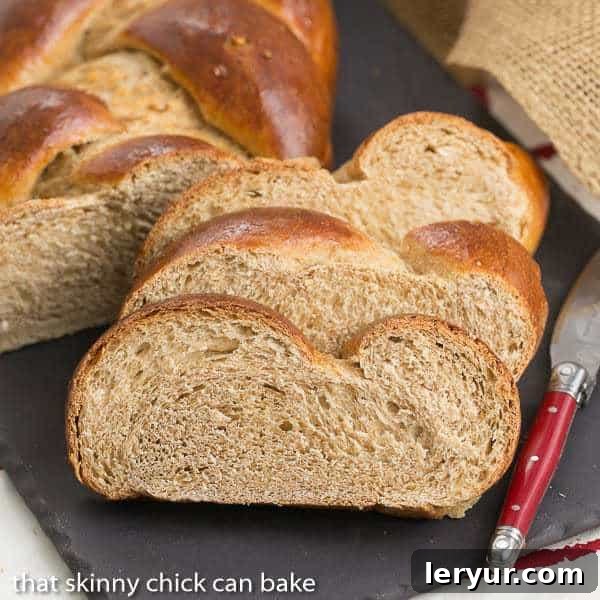
Whole Wheat Challah is more than just a loaf of bread; it’s a tender, egg-based delight, beautifully braided and imbued with rich flavor. This wholesome version takes the classic Jewish bread to new heights, offering a perfect blend of tradition and nutritional goodness. Imagine a warm, chewy slice, perhaps with a touch of butter, creating a truly sensational experience. And the best part? This incredible Whole Wheat Challah recipe is surprisingly easy to master!
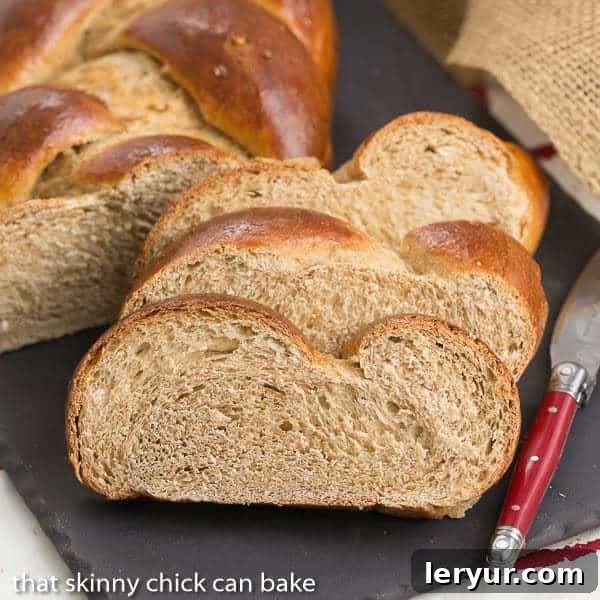
Baking Wholesome Tradition: The Magic of Whole Wheat Challah
For many, Challah bread evokes cherished memories and a sense of warmth. While traditional Challah recipes often call for white flour, this whole wheat adaptation brings a unique, earthy depth and added nutritional benefits without sacrificing its signature tenderness and subtle sweetness. This recipe is a journey from simple ingredients to an extraordinary loaf, perfect for family gatherings, special occasions, or simply elevating your everyday meals.
My Journey to Whole Wheat Challah: A Personal Touch
Growing up in Ames, Iowa, Challah wasn’t a familiar presence in our kitchen. It wasn’t until much later, inspired by a neighbor, that my mom began baking these exquisite braided loaves. My husband, Bill’s, cardiology fellowship rotation in Des Moines brought us closer to my childhood home, leading to frequent visits. These visits were a delightful blend of spending time with my parents, offering them their grandson fix, and, of course, indulging in my mom’s home cooking.
It was during these visits that I truly fell in love with her rich, slightly sweet, and unmistakably eggy bread. However, as I made efforts to incorporate more whole grains into my diet, I found myself inadvertently depriving myself of this beloved treat. The realization that I hadn’t even attempted to create a whole wheat challah recipe was a significant oversight! Determined to bring this wholesome version to my table, I gathered a few recipes and embarked on a delightful baking adventure. The result was nothing short of spectacular – a testament to how traditional favorites can be wonderfully adapted.
Understanding Challah: A Rich Culinary Tradition
Before diving into the specifics of our whole wheat version, it’s worth understanding the roots of Challah itself. Challah (also spelled Hallah or Challa) is a traditional Jewish yeast bread, often rich with eggs, and typically braided. It holds significant cultural and religious importance, commonly served on the Sabbath and other Jewish holidays. In biblical Hebrew, the word “challa” means a loaf or cake, highlighting its ancient origins.
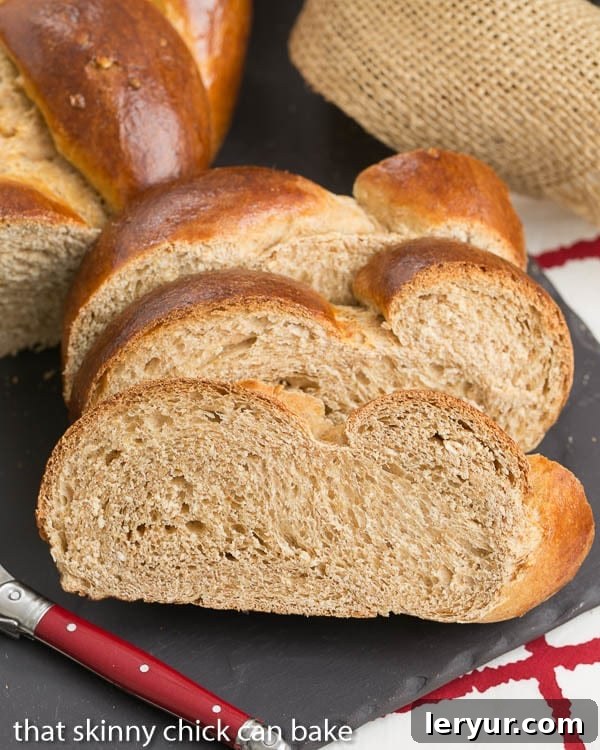
Traditionally, challah is made with white flour, resulting in a light, airy texture. However, the move towards whole wheat flour for this recipe not only enhances its nutritional profile but also introduces a more robust, nutty flavor that complements its inherent sweetness beautifully. It’s a wonderful way to enjoy a classic comfort food with an added touch of wholesomeness.
Why Choose Whole Wheat for Your Challah?
Opting for whole wheat flour in your challah recipe offers several advantages, both in terms of health and flavor. Whole wheat flour contains all three parts of the grain kernel—the bran, germ, and endosperm—unlike refined white flour, which only uses the endosperm. This means whole wheat challah is packed with:
- **Fiber:** Essential for digestive health, helping to regulate blood sugar levels and promote a feeling of fullness.
- **Nutrients:** Rich in B vitamins, iron, magnesium, and other vital minerals that are often lost in the refining process of white flour.
- **Richer Flavor Profile:** Whole wheat flour imparts a wonderfully complex, nutty, and slightly earthy flavor that adds a new dimension to the traditional challah taste. It stands up well to both sweet and savory accompaniments.
- **Satisfying Texture:** While still tender, whole wheat challah often has a slightly chewier, more substantial crumb, making each bite incredibly satisfying.
Incorporating whole wheat into your challah doesn’t mean sacrificing the iconic qualities of this beloved bread; rather, it elevates it, making it a more nourishing and flavorful choice for everyone to enjoy.
Mastering the Challah Dough: The Foundation of Perfection
The secret to an exceptional challah, whole wheat or otherwise, lies in the dough. Achieving the perfect consistency is paramount, and it largely comes down to the kneading process and proper rising. Here’s a deeper dive into making your challah dough:
Kneading by Hand vs. Mixer:
- Both manual kneading and using a stand mixer with a dough hook yield excellent results. The choice often comes down to personal preference and available time.
- **By Hand:** Be prepared for a good arm workout! Kneading by hand can take at least 15-20 minutes to develop the gluten sufficiently, resulting in a smooth, elastic dough. It’s a meditative process that connects you directly with your ingredients.
- **With a Stand Mixer:** This method is faster and less labor-intensive. Using the dough hook, you can achieve the desired consistency in 5-10 minutes, depending on your mixer and dough.
The “Window Pane” Test: Your Dough’s Best Friend
Knowing when your dough is kneaded enough is crucial. The “Window Pane” test is an invaluable technique:
- Tear off a small piece of dough, about the size of a golf ball.
- Gently stretch it between your fingers.
- If the dough is properly kneaded, you should be able to stretch it thin enough to see light pass through it (like a window pane) without it tearing.
- If it rips easily, it needs more kneading. Continue kneading for a few more minutes, then re-test. This elasticity is key to the challah’s airy yet chewy texture.
After kneading, the dough needs ample time to rise. Challah dough typically undergoes two proofs. The first rise, often in an oiled bowl covered with plastic wrap, allows the yeast to work its magic, doubling the dough in size, usually taking about two hours in a warm environment. The second rise, after punching down the dough, further develops flavor and texture, typically lasting about an hour until doubled again. Patience during these stages is rewarded with a beautifully light and flavorful loaf.
How to Braid a 3-Strand Challah: A Simple Guide
The iconic braided shape is what truly sets Challah apart, giving it an elegant appearance that belies the simplicity of its creation. Braiding bread might seem intimidating, but with a 3-strand technique, it’s incredibly straightforward and satisfying. Think of it like braiding hair – once you get the rhythm, it becomes a cinch! (Having grown up with three sisters and long hair, I’ve had plenty of practice!)
While multi-stranded braids (like a 6-strand) exist and are beautiful, for clarity and ease, I often stick to the 3-strand version, especially for beginners. Here’s how to create that classic look:
- Prepare Your Strands: Begin by dividing your dough in half (for two loaves, as per the recipe). Take one half and divide it into three equal pieces. Roll each piece into a rope, aiming for about 12 inches long. They should be slightly thicker in the middles and tapered at the ends. This shape helps create a beautifully contoured loaf.
- Set Up for Braiding: Lay the three dough ropes side by side on a lightly floured surface or a parchment-lined baking sheet. Ensure one set of small, tapered ends is facing you.
- Anchor the Top: Firmly pinch the three strands together at the end furthest from you. This creates a secure anchor point for your braid.
- The Braiding Motion:
- Take the strand on the far right and cross it over the middle strand. This new strand now becomes the middle.
- Next, take the strand that is now on the far left and cross it over the new middle strand.
- Continue this pattern: always take the outer-most strand (alternating right and left) and cross it over the current middle strand.
- Finish the Braid: Once you’ve braided the entire length of the dough, pinch together the loose strands at the end closest to you and tuck them neatly underneath the loaf. Repeat this process with the ends at the far end, tucking them under as well. This creates a clean, finished appearance.
- Final Proofing: Your beautifully braided loaf is now ready for its final proofing, where it will double in size before baking.
If you’re a visual learner, numerous excellent YouTube videos and blogs, like Tori Avey’s braiding tutorials, can provide clear demonstrations and help you perfect your technique.
Achieving the Perfect Golden Glaze: Essential Recipe Tips
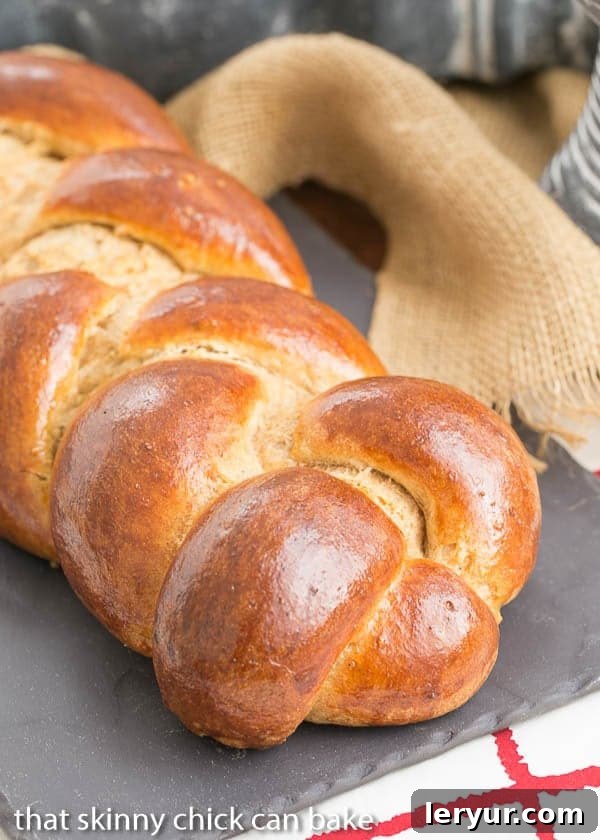
One of the most distinguishing features of Challah is its beautiful, glossy, golden-brown crust. This characteristic sheen isn’t just for looks; it adds to the bread’s overall appeal and slight crispness. Achieving this requires a simple yet crucial step: the egg wash.
- The Egg Wash: Before baking, brush your braided loaves generously with an egg wash. This is typically made by whisking one egg with a teaspoon of water. The egg wash contributes to the rich color and the signature glossy finish.
- Tools for Glazing: A silicone brush is ideal for applying the egg wash. Its soft bristles ensure an even coating, and it’s easy to clean – often dishwasher-safe!
- Dorie Greenspan’s Trick for Full Coverage: A fantastic tip I learned from the renowned baker Dorie Greenspan ensures your challah has an immaculate, all-over glaze. Brush the loaves once before they go into the oven. Then, after the bread has baked for about 15 minutes, pull it out and apply a second coat of egg wash. Since loaves expand and rise significantly in the heat of the oven, this second application guarantees full coverage, reaching any spots that might have stretched and become unglazed during the initial rise. This trick makes a noticeable difference in the final presentation.
- Optional Toppings: For an added touch, you can sprinkle poppy seeds or sesame seeds over the egg-washed challah before baking. This not only enhances the flavor and texture but also adds to its visual charm.
These simple steps ensure that your whole wheat challah emerges from the oven looking as magnificent as it tastes, ready to impress with its radiant, golden crust.
Baking and Serving Your Whole Wheat Challah
With your dough perfectly braided and glazed, the final step is baking it to golden perfection. Preheat your oven to 350°F (175°C). The loaves typically bake for 20-30 minutes, or until they reach that beautiful golden-brown hue and sound hollow when tapped on the bottom. The most accurate way to ensure your challah is fully baked, however, is to use an instant-read thermometer. Insert it into the thickest part of the loaf; when it reads 190°F (88°C), your challah is perfectly done.
Once out of the oven, resist the urge to slice immediately! Allow the challah to cool on a wire rack for at least 30 minutes. This resting period allows the internal structure to set and the flavors to fully develop, ensuring a cleaner slice and better texture.
Serving Suggestions:
- Classic with Butter: A warm slice with a pat of softened butter is pure bliss.
- Sweet Delights: Pair it with your favorite jam, honey, or a sprinkle of cinnamon sugar.
- French Toast: Challah makes the absolute best French toast – its rich, eggy nature absorbs the custard beautifully, creating a decadent breakfast or brunch.
- Savory Sandwiches: Its sturdy yet soft texture also makes it a fantastic base for sandwiches, from simple cheese to more elaborate fillings.
- Croutons or Bread Pudding: Stale challah is a treasure! Turn it into gourmet croutons or a rich bread pudding.
I sincerely hope this detailed guide inspires you to embrace the wonderful experience of baking a delicious and wholesome braided loaf of whole wheat challah. It’s a rewarding project that fills your home with an irresistible aroma and your table with an impressive, comforting bread.
Frequently Asked Questions About Whole Wheat Challah
Challah, sometimes spelled Hallah or Challa, is a rich, traditional Jewish yeast bread. It’s made with eggs and often characterized by its beautiful braided shape. It holds cultural significance and is traditionally served on the Sabbath and other Jewish holidays. In biblical Hebrew, the term “challa” refers to a loaf or cake.
Both methods are effective for kneading challah dough. Kneading by hand provides a hands-on experience and builds strength, but it will typically take at least 15-20 minutes to achieve the proper smooth and elastic consistency. Using the dough hook attachment on a stand mixer is a faster option, usually taking 5 to 10 minutes to achieve the desired texture.
The best way to check if your dough has been kneaded sufficiently is by performing the “Window Pane” test. Take a small piece of dough and gently stretch it between your fingers. If you can stretch it thin enough to see light through it without it tearing, then the gluten is properly developed, and the dough is ready. If it rips, continue kneading for a few more minutes and test again.
While visual cues like a golden-brown crust are helpful, the most accurate method for confirming your challah is done is to use an instant-read thermometer. Insert the thermometer into the center of the loaf. When the internal temperature reaches 190°F (88°C), your challah is fully baked and ready to be removed from the oven.
You May Also Like These Braided Loaves and Bread Recipes:
- Russian Braided Bread with Pesto Filling from Barbara Bakes
- Braided Semolina Bread from Foodie with Family
- Chocolate Challah Bread from Belly Full
- Braided Challah Bread
- Pumpkin Challah
- Spinach Onion Braid
- Braided Cinnamon Danish
- Plus, Challah Pretzels
- And many more Bread Recipes
Stay in touch through social media @ Instagram, Facebook, and Pinterest. Don’t forget to tag me when you try one of my recipes! If you love the results, please consider giving it a 5-star rating!
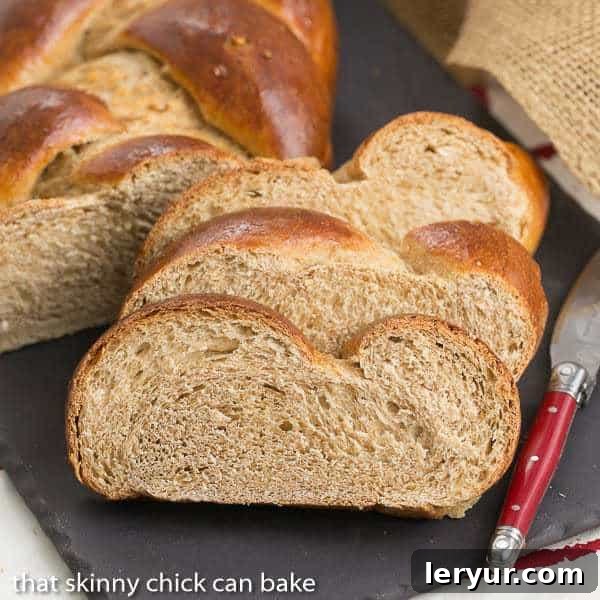
Whole Wheat Challah Recipe
A rich, tender egg bread made with the wholesome goodness of whole wheat flour, perfect for any meal.
20 minutes
30 minutes
50 minutes
2 loaves
Ingredients
- 2 (.25 ounce) packages instant yeast (Red Star Platinum recommended)
- 1 cup warm water
- ½ cup brown sugar
- ½ cup butter at room temperature
- 2 teaspoons salt
- 3 large eggs
- 2 cups whole wheat flour
- 2 cups all-purpose flour (may add up to ½ cup more if needed)
- ½ cup old-fashioned rolled oats
- 1 egg, beaten with 1 teaspoon water (for egg wash)
Instructions
- In the bowl of a stand mixer, combine the instant yeast and warm water. Let it stand for about 5 minutes until the yeast activates and becomes foamy.
- Using the paddle attachment, mix in 3 eggs, brown sugar, softened butter, salt, whole wheat flour, 2 cups of the all-purpose flour, and the rolled oats. Mix until just combined.
- Switch to the dough hook attachment. Knead the dough on medium speed until it is smooth, elastic, and pulls away from the sides of the bowl. This will take approximately 5 to 10 minutes. If the dough is too sticky, gradually add up to ½ cup more all-purpose flour, one tablespoon at a time, until the desired consistency is reached (pass the “Window Pane” test).
- Shape the kneaded dough into a ball and place it in a lightly oiled bowl, turning it once to coat the entire surface. Cover the bowl loosely with plastic wrap and let it rise in a warm place until doubled in size, which should take about 2 hours.
- Once doubled, gently punch down the dough to release the air. Recover the bowl and let the dough rise again until doubled in size, approximately 1 hour.
- After the second rise, punch down the dough once more. Divide the dough into two equal halves.
- Take one half of the dough and divide it into 3 equal pieces. Roll each piece into a rope, about 12 inches long, making sure the ends are tapered. Pinch the three ropes together firmly at one end and braid them together. Place the braided loaf onto a baking sheet lined with parchment paper.
- Repeat the braiding process with the second half of the dough to form another loaf.
- Cover the braided challah loaves loosely with a clean, dry cloth and let them rise in a warm spot for their final proofing, until doubled in size, about 1 hour.
- While the challah is rising for the final time, preheat your oven to 350°F (175°C).
- Prepare the egg wash by beating 1 egg with 1 teaspoon of water. Once the loaves have completed their final rise, gently brush them with the egg wash. Bake in the preheated oven for 20-30 minutes, or until golden brown. For an extra glossy finish, brush the loaves with a second application of egg wash after about 15 minutes of baking.
- Remove the challah from the oven and cool completely on a wire rack before slicing and serving.
Notes
For precise doneness, use an instant-read thermometer. Your Whole Wheat Challah is fully baked when its internal temperature reaches 190°F (88°C).
Recommended Products
As an Amazon Associate and member of other affiliate programs, I earn from qualifying purchases.
- Thermapen Instant Read Thermometer
- Reynolds Cookie Baking Sheets Non-Stick Parchment Paper, 25 Sheet, 4 Count
- USA Pan Bakeware Half Sheet Pan
- KitchenAid KSM150PSER Artisan Tilt-Head Stand Mixer with Pouring Shield, 5-Quart, Empire Red
Nutrition Information (per serving):
Yield: 24 servings (estimated)
Calories: 1657
Total Fat: 58g
Saturated Fat: 32g
Trans Fat: 2g
Cholesterol: 362mg
Sodium: 1317mg
Carbohydrates: 246g
Fiber: 21g
Sugar: 37g
Protein: 45g