
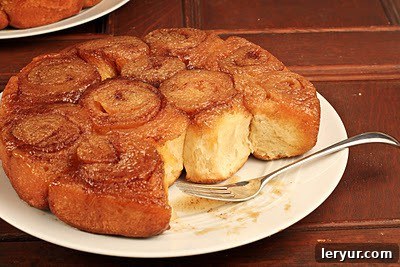
Maple Syrup Sticky Buns: Your Ultimate Guide to Irresistible Homemade Delights
Discover the joy of baking Maple Syrup Sticky Buns, featuring a remarkably soft, tender dough that cradles a truly decadent, gooey brown sugar topping infused with the rich, unmistakable flavor of pure maple syrup. These homemade treats are a symphony of textures and tastes, promising a breakfast or brunch experience that’s nothing short of spectacular.
The Unbeatable Charm of Homemade Maple Syrup Sticky Buns
There’s something inherently comforting about a warm, freshly baked sweet roll, especially when it’s drenched in a luscious, sticky glaze. Recently, my youngest expressed a deep craving for cinnamon rolls, a classic family favorite. While many recipes are good, I wanted to find one that truly transcended, offering that extra layer of indulgence and unique flavor. This quest led me to explore new horizons in baking, ultimately culminating in these absolutely divine Maple Syrup Sticky Buns – a recipe I knew would capture not only his heart but everyone else’s too.
My journey for the perfect sticky bun recipe led me to the renowned “Ultimate Sticky Buns” from Bon Appetit. Known for their meticulous recipes, it provided an excellent foundation. However, to truly elevate the flavor profile and create something uniquely special, I made a couple of strategic modifications. The most significant change was swapping out the honey for the unparalleled depth of pure maple syrup. Specifically, I opted for Amber Grade A Canadian maple syrup, celebrated for its rich flavor that complements baked goods beautifully. I also decided to omit the pecans, ensuring that the focus remained squarely on the incredible dough and the glorious maple-infused caramel topping. Oh, my goodness, the results were beyond spectacular. The caramel topping alone is so exquisitely delicious, I could honestly eat it by the spoonful! This recipe truly is a big winner, delivering an unparalleled sticky bun experience.
A Touch of Comfort and Family: My Journey to the Perfect Sticky Bun
I must first extend my heartfelt thanks for all the incredibly sweet messages of condolence regarding my Aunt Martha. She was an extraordinary woman whose spirit of generosity and sheer *joie de vivre* profoundly inspired me. Being away for a few days to honor her memory, however, left me a bit behind in my usual routine, and I found myself without a fresh blog post ready for today. When I finally arrived home, I was greeted by a familiar sight: my wonderful husband, Bill, deep in the process of making “chippy bars.” For those unfamiliar, that’s what my kids adorably dubbed chocolate chip pan cookies when they were just wee ones – a true testament to their simple charm.
Now, I’ve often heard reports from the kids that Bill’s version of the chippy bars, while edible, somehow never quite matched mine. And upon my return, I immediately understood why. There he was, with all the dry ingredients – flour, sugars, baking soda, and salt – meticulously mixed in a bowl, just about to incorporate some rather solid butter. A genuine “hmmmmm…” moment for any experienced baker! It’s a fundamental rule, truly, that dough preparation often begins with creaming the butter and sugar together, a step vital for achieving that perfect texture and rise. I just had to step in and gently take over. Any fellow cookie maker will instantly understand that instinct. Nevertheless, Bill absolutely earned major brownie points for diligently tackling the laundry and taking charge of dinner while I was away in Michigan. After carefully scooping the sugar out of his bowl and making the necessary adjustments, I was able to finish those chippy bars to their familiar perfection.
With those comforting pan cookies baking in the oven, a delicious aroma filling the kitchen, I realized I still needed to whip up something truly special beyond just another dessert for the blog. And that’s when inspiration struck! Ta-da! My newfound appreciation for sweet rolls, combined with the pure maple syrup at hand, led directly to these glorious Maple Syrup Sticky Buns. They were the perfect answer to a busy return home, a delightful treat to share, and an absolute highlight for our family.
Why These Maple Syrup Sticky Buns Stand Out
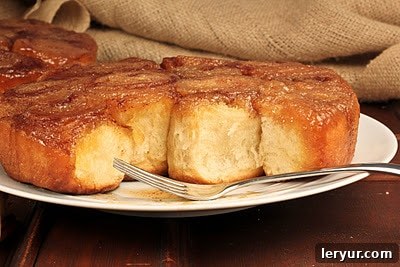
What truly sets these sticky buns apart is the harmonious blend of textures and flavors. The dough is not merely sweet; it’s a tender, enriched yeast dough that bakes up incredibly soft and pillowy, providing the perfect contrast to the lavish topping. This delicate interior ensures that every bite is light and airy, even as it’s enveloped in richness. The artistry of a good sticky bun lies in this balance, preventing it from becoming overly dense or heavy. It’s a testament to the classic baking techniques that yield such satisfying results.
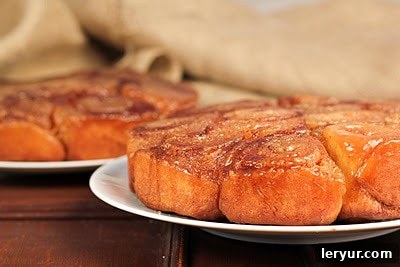
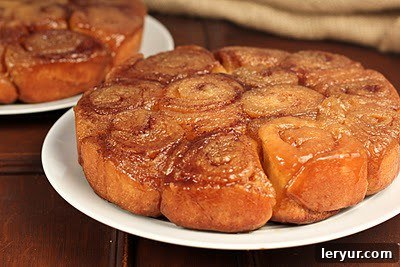
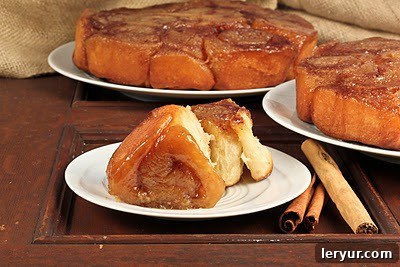
Then there’s the glaze – a truly phenomenal creation. It’s a molten cascade of deep brown sugar, infused with the distinctive, woodsy sweetness of pure maple syrup. Unlike simpler glazes, this one caramelizes beautifully as the buns bake, creating a genuinely gooey, sticky, and utterly irresistible coating that adheres perfectly to every swirl of the bun. The subtle warmth of cinnamon woven throughout the filling further enhances this caramel dream, adding a comforting spice note that perfectly complements the maple. It’s a complex flavor profile that feels both familiar and refreshingly gourmet.
These aren’t just any sticky buns; they are an experience. They embody everything you dream of when you imagine a truly perfect breakfast pastry: a golden-brown exterior, a soft and tender crumb, and a generous layer of glistening, sweet, and sticky topping that demands to be savored. Each bun is a miniature masterpiece, promising a moment of pure culinary bliss with every delightful bite. They’re proof that taking a classic and elevating it with high-quality ingredients like pure maple syrup can result in something truly unforgettable.
Mastering the Art of Sticky Bun Perfection: Tips for Success
Baking homemade sticky buns might seem daunting, but with a few key tips, you’ll achieve bakery-worthy results every time. First, let’s talk about yeast. Ensure your warm water is between 105-115°F (40-46°C) – too hot will kill the yeast, too cold won’t activate it. Your yeast should become visibly foamy after about 5 minutes; this “proofs” it, confirming it’s active and ready to make your dough light and airy. Don’t rush this crucial first step!
Next, consider your dough. Room temperature butter is non-negotiable for creaming properly with sugar, creating an emulsified base that traps air and contributes to the dough’s tender texture. When mixing, don’t be alarmed if the dough is sticky – that’s often a sign of a rich, well-hydrated dough that will bake up beautifully soft. If kneading by hand, be patient; it takes time to develop the gluten. For rising, a warm, draft-free environment is ideal. Placing the bowl in a slightly warmed, turned-off oven or near a sunny window can work wonders, helping the dough double in size as instructed.
The sticky glaze is the crown jewel of these buns. Beat the brown sugar, butter, maple syrup, corn syrup, and water until perfectly combined and smooth. This ensures an even consistency and flavor across all your buns. Dividing it equally between your prepared cake pans is also important for consistent results. As for the filling, don’t skimp on the cinnamon-sugar mixture; it’s what gives those beautiful swirls their classic flavor.
When rolling and cutting, aim for even thickness in your dough rectangles and consistent sizes for your individual rolls. This promotes even baking. Placing the cut sides down ensures the spirals hold their shape and cook uniformly. Finally, during baking, keep a watchful eye on your buns. Ovens can vary, and if they start browning too quickly, like mine did, reducing the oven temperature for the final minutes can prevent burning while allowing the interior to fully cook and the glaze to caramelize to perfection.
Beyond Breakfast: Serving and Storing Your Maple Syrup Sticky Buns
These maple syrup sticky buns are undeniably at their absolute best when served warm, just minutes after being inverted from the pans. The gooey caramel topping is still molten and inviting, clinging to every soft curve of the bun. They make an unforgettable breakfast or brunch centerpiece, perfect for special occasions or simply elevating a lazy weekend morning. Pair them with a freshly brewed cup of coffee or a glass of cold milk for a truly satisfying experience. The rich sweetness of the buns perfectly balances the slight bitterness of coffee, creating a delightful harmony of flavors.
While it’s hard to imagine having any leftovers, if you do, these sticky buns can be stored at room temperature in an airtight container for up to 2-3 days. To revive their fresh-baked goodness, a quick reheat in the microwave for 15-20 seconds or a few minutes in a warm oven will bring back that irresistible gooey texture and warmth. They’re also an excellent option for meal prepping breakfast treats, as the dough can be prepared the night before and allowed to do its second rise in the refrigerator overnight, ready to bake off first thing in the morning.
Maple Syrup Sticky Buns
30 minutes
30 minutes
1 hour
12 delicious buns
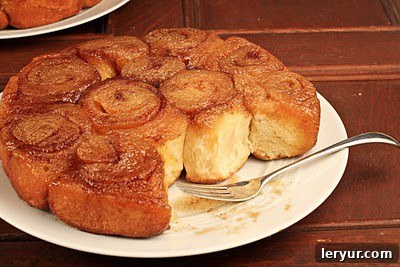
Indulge in these irresistible sticky buns featuring a tender, soft dough and a decadent brown sugar and pure maple syrup glaze. A truly special breakfast or brunch treat!
Ingredients
For the Dough:
- 1 cup warm water (105-115ºF)
- 4 teaspoons active dry yeast
- ⅔ cup granulated sugar
- ½ cup unsalted butter (one stick), softened to room temperature
- ½ cup nonfat dried milk powder
- 1 teaspoon salt
- 2 large eggs
- 4 ¼ cups all-purpose flour, plus extra for dusting work surfaces
For the Maple-Brown Sugar Glaze:
- 1 ¼ cups packed light brown sugar
- ¾ cup unsalted butter (1 ½ sticks), softened to room temperature
- ¼ cup pure maple syrup (Amber Grade A Canadian recommended)
- ¼ cup dark corn syrup
- ¼ cup water
For the Cinnamon Filling:
- 4 teaspoons granulated sugar
- 4 teaspoons ground cinnamon
Instructions
- Activate the Yeast: In a small bowl, combine the warm water, yeast, and a pinch of sugar. Let this mixture sit for about 5 minutes until it becomes foamy, indicating the yeast is active.
- Cream Wet Ingredients: Using a stand mixer fitted with the paddle attachment, beat the remaining ⅔ cup sugar, ½ cup butter, milk powder, and salt until they are thoroughly combined and creamy.
- Incorporate Eggs: Beat in the eggs, one at a time, ensuring each is fully incorporated before adding the next.
- Add Yeast and First Batch of Flour: Stir in the activated yeast mixture. Then, gradually add 3 cups of the flour, one cup at a time, scraping down the sides of the bowl as needed to ensure everything is well mixed.
- Add Remaining Flour and Knead: Mix in the last 1 ¼ cups of flour. Let the mixer run on medium speed for about 5 minutes to knead the dough. If you don’t have a stand mixer, you can knead by hand on a lightly floured surface for 8-10 minutes. The dough will be sticky.
- First Rise Preparation: Lightly butter a large bowl. Add the sticky dough to the bowl, then turn the dough over once or twice to ensure its entire exterior is coated with butter.
- First Rise: Cover the bowl tightly with plastic wrap. Allow the dough to rise in a warm, draft-free area until it has doubled in size, which typically takes about 2 ½ hours.
- Prepare the Glaze and Cinnamon Sugar: While the dough is rising for the second time, prepare the glaze. In a medium bowl, beat together the 1 ¼ cups brown sugar, ¾ cup butter, maple syrup, corn syrup, and ¼ cup water until well combined and smooth. Divide this glaze mixture equally between two greased 9-inch round cake pans. In a separate small bowl, mix together the 4 teaspoons of sugar and 4 teaspoons of ground cinnamon for the filling.
- Prepare Dough for Rolling: Once doubled, gently punch down the risen dough to release the air. Divide the dough in half.
- Roll, Butter, and Fill the Dough: On a lightly floured surface, roll each half of the dough into a 9 x 12-inch rectangle. Spread each rectangle with half of the remaining butter (ensure the remaining butter from the dough preparation step is used here, divided equally), then sprinkle each evenly with half of the cinnamon sugar mixture.
- Roll, Slice, and Arrange: Starting with the long side, tightly roll each rectangle into a log. Using a sharp knife or dental floss, cut one log into 12 even pieces. Place these cut pieces, spiral side down, into one of the prepared cake pans filled with glaze. Repeat this process with the second dough log, filling the second pan.
- Second Rise: Cover both pans loosely with plastic wrap. Let them rise again in a warm area until the buns have doubled in size, which should take approximately 1 hour.
- Preheat Oven: While the buns are on their second rise, preheat your oven to 375ºF (190°C).
- Bake to Golden Perfection: Bake the sticky buns in the preheated oven for about 30 minutes, or until they are golden brown on top and the glaze is bubbly. If you notice them browning too quickly, you can reduce the oven temperature to 325ºF (160°C) for the last 10 minutes, as I did to prevent over-browning.
- Invert and Serve: Carefully run a knife around the perimeter of each pan to loosen the buns. Immediately invert each pan onto a serving platter or wire rack. Allow them to cool for about 30 minutes before serving warm, ensuring the sticky glaze sets slightly but remains wonderfully gooey.
Notes
These finger-licking good Maple Syrup Sticky Buns were lovingly adapted from the “Ultimate Sticky Buns” recipe by Bon Appetit, with a special emphasis on pure maple syrup for an enhanced flavor profile.
Nutrition Information:
Serving Size:
2 rolls
Amount Per Serving:
Calories: 516Total Fat: 22gSaturated Fat: 13gTrans Fat: 1gCholesterol: 82mgSodium: 245mgCarbohydrates: 74gFiber: 2gSugar: 39gProtein: 8g
HOW MUCH DID YOU LOVE THIS RECIPE?
Please leave a comment on the blog or share a photo on Pinterest and tag us!
Disclosure: I received samples of pure maple syrup courtesy of The Federation of Quebec Pure Maple Syrup Producers, but the opinions stated in this post are entirely my own. I was not compensated in any additional way for writing this post, ensuring an honest review of this delightful ingredient.