
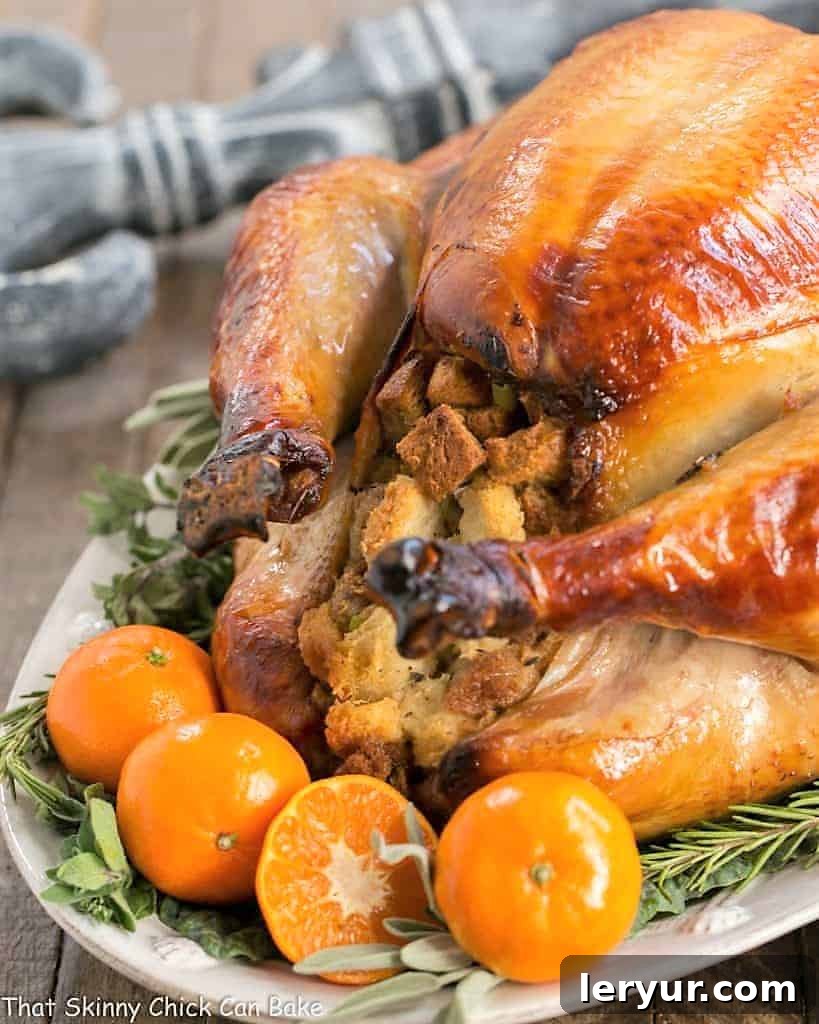
Imagine a Thanksgiving turkey so flavorful and moist, it becomes the star of your holiday feast. Years ago, a friend shared her secret: a game-changing Honey Brined Turkey Recipe that promised succulent meat, never dry. Intrigued, I meticulously noted the details of this revolutionary Turkey Brine Recipe and embarked on a culinary journey that has since transformed my holiday roasts into masterpieces of mahogany perfection. This method ensures every bite of your bird is infused with rich flavor and unparalleled tenderness, making it an unforgettable centerpiece for any special occasion.
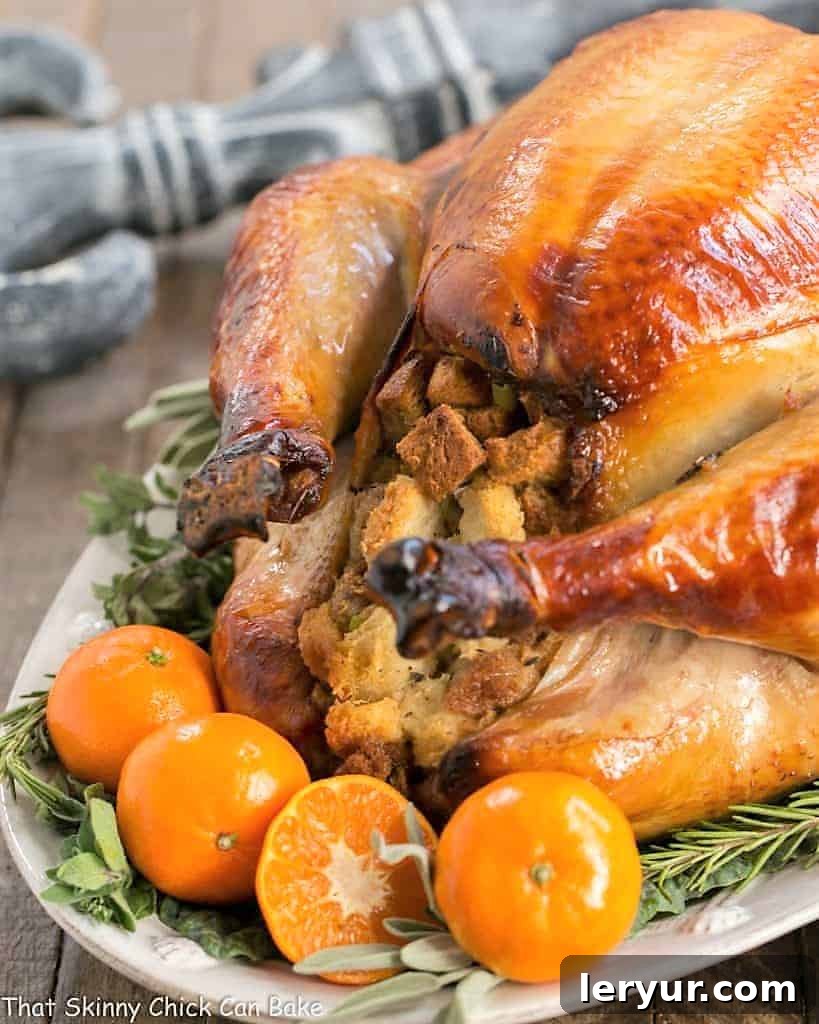
Why This Honey Brined Turkey Recipe Is a Must-Make for Your Holidays
For years, the quest for a perfectly moist and flavorful holiday turkey felt like a daunting challenge. The fear of a dry bird often overshadowed the joy of the feast. That was until I discovered the power of brining, specifically this incredible Honey Brined Turkey recipe. Here’s why this recipe deserves a permanent spot in your holiday cooking repertoire:
- Unrivaled Moisture and Tenderness: Brining works wonders, especially for the often-dry white meat of a turkey. By immersing the bird in a seasoned liquid, the brine’s salt initiates a process called osmosis, allowing moisture to penetrate deep into the muscle fibers. This not only plumps up the meat but also helps to denature proteins, resulting in an incredibly tender and juicy bird from breast to thigh. This method virtually guarantees that your turkey will be succulent, eliminating any worries about dryness.
- A Symphony of Sweet and Savory Flavors: This isn’t just any turkey brine; it’s a carefully balanced blend of pantry staples that creates a complex flavor profile. The molasses and honey infuse the turkey with a subtle sweetness and contribute to its stunning, rich mahogany skin during roasting. Soy sauce adds a crucial umami depth—the “fifth taste” that makes food incredibly satisfying and savory. This perfect marriage of sweet and salty creates a delectable flavor that permeates every fiber of the meat, elevating your holiday turkey far beyond ordinary.
- Achieve a Visually Stunning Roast: Beyond flavor, the combination of molasses and soy sauce is key to achieving that coveted, deep golden-brown exterior. The sugars in the brine caramelize beautifully in the oven, giving your turkey an irresistible, glossy sheen that looks as good as it tastes. Your guests will be impressed before they even take the first bite.
- All-Natural Goodness, From Your Kitchen: Unlike many pre-brined turkeys found in grocery stores, this homemade brine relies solely on natural, wholesome ingredients. You have complete control over what goes into your turkey, free from artificial additives or preservatives. This ensures a healthier and more authentic flavor experience that you can feel good about serving to your family and friends.
- Simplicity with Professional Results: Despite its gourmet taste and appearance, this turkey brine is surprisingly simple to prepare. The ingredients are readily available, and the process is straightforward, making it accessible for home cooks of all skill levels. With minimal effort, you can achieve results that taste like they came from a professional kitchen.
If you’re looking for an alternative to wet brining, my Dry Brined Turkey recipe is also a fabulous option, offering incredible flavor with less mess! For a smaller gathering or a lighter holiday meal, this Grilled Turkey Breast provides a wonderfully flavorful and convenient solution.
Key Ingredients for Your Perfect Turkey Brine
Crafting the ultimate turkey brine starts with understanding the role each ingredient plays. This honey brine recipe uses a simple yet powerful combination of staples to deliver incredible moisture, flavor, and color to your holiday bird. Here’s a closer look at the essential components:
- Kosher Salt: The cornerstone of any effective brine. Kosher salt, with its larger crystal size, dissolves gradually and is easier to measure accurately than fine table salt, which can make your brine overly salty. The salt is crucial for facilitating osmosis, drawing moisture and flavor deep into the turkey’s cells, breaking down muscle fibers for tenderness, and helping to season the meat from within.
- Hot Water: Essential for dissolving the kosher salt and ensuring a uniform brine solution. Starting with hot water allows the salt crystals to fully dissipate quickly, creating a perfectly balanced liquid. You’ll then cool this solution before adding the turkey.
- Molasses: This dark, rich syrup contributes significantly to both the flavor and the visual appeal of your turkey. It offers a deep, complex sweetness with slightly smoky undertones, which pairs beautifully with poultry. More importantly, the sugars in molasses caramelize during roasting, giving the turkey skin a gorgeous, deep, bronzed hue that is incredibly appetizing.
- Soy Sauce: Far more than just a source of sodium, soy sauce is a powerhouse of umami. Umami is the savory “fifth taste” that adds depth, richness, and a meaty complexity to dishes. Its presence in the brine amplifies the turkey’s natural flavors, making them more pronounced and satisfying. It also contributes to the beautiful browning of the skin.
- Honey: Another key sweetener, honey introduces a different kind of sweetness – floral, aromatic, and distinctly flavorful. It complements the molasses beautifully, adding another layer of complex taste to the brine. Like molasses, honey’s sugars aid in the caramelization process, enhancing the turkey’s golden-brown crust.
- Ice: Crucial for rapidly cooling down the hot brine solution before you introduce the turkey. Adding a large quantity of ice ensures the brine reaches a safe, cold temperature quickly, preventing any premature cooking or bacterial growth. As the ice melts, it also helps to dilute the brine to its ideal concentration, ensuring the perfect balance of saltiness.
- Turkey: The star of the show! Ensure your turkey is completely defrosted before brining. A partially frozen turkey will not absorb the brine effectively, leading to uneven seasoning and texture. For optimal results, plan ahead for proper thawing time in the refrigerator (approximately 24 hours per 4-5 pounds).
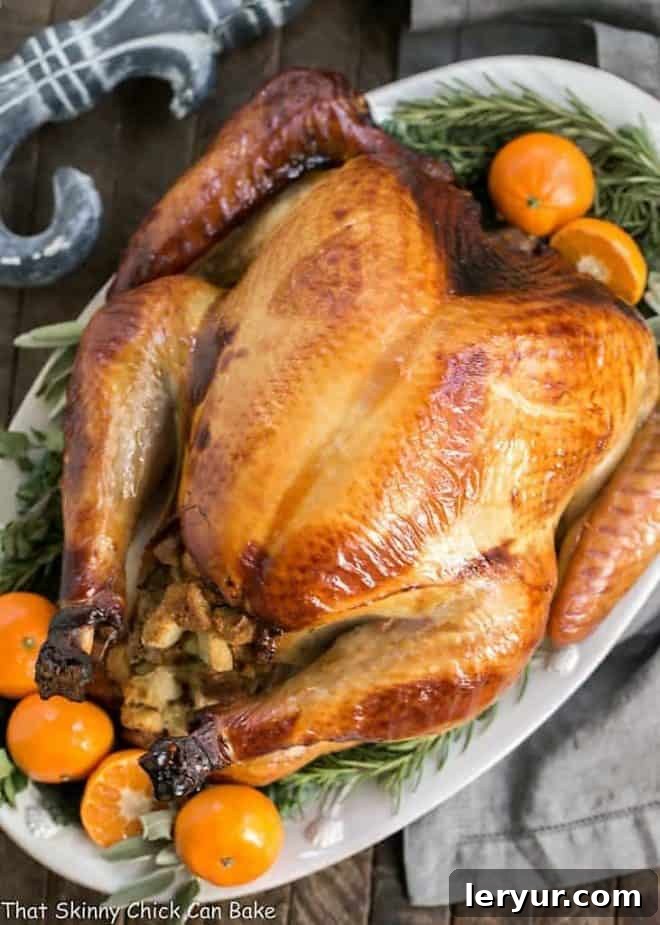
Mastering the Art of Brining: Essential Expert Tips
Brining a turkey is a straightforward process, but a few expert tips can elevate your results from good to absolutely phenomenal. Having made this simple turkey brine recipe for years, I’ve gathered insights that will help you achieve a moist, succulent, and perfectly bronzed bird every time. For instance, one Thanksgiving, I found myself with barely enough mild molasses and had to supplement with blackstrap molasses, which is significantly darker and has a much stronger taste and smell. I was concerned it would overpower the turkey, but to my pleasant surprise, the finished bird was still wonderful. While the turkey skin took on a deeper, more intense color from the robust brine, the meat remained incredibly moist and succulent, perfectly balancing the bronzed exterior.
- Preventing Leaks – Double Bagging is Key: A leaky brining bag can quickly turn your kitchen into a sticky disaster, as I unfortunately discovered during a re-test of this recipe. To avoid this common pitfall, invest in an extra-large, heavy-duty turkey brine bag. Even better, double-bag your turkey. Place the filled brine bag inside another bag to create an extra layer of protection against punctures or tears, ensuring your brine stays where it belongs.
- Optimal Brine Mixing Order: Start by pouring hot water into your brining container or bag. Then, add the kosher salt. The heat helps the salt dissolve much more quickly and completely. Once the salt is fully dissolved, you can incorporate the molasses, soy sauce, and honey, mixing thoroughly until everything is well combined. This sequence ensures an evenly distributed brine.
- Customizing Your Brine with Aromatics: While the basic honey brine is fantastic on its own, feel free to personalize it with aromatics and herbs. Consider adding bay leaves, whole peppercorns, fresh rosemary sprigs, thyme, sliced oranges or lemons, or even garlic cloves for an extra layer of flavor complexity. These additions infuse subtle notes into the turkey without overpowering the main honey-molasses profile.
- Cooling the Brine is Crucial for Safety: Never add your turkey to a hot or warm brine. This can begin to cook the outer layers of the meat, resulting in a rubbery texture and creating a food safety hazard. After mixing the hot water and dissolved salt, allow the brine to cool down significantly, either by letting it sit at room temperature for an hour or two (then chilling in the fridge) or by adding a substantial amount of ice directly to the mixture. The brine should be thoroughly chilled before the turkey is introduced.
- Brining Duration – Finding the Sweet Spot: The ideal brining time for most turkeys is typically between 12 to 18 hours, or simply overnight. This window allows ample time for the brine to penetrate the meat thoroughly, ensuring maximum juiciness and flavor. Brining for too short a period (e.g., less than 8 hours) may not yield optimal results, while brining for excessively long (over 18-24 hours) can make the turkey overly salty and potentially alter the meat’s texture, making it slightly mushy. Aim for that perfect balance.
- Temperature Control: Refrigeration or Cooler: Food safety dictates that your turkey must remain at a safe temperature (below 40°F / 4°C) throughout the entire brining process. If you have enough space, brining the bird in the refrigerator is the safest and most convenient option. However, on Thanksgiving, refrigerator real estate is precious. A large, clean cooler filled generously with ice is an excellent alternative. Ensure you have enough ice to submerge the turkey completely and monitor the ice level, adding more as it melts to maintain a consistently cold environment.
- Trussing for Even Roasting: To help your turkey roast more evenly, especially for a visually appealing presentation, consider trussing it. Trussing involves tying the legs together and securing the wings tight against the body of the turkey, typically with butcher’s twine. This technique compacts the bird, preventing the wing tips and leg ends from drying out or overcooking before the breast is done.
- Achieving a Perfect Golden Crust: When roasting your brined turkey, keep a close eye on the skin. As soon as it develops that gorgeous golden-brown color you desire, cover the turkey loosely with heavy-duty aluminum foil. This prevents the skin from over-browning or burning while allowing the internal meat to continue cooking to the perfect temperature.
- Stuffing Considerations: If you choose to stuff your turkey, remember that the stuffing will absorb some of the brined turkey’s juices, which can be saltier than usual. Adjust your stuffing recipe accordingly, perhaps reducing the added salt. Always check the temperature of the stuffing (it should reach 165°F / 74°C) before considering your bird done.
- PRO-Tip: Last-Minute Flavor Boost with Turkey Injection: If you find yourself short on time and haven’t brined your turkey, don’t despair! You can still infuse incredible flavor and moisture directly into the meat using an easy Turkey Injection recipe. This method allows you to directly infuse seasonings, like a Cajun spice blend or a savory butter mixture, into the breast and thigh meat just before roasting. It’s a fantastic way to ensure a flavorful and moist bird even without a pre-brine.
- The Importance of Patting Dry and Air Drying: After removing your turkey from the brine, drain it thoroughly and pat it completely dry with paper towels. For the crispiest skin imaginable, consider placing the patted-dry turkey on a rack in a roasting pan and refrigerating it uncovered for 4-6 hours, or even overnight. This air-drying process draws out surface moisture, leading to incredibly crisp skin once roasted.
- Resting Your Turkey: Just as crucial as brining and roasting, resting the turkey after it comes out of the oven is vital. Tent it loosely with foil and let it rest for at least 20-30 minutes (or even up to an hour for larger birds) before carving. This allows the juices to redistribute throughout the meat, ensuring every slice is as moist and flavorful as possible.
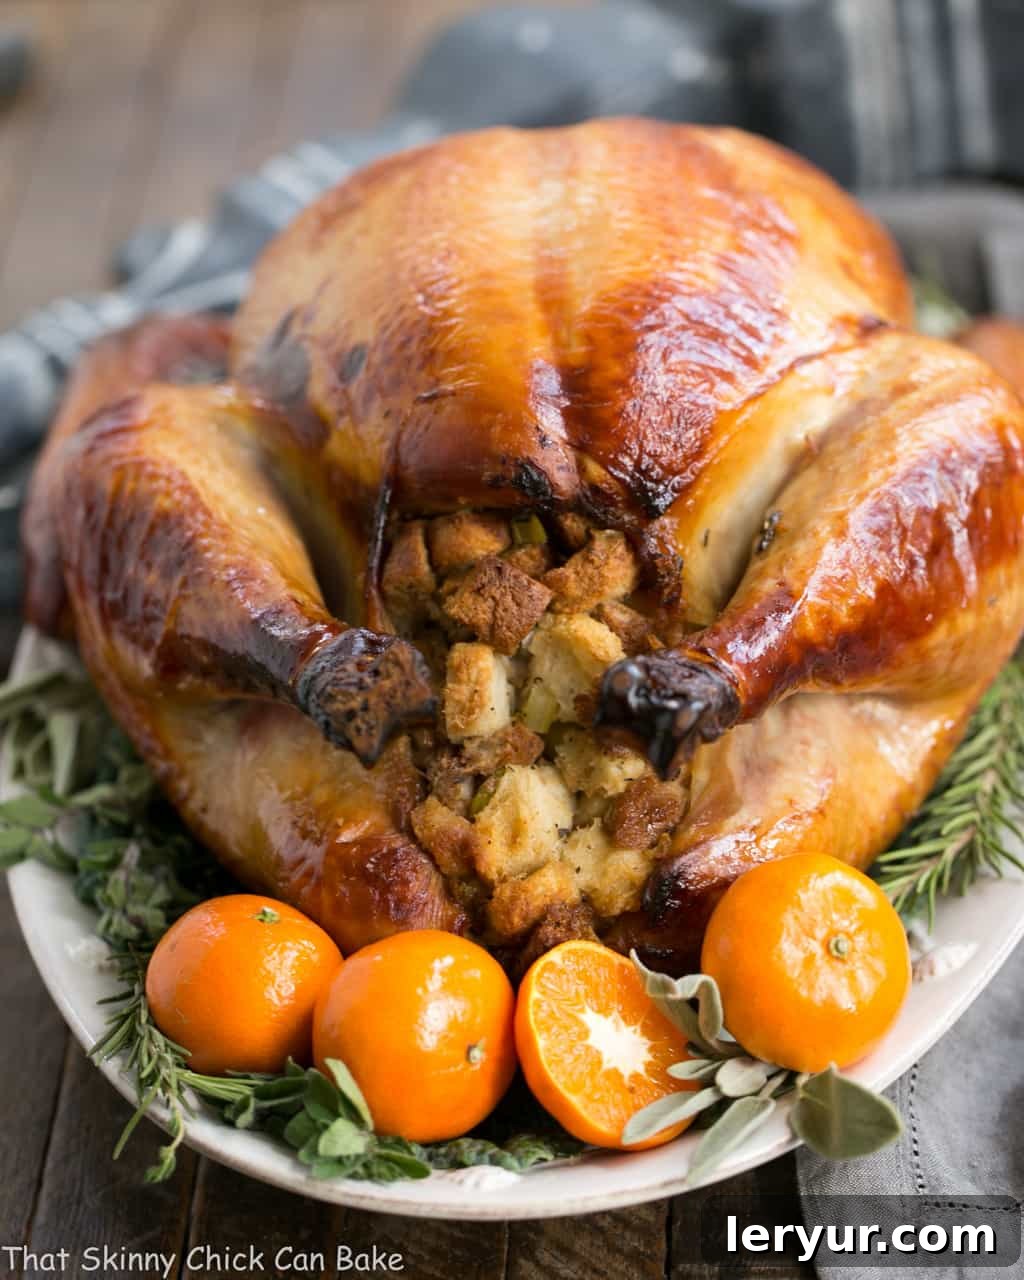
Frequently Asked Questions About Brining Turkey
Brining is a culinary technique rooted in science, primarily the process of osmosis and diffusion. When you submerge meat in a brine solution—a liquid heavily concentrated with salt—the salt from the brine begins to infuse into the less salty turkey cells. Through osmosis, water is drawn into the turkey’s muscle fibers, causing them to plump up. Additionally, the salt helps to denature (unravel) the proteins in the meat. These unwound proteins then trap more moisture within the cells, preventing it from being squeezed out during the cooking process. The result is a turkey that is not only incredibly juicy but also seasoned deeply from within. A significant advantage of brining your own turkey at home is that it relies solely on wholesome, natural ingredients, avoiding any unwanted chemicals often found in commercially pre-brined birds.
For a wet brine like this honey brined turkey recipe, the ideal brining time for most turkeys (typically 12-16 pounds) ranges from 8 to 18 hours. This window allows sufficient time for the salt and flavors to penetrate the meat without over-salting or compromising the texture. If you brine a turkey for too long, say beyond 24 hours, the meat can become excessively salty, and its texture may suffer, potentially becoming mushy or spongy. Larger turkeys might benefit from the longer end of this range, while smaller birds require less time. Keep in mind that this timing applies to wet brining; dry brining is a different process that typically requires a few days to fully infuse the turkey.
While brines can be customized with various aromatics and sweeteners, the fundamental ratio for a basic wet brine is 1 tablespoon of kosher salt for each cup of water or other liquid. It is absolutely crucial to use kosher salt (or another coarse salt like sea salt) instead of standard table salt. Table salt crystals are much finer and denser, meaning that 1 tablespoon of table salt contains significantly more sodium than 1 tablespoon of kosher salt. Using table salt at this ratio will result in a brine that is far too salty, potentially ruining your turkey. Always stick to kosher salt for consistent and delicious results.
While salt and water form the foundation, the beauty of homemade brine lies in its versatility. Besides the core ingredients of salt, water, and sugar (which can be granulated white sugar, brown sugar, molasses, or honey, as in this recipe), there’s a world of tasty additions to explore. You can significantly enhance the flavor profile by incorporating a variety of herbs such as fresh rosemary, thyme, sage, and bay leaves. Spices like whole peppercorns, coriander seeds, mustard seeds, or even a pinch of red pepper flakes can add warmth and complexity. Citrus elements, such as sliced oranges, lemons, or their zest, contribute brightness. For a savory depth, consider garlic cloves (smashed) or sliced onions. Each addition subtly infuses the turkey with its unique essence, creating a more nuanced and unforgettable holiday bird.
Absolutely, maintaining a safe temperature is paramount during the brining process. It is critical that your turkey remains refrigerated (at or below 40°F / 4°C) while it is brining to prevent the growth of harmful food-borne bacteria. If your refrigerator space is limited, especially during holiday cooking, a large, insulated cooler filled generously with ice can serve as an excellent alternative. Ensure the turkey is fully submerged in the brine and surrounded by ice. You’ll need to regularly monitor the ice level and add more as needed to guarantee a consistently cold environment throughout the entire brining duration.
No, there is generally no need to rinse your brined turkey before roasting. In fact, rinsing can be counterproductive for a few reasons. First, it can wash away some of the flavorful brining liquid that has seasoned the surface of the skin. Second, rinsing raw poultry under running water can spread bacteria around your kitchen sink and countertops, a phenomenon known as cross-contamination. Instead of rinsing, simply remove the turkey from the brine, allow it to drain well, and then thoroughly pat it dry with paper towels. For the crispiest skin, you can even let the turkey air dry uncovered in the refrigerator for 4-6 hours (or overnight) after patting it dry.
Roasting a brined turkey follows a similar method to an unbrined one, with a few key considerations to maximize its juicy potential and crispy skin. Begin by preheating your oven to a high temperature, typically 425°F (220°C), for the initial browning phase. Place your well-drained and patted-dry turkey in a sturdy roasting pan. After about 20-30 minutes, once the skin has started to develop a beautiful golden hue, immediately decrease the oven temperature to 350°F (175°C) for the remainder of the cooking time. You can baste the turkey occasionally with a combination of melted butter and white wine, or just its own pan drippings, to keep the skin moist and promote browning. Once the skin achieves its desired gorgeous, brown lacquer, loosely tent the turkey with heavy-duty aluminum foil to prevent it from burning while the interior cooks. The turkey is done when a meat thermometer inserted into the thickest part of the thigh (without touching bone) registers 165°F (74°C). The best turkey brine, like this honey brine, truly creates delicious results, delivering a succulent and flavorful holiday turkey every single time!
While a few items make the process easier, you likely have most of what you need. Essential equipment includes an extra-large brining bag or a food-grade container large enough to fully submerge your turkey (a clean cooler works perfectly for larger birds and temperature control). A sturdy roasting pan is crucial for the oven. A reliable meat thermometer is indispensable for ensuring the turkey reaches a safe internal temperature. Optional but helpful tools include a turkey baster, butcher’s twine for trussing, and a cutting board with a well to catch juices when carving.
No, you should never brine a frozen or partially frozen turkey. For the brine to effectively penetrate and season the meat, the turkey must be completely defrosted. Brining a frozen turkey will result in uneven seasoning and potentially unsafe conditions as the turkey thaws slowly in the brine. Always ensure your turkey is fully thawed in the refrigerator before starting the brining process. Plan for approximately 24 hours of thawing time per 4-5 pounds of turkey.
If you’ve purchased a turkey labeled as “pre-brined,” “self-basting,” “enhanced,” or injected with a solution, you should generally avoid brining it again. These turkeys have already been treated with a saline solution to add moisture and flavor. Adding another brine can result in an excessively salty bird with a rubbery or unappetizing texture. Always check the label of your turkey; if it contains a solution, skip the brining step and proceed directly to seasoning and roasting.
Complement Your Turkey with These Delicious Holiday Side Dishes:
- No Boil Slow Cooker Mashed Potatoes from Spend with Pennies – The perfect creamy accompaniment with minimal effort.
- Shredded Brussels Sprouts Recipe with Pistachios, Cranberries, and Parmesan from Cookin’ Canuck – A vibrant and flavorful vegetable dish.
- The Best Thanksgiving Stuffing Recipe from Fifteen Spatulas – A classic, aromatic side that pairs wonderfully with turkey.
- Spinach Souffle – A light and airy side dish that adds elegance to your meal.
- Praline Topped Sweet Potato Casserole – A decadent and sweet staple for the holiday table.
- Best Holiday Side Dish Recipes – Explore a collection of top-rated sides to complete your feast.
- Plus more Holiday Recipes – Discover additional festive dishes for any celebration.
Stay connected and share your culinary creations with me! Follow on social media @ Instagram, Facebook, and Pinterest. Don’t forget to tag me when you try one of my recipes! If you love the results, please consider leaving a 5-star rating in the recipe card below to help others discover this delicious recipe.
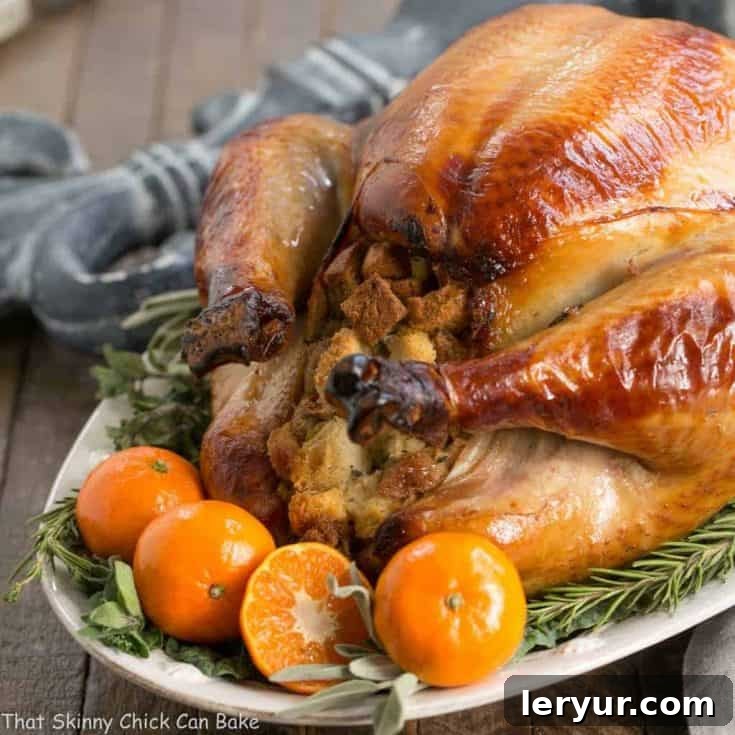
Honey Brined Turkey Recipe
15 minutes
3 hours
3 hours 15 minutes
16 servings
The perfect way to get succulent meat from your holiday turkey, ensuring every slice is bursting with flavor and moisture!
Ingredients
For the Honey Brine:
- 1 pound kosher salt
- 6 quarts hot water
- 1 cup molasses
- 1 cup soy sauce
- 1 cup honey
- 5 pounds of ice
- 16-pound turkey, defrosted (any size will work, adjust brine and cooking time accordingly)
Instructions
- Prepare the Brine Base: In an extra-large, heavy-duty brining bag (or a large food-safe container), pour the hot water. Add the kosher salt and agitate the bag or stir well to help dissolve the salt completely. Ensure no salt crystals remain.
- Add Flavorings: Once the salt is dissolved, add the molasses, soy sauce, and honey to the liquid. Mix thoroughly until all ingredients are fully combined and the brine is uniform.
- Chill the Brine: Add the 5 pounds of ice to the brine mixture. Stir until the ice melts and the entire brine solution is thoroughly chilled. It is crucial for the brine to be cold before adding the turkey to prevent any cooking or bacterial growth.
- Brine the Turkey: Carefully place the defrosted turkey (with giblets removed) into the chilled brine solution within the bag. Ensure the turkey is completely submerged. Seal the brining bag securely with a twist tie, expelling as much air as possible.
- Refrigerate or Cooler: Place the sealed brining bag in a large cooler filled with additional ice to keep it cold, or in the refrigerator (preferably in a large pan to catch any potential leaks). Allow the turkey to brine for 12 to 18 hours or overnight for optimal flavor and moisture. Do not brine for longer than 24 hours to avoid over-salting.
- Prepare for Roasting: After brining, remove the turkey from the bag. Discard the brine. Drain the turkey well and thoroughly pat it dry, inside and out, with paper towels. For extra crispy skin, you can place the patted-dry turkey on a rack in a roasting pan and refrigerate it uncovered for 4-6 hours (or overnight) to air dry before roasting. Roast as desired, following your preferred turkey roasting method.
Notes
Recipe adapted from my friend, Mary Ann.
Roasting time will vary depending on the size of your turkey and your oven. Always use a meat thermometer to ensure proper doneness (165°F / 74°C in the thickest part of the thigh, not touching bone).
The provided calories and nutrition information are an approximation and may not be 100% accurate because the amount of salt, honey, and molasses that is actually absorbed from the brining liquid will vary.
Due to the molasses and soy sauce in the brine, the turkey skin will take on a deeper, darker color than an unbrined turkey. The meat itself may also appear slightly darker, but rest assured, it will still taste wonderfully flavorful and succulent.
Recommended Products for Brining & Roasting
As an Amazon Associate and member of other affiliate programs, I earn from qualifying purchases.
- Roasting Pan
- Brining Bags
- OXO Turkey Baster
Nutrition Information:
Yield:
16
Serving Size:
1
Amount Per Serving:
Calories: 991
Total Fat: 34g
Saturated Fat: 10g
Trans Fat: 0g
Unsaturated Fat: 22g
Cholesterol: 494mg
Sodium: 12355mg
Carbohydrates: 34g
Fiber: 0g
Sugar: 33g
Protein: 131g
This nutritional info is skewed as you will not be consuming the entire brining liquid.
HOW MUCH DID YOU LOVE THIS RECIPE?
Please leave a comment on the blog or share a photo on Pinterest