
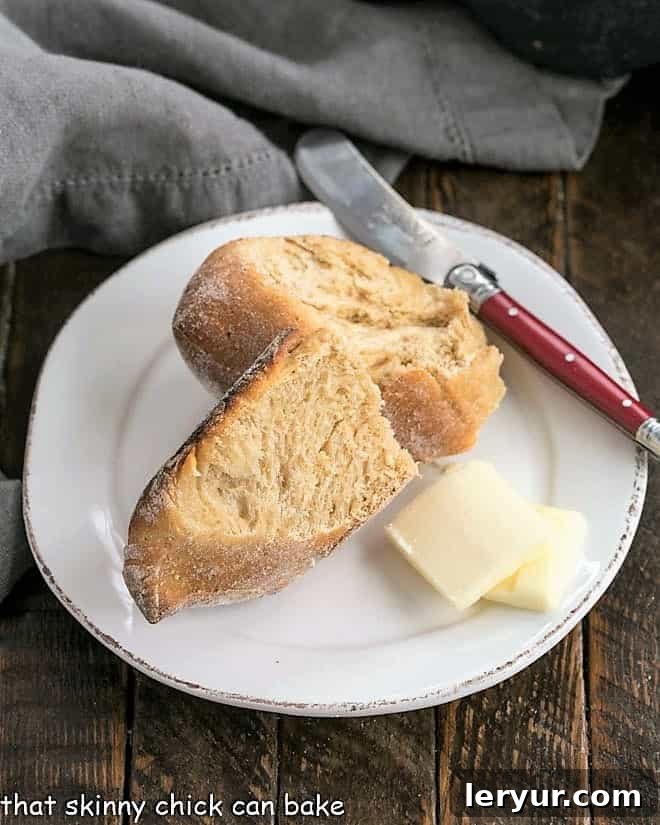
This Honey Whole Wheat Bread Wreath is more than just a beautiful centerpiece; it’s a testament to the joy of homemade baking. While it looks stunning on any holiday table, this surprisingly easy bread recipe offers a delicious, comforting experience all year round.
My family absolutely raved about this particular Whole Wheat Bread Recipe when I recently baked it. There’s something truly magical about a slice of this tender, slightly sweet loaf, especially when enjoyed with a generous smear of cool, melting butter. The inviting aroma alone fills the kitchen with warmth and cheer, making any day feel a little more special. Whether it’s a festive gathering or a cozy weekend breakfast, this bread promises to be a beloved addition to your table.
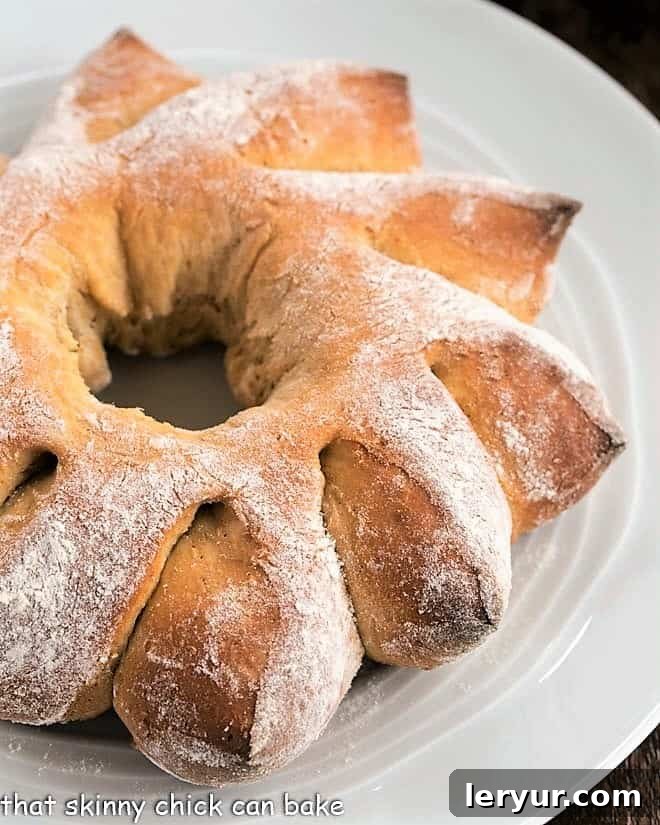
Honey Wheat Bread: A Festive & Flavorful Creation
As the holiday season approaches, there’s an undeniable charm in spending time in the kitchen, crafting delicious treats and baking fresh bread. Few things evoke such a comforting feeling as the intoxicating aroma of freshly baked yeast bread wafting through your home. This particular recipe yields a subtly sweet, hearty honey whole wheat bread that is ingeniously sliced before its second proofing and baking. This simple technique transforms a classic loaf into a stunning, impressive wreath shape, making it an ideal choice for festive occasions, brunches, or simply to elevate your everyday meals.
The Health Benefits of Whole Wheat Bread: Is It Good For You?
When considering the nutritional value of bread, whole wheat bread generally stands out as a healthier choice compared to varieties made solely with refined white flour. Whole grains, by definition, retain all parts of the grain kernel—the bran, germ, and endosperm—which are packed with essential nutrients. This means whole wheat bread typically boasts a higher content of dietary fiber, B vitamins, iron, magnesium, and selenium.
The increased fiber content in whole wheat bread is particularly beneficial. Fiber aids in digestion, helps maintain bowel regularity, and can contribute to a feeling of fullness, which might assist in weight management. It also plays a role in stabilizing blood sugar levels, preventing the rapid spikes often associated with refined carbohydrates. However, it’s important to remember that even with its health advantages, whole wheat bread is still a source of carbohydrates and calories. Therefore, it should be consumed in moderation as part of a balanced diet. It’s a nourishing choice, but not a “diet food” in itself.
Understanding Calories in Whole Wheat Bread
The caloric content of whole wheat bread can vary significantly depending on several factors, including the specific recipe, the percentage of whole wheat flour used, and the addition of sweeteners like honey or brown sugar, as well as fats. In this particular recipe, designed to make three beautiful wreaths, if each wreath is sliced into 8 generous pieces, each slice contains approximately 215 calories. This figure, however, is for the bread alone. Keep in mind that adding delicious toppings such as butter, jam, cream cheese, or various spreads will increase the total caloric intake per serving. Always consider your serving size and any accompaniments when calculating your nutritional intake.
Crafting the Perfect Bread Wreath: A Step-by-Step Guide
The inspiration for this whole wheat bread wreath was born from a delightful combination of circumstance and culinary curiosity. I had just printed a recipe for honey whole wheat rolls when a wonderful delivery of baking ingredients arrived at my doorstep. Serendipitously, among the holiday gifts from Hodgson Mill was the very whole wheat pastry flour I needed for the bread. Around the same time, I discovered a captivating wreath shaping technique on artisanbreadinfive.com, sparking an immediate desire to try it. It felt like destiny – this whole wheat bread recipe was meant to be brought to life!
Creating this stunning bread wreath is simpler than it looks, and the technique adds a touch of artisanal flair to your homemade bread. Here’s a detailed breakdown of the process:
- Prepare the Dough: Begin by thoroughly mixing your dough according to the recipe instructions. Once mixed, allow the dough to undergo its initial rise until it has doubled in size. This crucial step develops flavor and texture. After the first rise, gently punch down the dough to release the air.
- Form the Base: Carefully remove a one-pound portion of the dough. This will be the foundation for your wreath. Shape this piece of dough into a smooth ball, then gently flatten it into a thick disc. The next step is to create the central opening: use your fingers to punch a large hole in the middle of the flattened dough. Stretch the dough carefully to enlarge this opening, aiming for a few inches across. Much like making bagels, it’s important that the opening is sufficiently wide, as the springy dough will naturally want to shrink back slightly during handling.
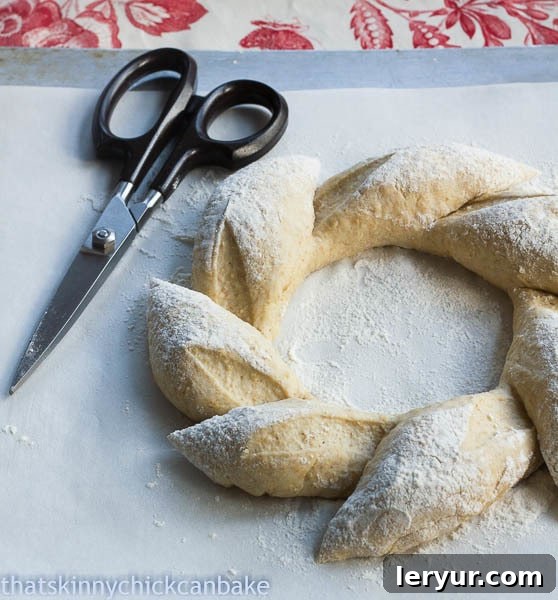
- Sculpt the Wreath Shape: Once you have a ring of dough, place it on a prepared baking sheet. Using kitchen shears or a very sharp knife, make even cuts nearly all the way through the ring at regular intervals around its circumference. These cuts will create individual “points.” After cutting, gently pull and slightly twist each point away from the center of the ring. This action not only creates the distinctive wreath shape but also exposes more surface area, resulting in a beautifully rustic texture once baked.
- Final Proof and Bake: After shaping, allow your sculpted wreath to rise again. This second proofing is vital for achieving a light, airy texture. Once it has sufficiently risen and appears visibly puffy, it’s ready to be baked in a preheated oven until golden brown and cooked through.
This hands-on process is incredibly rewarding, culminating in a loaf that is as much a feast for the eyes as it is for the palate.
The Simplicity and Elegance of This Honey Wheat Bread
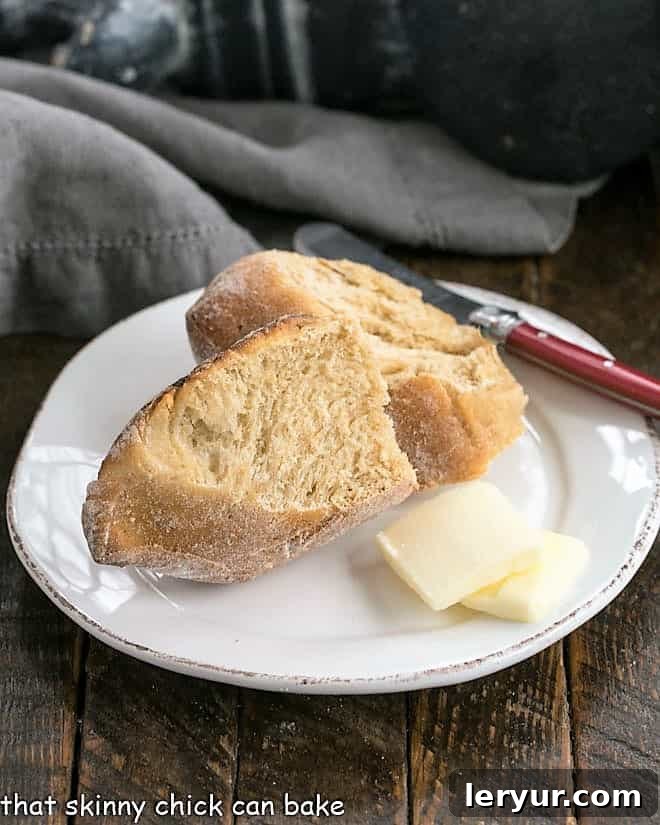
Despite its impressive appearance, this Honey Wheat Bread is remarkably simple to prepare, making it accessible even for novice bakers. The lovely presentation it offers is truly a bonus. Next time I bake, I might experiment with making more frequent slashes around the wreath to create an even more intricate design, but I was thoroughly delighted with the results of my initial attempt. I finally achieved a wheat bread with the perfect balance of sweetness – enough to satisfy without being overly sugary, allowing the wholesome flavor of the wheat to shine through.
Moreover, the subtle inclusion of oatmeal in the recipe contributes an indescribable quality. Whether it enhances the flavor profile, adds a delightful chewiness to the texture, or both, it simply makes this bread exceptionally good. It adds a depth that elevates it beyond a standard whole wheat loaf, offering a truly comforting and satisfying eating experience. This bread is not just food; it’s a creation that brings joy and warmth to any table.
If you’re looking to explore more wholesome bread recipes, be sure to check out these delicious Whole Wheat Dinner Rolls. And for those who might feel a bit apprehensive about working with yeast, don’t worry! You can still enjoy the goodness of whole wheat with this fantastic Whole Wheat Molasses Quick Bread, which requires no yeast at all.
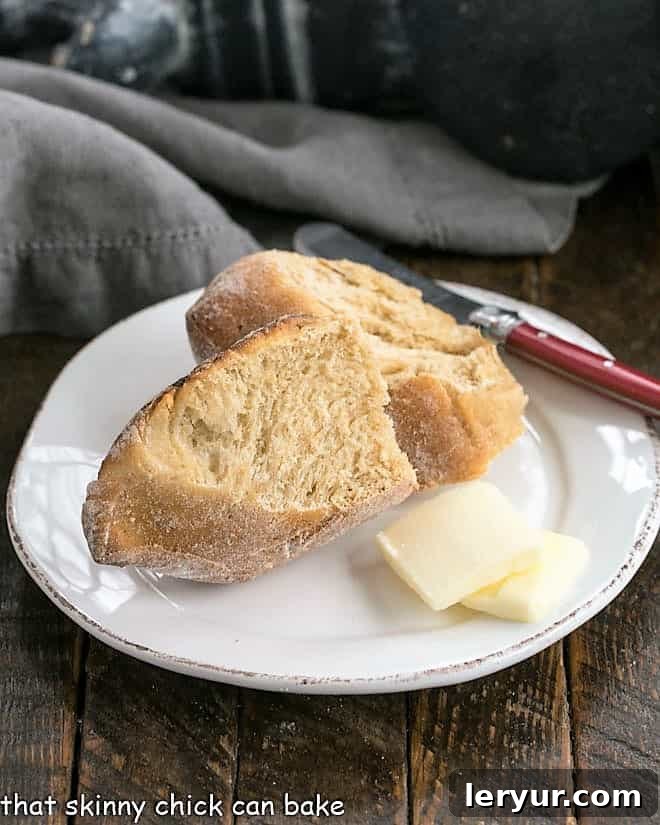
Honey Whole Wheat Wreath
45 minutes
30 minutes
1 hour 15 minutes
24 servings
A truly beautiful and delicious whole wheat bread, elegantly shaped like a wreath, perfect for any occasion.
Ingredients for Honey Whole Wheat Wreath
- 1 ¼ cup quick oats
- 1 cup boiling water
- 1 package active dry yeast (equivalent to 2 ¼ teaspoons)
- ¼ cup warm water (at approximately 110ºF or 43ºC, ideal for yeast activation)
- 1 ½ cups buttermilk (for added tenderness and flavor)
- 6 tablespoons honey (providing natural sweetness)
- 2 tablespoons brown sugar
- 3 tablespoons olive or canola oil (plus extra for greasing the bowl)
- 1 tablespoon salt
- 4 ½ cups all-purpose flour (plus additional for dusting the dough ring)
- 2 cups whole wheat pastry flour (for a lighter whole wheat texture)
Step-by-Step Instructions
- In a medium bowl, combine the quick oats with boiling water. Stir occasionally and let the mixture sit for 10 minutes, allowing the oats to soften and absorb the liquid.
- In a separate small bowl, gently dissolve the active dry yeast in the ¼ cup of warm water (110ºF). Allow it to sit undisturbed for about 5 minutes until it becomes foamy, indicating the yeast is active.
- Add the buttermilk, honey, brown sugar, and olive or canola oil to the softened oat mixture. Stir these ingredients together until well combined. The mixture may still appear somewhat lumpy due to the oats.
- Transfer the oat mixture into the bowl of a large stand mixer. Pour in the activated yeast mixture. Using the paddle attachment, mix on low speed until the lumps of oats begin to break apart and the ingredients are well incorporated.
- Switch from the paddle attachment to the dough hook. Add the salt, 3 cups of the all-purpose flour, and all of the whole wheat pastry flour to the mixer bowl.
- Knead the dough on low speed with the dough hook for approximately 10 minutes, or until the dough becomes smooth and elastic. You may need to reposition the dough occasionally to ensure even kneading. If the dough seems too sticky, you can add up to ½ cup more all-purpose flour, one tablespoon at a time, until the desired consistency is reached. Alternatively, the dough can be kneaded by hand on a lightly floured surface.
- Lightly grease a large clean bowl. Place the kneaded dough into the greased bowl, turning it once to coat. Cover the bowl loosely with greased plastic wrap and allow the dough to rise in a warm place until it has doubled in size, which typically takes about one hour.
- While the dough is rising, prepare a baking sheet by lining it with parchment paper to prevent sticking.
- Once the dough has risen, gently punch it down to release the air. Remove a one-pound portion of the dough to shape into a wreath. (The remaining dough can be used to make additional wreaths or traditional loaves of bread).
- Form the one-pound dough portion into a smooth ball. Then, create the wreath shape by gently punching through the middle of the dough ball with your fingers and stretching it outwards to form a central hole that is roughly three times the width of the dough ring itself. This wider hole will help maintain the wreath shape during baking.
- Carefully transfer the dough ring onto the prepared baking sheet. Lightly dust the top of the ring with a little all-purpose flour. Using clean kitchen scissors, make cuts nearly all the way through the ring at a sharp angle, creating distinct points around the circumference. After making each cut, gently reposition and twist the points slightly away from the center of the ring to define the wreath shape.
- Loosely cover the shaped wreath with greased plastic wrap. Allow it to undergo a second rise (proof) in a warm place until it has visibly doubled in size, which should take approximately ½ hour.
- Preheat your oven to 400ºF (200ºC) during the final stages of the second rise. Bake the wreath for 25-30 minutes, or until the bread is golden brown on top and reaches an internal temperature of 200ºF (93ºC) when measured with an instant-read thermometer.
- Once baked, carefully remove the Honey Whole Wheat Wreath from the oven and transfer it to a wire rack to cool completely before slicing and serving. This ensures the best texture and flavor.
Recipe Notes & Tips
This generous recipe yields enough dough to make approximately three individual wreaths or loaves, allowing you to enjoy fresh bread multiple times or share with loved ones. For optimal freshness, any unbaked dough can be refrigerated for up to 2-3 days or frozen for longer storage after the first rise.
This recipe has been thoughtfully adapted from a classic Cooking Light recipe, ensuring a balance of wholesome ingredients and delicious results.
Recommended Baking Essentials
As an Amazon Associate and member of other affiliate programs, I earn from qualifying purchases, helping support this site at no extra cost to you.
- Nicewell Food Scale: For precise ingredient measurements.
- Set of Glass Mixing Bowls: Essential for mixing and rising dough.
- Reynolds Cookie Baking Sheets Non-Stick Parchment Paper: For easy cleanup.
- USA Pan Bakeware Half Sheet Pan: Durable and reliable baking surface.
- Kitchen Shears: Perfect for shaping the wreath.
- KitchenAid Stand Mixer: A baking powerhouse for easy dough preparation.
Nutrition Information:
Yield:
24 servings
Serving Size:
1 slice
Amount Per Serving (estimated):
Calories: 215Total Fat: 2gSaturated Fat: 1gTrans Fat: 0gUnsaturated Fat: 1gCholesterol: 2mgSodium: 325mgCarbohydrates: 42gFiber: 3gSugar: 7gProtein: 7g
Thatskinnychickcanbake.com occasionally offers nutritional information for recipes contained on this site. This information is provided as a courtesy and is an estimate only. This information comes from online calculators. Although thatskinnychickcanbake.com attempts to provide accurate nutritional information, these figures are only estimates.
Varying factors such as product types or brands purchased can change the nutritional information in any given recipe. Also, many recipes on thatskinnychickcanbake.com recommend toppings, which may or may not be listed as optional and nutritional information for these added toppings is not listed. Other factors may change the nutritional information such as when the salt amount is listed “to taste,” it is not calculated into the recipe as the amount will vary. Also, different online calculators can provide different results.
To obtain the most accurate representation of the nutritional information in any given recipe, you should calculate the nutritional information with the actual ingredients used in your recipe. You are solely responsible for ensuring that any nutritional information obtained is accurate.
Share Your Love for This Recipe!
Did you enjoy baking this delightful Honey Whole Wheat Wreath? Please leave a comment on the blog below or share a photo of your beautiful creation on Pinterest – we’d love to see it!