
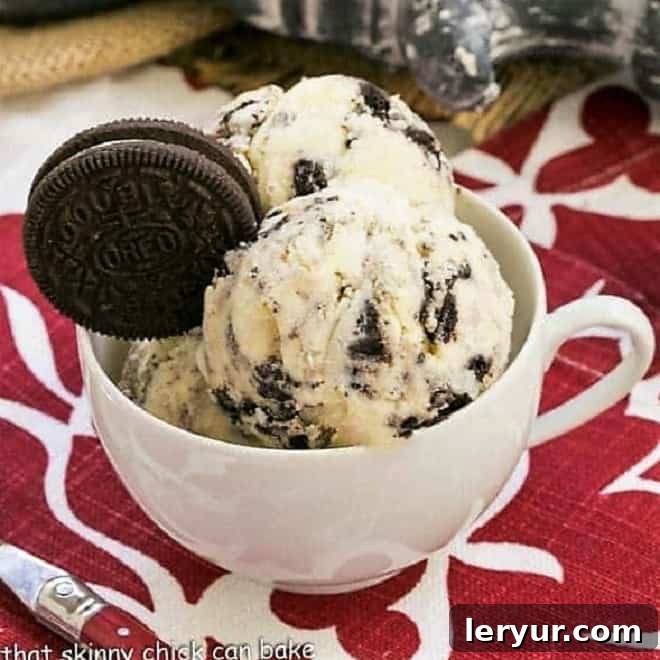
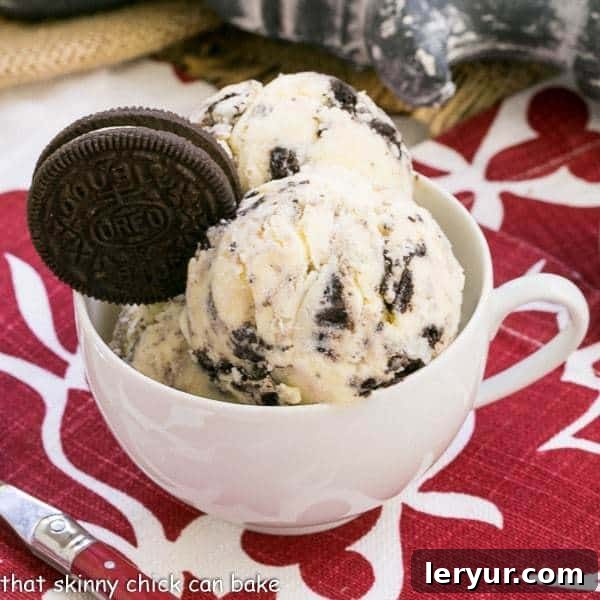
Welcome to the ultimate guide for crafting the most delectable Homemade Oreo Ice Cream! If your household, much like mine, reveres the classic crunch and creamy filling of Oreo cookies, then prepare yourself for a dessert experience that will be absolutely devoured. This isn’t just any ice cream; it’s a labor of love that transforms simple ingredients into a luxurious, rich, and intensely satisfying Cookies and Cream delight, bursting with generous chunks of America’s favorite cookie. Say goodbye to store-bought versions and hello to the fresh, customizable magic of homemade indulgence.
There’s something inherently comforting about a well-stocked pantry, especially when it includes a steady supply of Oreos. In our home, Double Stuf is the reigning champion, making it an effortless decision to whip up a batch of this beloved ice cream. The beauty of making it yourself lies in the freedom to load it with as many or as few crushed Oreos as your heart desires, ensuring every spoonful is tailored to perfection. This recipe isn’t just about making ice cream; it’s about creating memories and sharing joy, one creamy, crunchy bite at a time.
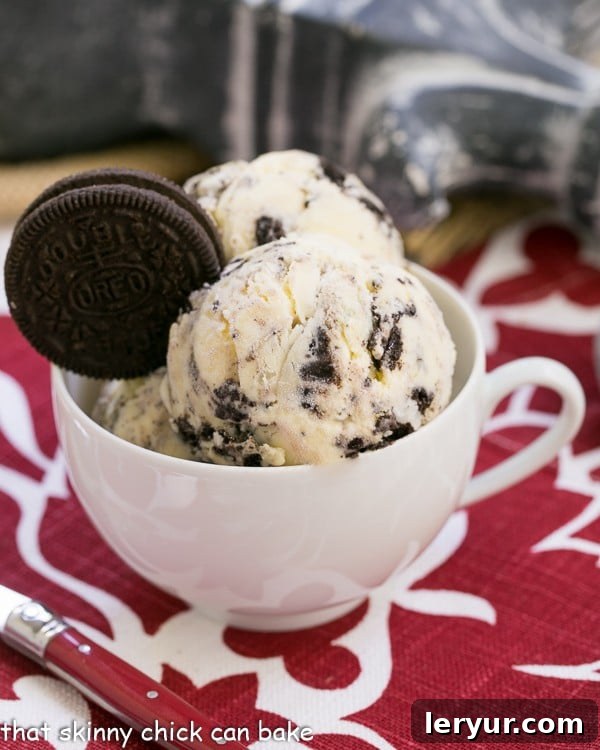
Why You Must Make This Creamy Oreo Ice Cream
Diving into the world of homemade ice cream opens up a realm of unparalleled flavor and satisfaction, especially when it comes to a classic like Cookies and Cream. Our Oreo Ice Cream recipe isn’t just another dessert; it’s an experience waiting to happen. Here’s why this recipe deserves a prime spot in your kitchen:
- A Guaranteed Family Favorite: If your family consists of devoted Oreo enthusiasts, prepare for widespread adoration. This ice cream will quickly become a recurring request, cherished by all ages for its familiar and comforting flavors.
- Unleash Your Inner Ice Cream Artist: The power of customization is truly in your hands. You dictate the cookie-to-cream ratio, ensuring every batch meets your exact preference. Love extra crunch? Add more Oreos! Prefer a subtle hint? Adjust accordingly.
- Endless Flavor Possibilities: While our recipe focuses on a rich vanilla base, the options don’t stop there. Feel free to experiment by swapping out the vanilla for a decadent chocolate ice cream base, or even a hint of mint for a refreshing twist. This adaptability makes the recipe a fantastic foundation for future ice cream adventures.
- Superior Freshness and Quality: Unlike mass-produced alternatives, homemade ice cream offers an unbeatable freshness. You control every ingredient, ensuring a high-quality dessert free from artificial preservatives and unknown additives.
- A Fun and Rewarding Project: Making ice cream at home is a wonderfully engaging culinary project. From tempering the custard to watching your ice cream maker churn, it’s a process that’s both educational and incredibly rewarding, culminating in a treat everyone will brag about.
Key Ingredients for the Best Oreo Ice Cream
Crafting exceptional ice cream begins with understanding the role of each ingredient. This French-style custard base provides a luxurious foundation for our Oreo masterpiece. Here’s what you’ll need and why each component is crucial:
- Egg Yolks: Essential for a truly rich, French-style custard ice cream. The yolks contribute to the incredible creaminess and smooth texture, preventing ice crystals from forming and giving the ice cream a velvety mouthfeel. Always opt for large, fresh eggs.
- Granulated Sugar: Beyond sweetness, sugar plays a vital role in the texture of ice cream. It lowers the freezing point, contributing to a softer, more scoopable consistency.
- Heavy Cream (at least 36% butterfat): This is non-negotiable for achieving that luxurious, full-bodied creaminess. The high-fat content is key to preventing iciness and creating a dense, rich texture that holds its form beautifully. Do not substitute with lighter creams, as the result will be less decadent.
- Whole Milk: While heavy cream provides richness, whole milk balances the fat content and contributes to the overall liquid volume of the base. Using whole milk (not skim or 2%) ensures the ice cream remains consistently creamy and flavorful. Lower fat milks will lead to a less creamy, more icy texture.
- Kosher Salt: A secret weapon in dessert making! A small amount of salt doesn’t make the ice cream taste salty; instead, it brilliantly enhances all the other flavors, especially the sweetness and the chocolatey notes of the Oreos. If using table salt, reduce the amount slightly (about ¾ of a ¼ teaspoon) as it’s finer and more concentrated.
- Real Vanilla Extract: The foundation of our classic vanilla base. Always use high-quality, pure vanilla extract for the best flavor. Imitation vanilla can leave an artificial aftertaste that detracts from the overall deliciousness. Consider using vanilla bean paste for an even more intense vanilla aroma and flecks.
- Oreo Cookies: The star of the show! Any variety of Oreo will work wonderfully. We often use Mega Stuf for an extra burst of creamy filling, but classic Double Stuf or even seasonal flavors can be fantastic. The key is to chop them into bite-sized pieces rather than crushing them finely, ensuring distinct pockets of cookie and cream in every scoop.
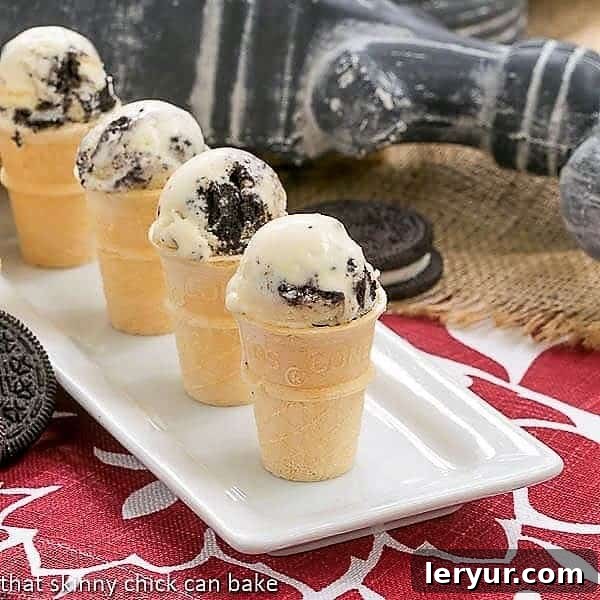
How to Make the Perfect Homemade Oreo Ice Cream
Making homemade ice cream, especially a custard-based one, might seem daunting at first, but with a few careful steps, you’ll be rewarded with a dessert that far surpasses anything you can buy. This recipe walks you through creating a rich, velvety base that perfectly complements the beloved crunch of Oreos. Let’s get started:
My personal journey with Oreos has been quite an evolution. Growing up, our pantry always had them, but I confess, I was never a die-hard fan of the cookie itself. My siblings and father, however, were obsessed. We’d often twist them apart to create our own “Double Stuf” versions, and I’d politely eat the cookie while secretly coveting the creamy filling. It wasn’t until I discovered their magic in a chocolate cookie pie crust that I found my true appreciation for the sandwich cookie, giving me a perfect excuse to always have them on hand.
When the MegaStuf Oreos were introduced, with their even more generous filling, I immediately envisioned their potential in ice cream. A taste test confirmed my suspicions – they are truly fantastic for this recipe, offering an incredible contrast of creamy and crunchy textures. But don’t feel limited; any type of Oreo cookie you love will work beautifully in this homemade ice cream recipe. The goal is to create a dessert that brings joy, and you can’t go wrong with Oreos!
Step-by-Step Instructions for Creamy Perfection:
- Prepare the Egg Mixture: In a heatproof bowl (a large Pyrex measuring cup with a spout is ideal for easy pouring), whisk together the egg yolks with a portion of the granulated sugar until the mixture is pale yellow and slightly thickened. This process helps incorporate air and prepare the yolks for tempering.
- Heat the Cream Base: In a medium saucepan, combine the remaining sugar, heavy cream, whole milk, and kosher salt. Heat this mixture over medium heat, stirring occasionally, until it just begins to simmer. You’ll see tiny bubbles forming around the edges of the pan.
- Temper the Egg Yolks (Crucial Step): This is the most important step to ensure a smooth custard without scrambled eggs. Slowly and gradually, drizzle about half a cup of the hot cream mixture into the whisked egg yolks, whisking constantly and vigorously. Repeat this process with another half cup of the hot cream. Tempering slowly raises the temperature of the egg yolks, preventing them from scrambling when they meet the rest of the hot liquid.
- Combine and Thicken the Custard: Once tempered, pour the entire egg yolk mixture back into the saucepan with the remaining hot cream. Continue to cook over medium heat, stirring continuously with a wooden spoon or silicone spatula, until the mixture thickens enough to coat the back of the spoon (this usually takes 1-2 minutes). It should not boil.
- Strain for Smoothness: Immediately pour the hot custard through a fine-mesh strainer into a clean bowl. This step is a professional chef’s secret to silky-smooth ice cream, catching any tiny bits of cooked egg that may have formed, ensuring an impeccably smooth base. Stir in the real vanilla extract at this stage.
- Cool the Custard Rapidly: To stop the cooking process and cool the custard quickly, place the bowl into an ice bath (a larger bowl or your kitchen sink filled with ice and a little water). Stir the custard occasionally until it reaches room temperature. This rapid cooling also helps in achieving a smoother texture.
- Chill for Flavor and Texture: Cover the bowl tightly with plastic wrap, pressing it directly onto the surface of the custard to prevent a skin from forming. Refrigerate the custard for at least 2 hours, or ideally, overnight. Chilling is vital as it allows the flavors to meld and the fat globules to firm up, which results in a much creamier final product.
- Churn the Ice Cream: Transfer the thoroughly chilled custard to your ice cream maker and churn according to the manufacturer’s instructions. The churning process introduces air and breaks up ice crystals, creating that desirable smooth consistency.
- Layer with Oreos and Freeze: Once the ice cream reaches a soft-serve consistency, remove it from the ice cream maker. In a freezer-safe container, layer a third of the ice cream, then half of your chopped Oreo cookies. Repeat with another layer of ice cream, the remaining cookies, and finally, the last third of the ice cream. This layering ensures cookie distribution throughout.
- Harden for Perfect Scoops: While you can enjoy it immediately as a soft serve, for firmer, scoopable ice cream, cover the container and freeze for at least 4 more hours, or until thoroughly hardened.
Tips for Perfect Homemade Oreo Ice Cream:
- Don’t Rush the Chill: The chilling step for the custard is non-negotiable. An adequately chilled base will churn more efficiently and result in a much creamier ice cream.
- Chop, Don’t Crush: For the best texture, chop your Oreos into discernible pieces. This provides a satisfying bite and prevents them from dissolving completely into the ice cream.
- Pre-chill Your Container: For layering, place your freezer-safe container in the freezer for about 30 minutes before you start layering the ice cream and cookies. This helps the ice cream stay colder and firm up faster.
- Minimize Air Exposure: When storing, press a piece of plastic wrap directly onto the surface of the ice cream before covering with a lid. This prevents freezer burn and keeps your ice cream fresh and creamy longer.
Frequently Asked Questions About Oreo Ice Cream
The true origin of Cookies and Cream ice cream is a delightfully contested topic, with various entities laying claim to its invention. Ice cream consultant Malcolm Stogo is often credited with inventing Oreo ice cream in the late 1970s (specifically 1976, ’77, or ’78). However, South Dakota State University’s dairy department also asserts that they pioneered it in 1979. Commercially, Blue Bell began producing their version in 1980, while Edy’s/Dreyer’s disputes this, claiming to be the first to market it in 1982. Regardless of its precise origin, this flavor has firmly established itself as a beloved classic.
Cookies and Cream ice cream consistently ranks among the top favorite flavors globally. In 2020, it held a respectable position, tied for 5th place with Cookie Dough Ice Cream among adult consumers in the U.S. Its enduring appeal lies in the perfect combination of creamy sweetness and crunchy cookie bits, making it a timeless choice for many.
For optimal texture in your ice cream, I highly recommend chopping the Oreos into bite-sized pieces rather than fine crumbs. This method helps keep the creamy filling relatively intact and provides delightful pockets of crunch. If you prefer a more “crushed” texture, place the cookies in a gallon-sized Ziploc bag, seal it, and use a rolling pin or the flat side of a meat mallet to break them into desired pieces. Avoid over-crushing, as very fine crumbs can sometimes become too soft in the ice cream.
The beauty of this recipe is its versatility when it comes to Oreo varieties. This particular version was made with Double Stuf Oreos, which offer a great cookie-to-cream balance. However, feel free to use any of your favorite types: Mega Stuf for extra creaminess, Golden Oreos for a vanilla-on-vanilla experience, Mint Oreos for a refreshing twist, or even seasonal flavors to match the occasion. Just chop and measure what you have on hand – the deliciousness is guaranteed!
The inclusion of egg yolks in this recipe signifies a French-style custard base, known as “Philadelphia style” in some ice cream circles. The yolks are crucial for creating an exceptionally rich and creamy texture. They contribute additional fat, which helps to emulsify the mixture and prevent the formation of large ice crystals, resulting in a wonderfully smooth, dense, and luxurious ice cream that truly melts in your mouth.
To maintain the best quality and prevent freezer burn, homemade ice cream should be stored in an airtight container in the coldest part of your freezer. For an extra layer of protection, press a piece of plastic wrap directly onto the surface of the ice cream before securing the lid. This minimizes air exposure, which is the main culprit behind ice crystal formation and freezer burn, ensuring your ice cream remains perfectly creamy and delicious for up to two weeks.
While this recipe is designed for an ice cream maker to achieve its optimal creamy texture, you can adapt it for a “no-churn” method. After chilling the custard base, instead of churning, pour it into a shallow freezer-safe container. Freeze for about 30-45 minutes until the edges start to set, then remove and vigorously whisk or beat with an electric mixer to break up ice crystals. Repeat this process every 30-45 minutes for 2-3 hours. After a few rounds, fold in the chopped Oreos and then allow it to freeze solid for several hours. The texture won’t be identical to a churned ice cream, but it will still be a delicious homemade treat!
Properly stored homemade ice cream will maintain its best quality for about 1-2 weeks in the freezer. Beyond that, while still safe to eat, its texture might start to degrade, becoming icier due to crystal formation, and its fresh flavors might diminish. Always ensure it’s in an airtight container with minimal air space to maximize its shelf life and deliciousness.
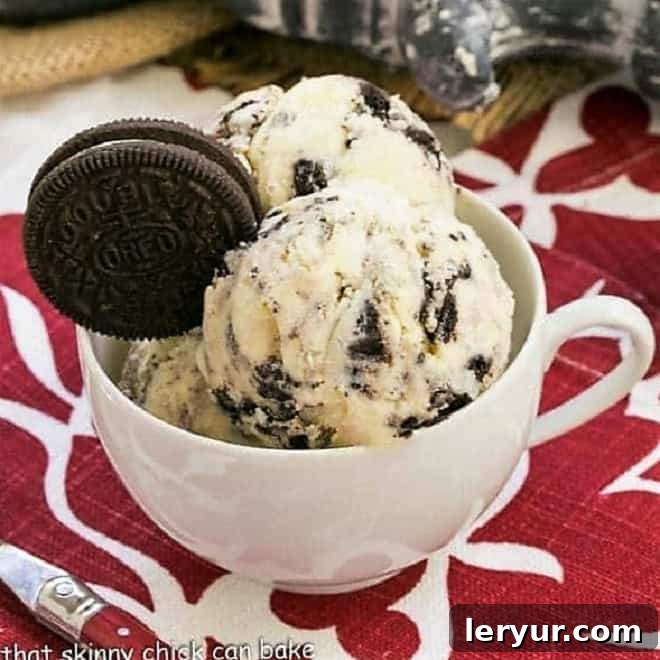
More Irresistible Dessert Recipes to Explore
If you’ve fallen in love with the joy of homemade desserts, especially ice cream, you’ll be thrilled to discover more delightful recipes from our collection. Expand your repertoire and satisfy your sweet tooth with these fantastic ideas:
- Cinnamon Chunk Ice Cream by Farm Fresh Feasts
- Chocolate Mint Frappe by Noshing with the Nolands
- Homemade Ice Cream Round Up
- Cookie Dough Ice Cream
- Fudge Topped Marshmallow Ice Cream
- Discover even more of the Best Dessert Recipes for every occasion!
Stay connected with us through social media! Follow us on Instagram, Facebook, and Pinterest. Don’t forget to tag us when you whip up one of our delicious recipes! We love seeing your culinary creations. And if this Oreo Ice Cream stole your heart, please consider giving it a 5-star rating in the recipe card below – your feedback means the world to us!
Oreo Ice Cream
30 minutes
15 minutes
45 minutes
1 quart (approx. 12 servings)
Luscious homemade vanilla ice cream with generous chunks of Oreo cookies, offering a delightful creamy and crunchy experience.
Rated 5 out of 5 stars based on 48 reviews.
Ingredients
For the Ice Cream Base:
- 5 large egg yolks
- ½ cup granulated sugar, divided
- 1¾ cups heavy cream (at least 36% butterfat)
- ¾ cup whole milk
- ¼ teaspoon kosher salt
- 2 teaspoons pure vanilla extract
- 1¼ cups chopped Oreo cookies (approximately 10 Mega-Stuf or 15-18 regular Oreos, adjust to preference)
Instructions
- Prepare Egg Mixture: Whisk together the egg yolks and ¼ cup of the sugar in a large Pyrex measuring cup or heatproof bowl; set aside.
- Heat Cream Base: In a saucepan, combine the remaining ¼ cup of sugar, heavy cream, whole milk, and kosher salt. Heat over medium heat, stirring occasionally, until the mixture begins to simmer (small bubbles form around the edges).
- Temper Egg Yolks: When the cream mixture simmers, slowly drizzle about ½ cup of the hot cream into the whisked egg yolk mixture, whisking constantly and vigorously to prevent scrambling.
- Combine Custard: Repeat with another ½ cup of hot cream, still whisking constantly. Then, add the tempered egg mixture back to the saucepan, whisking continuously.
- Thicken Custard: Continue to stir the mixture over medium heat until the custard thickens enough to coat the back of a spoon, about 1-2 minutes. Do not allow it to boil.
- Strain and Flavor: Pour the custard through a fine-mesh strainer into a clean bowl. Stir in the vanilla extract until well combined.
- Cool Custard: Place the bowl in an ice bath (a larger bowl or sink filled with ice and water), stirring occasionally, until the mixture reaches room temperature.
- Chill Thoroughly: Cover the bowl with plastic wrap, pressing it directly onto the custard’s surface, and place the mixture in the refrigerator to chill for at least 2 hours, or preferably overnight.
- Churn Ice Cream: Freeze the chilled custard in your ice cream maker according to the manufacturer’s instructions until it reaches a soft-serve consistency.
- Layer with Oreos: Once churned, scoop a third of the soft ice cream into a freezer-safe container. Layer with half of the chopped Oreo cookies. Repeat this process: another third of ice cream, the remaining half of cookies, and finally, the last third of ice cream on top. You may eat immediately for a soft serve texture.
- Harden (Optional): For firmer ice cream, cover the container tightly and freeze for at least 4 more hours, or until fully set.
Notes
Straining the custard is a key step that helps remove any tiny bits of cooked egg, ensuring an impeccably smooth and luxurious ice cream texture.
For an amazing Oreo Ice Cream Pie: Simply scoop the freshly churned ice cream into a prepared chocolate cookie crust. Smooth the top and freeze until firm. For an extra decadent touch, drizzle with fudge sauce and freeze again before serving!
Recommended Products
As an Amazon Associate and member of other affiliate programs, I earn from qualifying purchases.
- Pyrex Measuring Cups
- Ice Cream Scoop
- Ice Cream Maker
Nutrition Information:
Yield:
12
Serving Size:
1 scoop
Amount Per Serving:
Calories: 294Total Fat: 19gSaturated Fat: 10gTrans Fat: 0gUnsaturated Fat: 8gCholesterol: 118mgSodium: 155mgCarbohydrates: 27gFiber: 1gSugar: 20gProtein: 4g
HOW MUCH DID YOU LOVE THIS RECIPE?
Please leave a comment on the blog or share a photo on Pinterest!