
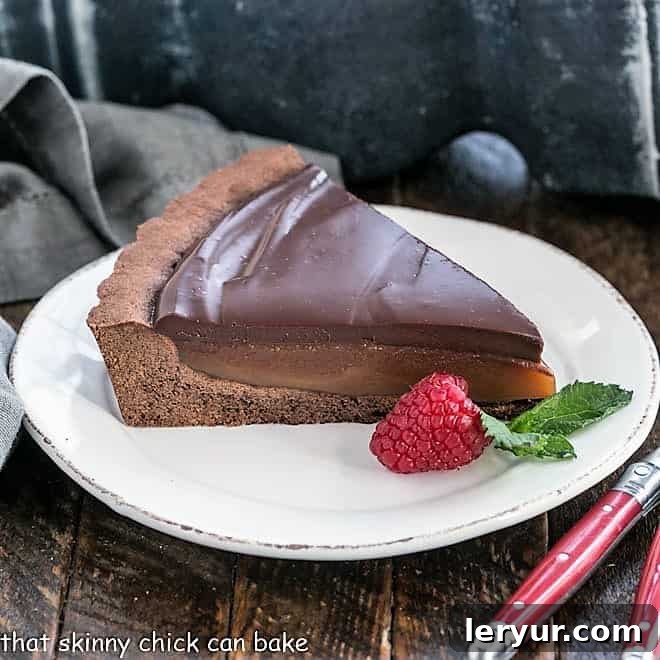
Twix lovers, prepare for an unparalleled culinary experience! This outrageously decadent Chocolate Caramel Tart is crafted with an incredibly dreamy, homemade caramel that promises to transport your taste buds to pure bliss. Featuring a rich, cocoa-infused crust, a thick layer of silken, golden caramel, and crowned with a luscious, glossy ganache, this phenomenal tart is the epitome of chocolate and caramel perfection. It’s more than just a dessert; it’s a luxurious statement piece, perfect for any special occasion.
I recently shared this exquisite caramel dessert with a group of friends, and their reactions were priceless. One friend, accustomed to store-bought sweets, was genuinely surprised to learn that caramel could be made from scratch, exclaiming over the depth of flavor only homemade can provide. Another, typically a dessert skeptic, declared it “worth every single bite (and calorie!)” – a true testament to its irresistible charm. The joy of witnessing such delight makes every moment spent crafting this tart truly rewarding.
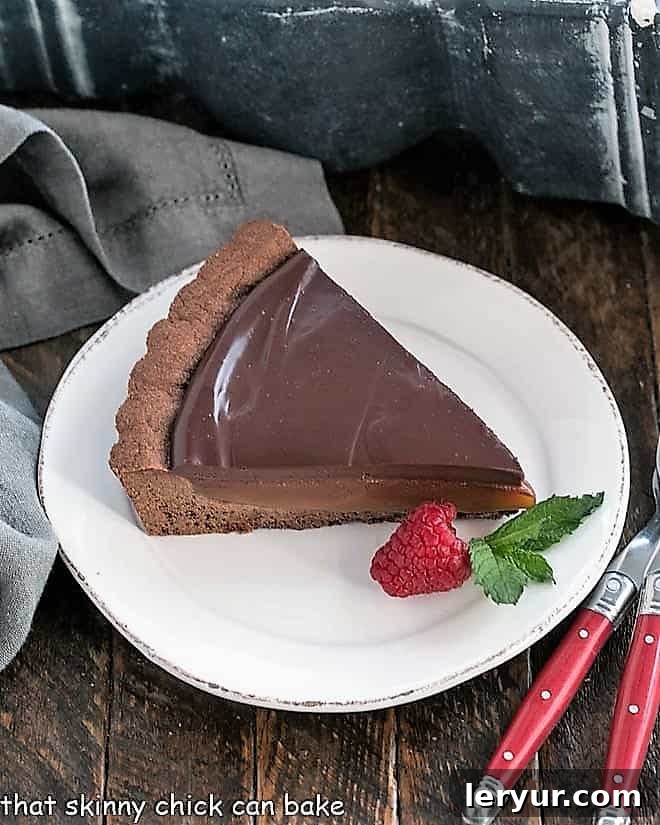
Why This Chocolate Caramel Tart Is a Must-Try
Long before it became a viral sensation, the concept of a gourmet “Twix bar” in tart form captivated my imagination. When I first encountered a similar tart recipe from Saveur magazine, I knew it was destined for my kitchen. This isn’t just a dessert; it’s an elevated culinary creation that transcends the ordinary, offering a sophisticated twist on a beloved candy classic. Here’s why this recipe deserves a prime spot in your baking repertoire:
- Unforgettable Flavor Profile: The harmonious blend of a deep chocolate crust, rich, buttery homemade caramel, and a silky dark chocolate ganache creates a symphony of textures and tastes. Each layer complements the next, building to an incredibly satisfying experience that’s both sweet and complex.
- A Rewarding Baking Challenge: While making caramel from scratch might seem daunting, it’s an immensely rewarding process. This recipe offers clear, concise tips to guide you, making what might seem like an advanced technique accessible. The sense of accomplishment you’ll feel when you master the caramel is as sweet as the tart itself.
- The Ultimate Chocolate & Caramel Indulgence: If you are a devotee of the timeless chocolate and caramel pairing, this tart will be your new obsession. Every bite delivers a luscious combination that will make you swoon, proving once again that some classic pairings are simply irresistible.
- Perfect for Special Occasions: This tart isn’t just a dessert; it’s an event. Its impressive appearance and unforgettable taste make it the ideal centerpiece for birthdays, holidays, or any gathering where you want to truly impress your guests. It’s a labor of love that speaks volumes of your culinary dedication.
I distinctly remember making this tart for my youngest son’s 21st birthday celebration. Knowing his profound love for caramel (a trait he inherited from me!), I packed it up and took it to campus for an early birthday dinner. After a hearty steak meal with Nick and his roommates, we were all wonderfully sated. Yet, despite our full bellies, we couldn’t resist sampling a few indulgent bites of this magnificent caramel dessert. It was, without a doubt, worth every single glorious calorie and every shared laugh around the table.
Essential Ingredients for Your Chocolate Caramel Tart
Crafting a truly exceptional tart begins with selecting the right ingredients. Each component plays a vital role in achieving the perfect texture, flavor, and visual appeal. Pay close attention to these notes to ensure your tart reaches its full potential:
- Kitchen Staples: Ensure you have all your basic pantry items ready, including all-purpose flour, unsalted butter, kosher salt, granulated sugar, and powdered sugar. Quality matters, even for the basics, so choose fresh, reliable brands.
- Dutch-Process Unsweetened Cocoa Powder: This is a crucial distinction. Dutch-process cocoa is treated with an alkali to neutralize its natural acidity, resulting in a darker color and a smoother, less bitter chocolate flavor compared to natural cocoa (like Hershey’s brand). Brands like Droste are excellent choices often found in the baking aisle. Its rich hue will give your crust a sophisticated dark chocolate appearance.
- Egg Yolks: For optimal separation, always separate your eggs while they are cold, as the yolks are less likely to break. However, allow the separated yolks to come to room temperature before incorporating them into the crust mixture. This ensures they blend smoothly and evenly, contributing to a tender, cohesive dough.
- Real Vanilla Extract: The label should explicitly state “real vanilla extract,” not imitation. Real vanilla provides a depth of flavor that imitation cannot replicate, significantly enhancing both the caramel and the crust.
- Light Corn Syrup: This ingredient is essential for homemade caramel. It acts as an invert sugar, preventing the sugar syrup from crystallizing as it cooks and cools. This results in a smooth, silky caramel, free from a grainy texture. Karo is a widely available and reliable brand.
- Heavy Cream: Used in both the luscious caramel filling and the silky ganache topping, heavy cream (with at least 36% milk fat) provides richness, creaminess, and body. Do not substitute with lighter creams, as they won’t yield the same luxurious results.
- Crème Fraîche: A European-style cultured cream, crème fraîche adds a subtle tang and an unparalleled richness to the caramel, balancing its sweetness and giving it a more complex, gourmet flavor profile. If unavailable, full-fat sour cream can be a substitute in a pinch, though crème fraîche offers a superior profile.
- Semisweet Chocolate: For the ganache, finely chopping your semisweet chocolate is key. Smaller pieces melt more easily and evenly when hot cream is poured over them, ensuring a perfectly smooth and glossy ganache without lumps. Opt for good quality chocolate chips or a chopped chocolate bar for the best flavor.
Understanding the Art of Tart Making
Before diving into the specifics of this chocolate caramel masterpiece, it’s helpful to understand what defines a tart and the general principles behind its construction. A tart is typically characterized by a pastry crust, shallow sides, a flavorful filling, and notably, no top crust (distinguishing it from a pie). Tarts offer incredible versatility, ranging from sweet to savory, baked to no-bake, and can be presented as full-sized showstoppers or delicate individual tartlets.
- The Versatile Crust: Tart crusts can take many forms. They can be a classic shortcrust pastry, a crumb crust made from cookies or graham crackers, or a simple pressed-in dough, like the delicious chocolate crust in this recipe. Each offers a unique texture and flavor foundation for your filling.
- Baking or No-Bake: Depending on the recipe, the crust might be blind-baked (pre-baked before filling) to ensure a crisp base and prevent sogginess, or it might be a no-bake version that simply chills to set. Our chocolate crust requires pre-baking for optimal results.
- The Essential Tart Pan: Most tarts are baked in a two-piece tart pan featuring a removable bottom. This ingenious design allows for effortless removal of the tart from the pan once it’s set, making slicing and serving a breeze while preserving the tart’s beautiful fluted edges.
- Serving Sizes: Tarts can be scaled to various sizes. From grand, full-sized tarts perfect for family gatherings to charming single-serving tartlets or even bite-sized appetizers, specialty pans are available for every dimension.
- General Tart Assembly Process: The typical process involves first preparing and baking or chilling the crust according to the recipe. Once the crust is ready, the filling is prepared and poured in. The tart is then either baked further or chilled until set. Finally, after cooling, any desired toppings or garnishes are added, transforming it into a stunning dessert ready to be sliced into elegant wedges and served.
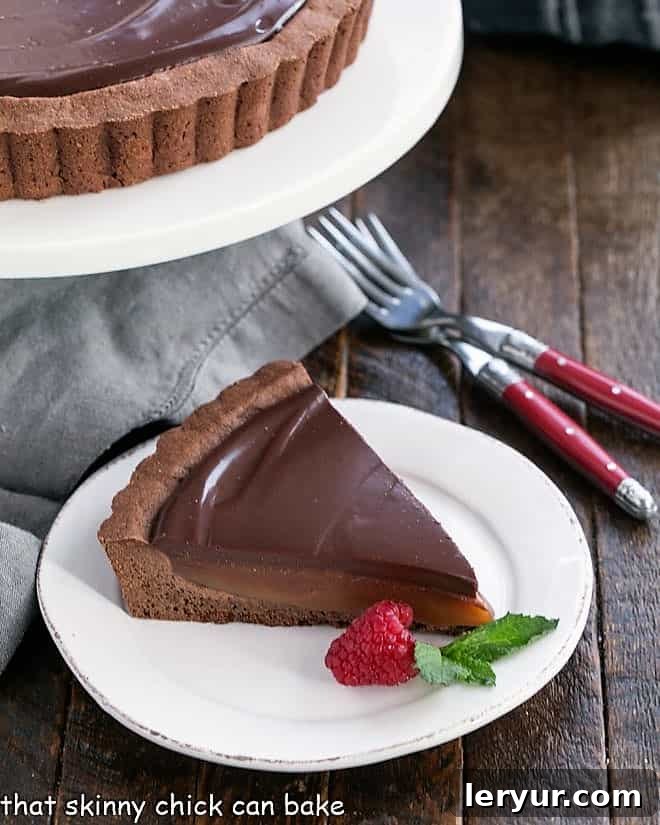
Mastering the Homemade Caramel Filling: Pro Tips
The homemade caramel is the soul of this tart, elevating it from good to absolutely sublime. Its thick, vanilla-infused richness nestled atop the chocolate crust and beneath the ganache truly defines total bliss. Making caramel from scratch is a culinary triumph that’s well worth the effort. My personal slice of this heaven on a plate, enjoyed during a recent remake, was just as delightful as the first time I made it for Nick’s birthday.
Here are invaluable tips to ensure your homemade caramel is perfect every time:
- Patience is Key: Caramel making is not a race. You must be patient and allow the sugar syrup to reach exactly 240°F (115°C) to achieve the correct soft-set texture when cooled. Rushing the process or pulling it off the heat too early will result in a runny caramel that won’t set properly, while overcooking it will yield a hard, brittle candy.
- Trust Your Eyes (and Your Thermometer!): While your candy thermometer is an indispensable tool, don’t rely solely on it. Watch for the visual cues: the mixture should transform into a beautiful medium amber color. This golden hue indicates the perfect balance of caramelized sugar, providing a rich, complex flavor. The color often develops rapidly in the final stages, so stay vigilant.
- Resist the Urge to Stir: Once your sugar syrup begins to boil, resist the temptation to stir it. Stirring can introduce air bubbles and cause sugar crystals to form on the sides of the pan, leading to a grainy caramel. Instead, you may gently swirl the pan occasionally to ensure even heating and prevent localized scorching, especially as the edges start to brown more quickly than the center.
- Pro-Tip: Use a Heavy-Bottomed Saucepan: A heavy-bottomed saucepan is your best friend when making caramel. Its thick base distributes heat evenly, preventing hot spots that can cause the sugar to burn in one area while remaining uncooked in another. This even heating is critical for uniform caramelization.
- Careful Additions Off Heat: Once your caramel reaches the desired temperature and color, immediately remove the pan from the heat before whisking in the butter, heavy cream, crème fraîche, and vanilla extract. These cooler ingredients will cause the hot sugar syrup to bubble and expand vigorously. Adding them off the heat helps prevent overflow and reduces the risk of burns. Whisk until smooth and fully incorporated.
- Ensure Thermometer Accuracy: Before you begin, verify the accuracy of your candy thermometer. A simple test: place the tip in a pan of boiling water. It should read 100°C (212°F). If it reads differently, make a mental note of the variance and adjust your target temperature accordingly. An accurate thermometer is non-negotiable for consistent caramel success.
- Refrigeration for Perfection: Keep your finished tart refrigerated until just before you’re ready to serve. This ensures the caramel remains firm and beautifully set. If you slice the tart too far in advance or leave it at room temperature for an extended period, the caramel may soften and begin to ooze, affecting the pristine appearance of your slices. While it will still taste incredible, chilling keeps it picture-perfect.
Frequently Asked Questions About Chocolate Caramel Tart
Why Is My Caramel Tart Runny?
A runny caramel tart is typically due to one of two main reasons. Firstly, the caramel might not have been cooked to the correct temperature during preparation. It absolutely needs to reach 240°F (115°C) to achieve the proper consistency and set firmly when cooled. Using an accurate candy thermometer is crucial for monitoring this. Secondly, leaving the tart at room temperature for too long can cause the filling to soften significantly. Caramel is temperature-sensitive, so always keep your tart refrigerated to maintain its ideal texture.
How Long Can You Keep a Caramel Tart?
When properly stored in the refrigerator, your chocolate caramel tart will remain delicious for at least 3-4 days. To maintain its integrity and prevent the caramel from oozing into any empty spaces created by removed slices, always keep it covered and chilled.
How Many Calories Are There in a Slice of a Caramel Tart?
The caloric content of a caramel tart slice will vary considerably based on the recipe and the size of your slices. For this particular decadent tart, if you divide it into 12 generous slices, each serving will contain over 600 calories! This is definitely a rich, indulgent dessert meant for special occasions or to be savored in smaller portions. Consider serving just a sliver to fully appreciate its richness without overdoing it.
Explore More Decadent Desserts You May Also Like
If the luxurious combination of chocolate and caramel in this tart has captured your heart, you’re in for a treat with these other sensational dessert recipes. While I might wish my children could magically bake this exquisite Chocolate Caramel Tart for my birthday or Mother’s Day, its scrumptiousness makes it a true labor of love for anyone. I also have a soft spot for these Brown Sugar Caramels. But if an upscale chocolate Twix tart isn’t quite what you’re craving, I have a strong feeling that one of these other delightful desserts will surely tickle your fancy:
- Frozen Strawberry Cheesecake from Serena Bakes Simply From Scratch – A refreshing and creamy delight.
- Creamy Lemon Tart – Bright, zesty, and perfectly balanced.
- Classic Carrot Cake – A timeless favorite, moist and spiced to perfection.
- French Silk Tart – Velvety smooth chocolate, an absolute dream.
- Ultimate Turtle Brownies – Chewy, nutty, and loaded with caramel and chocolate.
- Discover more of the Best Dessert Recipes for every occasion.
- Indulge in more Homemade Chocolate Recipes to satisfy your cocoa cravings.
Stay connected and share your culinary creations with me on social media! Find me @ Instagram, Facebook, and Pinterest. Don’t forget to tag me when you try one of my recipes! If you love the results, please consider leaving a 5-star rating and comment.
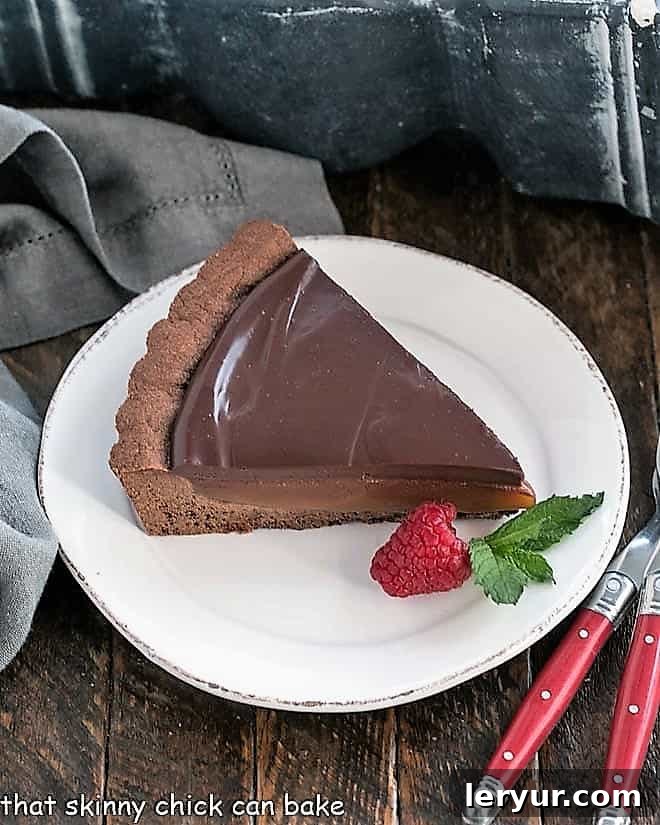
Chocolate Caramel Tart Recipe
40 minutes
35 minutes
1 hour 15 minutes
12 servings
A decadent pie with a chocolate crust, a rich homemade caramel filling, and a silky ganache topping. This recipe is adapted from Saveur magazine, promising an elevated dessert experience.
Ingredients
For the Chocolate Crust:
- 1 ½ cups all-purpose flour
- ¼ cup plus 1 tablespoon Dutch-process unsweetened cocoa powder
- ¼ teaspoon kosher salt
- 10 tablespoons unsalted butter, cut into pieces, at room temperature
- ½ cup plus 2 tablespoons powdered sugar
- 2 large egg yolks, at room temperature
- ½ teaspoon real vanilla extract
For the Homemade Caramel Filling:
- 1 ½ cups granulated sugar
- 3 tablespoons light corn syrup
- ¼ teaspoon kosher salt
- 6 tablespoons unsalted butter
- 6 tablespoons heavy cream
- 1 tablespoon crème fraîche
- ½ teaspoon real vanilla extract
For the Silky Ganache Topping:
- ½ cup heavy cream
- 4 ounces semisweet chocolate, finely chopped
Instructions
- Prepare the Crust: Preheat your oven to 350ºF (175ºC). In a medium bowl, whisk together the flour, cocoa powder, and salt. Set this dry mixture aside.
- Using a handheld mixer (or stand mixer), cream the room temperature butter and powdered sugar together until the mixture is light, pale, and fluffy. Once combined, mix in the egg yolks and vanilla extract until fully incorporated.
- Gradually add the dry ingredients to the wet ingredients, mixing on low speed until just combined and a soft dough forms. Be careful not to overmix.
- Press the prepared dough evenly into the bottom and up the sides of a 9-inch tart pan with a removable bottom. Ensure the crust is uniformly thick.
- Refrigerate the pressed crust for at least 30 minutes to firm up. Before baking, prick the bottom and sides of the tart shell generously with a fork. Bake for 20 minutes, then cool completely to room temperature on a wire rack.
- Make the Caramel Filling: In a large, heavy-bottomed saucepan, whisk together the granulated sugar, light corn syrup, kosher salt, and 6 tablespoons of water. Bring this mixture to a boil over medium-high heat.
- Cook the sugar syrup without stirring. Monitor the temperature with an accurate candy thermometer until it reads 240ºF (115ºC) and develops a beautiful medium amber color. You may gently swirl the pan briefly to prevent any hot spots from scorching the sugar.
- Immediately remove the pan from the heat. Carefully whisk in the butter, heavy cream, and crème fraîche (be aware that the mixture will bubble up vigorously). Continue whisking until the caramel is smooth and all ingredients are fully incorporated. Finally, whisk in the vanilla extract.
- Pour the warm caramel filling into the cooled chocolate tart shell. Allow it to cool slightly at room temperature, then refrigerate until the caramel is firm and set, which will take approximately 4–5 hours. For quicker setting, you can place it in the freezer for a shorter duration.
- Prepare the Ganache Topping: In a small saucepan, bring the ½ cup of heavy cream to a gentle boil over medium heat.
- Place the finely chopped semisweet chocolate in a medium, heatproof bowl. Once the cream boils, pour the hot cream directly over the chocolate. Let it sit undisturbed for 1-2 minutes to allow the chocolate to soften. Then, whisk until the ganache is completely smooth and glossy.
- Pour the prepared ganache evenly over the set caramel layer in the tart. Gently tilt the pan to ensure an even coating. Refrigerate the tart again until the ganache is fully set, usually another 4–5 hours. Slice and serve chilled for the best texture and presentation.
Notes
Please note that the “Total Time” listed for this recipe does not include the essential chilling times required for the crust, caramel, and ganache to properly set.
This is an incredibly rich and decadent dessert. While it technically yields 12 servings, consider cutting smaller slices, as a little goes a long way to satisfy those sweet cravings.
For the cleanest cuts, use a hot, dry knife. Dip your knife in hot water, wipe it clean, and then slice just before serving. Repeat for each slice to prevent sticking.
For an extra touch of gourmet flavor, consider sprinkling a pinch of flaky sea salt over the ganache layer just before it sets. This enhances the chocolate and caramel notes beautifully.
Recommended Products
As an Amazon Associate and member of other affiliate programs, I earn from qualifying purchases.
- Deep Frying / Candy Thermometer
- KitchenAid 9-Speed Digital Hand Mixer
- 9-inch Tart Pan with Removable Bottom
Nutrition Information:
Yield:
12
Serving Size:
1 slice
Amount Per Serving:
Calories: 646Total Fat: 39gSaturated Fat: 24gTrans Fat: 1gUnsaturated Fat: 12gCholesterol: 139mgSodium: 334mgCarbohydrates: 74gFiber: 2gSugar: 54gProtein: 5g
How Much Did You Love This Recipe?
Please leave a comment on the blog or share a photo on Pinterest