
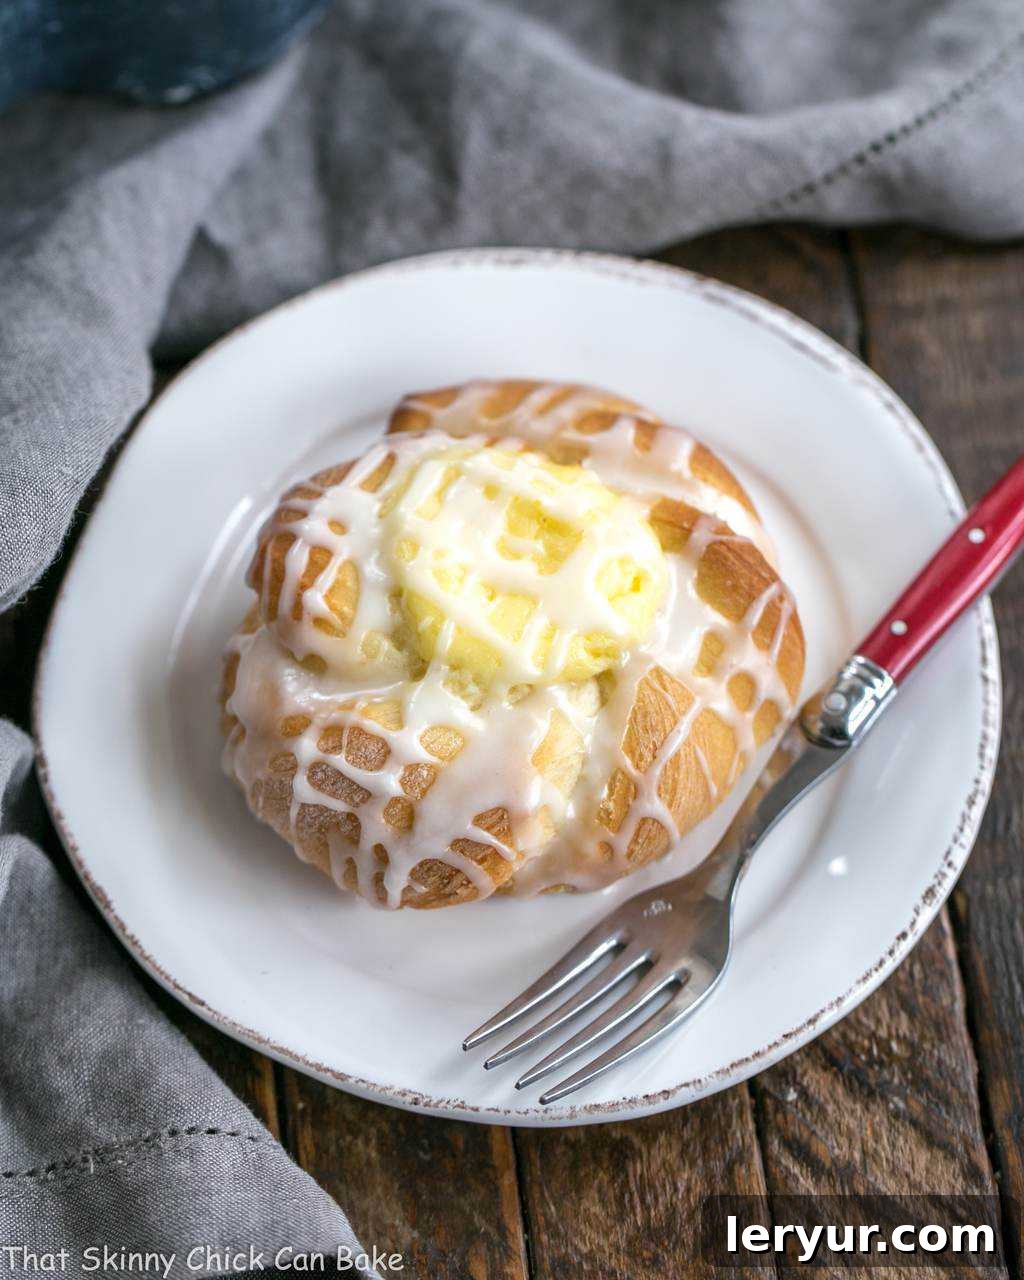
Danish Twists with Cream Cheese Filling are a delightful culinary creation, featuring tender, subtly sweet yeast bread dough expertly twisted around a rich, creamy cheese center, all finished with a generous drizzle of a delicate powdered sugar glaze. These pastries are an absolute breakfast and brunch essential, bringing a touch of bakery-quality indulgence right to your home.
Long before the age of instant information and social media, my mother was the ultimate connoisseur of new trends and delicious finds, thanks to her extensive network of bridge club, church, and university friends. One particular summer, the buzz was all about the Sara Lee outlet located in the bustling metropolis of Des Moines, a mere thirty miles south of our quiet hometown. Their Cream Cheese Danish became the talk of the town, and naturally, my sisters and I were utterly bewildered. “What on earth,” we pondered with youthful curiosity, “was cheese doing in a sweet roll?” The concept seemed entirely foreign and perhaps a little daring for our pre-teen palates.

Why You’ll Fall in Love with These Homemade Cream Cheese Danish Twists
My initial mental image of a “cheese danish” was far from the sweet, luscious treat it turned out to be. I envisioned savory cheeses like sharp cheddar or salty Parmesan being baked into a breakfast pastry, a notion that sounded quite peculiar to my younger self. “Who would ever eat something like that?” I remember thinking, despite my profound love for all breakfast pastries. These “cheese danishes” struck me as a strange culinary experiment.
However, my skepticism quickly melted away when my mom, captivated by the hype, purchased an entire case of these mysterious cream cheese-filled danishes for our freezer. The moment I took that first bite, I was utterly smitten. The tender, sweet yeast bread perfectly complemented the tangy, rich cream cheese filling, creating a harmonious blend of flavors and textures that was nothing short of extraordinary. These homemade Danish Twists with Cream Cheese Filling are more than just a recipe; they are a delightful journey back to those cherished 1970s memories, recreating the magic of those first irresistible pastries.
Here are just a few compelling reasons why you simply must make this recipe a staple in your kitchen:
- A Cheesecake Lover’s Dream: If your heart beats for the creamy decadence of cheesecake and the flaky tenderness of danish pastries, then prepare to be enchanted. This cheese danish perfectly marries the best of both worlds, offering a unique and incredibly satisfying experience.
- Nostalgic Perfection: For many, the taste of a classic cream cheese danish evokes fond memories of childhood favorites, like the iconic Sara Lee Danish. Our homemade version captures that beloved flavor, transporting you back to simpler, sweeter times with every bite.
- Unmatched Homemade Quality: While store-bought danishes can be convenient, nothing truly compares to the fresh, vibrant taste and superior texture of a homemade pastry. You control the quality of ingredients, ensuring a wholesome and utterly delicious treat that far surpasses any mass-produced alternative.
- The Ultimate Holiday or Brunch Centerpiece: Elevate any holiday breakfast, festive brunch, or special weekend gathering with these stunning Danish twists. Their elegant appearance and irresistible flavor make them the perfect showstopper, guaranteed to impress your family and guests.
- Simple Indulgence: Despite their impressive look and taste, these danishes are surprisingly straightforward to make, even for novice bakers. The satisfaction of pulling a tray of golden-brown, aroma-filled pastries from your own oven is unparalleled.

Key Ingredients for Perfect Danish Twists
Crafting the perfect Danish Twist requires attention to each ingredient, ensuring they contribute to the tender bread, luscious filling, and delectable glaze. Here’s a detailed look at what you’ll need and why each component is vital:
- Kitchen Staples: Sugar, Salt, Milk – These foundational ingredients are critical for flavor balance, activating the yeast, and achieving the right consistency in both the dough and the glaze. Use good quality versions for the best results.
- Bread Flour – This is not interchangeable with all-purpose flour for this recipe. Bread flour has a higher protein content (typically 12-14%), which translates to higher gluten development. This gluten network is essential for creating the elastic, chewy yet tender texture characteristic of yeast breads like danishes, allowing the dough to rise beautifully and hold its structure.
- Instant Yeast – A baker’s best friend for efficiency! Instant yeast is designed with smaller granules than active dry yeast, meaning it dissolves and activates more quickly. This eliminates the need for rehydrating or “proofing” it in warm liquid before mixing with the flour, saving you time and streamlining the baking process. Ensure your yeast is fresh and not expired for proper dough rise.
- Egg – A crucial binder and enricher for the dough. Using an egg at room temperature ensures it incorporates smoothly and evenly into the other ingredients, creating a more uniform and tender dough. It also adds richness, color, and helps with structure.
- Butter – Melted and then cooled, butter contributes significantly to the richness and flavor of the dough. It makes the danish tender and adds a beautiful golden hue. Salted butter is perfectly acceptable here, but if using unsalted, you might want to slightly increase the salt in the recipe. Ensure it’s cooled to avoid “killing” the yeast.
- Milk – Warm milk, ideally around 120°F (49°C), is essential for activating the yeast without scalding it. Temperatures that are too hot can deactivate or kill the yeast, preventing the dough from rising. You’ll also need additional milk for the powdered sugar glaze. The amount should be adjusted to achieve a smooth, pourable consistency for drizzling.
- Cream Cheese – The star of our filling! It’s imperative that your cream cheese is at room temperature. Cold cream cheese will be lumpy and difficult to blend smoothly with sugar and egg, resulting in a grainy filling. Room temperature cream cheese whips up light, airy, and perfectly smooth, creating that luscious center we all crave.
- Egg Yolk – Used specifically in the cream cheese filling, the egg yolk adds richness, helps set the filling during baking, and contributes to its silky texture. For easier separation of the yolk from the white, crack the egg when it’s cold. However, allow the separated yolk to come to room temperature before incorporating it into the filling for optimal blending.
- Vanilla Extract – A touch of pure vanilla extract elevates the flavor profile of the cream cheese filling, adding a warm, aromatic depth. Always check the label to ensure you’re using real vanilla extract, as imitation versions can have a less complex flavor.
- Powdered Sugar – Also known as Confectioners’ Sugar, this finely milled sugar is vital for our smooth, lump-free glaze. Sifting powdered sugar before whisking it with milk is a critical step to remove any lingering lumps, ensuring a silky, elegant drizzle over your cooled danishes.

Expert Tips for Danish Baking Success
My love affair with cream cheese filling extends far beyond these delightful danishes. Whether gracing a rich Bundt Cake, enriching a soft Tea Roll, or forming the heart of these twisted pastries, a good cream cheese center truly elevates any recipe to extraordinary heights. To ensure your Danish Twists turn out perfectly every time, here are some crucial tips gleaned from years of baking experience:
- Check Your Yeast: Before you even begin mixing, always confirm that your instant yeast has not expired. Old or inactive yeast is the most common reason for doughs failing to rise, leading to dense, disappointing pastries. A quick check of the expiration date can save you a lot of effort and ingredients.
- Kneading Made Easy: While hand kneading is a perfectly viable and therapeutic option, using a stand mixer equipped with a paddle attachment initially, then switching to a dough hook, is undoubtedly the easiest and most efficient way to develop the gluten in your dough. It ensures thorough mixing and proper elasticity without excessive physical exertion.
- Room Temperature Cream Cheese is Non-Negotiable: This tip is worth repeating! For the smoothest, most luxurious cream cheese filling, your cream cheese absolutely must be at room temperature. Cold cream cheese will stubbornly clump, no matter how long you beat it, resulting in a grainy texture. Allow it to soften on the counter for at least an hour before you plan to mix your filling.
- The Piping Bag Advantage: For a clean, professional finish when filling your danish twists, transfer your cream cheese mixture into a Ziploc bag. Snip off one corner with scissors to create a makeshift piping bag. This method allows for precise placement of the filling into the centers of your twists, yielding a much neater and more attractive result than using a spoon.
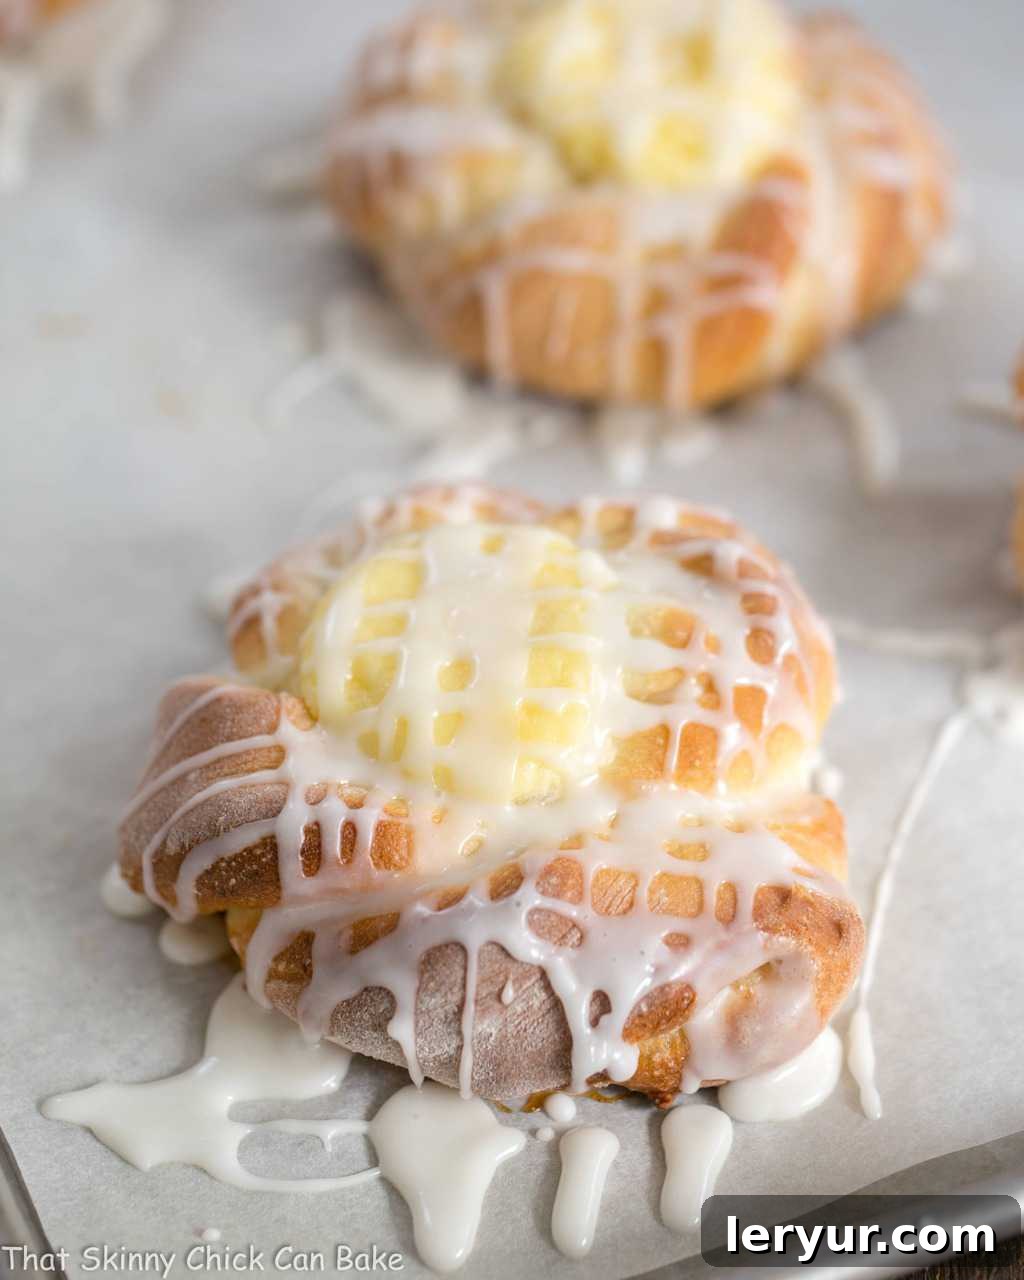
- Mastering the Glaze Drizzle: Once your danishes have baked and cooled, it’s time for the final touch. While a fork can create charming crisscross drizzles, for greater control and a more refined look, try using another small Ziploc bag. Snip a tiny corner off this bag to create a fine opening, allowing you to elegantly pipe the glaze over your rolls in delicate lines or intricate patterns.
- Optimal Proofing Environment: Yeast dough loves warmth and humidity. If your kitchen is cool, try creating a warm spot by turning your oven on for a minute or two, then turning it off and letting the dough rise inside (with the oven off, of course). Alternatively, place the covered bowl near a sunny window or in a slightly warm, draft-free location.
- Don’t Overbake: Danish pastries bake relatively quickly. Keep a close eye on them during the last few minutes of baking. They are done when they are golden brown around the edges and the filling is set. Overbaking can lead to dry pastries.
- Cooling is Key: Always transfer your baked danishes to a wire rack to cool completely before applying the glaze. This prevents them from becoming soggy on the bottom and allows the glaze to set properly without melting away.
My husband, Bill, known affectionately as “the picky hubby,” arrived home after a particularly long day at work, his eyes immediately drawn to the golden-brown pastries cooling on the counter. “Are these up for grabs?” he inquired, his tone hopeful. “Why, yes,” I replied with a practical smile, “but let’s freeze most of them to keep them fresh for longer.” Little did I know, this practical advice would lead to a new morning ritual. Day after day, Bill began his day with one of these marvelous cream cheese danishes, savoring every single bite. He was utterly delighted, and I have no doubt that you will be, too!
Frequently Asked Questions About Danish Twists
While both Danish pastry and puff pastry are exquisite varieties of laminated doughs (meaning they are made with many layers of butter folded into dough), they differ fundamentally in their leavening methods. Danish pastry, like the dough used in this recipe, is a yeast-leavened dough. The yeast produces carbon dioxide, causing the dough to rise and become airy and tender. Puff pastry, on the other hand, relies entirely on steam. As the layers of butter melt during baking, they release steam, which pushes apart the many thin layers of dough, resulting in an incredibly flaky, light, and airy texture without the need for yeast.
The versatility of Danish pastries means you’re limited only by your imagination when it comes to fillings! Beyond the classic cream cheese, a world of delicious alternatives awaits. Consider using vibrant fruit jelly, homemade jam, or sweet fruit preserves for a burst of fruity flavor. Canned fruit pie filling (apple, cherry, or blueberry) works wonderfully, as does tangy lemon curd or a rich chocolate ganache. For a hazelnut lover’s dream, Nutella is an excellent choice. You can even explore savory options like pesto and sun-dried tomatoes or a cheese and herb mixture, but remember to significantly decrease the sugar in the dough and omit the sweet frosting for a balanced flavor profile.
Yes, due to the dairy content of the cream cheese filling, these danishes absolutely need to be refrigerated to maintain freshness and safety. Store your baked Cream Cheese Danish Twists in an airtight container in the refrigerator for up to 3-4 days. For longer storage, they freeze exceptionally well! Place them in a freezer-safe container or bag, and they will keep beautifully for up to 3 months. To enjoy, simply defrost them overnight in the refrigerator, or gently warm them in a microwave or oven for a few minutes for that freshly baked taste.
Explore More Delicious Breakfast & Brunch Recipes
If you’ve enjoyed making these delightful Cream Cheese Danish Twists, you’re sure to find inspiration in these other fantastic recipes:
- Chocolate Braid Recipe from Living Locurto
- Easy Raspberry Nutella Danish from Crazy for Crust
- Braided Raspberry Danish
- Braided Cinnamon Danish
- Cream Cheese Tea Roll
- Plus, discover many more of the Best Breakfast Recipes from the blog.
- And find endless Brunch Food inspiration for your next gathering.
Stay in touch through social media! Follow us on Instagram, Facebook, and Pinterest. Don’t forget to tag me when you try one of my recipes – I love seeing your creations! And if you absolutely adore the results, please consider giving it a 5-star rating in the recipe card below.
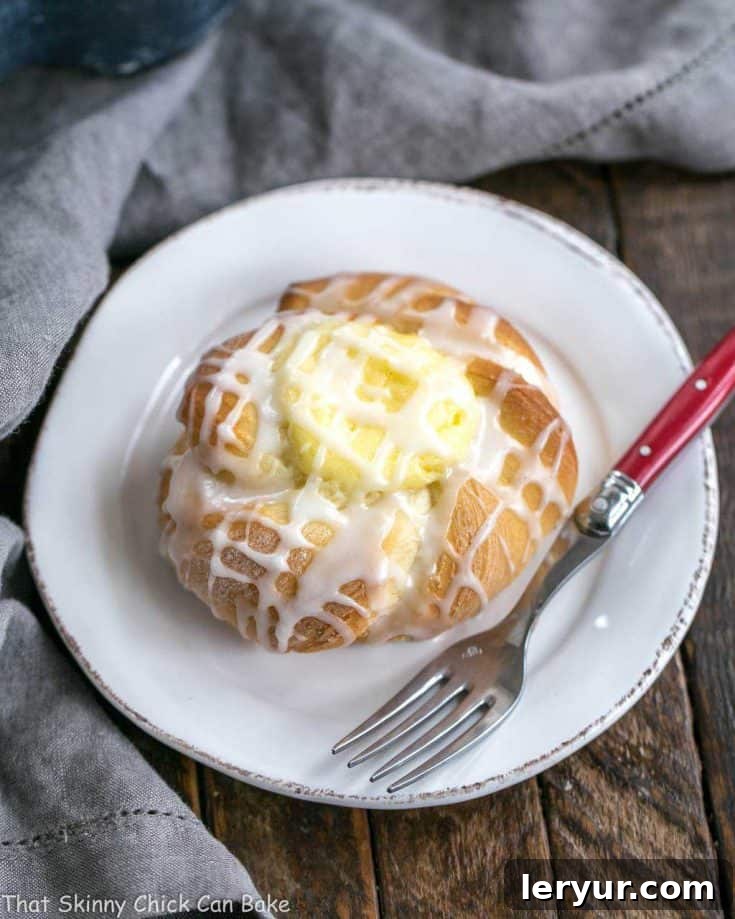
Danish Twists with Cream Cheese Filling
30 minutes
10 minutes
40 minutes
12 pastries
Sweet yeast bread twists with a luscious cream cheese filling, perfect for any morning!
Ingredients
For the Dough:
- 3 cups bread flour
- 4 ½ tablespoons granulated sugar, divided
- ¾ teaspoon salt
- 2 ¼ teaspoons instant yeast
- 1 large egg, at room temperature
- 2 tablespoons butter, melted and cooled
- 1 cup warm milk, about 120°F (49°C)
For the Cream Cheese Filling:
- 8 ounces cream cheese, softened to room temperature
- ¼ cup granulated sugar
- 1 large egg yolk
- ½ teaspoon pure vanilla extract
For the Glaze:
- 1 ¼ cup powdered sugar
- 2 tablespoons milk (or as needed for drizzling consistency)
Instructions
- In the bowl of a stand mixer fitted with the paddle attachment, combine 2 cups of the bread flour, 3 tablespoons of the granulated sugar, salt, and instant yeast. Mix briefly to combine.
- Add the room temperature egg, cooled melted butter, and warm milk to the dry ingredients. Continue mixing on low speed, then gradually add in the remaining 1 cup of bread flour until a shaggy dough forms.
- Switch from the paddle attachment to a dough hook. Knead the dough on medium-low speed for about 5 minutes, until it becomes soft, elastic, and pulls away cleanly from the sides of the bowl.
- Transfer the kneaded dough to a large, lightly greased bowl. Turn the dough once to ensure it’s lightly coated with oil on all sides.
- Cover the bowl with a clean tea towel or plastic wrap. Let the dough rise in a warm, draft-free spot until it has doubled in size, which usually takes about 45 minutes to 1 hour, depending on your kitchen temperature.
- While the dough is proofing, prepare the cream cheese filling. In a medium bowl, use an electric mixer to beat together the softened cream cheese and ¼ cup of granulated sugar until smooth and creamy. Mix in the egg yolk and vanilla extract until well combined and lump-free. Set this filling aside.
- Once the dough has doubled in size, gently punch it down in the bowl to release the air. Transfer the dough to a lightly floured work surface.
- Roll the dough out into an approximate 12 x 10-inch rectangle. Evenly sprinkle the surface of the dough with the remaining 1 ½ tablespoons of granulated sugar.
- Line two baking sheets with parchment paper or silicone baking mats and set them aside. This will prevent sticking and make cleanup easier.
- Gently fold the sugared dough in half lengthwise (hotdog style) to create a 12 x 5-inch rectangle. Using a sharp knife or pizza cutter, cut the dough into 12 even 1-inch wide strips.
- Take each strip of dough and gently twist it several times, then coil the twisted strip into a spiral shape. Place each spiral twist onto the prepared baking sheets, leaving some space between them. Using your thumb or the back of a spoon, press down firmly in the center of each twist to create a small well for the filling.
- Cover the shaped twists on the baking sheets with a clean tea towel. Allow them to rise again in a warm spot for about 20 minutes, or until they look slightly puffed and airy.
- During the second rise, preheat your oven to 375°F (190°C).
- Once the danishes have puffed, use the tips of your fingers or a small spoon to re-create or deepen the center well in each twist, ensuring there’s ample space for the cream cheese filling.
- Divide the prepared cream cheese filling evenly among the danish twists, placing a generous dollop into the center well of each one.
- Bake the danishes for 8-10 minutes, or until they are beautifully golden brown around the edges and the filling is set. Baking time may vary depending on your oven.
- Carefully remove the baked danishes from the oven and transfer them to a wire rack to cool completely.
- While the danishes cool, prepare the glaze. In a small bowl, whisk together the powdered sugar and 2 tablespoons of milk. Add more milk, a tiny bit at a time, if needed, until you achieve a smooth, drizzling consistency.
- Once the danishes are fully cooled, generously drizzle the powdered sugar glaze over each one. Serve immediately or store as directed.
Notes
Dough adapted from A Kitchen Addiction.
Total time indicated does not include the initial dough proofing time.
Recommended Products
As an Amazon Associate and member of other affiliate programs, I earn from qualifying purchases.
- KitchenAid KSM150PSER Artisan Tilt-Head Stand Mixer with Pouring Shield, 5-Quart, Empire Red
- Reynolds Cookie Baking Sheets Non-Stick Parchment Paper, 25 Sheet, 4 Count
- USA Pan Bakeware Half Sheet Pan, Warp Resistant Nonstick Baking Pan, Made in the USA from Aluminized Steel – 1050HS
Nutrition Information:
Yield:
12
Serving Size:
1 Danish
Amount Per Serving:
Calories: 313Total Fat: 10gSaturated Fat: 6gTrans Fat: 0gUnsaturated Fat: 4gCholesterol: 57mgSodium: 228mgCarbohydrates: 48gFiber: 1gSugar: 21gProtein: 7g
HOW MUCH DID YOU LOVE THIS RECIPE?
Please leave a comment on the blog or share a photo on Pinterest