

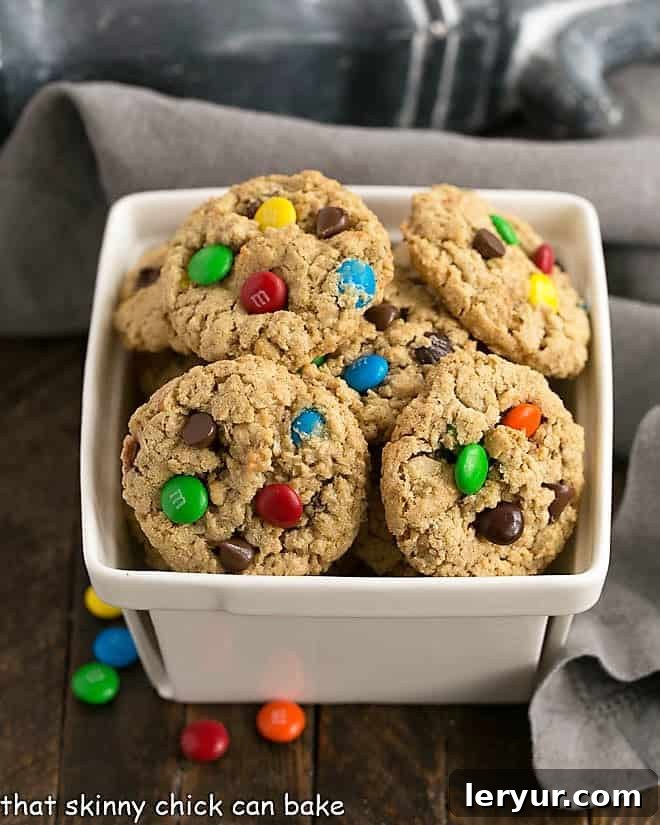
When the wholesome goodness of oatmeal and the creamy delight of peanut butter cookies unite with the vibrant fun of M&M’s, the rich sweetness of chocolate chips, and the delightful crunch of walnuts, the result is nothing short of extraordinary: a batch of perfectly chewy, utterly irresistible Classic Monster Cookies!
These beloved Peanut Butter Oatmeal Cookies hold a special place in my heart, stirring fond memories of my mother baking colossal batches back in the vibrant 1970s. Her original recipe called for a generous ¼ cup of dough per cookie – a true testament to why they earned the name “monster cookies!” Their impressive size and delightful medley of flavors make them a timeless treat that continues to captivate generations.

Why These Monster Cookies Are a Must-Bake
If you’re searching for a cookie recipe that truly delivers on flavor, versatility, and sheer crowd-pleasing appeal, look no further than Classic Monster Cookies. Here’s why this recipe is an absolute game-changer for any home baker:
- Perfect for Any Occasion: Whether you’re hosting a large party, preparing for a school event, or simply need a substantial stash of homemade treats, this recipe yields a generous quantity of delicious cookies. It’s the ultimate solution when you need to bake for a crowd, ensuring everyone gets a taste of something truly special.
- A Delight for Gluten-Free Diets: One of the fantastic features of Monster Cookies is that they are naturally flourless. This makes them a wonderful option for those with gluten sensitivities or anyone looking for a delicious dessert that accommodates a gluten-free lifestyle, without compromising on taste or texture.
- Peanut Butter Lover’s Dream: For anyone who adores the rich, nutty flavor of peanut butter, these cookies are an absolute triumph. The peanut butter forms the backbone of their chewy texture and robust taste, making them an undeniable hit for any fan of peanut butter desserts.
- Loaded with Irresistible Flavors: These aren’t just any cookies; they are packed to the brim with a symphony of delightful ingredients. Imagine sinking your teeth into a chewy cookie studded with vibrant M&M’s, decadent chocolate chips, and crunchy walnuts. Every bite offers a burst of flavor and texture, ensuring an unforgettable snacking experience.
- Unmatched Nostalgic Appeal: For many, these cookies evoke a sense of nostalgia, reminiscent of childhood favorites. The combination of classic ingredients creates a comforting and familiar taste that appeals to all ages, making them more than just a dessert—they’re a memory in the making.
My own teenage years are filled with memories of sneaking these loaded peanut butter oatmeal cookies straight from the freezer. It seems my palate hasn’t changed much since then! The sheer scale of my mom’s original classic monster cookie recipe – calling for an astonishing 12 eggs, a pound of butter, and 18 cups of oatmeal – definitely necessitated a more manageable, yet equally delicious, scaled-down version for the modern kitchen. This recipe offers all the flavor of that legendary batch, but in a size that’s practical for home baking.
Essential Ingredient Insights for Perfect Monster Cookies
The magic of these cookies lies in the quality and type of ingredients you choose. Paying attention to these details will ensure your Monster Cookies turn out perfectly chewy and flavorful every time:
- Kitchen Staples: You’ll need granulated sugar and brown sugar for the perfect balance of sweetness and moisture, baking soda for lift, and salted butter. Using salted butter adds a subtle depth of flavor that complements the richness of the peanut butter and chocolate. Ensure your butter is at room temperature for easy creaming.
- Eggs: Large eggs are crucial for the structure and richness of these cookies. Always bring them to room temperature before mixing; this helps them emulsify better with the fats and sugars, leading to a smoother, more uniform dough.
- Vanilla Extract: Don’t skimp on quality here. Always use real vanilla extract. Its complex aromatic notes significantly enhance the overall flavor profile. Imitation vanilla simply won’t deliver the same depth and warmth.
- Peanut Butter: Opt for creamy peanut butter, such as Jif or a similar brand. The consistent texture of processed creamy peanut butter is essential for achieving the right dough consistency and cookie spread. Natural peanut butter, with its varying oil separation and coarser texture, is not ideal for this recipe as it can alter the final result.
- Quick Oats: This is a key ingredient for the signature chewy texture. Use quick oats, which are thinner and softer than old-fashioned (rolled) oats. Their smaller flakes integrate seamlessly into the dough, providing a tender chew without making the cookies too dense. Avoid instant oats, as they are too fine and can make the cookies mushy.
- Chocolate Chips: Semisweet chocolate chips provide a classic, balanced sweetness that pairs beautifully with the peanut butter. Feel free to experiment with milk chocolate or dark chocolate if you prefer, but semisweet is a tried-and-true choice.
- Walnuts (Optional): Chopped walnuts add a fantastic textural contrast and a slight bitterness that balances the sweetness. If you choose to include them, consider toasting them briefly in a dry skillet over medium heat or in the oven for about 5-7 minutes. Toasting enhances their natural oils and deepens their nutty flavor, elevating the cookie’s complexity.
- Regular M&M’s: You’ll need a generous 1 pound (or 16 ounces) of regular M&M’s. These candy-coated chocolates not only add vibrant color but also a delightful crunch and extra burst of chocolatey goodness. For an extra touch of bakery-worthy appeal, reserve a handful of M&M’s to press onto the tops of the cookies immediately after they come out of the oven. Be cautious, as the baking pan will be hot!
Expert Tips for Baking the Best Monster Cookies
These incredibly yummy cookies are the perfect remedy for any peanut butter and chocolate craving. Don’t let the large batch size deter you; they freeze beautifully, making them ideal for meal prep or unexpected guests. Plus, you can easily customize them for any holiday or season by simply swapping in festive M&M’s, just like I did with these Patriotic Monster Cookies. Here are my top tips for mastering this classic recipe:
- Batch Size Flexibility: This recipe is a scaled-down version of my mom’s original, which used 12 eggs! While it’s perfect for a substantial yield (about 6 dozen cookies), it can easily be doubled if you’re catering to an exceptionally large group or special event. Conversely, if you prefer a more manageable quantity for everyday enjoyment, the recipe cuts in half perfectly to produce a reasonable three dozen cookies.
- The Right Oats are Key: As mentioned, use quick oats. Their thinner, more delicate flakes are crucial for the ideal chewy texture in these loaded cookies. Old-fashioned (rolled) oats are too coarse and can make the cookies denser, while instant oats are too fine and can lead to a mushy result.
- Customize Your Cookie Size: You have flexibility with cookie size! For a more standard cookie, scoop out about 1 ½ tablespoons of dough per cookie. If you’re aiming for truly “monster-sized” cookies, opt for ¼ cup of dough per cookie, similar to the original recipe. Remember to adjust your baking time accordingly – larger cookies will need more time in the oven.
- Chill for Thicker Cookies: If you desire a thicker, chewier cookie that spreads less, a simple trick is to chill your cookie dough before scooping and baking. Place the dough in the refrigerator for at least 30 minutes, or even a few hours. Cold dough holds its shape better in the oven, resulting in a slightly thicker cookie.
- Avoid Over-Baking: This is perhaps the most crucial tip for achieving that signature chewy texture. Monster Cookies are best when they are slightly underdone in the center. They will continue to set as they cool on the baking sheet. Remove them from the oven when the edges are set and lightly golden, but the centers still look soft and slightly gooey. This ensures a wonderfully moist and chewy bite.
- PRO-Tip: Non-Stick Measuring for Sticky Ingredients: When measuring sticky ingredients like peanut butter, honey, or corn syrup, lightly spray your measuring cup or spoon with non-stick cooking spray. The ingredient will slide right out effortlessly, saving you from frustrating sticky messes and ensuring accurate measurements. This truly is a game-changer!
- Uniformity with a Cookie Scoop: For professional-looking cookies that bake evenly, I highly recommend using a cookie scoop. This ensures that each cookie is the same size, promoting consistent baking times and a beautiful presentation. If the dough starts sticking in the scoop, simply give it a quick clean and continue.
- PRO-Tip: Shaping Hot Cookies: Even with a cookie scoop, cookies sometimes don’t bake into perfect rounds. If this bothers you and you crave that perfectly circular bakery-style look, gently take your spatula and tap the warm cookies into shape immediately after they come out of the oven. Work quickly and carefully, as the baking sheet will be extremely hot. Always use an oven mitt or hot pad for protection.
- PRO-Tip: Garnish for Visual Appeal: To truly make your Monster Cookies look bakery-shop worthy, reserve a small handful of M&M’s and chocolate chips. As soon as the cookies are out of the oven, while they are still hot and pliable, gently press a few of these reserved candies and chips onto the tops of each cookie. This creates a vibrant, inviting visual that makes them even more appealing.
- Freezing Baked Cookies: These cookies are excellent freezer candidates! Once completely cooled, place them in a single layer in a gallon-sized Ziploc freezer bag. Press out as much air as possible before sealing and placing them in the freezer. Alternatively, you can layer them between sheets of parchment paper in an airtight, freezer-safe container. They will maintain their quality for up to three months, though I confess, I’ve enjoyed many a cookie that has been in my freezer for even longer!
- Defrosting: Simply let them sit at room temperature for an hour or so, or if you’re impatient like me, enjoy them slightly frozen for a unique texture!
Recommended Tools for Baking Success
Having the right kitchen tools can make all the difference in your baking experience. For these Classic Monster Cookies, a few essential items will ensure a smooth process and perfect results:
- Large Mixing Bowls: You’ll be combining a good number of ingredients, so spacious mixing bowls are essential for comfortable mixing without spills.
- Electric Mixer (Stand or Handheld): While you can certainly mix by hand, an electric mixer will make quick work of creaming butter and sugars and incorporating eggs and peanut butter, ensuring a smooth, well-combined dough.
- Sturdy Spatula or Wooden Spoon: For scraping down the sides of the bowl and mixing in the dry ingredients and delicious mix-ins.
- Measuring Cups and Spoons: Accurate measurements are crucial in baking, so a reliable set is a must.
- Cookie Scoop: As mentioned in the tips, a cookie scoop ensures uniform cookies, which bake evenly and look professionally made.
- Parchment Paper: Essential for preventing sticking and ensuring easy cleanup. Pre-cut sheets are a real time-saver.
- Baking Sheets: Sturdy, light-colored baking sheets promote even baking. Having multiple sheets allows you to prepare your next batch while the first is baking.
- Cooling Racks: Allow cookies to cool completely and evenly, preventing them from becoming soggy on the bottom.
Frequently Asked Questions About Monster Cookies
Why Are These Called Monster Cookies?
The name “Monster Cookies” can be attributed to several factors, all adding to their legendary status. When my mom first started baking her humongous batches back in the 1970s, her recipe card specified using a ¼ cup of dough per cookie! If that’s not a monster-sized cookie, I don’t know what is! Another plausible explanation is that the cookies are a delightful “mishmash” of ingredients – much like Frankenstein’s monster was a mashup of different parts. This eclectic mix of peanut butter, oats, chocolate chips, and M&M’s truly creates a monstrously good flavor. Lastly, the sheer size of the original recipe itself, calling for truly monstrous quantities of ingredients, undoubtedly contributed to the name. While there might not be a single definitive answer, what’s certain is that these peanut butter oatmeal cookies are incredibly delicious from the very first bite!
Where Did the Recipe Originate?
The origins of Monster Cookies are fascinating and rooted in history. I discovered this intriguing information from a comment on another Monster Cookie recipe: “I have the original monster cookie recipe. It was made in the 1930s by the CCC (Civilian Conservation Corps) in the Depression era. The monster name came from the size of the recipe, not the size of the cookie. It has 12 eggs, 2 lbs brown sugar, 4 cups white sugar, 1 tbs vanilla, 1 tbs Karo, 8 tsp soda, 1 lb butter or margarine, and 3 lbs chunky peanut butter. Mix in a very large bread bowl. Add 18 cups of rolled oatmeal. Add 1 lb M&M’s and 12 oz chocolate chips. There is NO flour. I expect the candy was a later embellishment. My 92-year-old husband’s aunts got the recipe when their husbands were in the CCC.” This historical context adds another layer of appreciation for this beloved, hearty cookie!
How Do You Store Monster Cookies?
To keep your Monster Cookies fresh and chewy, store them in an airtight container at room temperature. They will remain delicious for about 3-4 days. For longer storage, freezing is an excellent option.
Can You Freeze Monster Cookies?
Absolutely! Monster Cookies freeze exceptionally well, making them perfect for preparing ahead or saving for later cravings. Once the cookies have completely cooled, place them in a freezer-quality gallon-sized Ziploc bag, removing as much air as possible before sealing. They can be stored in the freezer for 3-4 months. To enjoy, simply defrost them at room temperature before serving. Personally, I’m quite happy to eat a slightly frozen cookie!
Can You Freeze the Dough?
Yes, freezing the Monster Cookie dough is a fantastic way to have fresh-baked cookies on demand. To freeze the dough, scoop out individual dough balls (to your desired cookie size) and arrange them on a rimmed baking sheet. Cover the baking sheet with plastic wrap and place it in the freezer for a few hours until the dough balls are frozen solid. Once frozen, transfer the dough balls to a freezer-quality Ziploc bag for long-term storage in the freezer. They will keep well for 3-4 months. When you’re ready to bake, you can either bake the dough balls directly from the freezer (extending the baking time by a few minutes) or thaw them in the refrigerator overnight before baking as usual.
You May Also Love These Decadent Treats:
- Indulge in the ultimate dessert experience with Snickers Peanut Butter Brownie Ice Cream Cake from Life Love and Sugar.
- Elevate a childhood classic with these amped-up Reese’s Rice Krispies Treats, bursting with peanut butter and chocolate flavor.
- For a timeless treat, try Dorie Greenspan’s Classic Peanut Butter Cookies.
- Experience the irresistible flavors of a favorite Girl Scout cookie in this delectable Tagalong Dip.
- Dive into layers of rich flavor with this luxurious Peanut Butter Chocolate Mousse Cake.
- Satisfy your sweet tooth with the creamy perfection of Chocolate Peanut Butter Pie.
- Explore even more delightful options in our collection of the Best Cookie Recipes.
Stay in touch through social media @ Instagram, Facebook, and Pinterest. Don’t forget to tag me when you try one of my recipes! And if you love the results, please give it a 5-star rating in the recipe card below.
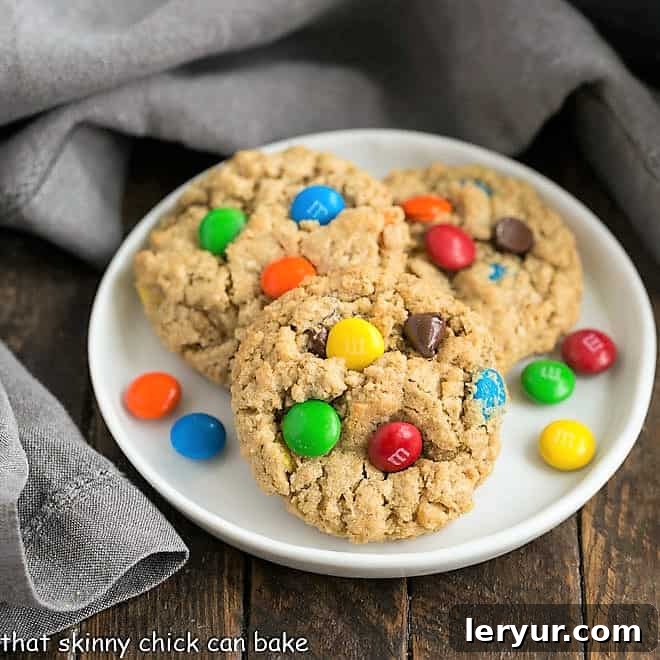
Classic Monster Cookies
15 minutes
12 minutes
27 minutes
6 dozen
These loaded, chewy peanut butter oatmeal cookies are packed with M&M’s, chocolate chips, and walnuts for an irresistible homemade treat.
Ingredients
- ½ cup of salted butter, at room temperature
- 2 ¼ cups packed brown sugar
- 2 cups granulated sugar
- 6 large eggs, at room temperature
- 2 tablespoons pure vanilla extract
- 2 ⅔ cups creamy peanut butter (such as Jif, avoid natural peanut butter)
- 4 teaspoons baking soda
- 9 cups quick oats (not old-fashioned or instant)
- 1 cup semisweet chocolate chips, plus more for garnish
- 1 cup chopped walnuts (optional, lightly toasted for enhanced flavor)
- ½ pound (approx. 1 ½ cups) regular M&M’s, plus more for garnish
Instructions
- Prepare Oven: Preheat your oven to 350°F (175°C). Line several large baking sheets with parchment paper and set aside.
- Cream Wet Ingredients: In a large mixing bowl, cream together the softened butter, brown sugar, and granulated sugar until light and fluffy. Beat in the room temperature eggs one at a time until well combined. Stir in the pure vanilla extract and creamy peanut butter until the mixture is smooth and fully incorporated.
- Combine Dry Ingredients and Mix-ins: Add the baking soda to the wet mixture and mix well. Gradually add the quick oats, chocolate chips, chopped walnuts (if using), and M&M’s. Mix until all ingredients are evenly distributed throughout the dough.
- Scoop Dough: Using a cookie scoop or a rounded tablespoon, scoop out portions of dough and place them onto the prepared parchment-lined baking sheets, leaving about 2 inches between each cookie.
- Bake: Bake for 10-12 minutes, or until the edges are lightly golden and set, but the centers still look slightly soft. If you opt for larger, ¼ cup sized cookies, extend baking time to about 18-20 minutes.
- Cool: Allow the cookies to cool on the baking sheets for a few minutes before transferring them to a wire rack to cool completely.
Notes
For truly authentic “MONSTER” cookies, the original recipe suggests using ¼ cup dough balls and baking them for approximately 20 minutes. For an extra touch of visual appeal, gently press a few reserved M&M’s onto the tops of the cookies immediately after they come out of the oven, while they are still warm. This recipe is highly adaptable and can easily be cut in half if you prefer to make about 3 dozen cookies instead of 6 dozen. When reviewing the nutritional information below, please note that 2 cookies are considered one serving.
Recommended Products
As an Amazon Associate and member of other affiliate programs, I earn from qualifying purchases.
- Black Spatula
- Reynolds Cookie Baking Sheets Non-Stick Parchment Paper, 25 Sheet, 4 Count
- USA Pan Bakeware Half Sheet Pan
Nutrition Information:
Yield: 36 cookies
Serving Size: 2 cookies
Amount Per Serving:
Calories: 374
Total Fat: 19g
Saturated Fat: 6g
Trans Fat: 0g
Unsaturated Fat: 11g
Cholesterol: 39mg
Sodium: 316mg
Carbohydrates: 46g
Fiber: 3g
Sugar: 31g
Protein: 8g
HOW MUCH DID YOU LOVE THIS RECIPE?
Please leave a comment on the blog or share a photo on Pinterest