
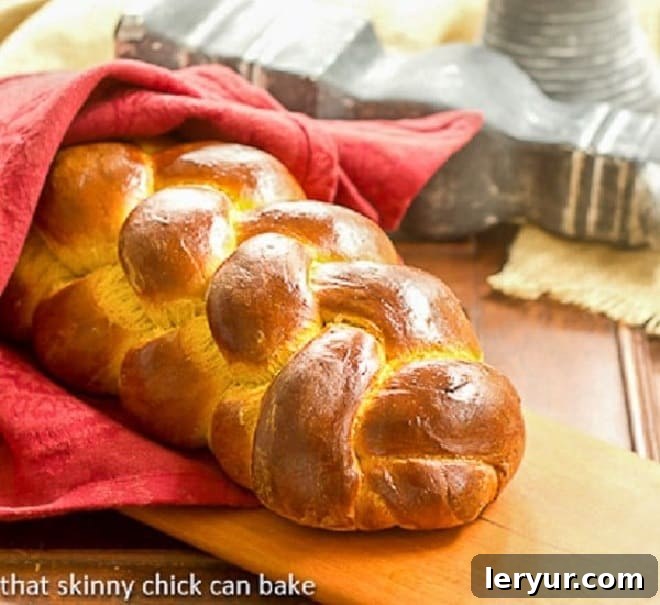
Welcome to the ultimate guide for baking a truly special loaf that captures the essence of autumn: **Pumpkin Challah**. This rich, beautifully braided bread, infused with the subtle sweetness and vibrant hue of pumpkin, is destined to become the star of your Thanksgiving table, holiday gatherings, or any meal where exceptional homemade bread is desired. If you cherish the luxurious, eggy texture of classic challah, prepare to fall in love with its seasonal counterpart.
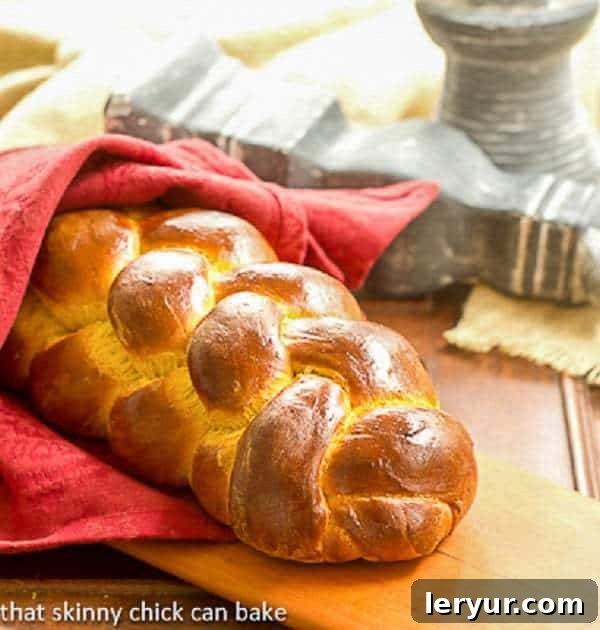
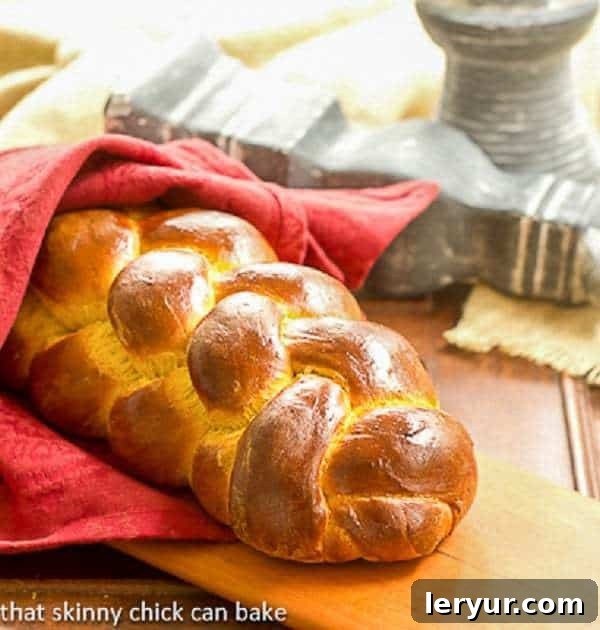
This **Braided Bread** offers a delightful autumnal twist, transforming a beloved classic into a showstopper with the simple addition of pumpkin puree. The result is an incredibly soft, tender, and moist loaf that complements virtually any dish. Beyond its exquisite taste and texture, the radiant golden-orange color of this pumpkin challah is simply phenomenal, promising a feast for the eyes as well as the palate.
Why You’ll Absolutely Love This Pumpkin Challah Recipe
Embrace the flavors of the season with this remarkable pumpkin challah. Here’s why this recipe deserves a special place in your baking repertoire this fall:
- Seasonal Perfection: This challah recipe is crafted to celebrate autumn, making it the ideal bread for fall holidays, cozy weekend brunches, or simply to add a touch of warmth to any meal. Its seasonal appeal is undeniable, bringing the comfort of pumpkin to a beloved bread.
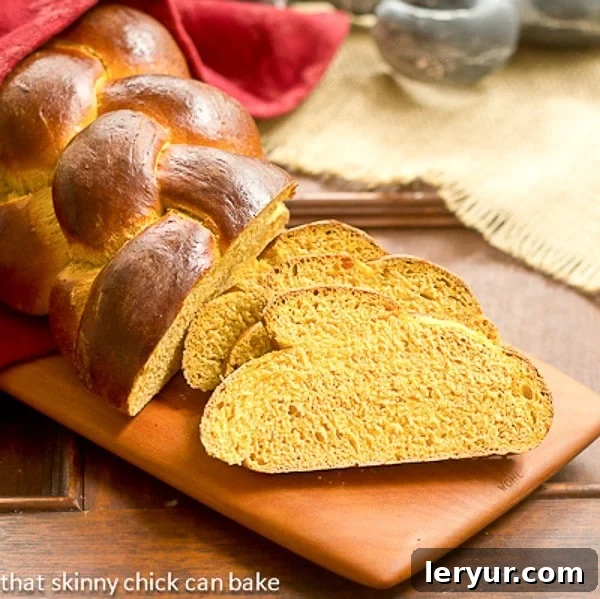
- Enhanced Moisture and Flavor: The pumpkin puree isn’t just for color; it’s a secret ingredient that adds an incredible depth of moisture and a delicate sweetness to the bread. This results in a challah that is even softer and more tender than the traditional version, with a comforting, earthy pumpkin note that is subtle, not overpowering.
- A Rewarding Baking Experience: If you’ve ever dreamt of braiding your own bread, this is your perfect opportunity to learn and practice. While the idea of braiding might seem daunting, the process is incredibly satisfying, and the end result—a beautiful, golden-brown loaf—is immensely rewarding. Even if your first attempt isn’t perfectly symmetrical, the taste will be absolutely delicious, and with each bake, your braiding skills will improve!
- Versatility for Any Occasion: While it shines brightly during Thanksgiving and other fall celebrations, the mild pumpkin flavor and rich texture make this challah versatile enough to be enjoyed year-round. It’s fantastic with savory meals, delightful as toast, and incredible in creative leftover dishes.
- Visually Stunning: The natural beta-carotene from the pumpkin gives this challah a stunning, deep golden-orange hue, making it a true centerpiece on any table. Its intricate braided pattern, combined with its vibrant color, makes it a feast for the eyes before you even take the first bite.
I remember the immense satisfaction of finally conquering the seemingly complex 6-strand challah braid. It felt like a significant baking milestone, thanks in large part to an incredibly helpful online video tutorial by the renowned Joan Nathan. As someone who struggles even with simple hair braiding, achieving this intricate loaf was a huge personal victory.
I enlisted my daughter’s eager assistance, and together, we watched the tutorial, mimicking each movement as I braided and repeated Joan’s instructions aloud. The process, while initially challenging, became a shared learning experience. I sincerely hope that with each subsequent bake, the braiding becomes more intuitive! But regardless of the learning curve, the results were consistently a spectacular loaf of bread. My curiosity about pumpkin challah had been piqued after seeing several fellow bloggers share their autumnal versions. My personal preference leaned towards highlighting the natural, earthy sweetness of pumpkin itself, rather than overwhelming it with a medley of autumn spices. Therefore, I opted to omit additions like cinnamon and nutmeg, allowing the pure essence of the pumpkin to truly shine through.
Mastering the Perfect Pumpkin Challah: Expert Tips for Success
Crafting a flawless loaf of pumpkin challah is a rewarding endeavor. Follow these expert tips to ensure your bread turns out beautifully moist, flavorful, and perfectly risen every time:
- Embrace Subtle Pumpkin Flavor: If you’re concerned about a strong, dominant pumpkin taste, rest assured. This challah offers a delightful, nuanced sweetness from the pumpkin, but it’s not an overtly “squashy” flavor. It’s a gentle background note that adds richness without taking over. It’s designed to be approachable even for those who aren’t pumpkin purists.
- Spice It Up (Optional): While this particular recipe focuses on the pure flavor of pumpkin, feel free to personalize it! If you adore warm, aromatic spices, consider adding 1-2 teaspoons of ground cinnamon, a half teaspoon of nutmeg, or a pinch of ground ginger or allspice to your dough. These additions will create a more traditional “fall spice” profile, but remember, this plainer version offers greater versatility for serving with various meals.
- PRO-Tip for Perfect Proofing: Patience is paramount when proofing bread dough. Never force your dough to rise in overly warm conditions. The ideal temperature range for a successful proof is generally between 75-95°F (24-35°C). Many professional bread makers actually prefer a cooler, slower rise, believing it develops a richer flavor and a superior crumb structure. A slow rise allows the yeast to work more gradually, creating complex flavors and a lighter, airier texture. Find a warm, draft-free spot, and let nature take its course.
- Minimize Extra Flour: When you’re shaping your dough, particularly during the braiding stage, resist the urge to add excessive amounts of flour to your work surface or hands. Too much additional flour can alter the dough’s hydration, making your final bread drier and tougher. Use the absolute minimal amount necessary to prevent sticking. A lightly floured surface is all you need to maintain the perfect consistency of your already perfected recipe.
- Creative Leftover Ideas: Don’t let a single slice of this magnificent challah go to waste! Leftover pumpkin challah makes the most incredible French toast you’ll ever taste. The rich, eggy bread is perfectly suited for soaking up a custardy batter. Elevate your French toast experience by topping it with sautéed apples spiced with cinnamon and a drizzle of maple syrup—a truly decadent breakfast or brunch.
- PRO-Tip for Optimal Rise: A crucial indicator of properly proofed dough is its size and texture. Your dough should proof to approximately triple its original volume before baking. If it doesn’t rise sufficiently, the braids might separate during baking, or the finished bread could turn out dense and cake-like instead of light and airy. When gently prodded, properly proofed dough should feel puffed like a marshmallow and have a noticeable wobble as you move it, indicating a light and airy internal structure.
I sent a portion of the freshly baked loaf home with my eldest son, and his immediate feedback was that he didn’t perceive much difference in flavor from regular challah. This might have been influenced by the generous amount of butter he slathered on his slice, but I was secretly pleased that the pumpkin flavor wasn’t overly assertive or “squashy,” maintaining the classic challah experience with a subtle twist.
The Art of Braiding Challah: A Step-by-Step Guide for Beautiful Loaves
Braiding challah is not just a culinary technique; it’s an art form that transforms a simple dough into a magnificent, visually appealing loaf. While it might seem intimidating at first, with a few simple tips and practice, you’ll be creating stunning braids in no time. Here’s how to achieve a beautiful, symmetrical challah:
- PRO-Tip for Even Strands: The key to a consistent and beautiful braid is starting with uniformly sized strands of dough. Divide your dough into the desired number of parts (typically 3, 4, or 6 strands for challah). For precision, especially if you’re new to this, use a kitchen scale to weigh each portion, ensuring they are perfectly equal. This small step makes a significant difference in the final appearance of your loaf.
- Shape and Lengthen Gently: Once divided, shape each dough ball into a rough log. Then, gently roll them out into long, even strands. The goal is to lengthen the dough without tearing or stressing it. Avoid stretching the dough aggressively, as this can lead to visible striations or uneven texture once the bread rises and bakes. A gentle, even rolling motion is best.
- Arrange Your Strands: On a lightly floured work surface, lay out your dough strands parallel to each other. If you notice one strand is slightly longer than the others, strategically place it in the middle—this can sometimes help balance the braid. Leave a small, consistent gap (about an inch or so) between each strand to allow for expansion during braiding and proofing.
- Secure the Top: Gather the ends of all your strands at the top and firmly pinch them together. This creates a secure anchor for your braid. Once pinched, tuck these joined ends underneath the loaf to create a neat starting point. This prevents the top from unraveling and gives your challah a professional finish.
- PRO-Tip for Braiding: For a classic 3-strand braid, simply braid the dough as you would braid three strands of hair. Take the rightmost strand, cross it over the middle one, then take the leftmost strand and cross it over the *new* middle one. Repeat this pattern, maintaining even tension, until you reach the end. Once braided, firmly pinch the opposite ends together and tuck them underneath the loaf, mirroring how you secured the top. For more complex braids (like 4, 5, or 6 strands), numerous excellent online video tutorials are available that demonstrate the specific weaving patterns. Don’t hesitate to consult them if you want to try something more intricate.
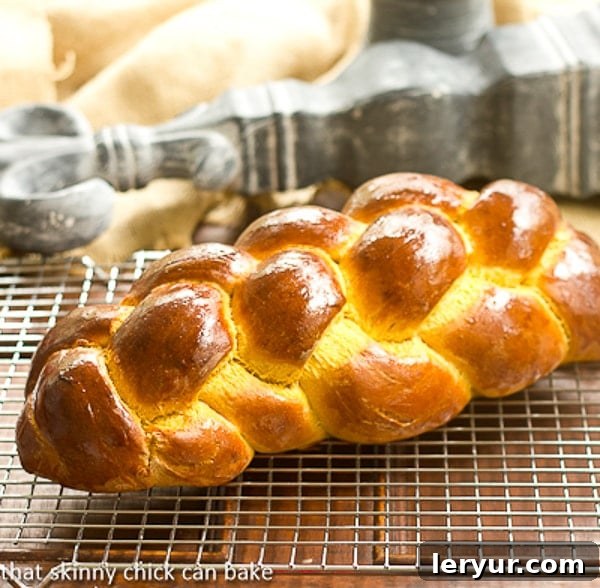
- The Golden Egg Wash: After your braided bread has completed its final proofing, brush it generously with an egg wash. An egg wash (typically a whisked egg yolk with a touch of water or milk) creates that signature glossy, deep golden-brown crust that challah is famous for. It not only adds shine but also contributes to the loaf’s rich color and slightly crisp exterior.
- PRO-Tip for Maximum Sheen: To ensure every nook and cranny of your beautiful braid achieves that perfect glaze, consider applying a second egg wash. After your challah has baked for about 20-25 minutes, carefully remove it from the oven and apply another thin layer of egg wash. As the bread rises and expands in the oven, new surfaces and crevices can be exposed. This second wash ensures those newly revealed areas also get glazed, resulting in an even more uniform and lustrous finish across the entire loaf.
- Visual Learners Welcome: If you’re unsure about braiding techniques, especially for multi-strand options, remember that the internet is a treasure trove of resources. Search for “how to braid challah 3 strands,” “6 strand challah braid tutorial,” or similar phrases on platforms like YouTube. Watching a video can often clarify steps that are difficult to grasp from written instructions alone, making the process much easier and more enjoyable.
Frequently Asked Questions About Challah
Challah is a traditional Jewish yeast bread, deeply embedded in cultural and religious practices. It is famously served on the Sabbath (Shabbat), various Jewish holidays, and other significant occasions. What distinguishes challah is its remarkable richness, derived from a generous amount of eggs in the dough, which contributes to its signature golden color and tender crumb. While it can be formed into many beautiful shapes—from spirals to knots—braiding a long loaf is arguably its most classic and recognizable form, symbolizing interconnectedness and blessings.
Both challah and brioche are revered for being rich, soft, and eggy types of bread, but they have distinct differences, primarily in their fat content. Traditional challah is made with oil (often vegetable oil) as its primary fat, making it pareve (neither meat nor dairy) and suitable for consumption with either meat or dairy meals according to kosher dietary laws. Brioche, on the other hand, is a French bread that is famously enriched with a substantial amount of butter, giving it a much richer, almost cake-like texture and a distinctly buttery flavor. This butter content means brioche is considered dairy. While both are utterly delicious, their fat source and dietary classifications set them apart.
While challah is undoubtedly delicious, categorizing it as “healthy food” requires a nuanced perspective. It does offer some nutritional benefits: the eggs in the dough provide a good source of protein, and because it’s typically made with oil instead of butter, it contains less saturated fat compared to brioche. Furthermore, with the addition of pumpkin puree in this recipe, you’re incorporating some beneficial vitamins and minerals like Vitamin A and dietary fiber. However, like most enriched bread, challah is still relatively high in carbohydrates and calories. It’s best enjoyed as a wholesome, occasional treat or as part of a balanced diet rather than a staple health food. Everything in moderation!
Explore More Autumnal Delights: You May Also Like:
If you’re enchanted by the flavors of pumpkin and the coziness of fall baking, you’ll love these other delicious recipes:
- Pumpkin Churro Cheesecake Bars from Nutmeg Nanny: A delightful fusion of classic churros and creamy pumpkin cheesecake.
- Old Fashioned Pumpkin Roll: A timeless dessert featuring a delicate pumpkin cake rolled with sweet cream cheese frosting.
- Caramel-Topped Pumpkin Cheesecake: Indulgent and decadent, this cheesecake is crowned with a luscious caramel sauce.
- Pumpkin Pie Cupcakes: All the flavors of your favorite pie, perfectly portioned into adorable cupcakes.
- Classic Pumpkin Bread: A quintessential fall bake, moist and spiced to perfection.
- Pumpkin Bars with Cream Cheese Frosting: Soft, chewy pumpkin bars topped with a rich and tangy cream cheese frosting.
- My Favorite Pumpkin Recipes: A curated collection of my most cherished pumpkin-centric dishes.
- More Bread Recipes: Discover a wide array of bread recipes, from savory to sweet.
We love connecting with our amazing baking community! Stay in touch through social media @ Instagram, Facebook, and Pinterest. Don’t forget to tag me when you try one of my recipes – I adore seeing your creations! And if you absolutely love the results and this recipe becomes a new favorite, please consider giving it a 5-star rating in the recipe card below. Your feedback helps other bakers discover these delightful recipes!
Pumpkin Challah Recipe
30 minutes
40 minutes
1 hour 10 minutes
1 loaf
A fabulous, rich, and tender 6-strand pumpkin challah loaf, inspired by The Shiska blog, perfect for any fall gathering.
Ingredients
- 1 package active dry yeast (Red Star brand recommended)
- ½ cup lukewarm water, divided (approximately 110ºF / 43ºC)
- 1 tablespoon plus 1 ½ teaspoons sugar
- 2 tablespoons whisked egg (half of one large egg)
- 3 egg yolks
- 2 tablespoons honey
- 1 tablespoon vegetable oil
- 1 teaspoon salt
- ¼ cup brown sugar
- 1 cup canned pumpkin puree (not pie filling)
- 3 ½ – 4 ½ cups all-purpose flour
For the Egg Wash:
- 1 egg yolk
- 1 ½ teaspoons water
Instructions
- Activate Yeast: Pour ¼ cup of the lukewarm water (around 110°F or 43°C) into a large mixing bowl or the bowl of your stand mixer. Add the yeast and 1½ teaspoons of sugar to the bowl, then gently stir to dissolve.
- Proof the Yeast: Allow the mixture to sit undisturbed for 10 minutes. The yeast should become foamy and bubbly, indicating it’s active and ready. Next, add the remaining ¼ cup lukewarm water, the rest of the sugar, whisked egg, egg yolks, honey, vegetable oil, and salt to the bowl. Whisk everything thoroughly to combine all the wet ingredients.
- Form the Dough: Stir in the brown sugar and pumpkin puree. Using the paddle attachment of your stand mixer (or a sturdy wooden spoon if mixing by hand), begin to gradually add the all-purpose flour, a half cup at a time. Continue mixing until the dough comes together, becoming smooth and elastic, and is no longer sticky to the touch. You may not need all of the flour, or you might need a little extra; adjust as necessary.
- Knead the Dough: If using a stand mixer, switch to the dough hook attachment and knead on low speed for a couple of minutes until the dough is smooth and resilient. If kneading by hand, turn the dough out onto a lightly floured surface and knead for 8-10 minutes, until it’s pliable and elastic.
- First Rise (Bulk Fermentation): Lightly grease a clean mixing bowl. Place the ball of dough into the greased bowl, then turn it over once to ensure both sides are lightly coated in oil. Cover the bowl with a damp kitchen towel or plastic wrap.
- Proofing Environment: For optimal rising, place the covered bowl in your unheated oven. Place a pan of hot water on a lower rack in the oven; the warmth and humidity will create a perfect environment for the dough. Let the dough rise for 2 hours, gently punching it down at the 1-hour mark to release gases and develop flavor. The dough should roughly double in size.
- Prepare for Shaping: Once the dough has completed its first rise, gently punch it down a few times in the bowl to deflate it. Turn the dough out onto your lightly floured work surface. If the dough feels a bit sticky, knead in a small amount of additional flour, just enough to make it manageable.
- Shape and Braid: Divide the dough into thirds (or the number of strands you desire for your braid). Roll each portion into a long, even “snake” or strand. Then, braid the strands as desired. For a classic look, a simple 3-strand braid is beautiful. For a more intricate loaf, refer to online video tutorials for 4-strand or 6-strand braiding techniques.
- Second Rise (Proofing the Loaf): Carefully transfer the braided bread onto a parchment-lined baking sheet. Prepare the egg wash by whisking together the egg yolk and 1½ teaspoons of water. Gently brush the entire surface of the loaf with the egg wash. Let the braided bread rest for its second proof while you preheat your oven to 350°F (175°C). The loaf should look slightly puffed.
- Bake to Golden Perfection: Bake the challah for a total of 35-40 minutes. Halfway through the baking time (around 18-20 minutes), carefully rotate the pan 180 degrees to ensure even browning. If you notice the crust is browning too quickly, loosely tent the loaf with aluminum foil to prevent over-darkening. The bread is done when it’s a deep golden-brown and sounds hollow when you gently tap on the bottom.
- Cool and Serve: Once baked, immediately remove the challah from the oven and transfer it to a wire cooling rack. Allow the bread to cool completely before slicing and serving. This ensures the crumb sets properly and enhances the flavor. Enjoy!
Notes
Total time listed does not include the essential dough proofing times.
Recommended Baking Tools
As an Amazon Associate and member of other affiliate programs, I earn from qualifying purchases.
- 7 qt Pro Line KitchenAid Mixer
- Roul’Pat Silicone Countertop Mat
- USA Pan Bakeware Half Sheet Pan
Nutrition Information:
Yield:
18 Servings
Serving Size:
1 Slice
Amount Per Serving:
Calories: 443
Total Fat: 3g
Saturated Fat: 1g
Trans Fat: 0g
Unsaturated Fat: 2g
Cholesterol: 47mg
Sodium: 126mg
Carbohydrates: 90g
Fiber: 3g
Sugar: 6g
Protein: 12g
HOW MUCH DID YOU LOVE THIS RECIPE?
Please leave a comment on the blog or share a photo on Pinterest