
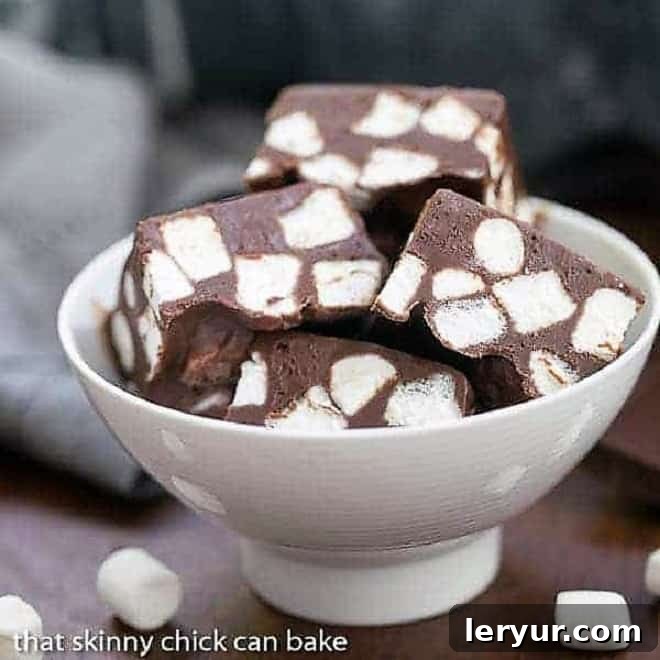
Short on time but craving an incredibly rich and satisfying chocolate treat? Look no further than this unbelievably simple 3-Ingredient Chocolate Marshmallow Fudge! It’s the perfect solution for busy schedules, offering maximum flavor with minimal effort.
Whether you’re looking for a delightful last-minute gift, a fun and engaging afternoon project to do with your children, or simply a decadent dessert to curb a sweet craving, whipping up a batch of this incredibly easy fudge recipe will be a decision you won’t regret. Its smooth texture and rich chocolate flavor, studded with soft marshmallows, make it an instant classic.
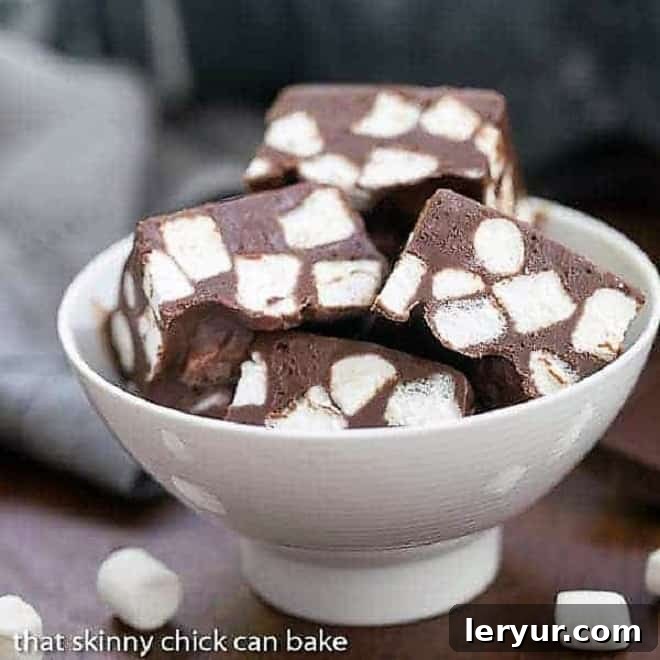
Why This 3-Ingredient Fudge is an Absolute Must-Make
Life can get hectic, and sometimes, the thought of elaborate baking projects feels overwhelming. This fudge recipe shines precisely because it simplifies indulgence without compromising on taste or quality. Imagine this scenario: two days before our annual family vacation, with our oldest visiting for dinner, I realized my freezer only held a few forlorn cookie crumbs. Panic setting in? Not with this recipe up my sleeve!
This effortless chocolate marshmallow fudge emerged as the perfect solution, proving itself invaluable for several compelling reasons:
- Effortless Preparation: Forget complex sugar thermometers or lengthy cooling processes. This recipe relies on a simple melt-and-mix method, primarily utilizing your microwave, making it incredibly beginner-friendly.
- Pantry Staple Ingredients: All you need are three readily available ingredients you likely already have or can easily find at any grocery store: semi-sweet chocolate, a bag of mini marshmallows, and a can of sweetened condensed milk. No obscure or expensive specialty items required!
- Long-Lasting Delight: Unlike many desserts that need to be consumed immediately, this fudge holds up beautifully. It can last for weeks in the refrigerator, making it excellent for meal prepping desserts, gifting, or simply having a treat on hand.
- Family Favorite: My family, like many others, absolutely adored this rich and creamy “Eagle Brand” inspired fudge. The best part? The cook didn’t have to break a sweat, leaving more time for enjoying company rather than slaving over a hot stove.
- Versatile & Adaptable: While delicious on its own, this fudge serves as a fantastic base for endless customizations. Add nuts, dried fruits, or different candy pieces to tailor it to any taste or occasion.
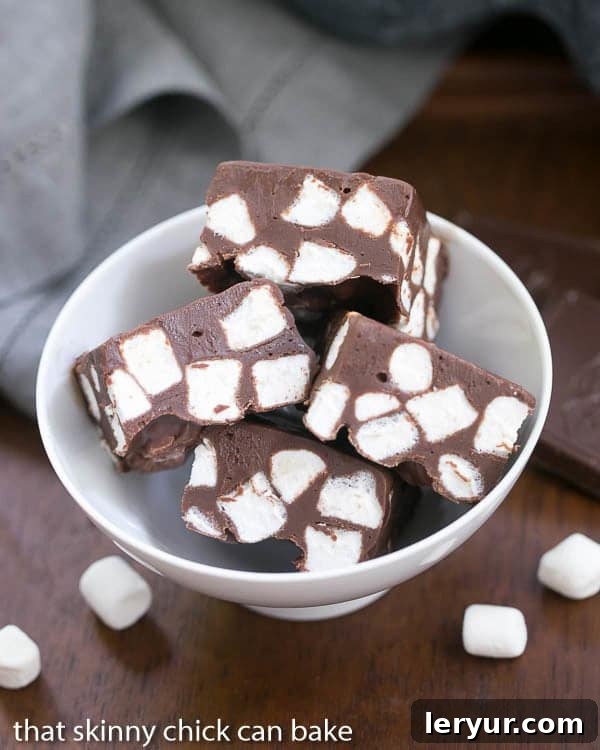
The Magic of 3 Ingredients: Understanding What Makes It Work
The beauty of this recipe truly lies in its simplicity. Each of the three core ingredients plays a vital role in creating that irresistible, melt-in-your-mouth fudge experience. Let’s break down the magic:
- Semi-Sweet Chocolate: This is the foundation of our fudge. Semi-sweet chocolate provides a deep, authentic chocolate flavor without being overly sweet. Unlike some traditional fudge recipes that might incorporate a lot of added sugar, the semi-sweet chocolate ensures an intense chocolate base. You can use high-quality chocolate chips or finely chopped baking bars for the best results. The quality of your chocolate will significantly impact the final taste, so choose wisely! For an even richer flavor, consider using a blend of semi-sweet and a smaller portion of dark chocolate.
- Sweetened Condensed Milk: This ingredient is the unsung hero, replacing a complex sugar and milk cooking process. Sweetened condensed milk is essentially cow’s milk from which water has been removed, and a substantial amount of sugar has been added. When combined with chocolate and heated, it creates a perfectly creamy, stable emulsion that sets beautifully into fudge. It’s the binding agent and the primary source of sweetness and smoothness, ensuring your fudge is never grainy.
- Mini Marshmallows: These tiny clouds of sweetness add a delightful chewiness and lightness to the dense fudge. They melt into pockets of soft, gooey texture, complementing the richness of the chocolate. While mini marshmallows are recommended for easier melting and distribution, you can chop larger marshmallows if that’s all you have on hand. They also subtly balance the intense chocolate flavor, making the fudge appealing to a broader palate.
I must confess, I’m not typically the biggest fudge or marshmallow enthusiast in my family. However, even I found this particular recipe to be incredibly tasty! The chocolate base had a more intense, sophisticated chocolate flavor because the semi-sweet chocolate wasn’t overloaded with additional sugars, unlike some of my No-Fail Fudge variations. But the real genius? The marshmallows perfectly balanced out the sweetness, creating a harmonious blend that was simply irresistible. We even enjoyed some of this deliciousness after returning from a marvelous trip to Alaska, where, alas, it was too early in the season for aurora borealis sightings, but the memories of this fudge lingered long after the journey!
Step-by-Step Guide: Crafting Your Decadent 3-Ingredient Chocolate Marshmallow Fudge
Making this fudge is remarkably straightforward, requiring minimal equipment and culinary skill. Follow these easy steps to achieve perfect, rich, and creamy chocolate marshmallow fudge every time:
- Prepare Your Pan: Begin by lining an 8×8-inch baking pan with nonstick foil. This simple step serves a dual purpose: it completely prevents the fudge from sticking to the pan, ensuring easy removal, and it acts as a convenient “sling.” Once the fudge has cooled and set, you can simply lift the foil edges to effortlessly remove the entire block of fudge from the pan for cutting. If you don’t have nonstick foil, regular foil sprayed with cooking spray or lined with parchment paper will also work.
- Combine Ingredients: In a generously sized, microwave-safe bowl, combine your 12 ounces of semi-sweet chocolate (chopped or chips) and the entire 14-ounce can of sweetened condensed milk. Ensure your chocolate is in smaller pieces to facilitate even melting.
- Gentle Melting: Place the bowl in the microwave and heat in short 30-second increments. After each interval, remove the bowl and stir the mixture thoroughly. This stirring is crucial to prevent the chocolate from burning and to ensure it melts smoothly and evenly. Continue microwaving and stirring until the chocolate is fully melted and the mixture is smooth, glossy, and well combined, with no lumps remaining. This usually takes about 2-3 minutes in total, depending on your microwave’s power. Alternatively, you can use a double boiler on the stovetop for a more controlled melting process.
- Stir in Marshmallows: Once your chocolate mixture is perfectly smooth, add the 3 cups of mini marshmallows. Gently fold them into the warm fudge mixture. The residual heat from the chocolate will soften the marshmallows, creating delightful pockets of gooeyness throughout the fudge. Don’t overmix; you want the marshmallows to be incorporated but not completely melted into obscurity.
- Spread and Chill: Pour the warm fudge mixture into your prepared 8×8-inch pan. Use a spatula to spread it evenly into all corners and flatten the top as much as possible. Once evenly distributed, transfer the pan to the refrigerator. Allow the fudge to chill for at least one hour, or until it is completely firm and set. This crucial step ensures the fudge holds its shape when cut.
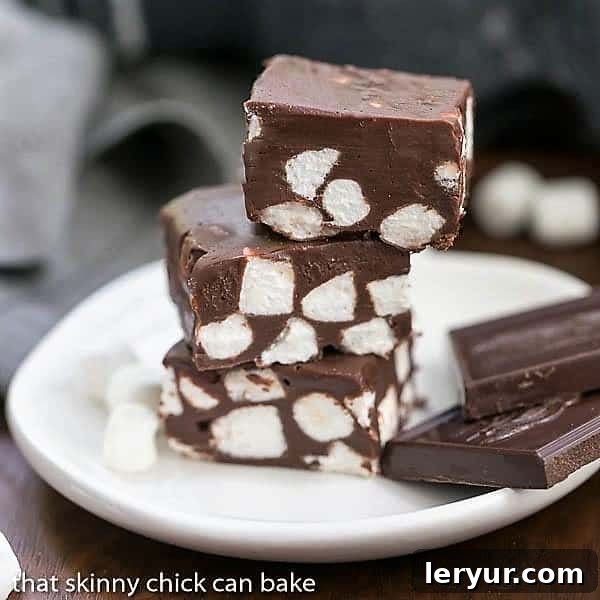
- Cut and Serve: Once thoroughly chilled, use the foil sling to lift the fudge from the pan. Place it on a clean cutting board. Using a sharp knife (running it under hot water and wiping it clean between cuts can help achieve cleaner edges), cut the fudge into desired squares or rectangles. Serve immediately and enjoy your homemade, incredibly easy chocolate marshmallow fudge!
How to Store Your Homemade Fudge for Maximum Freshness
One of the many advantages of this delightful fudge with sweetened condensed milk is its impressive shelf life. Properly stored, it maintains its fresh taste and texture for an extended period, making it ideal for making ahead or enjoying over time. Here’s how to best store your homemade fudge:
- PRO-Tip for Storage: Always store your fudge in an airtight container. This prevents it from drying out, absorbing odors from the refrigerator, or becoming stale. If you’re stacking multiple layers of fudge squares, place a sheet of parchment paper or wax paper between each layer. This prevents them from sticking together and makes it easier to grab individual pieces.
- Room Temperature Storage: If you plan to consume the fudge within a week or so, it can be kept at cool room temperature. Ensure it’s in an airtight container and away from direct sunlight or heat sources. This keeps it perfectly soft and ready to eat.
- Refrigerator Storage: For longer enjoyment, store the fudge in the refrigerator. Placed in an airtight container, it will remain fresh and delicious for up to a month. Chilled fudge tends to have a firmer texture, which some people prefer.
- Freezer Storage: This fudge freezes exceptionally well! For even longer preservation, cut the fudge into squares, wrap individual pieces tightly in plastic wrap, then place them in a freezer-safe airtight container or heavy-duty freezer bag. It can be frozen for 3-4 months without significant loss of quality. Thaw frozen fudge at room temperature for an hour or two before serving.
Frequently Asked Questions About Chocolate Marshmallow Fudge
These two milk products are often confused, but they are fundamentally different and are used to create distinct types of fudge. Sweetened condensed milk, as used in this recipe, is a thick, syrupy product with added sugar, making it perfect for quick, no-cook (or microwave-cook) fudge. This method uses minimal ingredients and is incredibly fast.
Fudge made with evaporated milk, on the other hand, is unsweetened condensed milk. This type of fudge typically requires a stovetop method, involves boiling the mixture to reach a specific temperature for crystallization, takes more time, and generally uses additional ingredients like sugar, butter, and flavorings. The resulting texture of each type of fudge is unique: condensed milk fudge is often softer and creamier, while evaporated milk fudge can be denser and slightly more crumbly. Ultimately, which is “better” is a matter of personal preference and the specific recipe you’re aiming for.
Making fudge with sweetened condensed milk is one of the simplest methods available. The process involves combining a can of sweetened condensed milk with chopped chocolate or chocolate chips in a heat-safe bowl. This mixture is then gently melted, typically in a microwave in short intervals, with frequent stirring until it becomes smooth and glossy. Once the base is melted, other desired ingredients, such as marshmallows, nuts, or extracts, are stirred in. The mixture is then spread into a prepared pan and refrigerated until firm. It’s a quick, straightforward, and virtually foolproof method to achieve delicious homemade fudge.
The possibilities for customizing fudge are virtually endless, allowing you to tailor it to any flavor preference or occasion. Here are some popular and delicious additions:
- Nuts: Chopped pecans, walnuts, almonds, or peanuts add a lovely crunch and nutty flavor. Toasting them lightly beforehand can enhance their aroma.
- Dried Fruit: Sweet and chewy dried cranberries, cherries, raisins, or chopped apricots can provide a delightful contrast in texture and taste.
- Chocolate Chips: Add different types of chocolate chips (white, milk, dark, butterscotch, peanut butter) for layered flavors. Freezing them beforehand can prevent them from melting completely, giving you distinct chocolate chunks.
- Candy Bars: Chop up your favorite frozen candy bars like Milky Way, Snickers, Twix, or Reese’s Peanut Butter Cups for an extra indulgent treat.
- Cookies & Biscuits: Crushed Oreo cookies, graham crackers, Biscoff, or shortbread biscuits add fantastic texture and flavor.
- Caramel: Soft bits of caramel or a swirl of melted caramel sauce can introduce a buttery, chewy element.
- Seasonal Additions: During the holidays, crushed candy canes along with a touch of peppermint extract create a festive flavor. For fall, a sprinkle of pumpkin pie spice or cinnamon can be wonderful.
- Extracts & Flavorings: A dash of vanilla extract is always a good idea, but you can also experiment with peppermint, almond, orange, or coffee extracts to infuse different notes.
Absolutely! While the microwave method is incredibly convenient and quick, you can easily make this fudge using a double boiler on the stovetop. Simply place your chocolate and sweetened condensed milk in a heat-safe bowl set over a saucepan of simmering water (making sure the bottom of the bowl doesn’t touch the water). Stir continuously until the chocolate is fully melted and the mixture is smooth. Then proceed with adding the marshmallows and chilling as instructed.
For perfectly neat squares, ensure your fudge is thoroughly chilled and firm. Remove it from the pan using the foil sling and place it on a sturdy cutting board. The trick for clean cuts is to use a very sharp, thin-bladed knife. For extra-crisp edges, run your knife under hot water for a few seconds, wipe it completely dry, and then make your cut. Repeat this process for each cut: heat, wipe, cut. This prevents the fudge from sticking to the knife and creates smooth, defined edges.
You May Also Like: More Irresistible Fudge and Dessert Recipes
If you’ve fallen in love with the simplicity and deliciousness of this chocolate marshmallow fudge, you’ll be thrilled to discover more delightful recipes to expand your sweet repertoire. Here are some fantastic ideas to try next:
- 25 Easy Fudge Recipes from Wine and Glue (for even more quick fudge inspiration!)
- Red Velvet Fudge (a vibrant and rich option for special occasions)
- Oreo White Chocolate Fudge (combining classic cookies with creamy white chocolate)
- Festive White Chocolate Fudge (perfect for holidays or colorful celebrations)
- White Chocolate Fudge with Sprinkles (a fun and whimsical treat everyone will love)
- Explore more of my Best Dessert Recipes for a wide range of sweet inspirations!
Stay connected and share your culinary creations with me through social media! You can find me on Instagram, Facebook, and Pinterest. Don’t forget to tag me when you try one of my recipes! If you absolutely love the results, please consider giving it a 5-star rating in the recipe comments or wherever reviews are available. Your feedback means the world!
Chocolate Marshmallow Fudge Recipe
Prep Time: 15 minutes
Cook Time: 2 minutes
Total Time: 17 minutes
Yield: Approximately 36 squares
Description: An incredibly easy, rich, and delicious fudge recipe, chock full of soft marshmallows.
Ingredients
- 12 ounces (approx. 340g) semi-sweet chocolate (high-quality chips or finely chopped baking bars recommended)
- 14 ounces (1 can, approx. 396g) sweetened condensed milk
- 3 cups mini marshmallows
Instructions
- Line Pan: Line an 8×8-inch baking pan with nonstick foil, leaving an overhang on the sides to create a “sling” for easy removal.
- Combine: In a large microwave-safe bowl, combine the semi-sweet chocolate and sweetened condensed milk.
- Melt: Microwave the mixture in 30-second increments, stirring thoroughly after each interval. Continue until the chocolate is completely melted and the mixture is smooth and glossy (usually 2-3 minutes total).
- Add Marshmallows: Stir in the mini marshmallows until they are well distributed and slightly softened by the residual heat.
- Set: Pour the fudge mixture into the prepared pan and spread evenly. Refrigerate for at least 1 hour, or until completely firm.
- Cut & Serve: Use the foil sling to lift the fudge out of the pan. Place on a cutting board and cut into 36 squares. Serve and enjoy!
Notes
This fudge freezes exceptionally well. For best results, wrap individual pieces tightly in plastic wrap before freezing in an airtight container.
Nutrition Information (Estimated per serving)
- Yield: 36 servings
- Serving Size: 1 square
- Calories: 108
- Total Fat: 4g
- Saturated Fat: 3g
- Trans Fat: 0g
- Unsaturated Fat: 1g
- Cholesterol: 5mg
- Sodium: 23mg
- Carbohydrates: 18g
- Fiber: 1g
- Sugar: 16g
- Protein: 2g
Please note that nutritional information is an estimate and can vary based on specific ingredients and brands used.
Cuisine: American
/
Category: Chocolate