
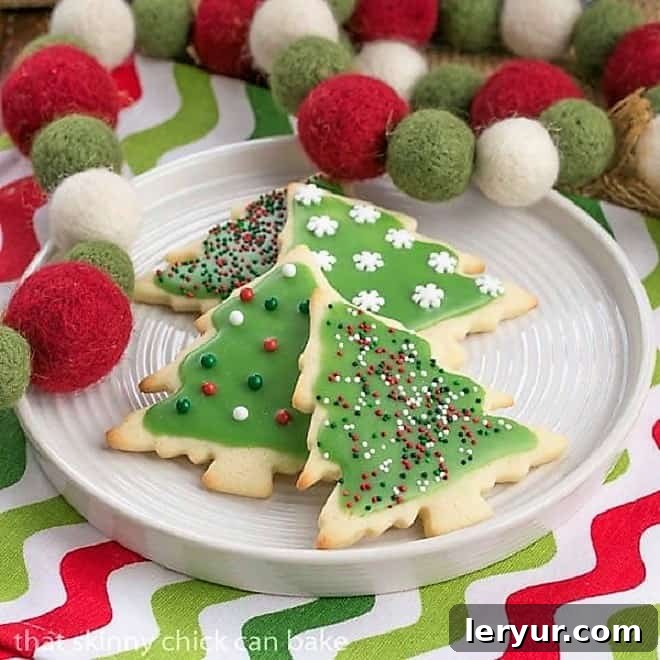
Welcome to your new favorite recipe for Christmas Sugar Cookies! These aren’t just any cookies; they are the quintessential holiday treat, designed to be perfectly tender, incredibly delicious, and most importantly, they hold their intricate cut-out shapes beautifully through baking. Every bite of these Easy Sugar Cookies brings back nostalgic memories of festive seasons and joyful baking. When a dear friend, Kaye, first shared this phenomenal recipe, I instantly knew it was a treasured keeper. It consistently produces that coveted sweet, buttery flavor and a delicate texture that makes everyone reach for just one more.
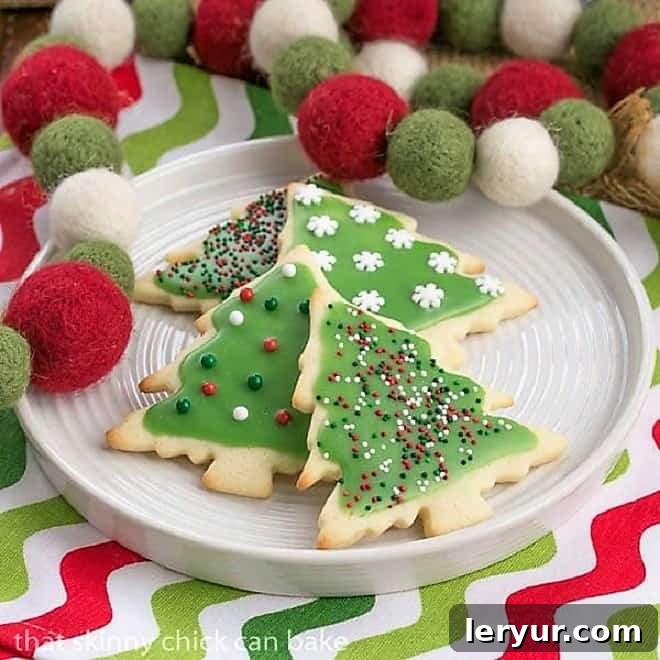
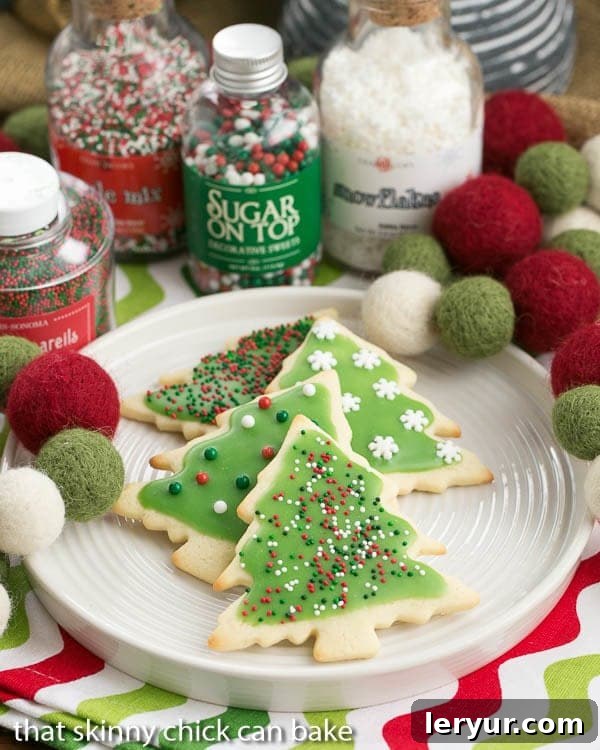
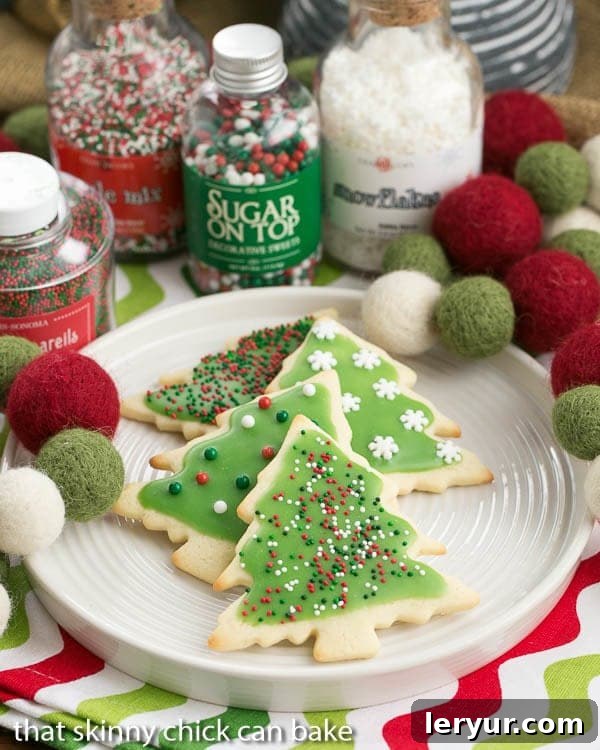
There’s something truly magical about a plate of Decorated Sugar Cookies during the holidays. The versatility of this recipe allows you to unleash your creativity, adjusting shapes and frosting colors to perfectly match any festive theme or special occasion. Whether you’re making classic Christmas trees, snowflakes, or custom designs for a birthday, these cookies are your blank canvas. And let’s not forget the delightful finishing touch: a generous scattering of festive sprinkles to make your Frosted Cookies sparkle and truly pop!
Why These Are the Best Christmas Sugar Cookies You’ll Ever Bake
This isn’t just another sugar cookie recipe; it’s the one you’ll return to year after year. Here’s why these cut-out sugar cookies stand out from the rest and why you absolutely need them in your holiday baking repertoire:
- Irresistible Flavor and Texture: My family goes absolutely wild for the sweet, rich, and buttery flavor profile of these cookies. They strike the perfect balance between soft and chewy, with just the right amount of crispness at the edges. The secret ingredient that sets them apart is cream cheese, which contributes extra fat and moisture, ensuring every cookie is incredibly soft and tender.
- Effortless Decorating: Forget the stress of elaborate piping bags and specialized decorating tools! Our simple frosting method uses just a small knife or an offset spatula. This approach makes cookie decorating incredibly easy and enjoyable, even for beginners, allowing you to create beautiful decorated sugar cookies without any fuss.
- Shape-Holding Perfection: One of the biggest frustrations with cut-out cookies is when they spread and lose their shape in the oven. This recipe is specifically designed to prevent that! These holiday cookies consistently maintain their crisp, clean edges, ensuring your reindeer look like reindeer and your stars stay starry.
- Versatile for Any Occasion: While they are undoubtedly stellar Christmas sugar cookies, their adaptability knows no bounds. I’ve used this exact dough to create delightful treats for various celebrations – from vibrant pink hearts for Valentine’s Day and lucky shamrocks for St. Patrick’s Day, to spirited basketballs for game day parties. Just change your cutters and frosting colors!
- A Tried and True Favorite: This recipe has been rigorously tested and unanimously approved by friends and family. It’s a consistently reliable recipe that delivers perfect results every time, earning its place as a staple in our home and surely in yours too.
Essential Ingredient Notes for Perfect Sugar Cookies
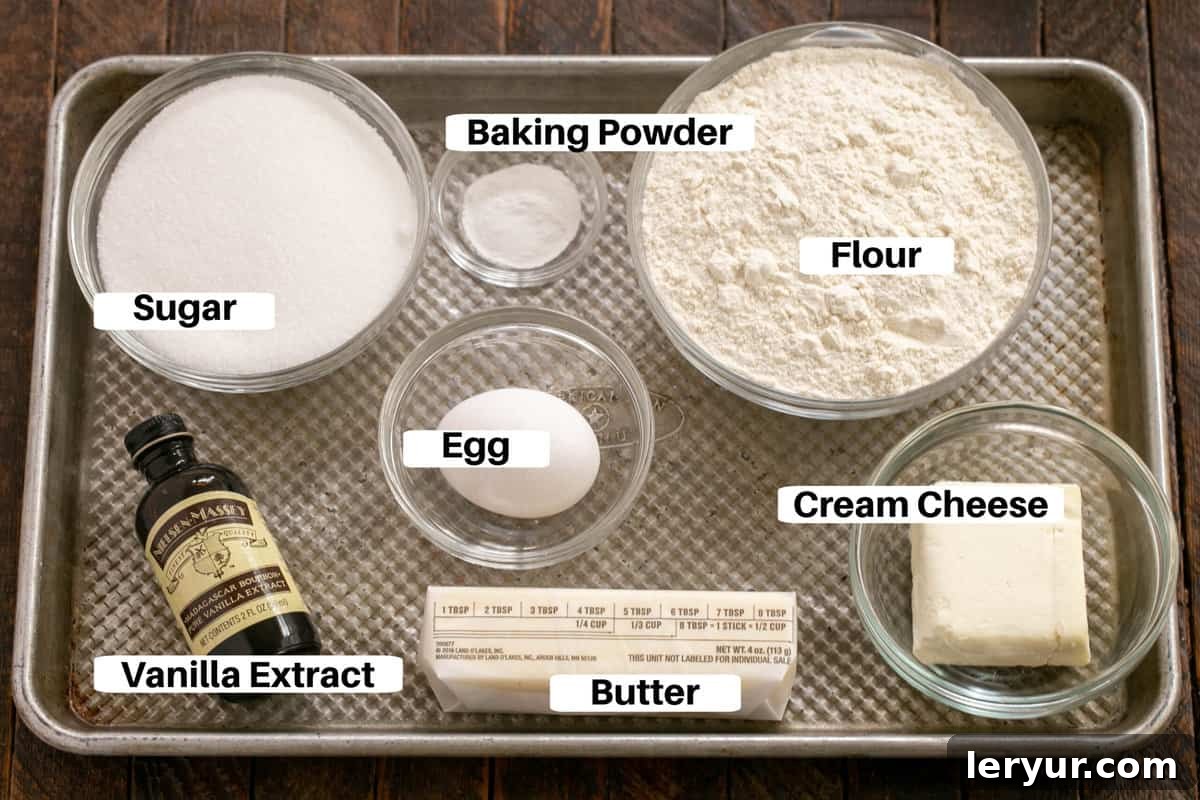
Using high-quality ingredients and preparing them correctly is crucial for achieving the best possible sugar cookie recipe. Here’s a detailed look at the components you’ll need and important tips for each:
- Kitchen Staples: You’ll need basic granulated sugar and all-purpose flour. Ensure your flour is fresh for optimal results.
- Unsalted Butter: Always use unsalted butter to control the overall saltiness of your cookies. It’s imperative that your butter is at room temperature. This allows it to cream smoothly with the sugar and cream cheese, incorporating air for a lighter, more tender dough. If it’s too cold, it won’t cream properly; if it’s melted, your dough will be greasy.
- Cream Cheese: This is the secret ingredient that elevates these cookies from good to extraordinary. Like butter, cream cheese should be at room temperature for easy mixing. It adds a delightful tang, extra richness, and a significant amount of fat, which is key to making these soft sugar cookies incredibly tender and helps prevent them from drying out.
- Large Egg: A single large egg, also at room temperature, helps bind the dough ingredients together and adds moisture, contributing to the cookie’s structure and richness. Room temperature eggs emulsify better with other ingredients, creating a smoother, more uniform dough.
- Pure Vanilla Extract: Do not skimp on quality here. Opt for real vanilla extract, not artificially flavored versions. A good quality vanilla, like Nielsen-Massey, makes a noticeable difference in the overall flavor of your easy sugar cookies, imparting a warm, aromatic depth.
- Baking Powder: This leavening agent is essential for giving the cookies a slight lift and delicate texture. Remember, baking powder is not the same as baking soda. It’s crucial to check its potency, as it can expire before you use the entire container. To test, place a spoonful in a cup of hot water; if it bubbles vigorously, it’s active. If not, replace it before starting your baking.
- Powdered Sugar (Confectioners’ Sugar): For the smoothest, silkiest sugar cookie icing, sifting your powdered sugar is a non-negotiable step. This removes any lumps, ensuring a flawlessly smooth consistency for decorating your frosted cookies.
- Milk: I typically use 2% milk, but any whole milk will work perfectly fine. The milk helps achieve the desired consistency for your frosting.
- Light Corn Syrup: This ingredient is fantastic for giving your frosting a beautiful, glossy sheen without the need for traditional royal icing techniques that involve egg whites. It also helps prevent the frosting from becoming too brittle.
- Almond Extract: A touch of almond extract adds a sophisticated, nutty aroma that complements the vanilla beautifully. If you’re not a fan of almond flavor, simply substitute it with an additional ½ teaspoon of vanilla extract in your frosting.
- Food Coloring: Essential for personalizing your decorated sugar cookies! The choice of food coloring will depend entirely on the holiday or occasion you’re baking for. Gel food colorings are often preferred for their vibrant hues and concentrated pigments.
Step-by-Step Guide: Crafting Your Perfect Cut-Out Sugar Cookies
Making these delightful Christmas sugar cookies is a straightforward process, but paying attention to each step will ensure your cookies are tender, flavorful, and hold their shape beautifully. Follow these simple instructions for the best results:
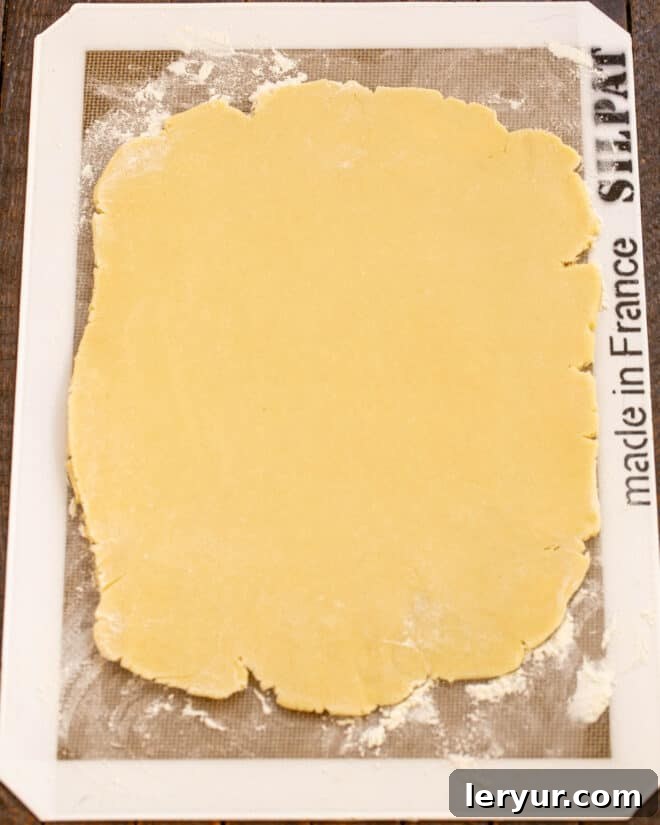
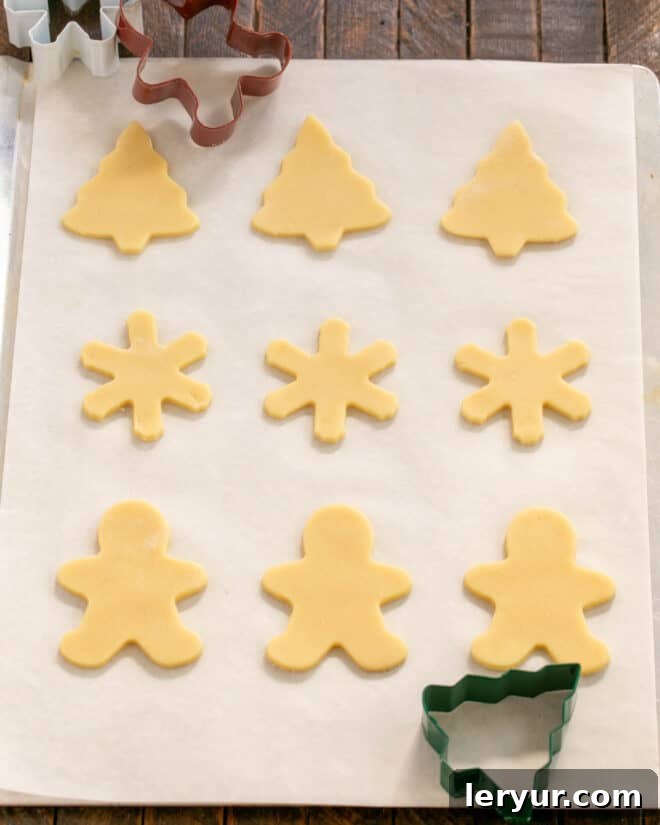
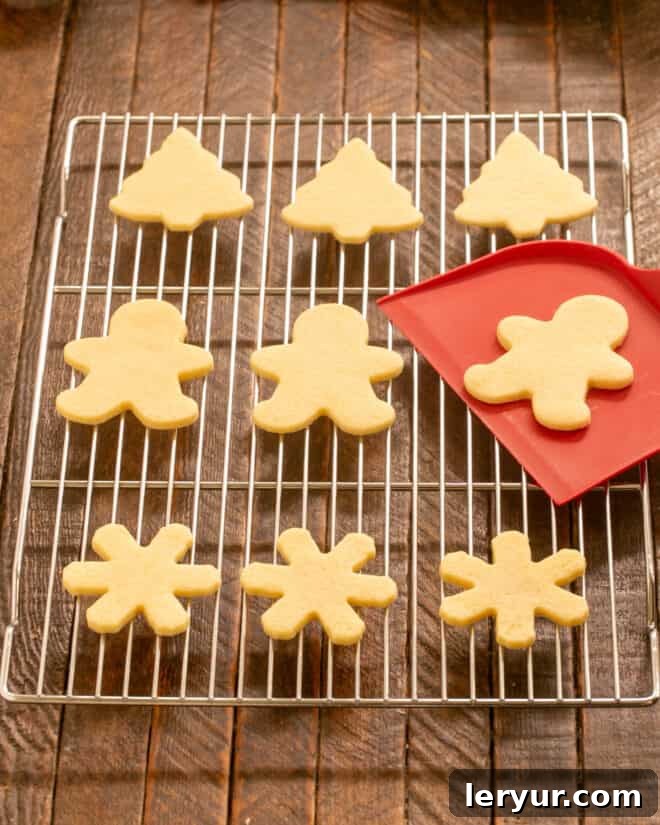
Simple Techniques for Beautifully Decorated Sugar Cookies
Decorating frosted cookies can be as simple or as elaborate as you desire. For these easy Christmas sugar cookies, I prefer a straightforward approach that still yields stunning results:
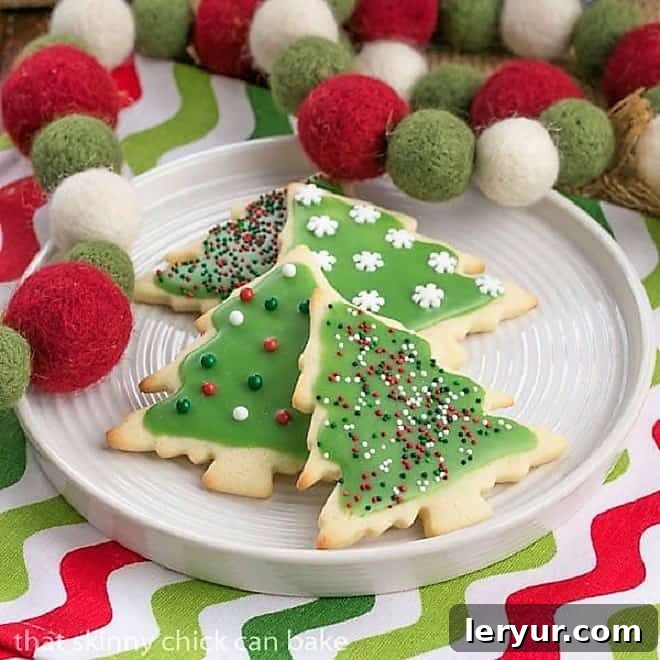
- Effortless Frosting Application: My go-to method for these Christmas cookie icing is to tint the frosting with festive food coloring, then spread it onto the cooled cookies using a small offset spatula or even a butter knife. It’s incredibly simple and creates a beautifully smooth, opaque layer. A few colorful sprinkles are all it takes to make them extra festive and eye-catching.
- Exploring Royal Icing (Optional): If you’re feeling adventurous or want a more precise look, you can certainly use royal icing. This involves piping an outline along the edge of the cookie, letting it set slightly, and then “flooding” the middle with a thinner consistency of icing. While royal icing offers intricate detail, I often prefer the faster, less fussy method for these particular frosted Christmas cookies, making them truly easy sugar cookies.
- The Magic of Sprinkles: Regardless of your chosen frosting, the key to great sprinkle adherence is timing. Always add your favorite sprinkles, colored sugars, or edible glitter while the frosting is still wet. This ensures they stick securely and don’t just roll off. Once the frosting dries, it’s too late!
- Choose Simple Shapes: For stress-free decorating, especially with kids, opt for simple cookie cutter shapes. A classic Christmas tree, star, or round cookie provides ample space for easy frosting and sprinkle application without requiring intricate detail work.
- Family-Approved Fun: The best part about these homemade sugar cookies is that they are genuinely beloved by the entire family. It’s a rare feat to find a treat that everyone agrees on, but these consistently hit the mark, making holiday baking a joyous and unifying activity.
Expert Tips for Unforgettable Cut-Out Sugar Cookies
Achieving perfectly tender and delicious cut-out sugar cookies consistently comes down to a few key techniques and ingredient choices. Here are my expert tips to guide you to baking success:
- The Taste Test Triumph: In a blind taste test among my girlfriends, this specific sugar cookie recipe emerged as the clear winner. Interestingly, we found that a dough that tasted “better” raw didn’t always translate to the best baked cookie, proving the importance of following the recipe’s specific ratios and chilling times.
- Quality Ingredients Matter: For truly exceptional results, invest in the best quality ingredients you can find. Brand-name butter (or even premium European butter), real Philadelphia cream cheese, and pure vanilla extract are not just recommendations; they are key to the superior flavor and texture of these soft sugar cookies. Keep an eye out for sales around the holidays to stock up!
- PRO-Tip: Butter Consistency: Be aware that generic and store-brand butters often contain a higher percentage of water compared to more expensive, premium brands. This higher water content can lead to cookies spreading more during baking, affecting their shape. For reliable shape retention, choose higher-fat butter.
- PRO-Tip: Room Temperature Ingredients: Always ensure your butter, eggs, and cream cheese are at room temperature before you begin mixing. This allows them to emulsify properly, creating a smooth, homogenous dough that’s easier to work with and results in a better cookie texture.
- Minimize Flour During Rolling: When rolling out your dough, use the absolute minimal amount of flour necessary to prevent sticking. Excess flour can be absorbed into the dough, making your cookies tough and dry.
- Alternative Rolling Method: As an excellent alternative to flour, use powdered sugar to dust your rolling surface and rolling pin. This helps prevent sticking without adding extra gluten to the dough, which can contribute to toughness.
- Use a Silpat Roul’Pat: For the easiest rolling and cleanup, I highly recommend using a large Silpat Roul’Pat or a similar silicone mat. The dough won’t stick, and cleanup is a breeze.
- PRO-Tip: Dough Thickness is Key: Roll your cookies to an approximate thickness of ⅛ inch for a classic tender-crisp cookie. You can roll them thinner for a crisper, snappier cookie or slightly thicker for a chewier, more substantial treat. Thicker cookies also work wonderfully for edible ornaments – just make a good-sized hole at the top before baking and re-open it with a skewer if needed when they come out of the oven.
- Baking Time for Texture: Baking your cookies for a slightly longer duration will result in a crispier texture. Conversely, slightly underbaking them will yield a softer, chewier cookie. Adjust baking time by a minute or two based on your preference.
- Parchment Paper is Your Friend: Always bake your cookies on parchment paper-lined baking sheets. This prevents sticking, promotes even baking, and makes cleanup incredibly easy. You can often reuse the same sheet of parchment paper for several batches.
- PRO-Tip: Prevent Sticking Cutters: If your dough begins to stick to your cookie cutter, simply dip the cutter in a bit of flour (or powdered sugar) before each cut. Re-chilling the dough for a short period can also help tremendously.
- PRO-Tip: Keep Dough Cold: To ensure your holiday cookies maintain their precise shapes, it’s essential to keep the dough cold. Work with half the dough at a time, keeping the other half refrigerated. If your cut-out shapes start to feel warm or soft before baking, place the entire baking sheet full of unbaked cookies in the fridge for about 10 minutes to rechill the dough.
- Cool Completely Before Frosting: This cannot be stressed enough! Always allow your sugar cookies to cool completely on a wire rack before applying any frosting. Attempting to frost warm cookies will result in melted, messy frosting.
- Glossy Frosting Secret: Our simple sugar cookie icing is a fantastic, shiny alternative to traditional royal icing, cleverly avoiding the use of egg whites or intricate piping techniques. The inclusion of corn syrup is what gives it that beautiful, professional-looking gloss.
- PRO-Tip: Corn Syrup Alternative: If you prefer not to use corn syrup, you can still achieve a delicious frosting. Simply add a little more milk or even a splash of heavy cream to thin the frosting to your desired consistency. While the results won’t be as glossy, they will still be incredibly tasty and perfect for your frosted cookies!
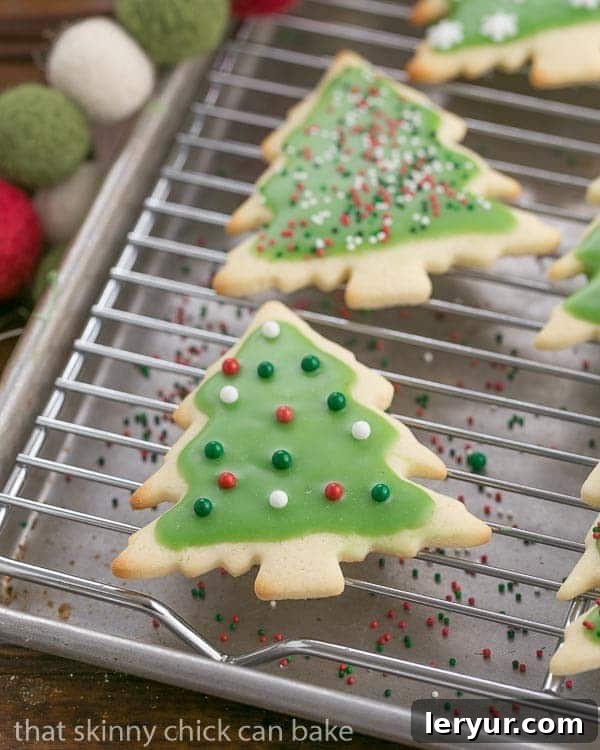
- Sprinkle Adherence: For sprinkles to adhere properly and not fall off, dust them onto your decorated sugar cookies immediately after frosting, while the icing is still wet. Then, place the cookies on a wire rack to allow the frosting to set and harden completely.
- Tidy Sprinkling: To minimize mess and even reuse sprinkles, place your freshly frosted cookies on a cooling rack positioned over a baking sheet. As you garnish, any excess sprinkles will fall onto the baking sheet below, making them easy to collect and reuse if desired.

Frequently Asked Questions About Sugar Cookies
Here are answers to some of the most common questions about making, storing, and enjoying these delightful Christmas sugar cookies:
The secret to truly soft sugar cookies lies primarily in adding extra fat to the dough. In this recipe, that comes from the cream cheese, which not only adds richness but also keeps the cookies incredibly tender. Another critical factor is to avoid over-baking. As soon as the edges just begin to show a hint of golden brown and the centers are set but still look soft, remove them from the oven. Even if they seem slightly underbaked, they will continue to cook slightly from residual heat on the baking sheet.
To enhance the flavor of your homemade sugar cookies, start with high-quality ingredients, particularly real butter over shortening or margarine, as butter provides a richer, more complex taste. A generous amount of good quality pure vanilla extract is essential. For an extra boost, consider adding a small amount of almond extract alongside the vanilla. Lemon zest or a touch of lemon extract can also brighten the flavor, especially if you’re making springtime or summer-themed cookies. Experimenting with different extracts can truly personalize your sugar cookie recipe.
Absolutely, sugar cookies freeze exceptionally well! For best results, it’s advisable to freeze unfrosted sugar cookies. Arrange them in an airtight container with parchment paper between layers to prevent sticking, and they will keep well for up to 3 months. When you’re ready to enjoy them, simply defrost them at room temperature, then frost and decorate them closer to the holidays or your event. If you need to freeze frosted cookies, be aware that sprinkles may bleed slightly when the cookies defrost due to moisture. To minimize this, freeze frosted cookies in a single layer on a rimmed baking sheet until solid, then stack them in an airtight container with parchment paper dividers. Defrost them slowly in the refrigerator.
For optimal freshness and taste, freshly baked and frosted sugar cookies are best enjoyed within 3-4 days when stored in an airtight container at room temperature. However, for planning ahead, you can make the dough several days in advance and keep it refrigerated, or even freeze the raw dough for up to a month. As mentioned, unfrosted cookies, when stored properly in an airtight container, will freeze beautifully for up to 3 months, offering great flexibility for holiday baking or party preparation.
The corn syrup in our sugar cookie icing serves a dual purpose. Beyond adding sweetness and helping to prevent the frosting from becoming overly sugary, its primary role is to give the frosting a beautiful, shiny, and smooth finish. This creates a glaze-like effect without the fuss and specific techniques required for traditional royal icing, making your decorated sugar cookies look professionally finished with minimal effort.
The timing for adding sprinkles depends on whether your homemade sugar cookies will be frosted. If you plan to frost your cookies, always add the sprinkles to the freshly applied, wet frosting. This ensures they adhere firmly as the frosting dries. If you prefer to bake your cookies without frosting but still want sprinkles, simply sprinkle them generously on top of each unbaked cookie while it’s on the cookie sheet. Then, apply gentle pressure with your finger to help them embed slightly into the dough before baking, preventing them from falling off.
Yes, sprinkles absolutely have expiration dates, and surprisingly, they can go rancid if kept well past their prime. This is due to the fats and oils in their ingredients. If you have older sprinkles lingering in your pantry, it’s always a good idea to give them a sniff test. If they smell off or have a stale odor, they’ve likely gone bad. It’s best to taste a tiny bit if you’re unsure. Using rancid sprinkles can unfortunately ruin the taste of even the best sugar cookie recipe. A huge thank you to my friend Sue, the brilliant blogger behind The View from Great Island, for bringing this often-overlooked possibility to my attention!
Essential Tools for Making Perfect Cut-Out Christmas Cookies
Having the right tools can make all the difference in ensuring your Christmas sugar cookies baking and decorating experience is smooth and enjoyable. Here’s a list of the essential items I used and highly recommend:
- Wilton Christmas Cookie Icing Set: These convenient squeeze bottles come with festive colors, perfect for quick and easy frosting. A quick warm-up in the microwave and gentle kneading make the icing flow smoothly.
- Wilton Nonpareils Christmas Sprinkles: Add a classic, vibrant touch to your freshly frosted cookies with these tiny, colorful balls. They instantly elevate the festive feel of your decorated sugar cookies.
- Wilton Holiday Assortment Sprinkles: For variety and extra festive cheer, this assortment provides a mix of shapes and colors, perfect for diverse holiday designs.
- Wilton Christmas Tree Cookie Cutter: A medium-sized cutter that creates a classic Christmas tree shape, which is wonderfully simple to decorate, as seen in our process shots.
- Wilton’s The Really Big Spatula: This oversized spatula is a game-changer for gently transferring delicate cookies from the baking sheet to the cooling rack without breakage, accommodating cookies of any size.
- Rimmed Baking Sheet: A sturdy, reliable half-sheet pan is indispensable for everything from baking cookies evenly to roasting vegetables.
- Parchment Paper Baking Sheets: Pre-cut parchment sheets are a lifesaver. They prevent cookies from sticking, ensure easy release, and make cleanup incredibly simple, often reusable for multiple batches.
Explore More Holiday Baking Delights
If you loved making these Christmas sugar cookies, you’ll surely enjoy these other festive and delicious recipes:
- Four Christmas Cookies from One Basic Dough from The Gunny Sack – Discover how to create multiple cookie varieties from a single versatile dough.
- Candy Cane Blossom Cookies – A festive twist on a classic, perfect for the holiday season.
- Stained Glass Cookies – Beautiful and shimmering cookies that look like delicate ornaments.
- Toffee Noel Nut Balls – Rich, buttery, and nutty treats that melt in your mouth.
- These Lofthouse Cookies – A soft, cake-like cookie base that can be decorated for literally any holiday or occasion!
- Plus, essential reading: How to Host a Cookie Exchange – Tips for organizing a fun and delicious cookie swap event.
- And for more inspiration, browse our collection of the Best Holiday Recipes – Your ultimate guide to festive culinary creations.
Stay connected and share your baking creations! Find me on social media @ Instagram, Facebook, and Pinterest. Don’t forget to tag me when you try one of my delicious recipes! And if you love the results, please consider leaving a 5-star rating in the recipe card below – your feedback means the world!
Note: I previously received an assortment of Wilton tools for making Christmas cookies. While I used them to create a batch of this sugar cookie recipe, I was not compensated for this post. The cookie cutters and large cookie spatula were featured in my process shots above. All opinions expressed are my own.
Best Sugar Cookies Recipe
30 minutes
9 minutes
39 minutes
36 cookies
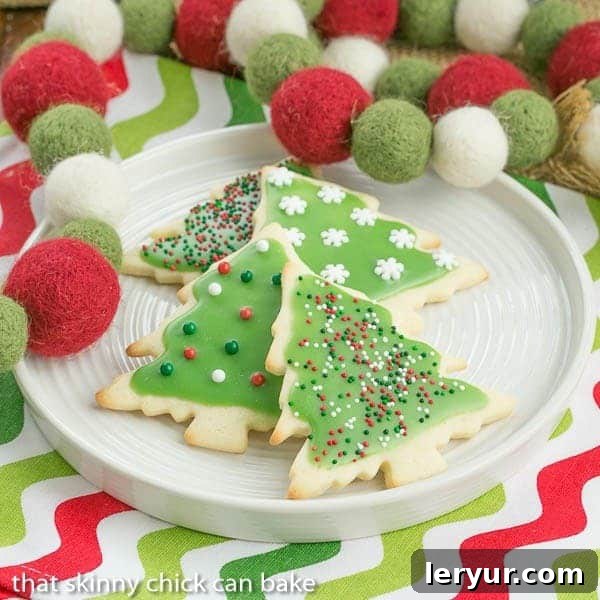
This is the ultimate recipe for delicious iced sugar cookies that hold their shape beautifully! Perfect for all your holiday baking and celebrations. Recipe developed by my friend, Kaye.
Ingredients
For the Cookie Dough:
- ½ cup (1 stick) unsalted butter, softened to room temperature
- 3 ounces cream cheese, softened to room temperature
- 1 cup granulated sugar
- 1 large egg, at room temperature
- ½ teaspoon pure vanilla extract
- 2 cups all-purpose flour
- ½ teaspoon baking powder
For the Shiny Holiday Frosting (I usually double this for ample coverage):
- 1 cup powdered sugar, sifted
- 1-2 tablespoons milk (adjust for desired consistency)
- 1 tablespoon light corn syrup (for a glossy finish)
- ¼ teaspoon almond extract (or ½ tsp extra vanilla extract if preferred)
- Food coloring of your choice
Instructions
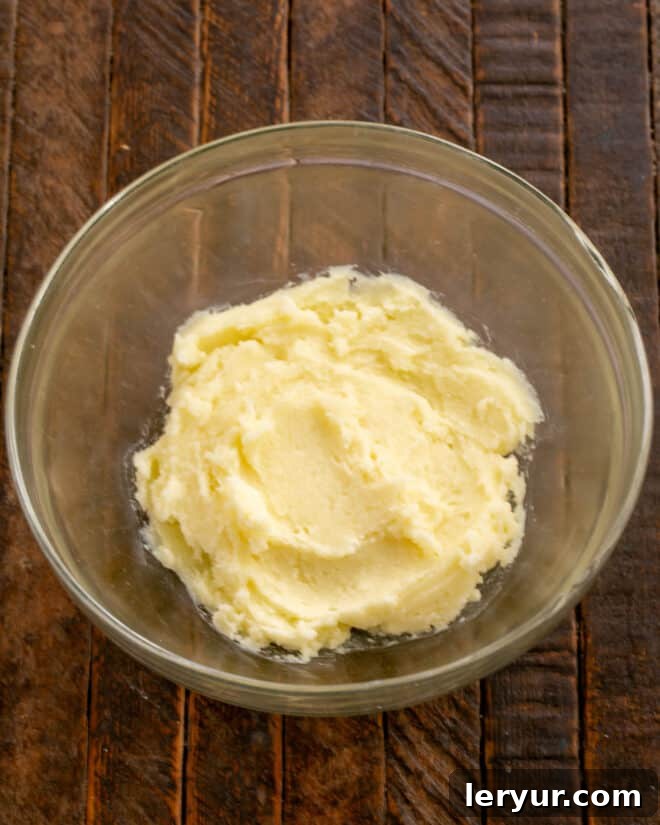
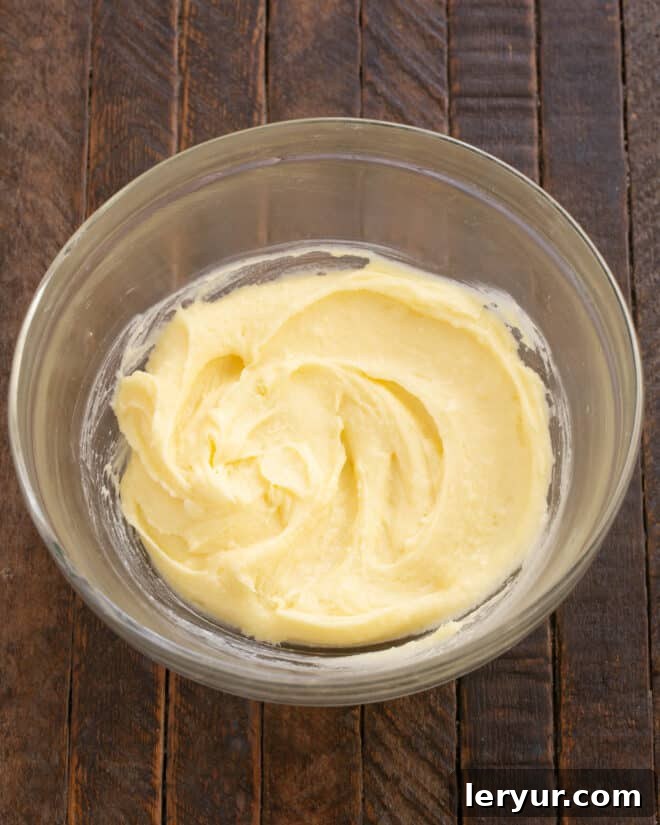
- In a large mixing bowl, using an electric mixer, cream together the softened butter, cream cheese, and granulated sugar until the mixture is light, fluffy, and well combined.
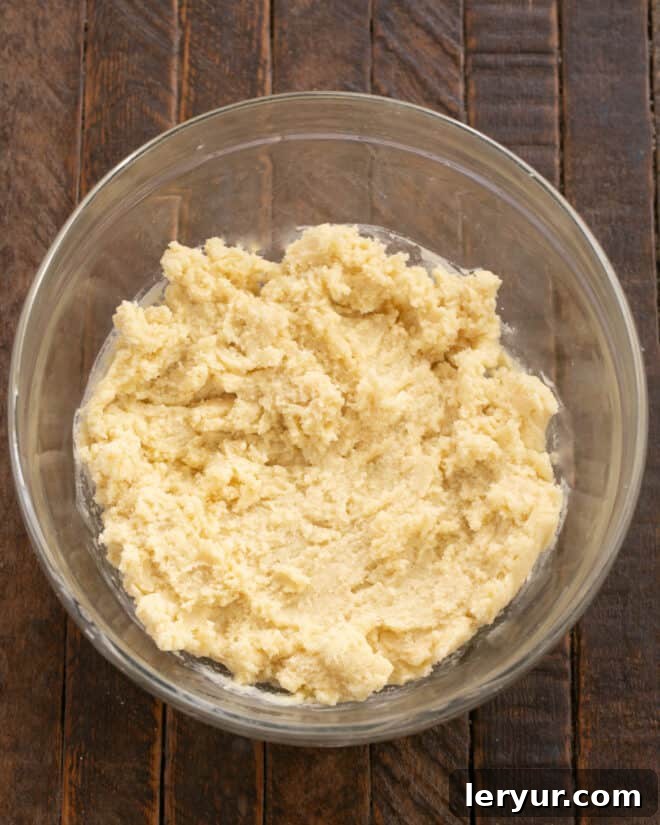
- Beat in the room temperature egg and vanilla extract until fully incorporated. Gradually add the all-purpose flour and baking powder, mixing on low speed until the ingredients are just combined and a soft dough forms. Be careful not to overmix.
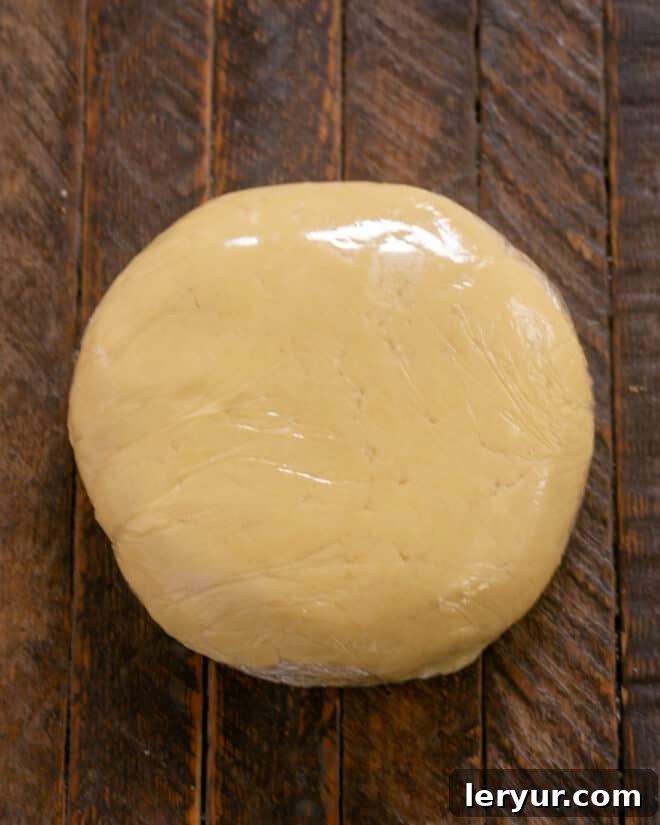
- Gather the dough and flatten it into a disk on a large piece of plastic wrap. Wrap the dough tightly and refrigerate for at least one hour, or until firm enough to roll. Chilling is crucial for preventing spread.
- Preheat your oven to 375ºF (190ºC). Prepare baking sheets by lining them with parchment paper.
- On a lightly floured surface (or using powdered sugar), roll out half of the chilled dough to an even thickness of about ⅛ to ¼ inch. Keep the remaining dough refrigerated until you are ready to use it.
- Dip your desired cookie cutters into flour to prevent sticking, then cut out shapes from the rolled dough. Carefully transfer the cut-out cookies to your prepared baking sheets, leaving at least an inch of space between each cookie.
- Bake for 7-9 minutes, or until the edges of the cookies just begin to turn a very light golden brown and the centers appear set. Avoid over-baking for a softer cookie.
- Allow the cookies to cool on the baking sheet for 2-3 minutes before carefully transferring them to a wire rack to cool completely. Ensure they are fully cooled before frosting.
- To prepare the frosting, whisk together the sifted powdered sugar, 1 tablespoon of milk, corn syrup, and almond extract in a medium bowl until smooth. If the frosting is too thick, add a bit more milk (a teaspoon at a time) or corn syrup until it reaches your desired spreading consistency. Stir in food coloring as desired.
Notes
Please note that the total time listed for this recipe does not include the essential chilling time for the cookie dough.
Recommended Products
As an Amazon Associate and member of other affiliate programs, I earn from qualifying purchases.
- Roul’Pat silicone counter sized silicone mat
- Classic Rolling Pin
- Reynolds Non-Stick Parchment Paper Baking Sheets
- USA Pan Bakeware Half Sheet Pan
Nutrition Information:
Yield:
36
Serving Size:
1 cookie
Amount Per Serving:
Calories: 94Total Fat: 4gSaturated Fat: 2gTrans Fat: 0gUnsaturated Fat: 1gCholesterol: 14mgSodium: 37mgCarbohydrates: 15gFiber: 0gSugar: 9gProtein: 1g
HOW MUCH DID YOU LOVE THIS RECIPE?
Please leave a comment on the blog or share a photo on Pinterest