
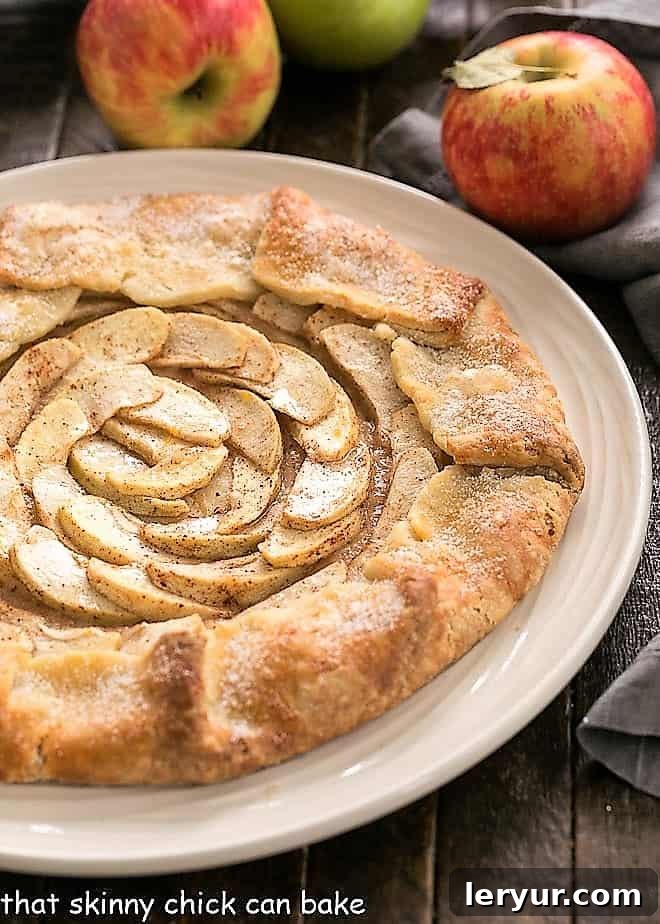
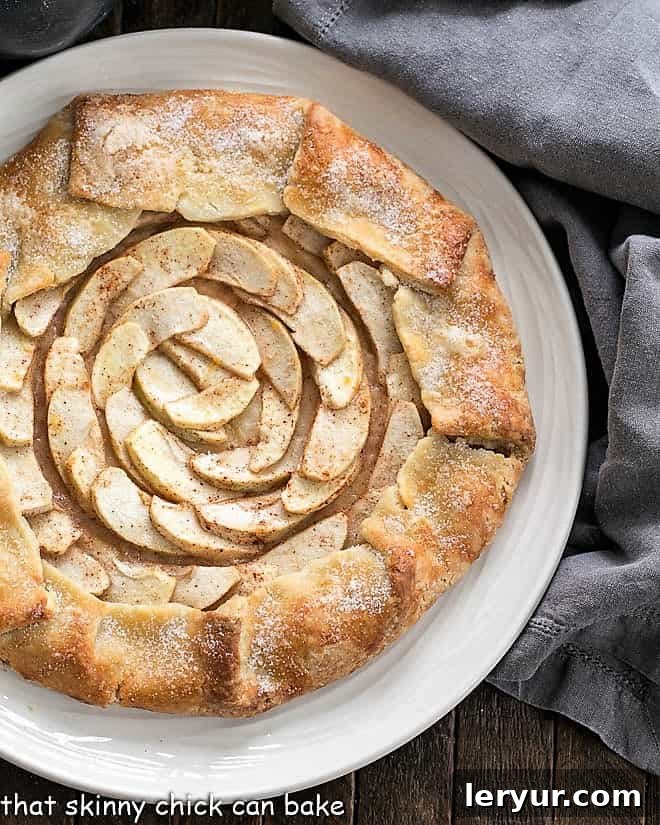
Welcome to the enchanting world of rustic baking, where simplicity meets sophistication in the most delightful way! This incredibly scrumptious Rustic Apple Galette stands as a testament to this philosophy. More than just a dessert, it’s a gorgeous and impressive creation that whispers of homemade charm, yet is surprisingly easy to achieve. Forget the complexities of a traditional double-crusted apple pie; this free-form apple tart delivers all the beloved flavors with significantly less effort, making it an ideal choice for bakers of all skill levels.
Imagine a buttery, tender crust perfectly cradling a vibrant cascade of cinnamon-spiced apples, baked to golden perfection. This easy Apple Tart Recipe transcends the ordinary, offering a dessert simple enough to whip up for a casual weeknight treat, yet elegant and delicious enough to dazzle even the most discerning dinner guests. We once had a guest exclaim that it was “unusual to find a crust as delicious as the filling,” a true compliment that perfectly encapsulates the magic of this galette. Its inviting aroma and stunning visual appeal make it an instant favorite, leaving everyone smitten from the very first bite.
Why This Rustic Apple Galette Belongs in Your Baking Repertoire
There are countless reasons why this homemade apple galette is destined to become a staple in your kitchen, whether you’re a seasoned baker or just starting your culinary journey. Its rustic beauty and exceptional taste make it an unforgettable dessert, perfect for any occasion from intimate family dinners to festive holiday gatherings.
- Effortless Elegance: This rustic apple tart offers all the delightful flavors of a classic apple pie without the fuss of crimping edges or worrying about a perfect top crust. The free-form nature of a galette means imperfection is celebrated, resulting in a charmingly rustic look that’s incredibly appealing. It’s far easier to make than a double-crusted apple pie, saving you time and stress, especially during busy seasons.
- Versatility Unleashed: Once you experience the sheer joy of creating your first galette, you’ll be eager to explore countless other variations. The simple pastry base is incredibly adaptable, serving as a perfect canvas for a wide array of fruits, from berries and peaches in summer to pears and plums in fall. This recipe provides a foundational skill that opens up a world of seasonal dessert possibilities.
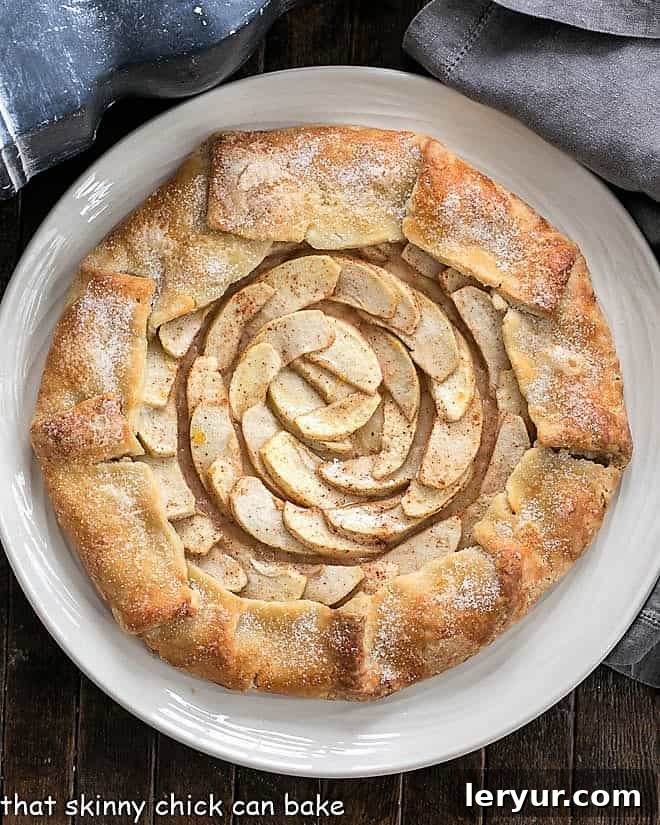
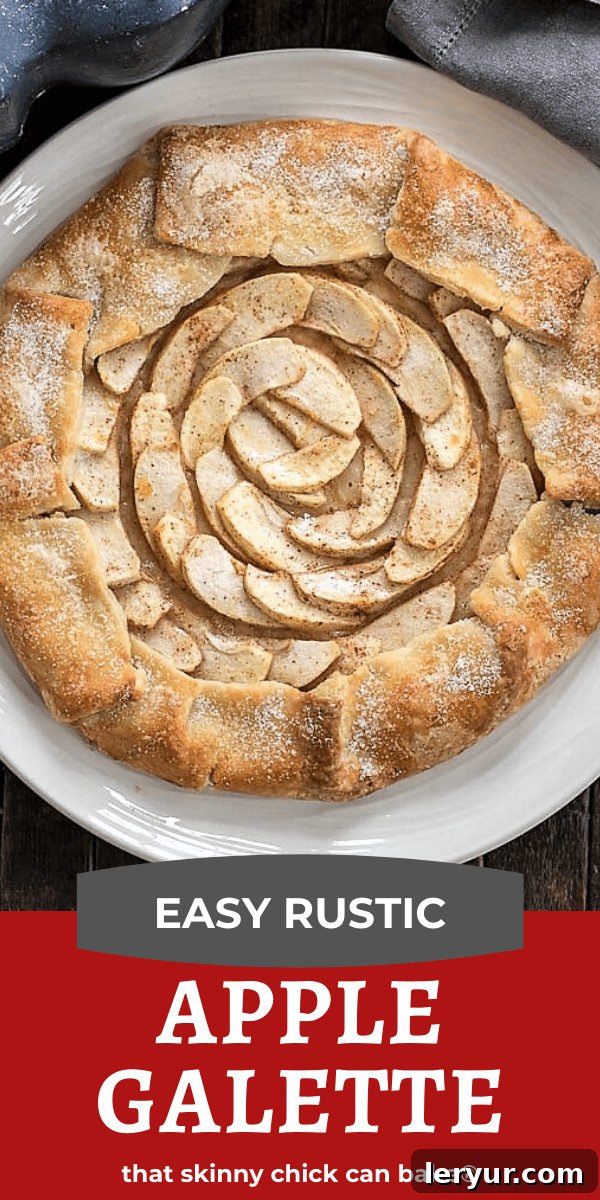
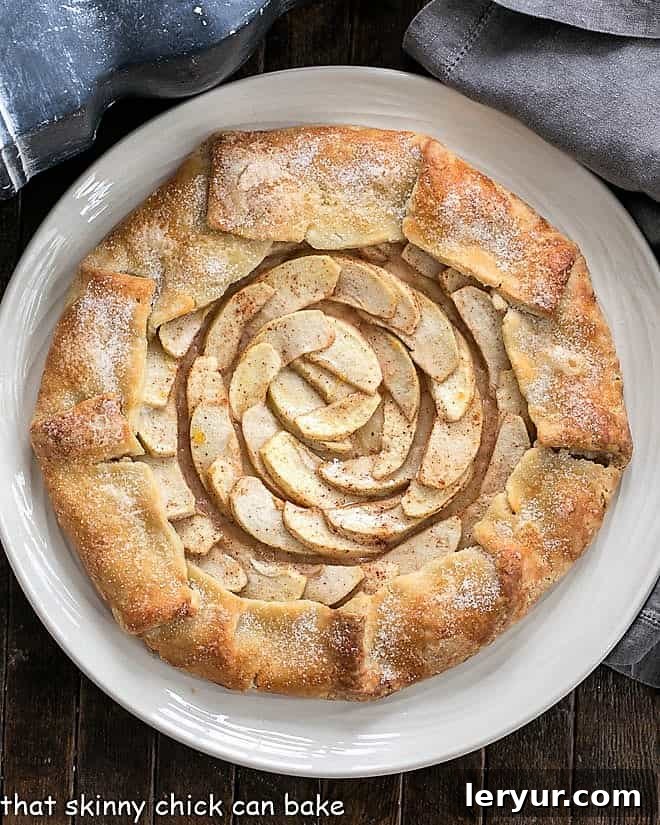
- A Stunning Presentation: While delightfully easy to make, this galette makes an undeniably beautiful presentation. With just a few extra minutes spent arranging your apple slices in a spiral or concentric circles, you can elevate this dessert from simple to spectacular. Everyone will be captivated by its charm and eager to know your secret to such a gorgeous apple tart. Its golden, flaky crust and caramelized fruit filling are a feast for the eyes before they even reach the palate.
- The Ultimate Comfort Food: There’s something inherently comforting about a warm apple dessert, especially one infused with the inviting aroma of cinnamon. This galette delivers that quintessential cozy experience, making it perfect for fall evenings, holiday celebrations, or simply when you crave a slice of homemade goodness.
- Year-Round Appeal: While often associated with autumn, apples are available throughout the year, meaning you can enjoy this exquisite fruit galette any time you desire a taste of pure bliss.
Essential Ingredients for Your Perfect Apple Galette
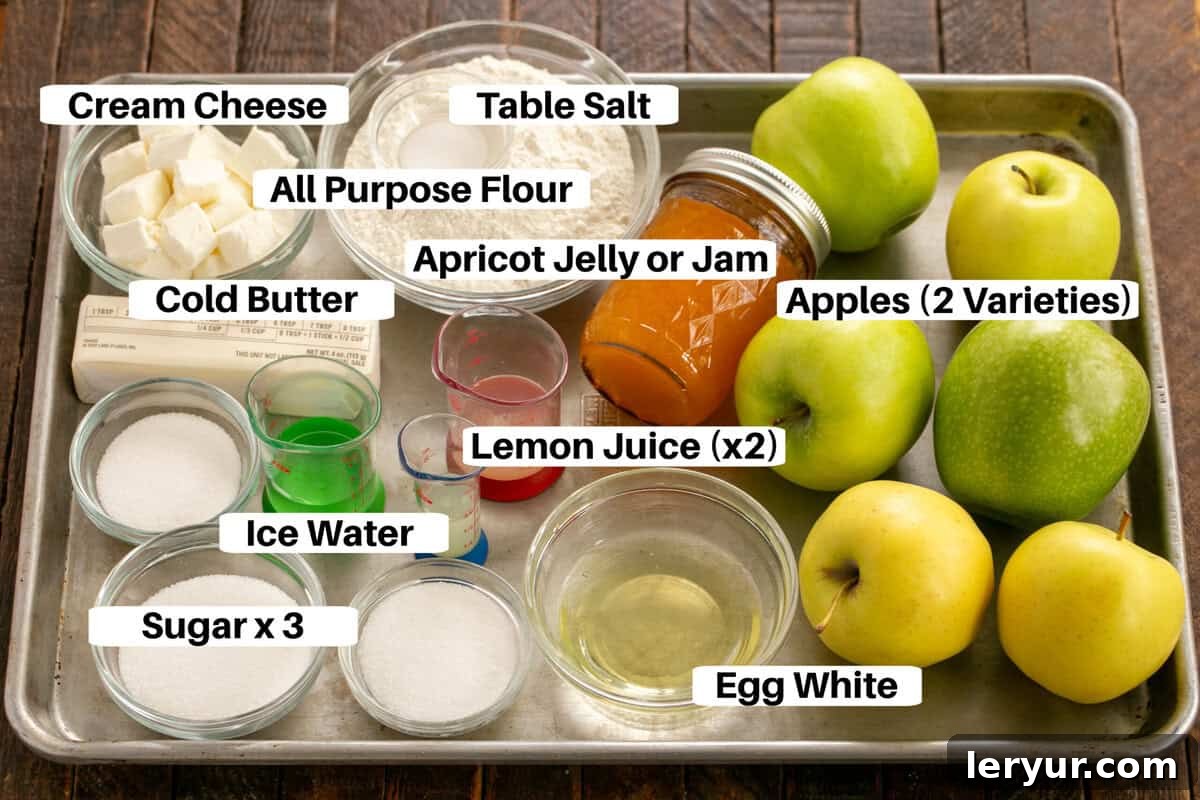
Crafting the perfect apple galette begins with understanding the role of each ingredient. Quality matters, and a few thoughtful choices can elevate your dessert from good to absolutely extraordinary. Here’s a closer look at the key components:
- Kitchen Staples: Flour, Sugar, Salt, Cinnamon, Ice Water – These foundational ingredients form the backbone of both the crust and the filling. Use all-purpose flour for the crust, granulated sugar for sweetness, and a pinch of salt to balance the flavors. High-quality cinnamon will impart a warm, aromatic spice that beautifully complements the apples. Ice water is crucial for the crust, ensuring it remains cold and tender.
- Unsalted Butter (Cold, Cut into Small Pieces) – The secret to an incredibly flaky galette crust lies in using very cold butter. When cold butter is incorporated into the flour and then bakes, the water content in the butter turns to steam, creating pockets of air that result in a light, airy, and flaky texture. Cutting it into small pieces ensures even distribution and prevents overworking the dough.
- Cold Cream Cheese – A unique addition to this galette crust, cold cream cheese contributes incredible richness and a delightful tenderness. It also makes the dough more pliable and easier to roll out, preventing cracks and tears, which is especially helpful for beginners.
- Fresh Lemon Juice – For both the crust and the filling, freshly squeezed lemon juice is paramount. In the crust, it adds a subtle brightness and helps with dough texture. In the filling, it brightens the apple flavor, prevents browning, and balances the sweetness. Avoid bottled lemon juice for the best results.
- Fresh Baking Apples – The heart of your galette! For the most flavorful and texturally appealing tart, use a blend of two different varieties of baking apples. Good choices include Granny Smith (for tartness and firm texture), Honeycrisp (for sweetness and crispness), and Golden Delicious (for sweetness and tender flesh). Combining varieties creates a more complex and nuanced apple filling that holds its shape beautifully while baking.
- Egg White – A lightly beaten egg white is brushed over the exposed crust edges before baking. This simple step gives the crust a beautiful golden sheen and helps sugar adhere, creating a delightful crunch and enhanced flavor.
- Apricot Jelly or Jam (Optional) – To add a professional touch and a glossy finish, gently warm and brush apricot jelly or jam over the baked fruit. This not only makes the apples look stunning but also adds a subtle layer of fruity sweetness.
The Rustic Elegance of a French Apple Tart
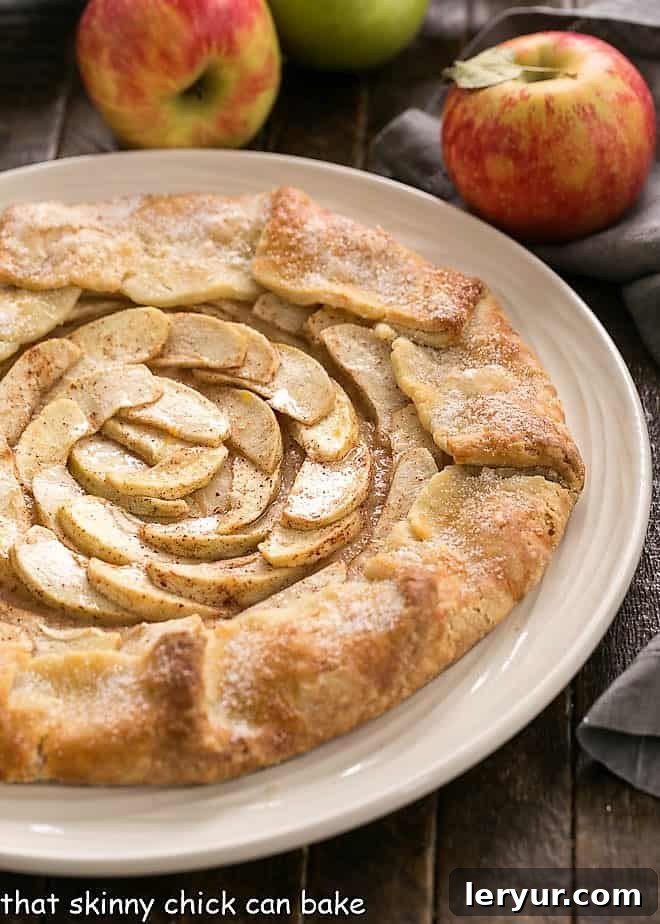
Embrace the effortless charm of French baking with this exquisite apple galette. This versatile dessert, often referred to as a rustic tart, combines a tender, flaky pastry with a vibrant, fruit-filled center. It’s a delightful departure from more formal pastries, celebrating natural beauty and unpretentious elegance.
I recall a memorable evening when we hosted friends; Bill fired up the Big Green Egg, and we savored a delicious spread including beef tenderloin wrapped in bacon and an array of delightful side dishes. Despite our sated appetites, this scrumptious apple galette, served alongside creamy vanilla ice cream, proved utterly irresistible. Every slice was savored, a testament to its comforting and satisfying appeal.
While often celebrated as a quintessential fall dessert, perfectly complementing the crisp air and warm spices of the season, the beauty of a fruit galette is its year-round versatility. With fresh, crisp apples readily available in grocery stores regardless of the season, this French pastry offers a dreamy escape any time the craving strikes. It’s the ideal choice for those moments when you desire a dessert that feels both special and wonderfully comforting, without the extensive labor typically associated with complex baking projects. Its simple yet sophisticated nature makes it a perfect ending to any meal.
Crafting Your Apple Galette: A Visual and Step-by-Step Guide
Creating this beautiful rustic apple galette is a straightforward and rewarding process. While the full recipe card below provides precise measurements and instructions, these step-by-step images and descriptions will help you visualize each stage and build confidence as you bake. Follow along to bring this simple yet stunning dessert to life!
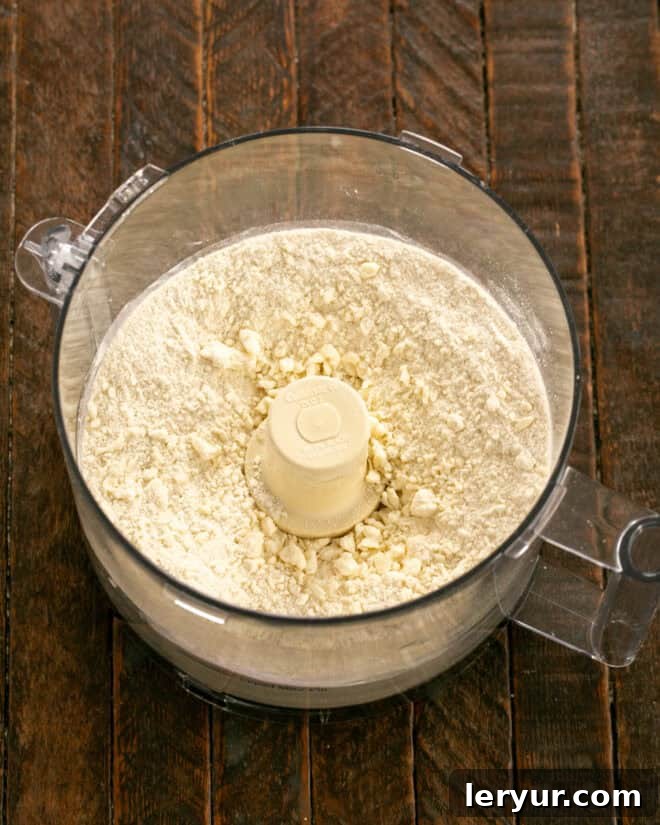
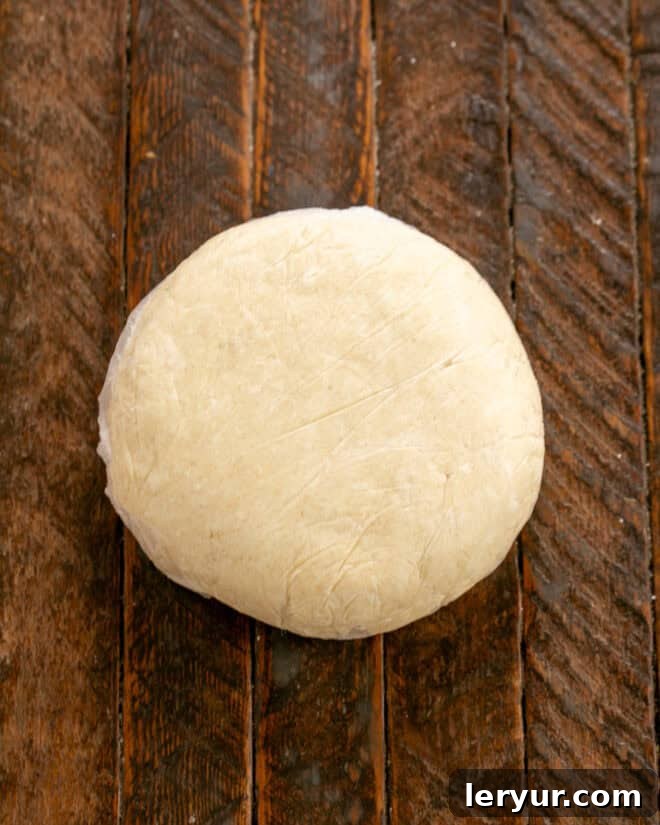
The journey begins with the dough, a simple mixture of flour, sugar, and salt, pulsed in a food processor with cold butter and cream cheese until it resembles coarse cornmeal. This initial pulsing ensures the butter remains in small, distinct pieces, which is key to a flaky crust. A touch of lemon juice and ice water gradually bring the dough together, forming a pliable mass that’s then flattened into a disk and chilled. This chilling period is crucial for relaxing the gluten, making the dough easier to roll and ensuring a tender texture.
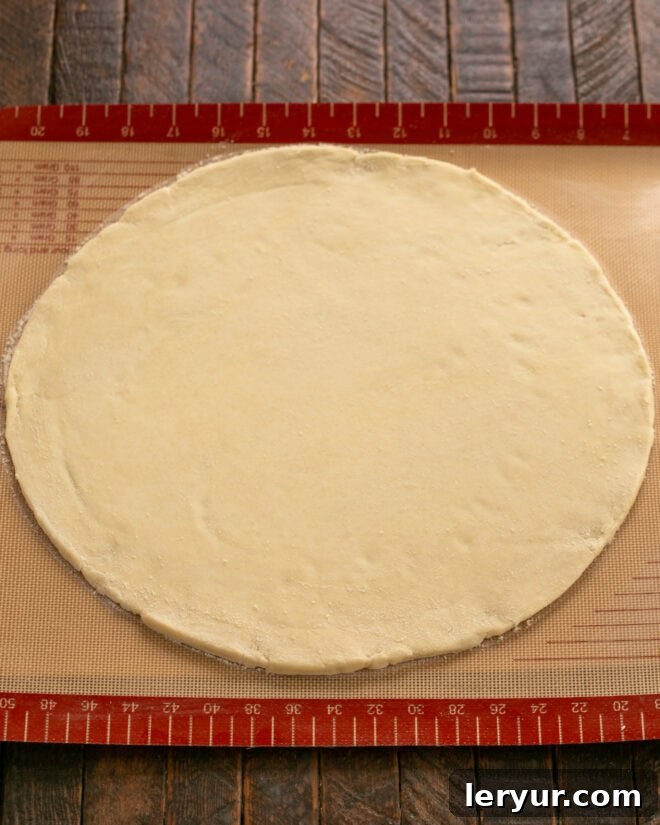
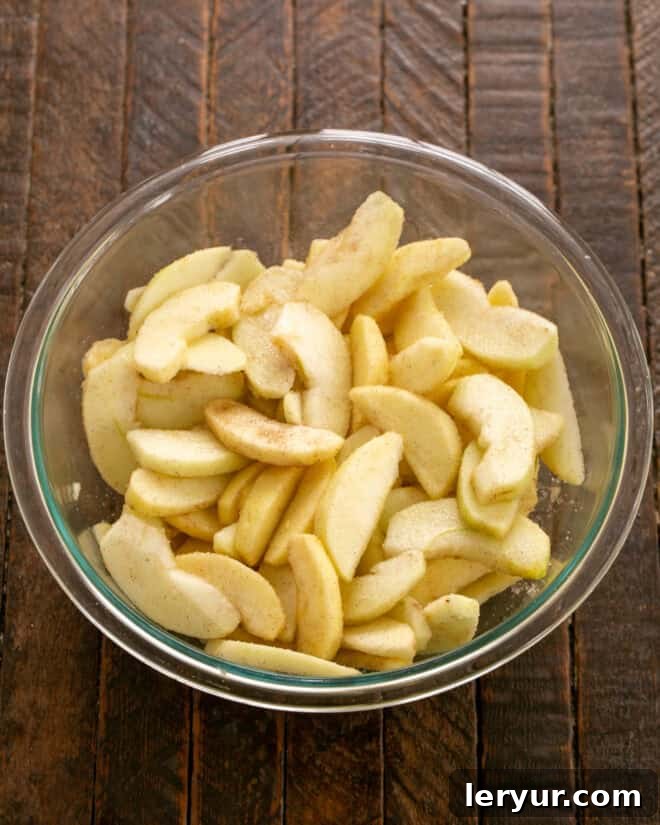
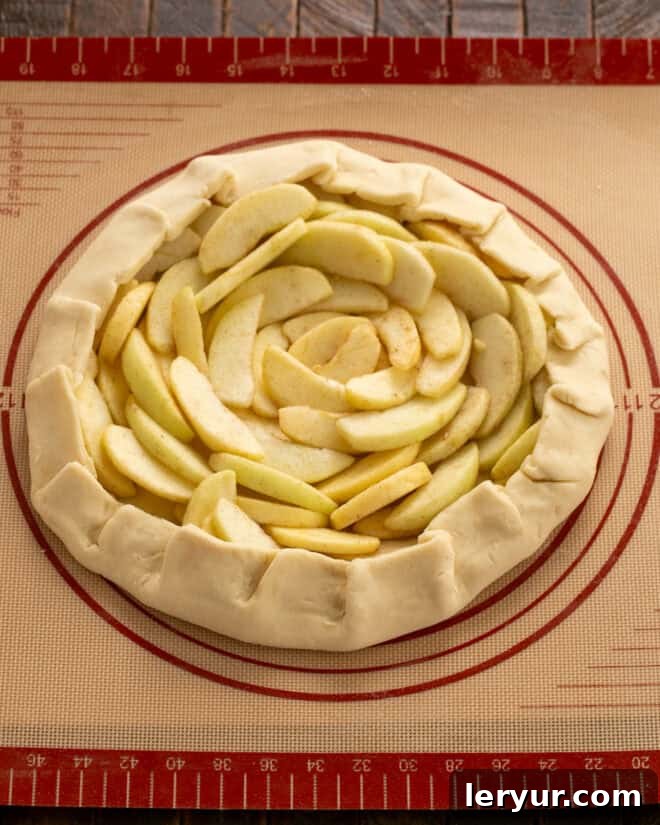
Once chilled, the dough is rolled out into a generous 15-inch circle, often between two sheets of parchment paper to prevent sticking and facilitate transfer. Meanwhile, the apples, peeled, cored, and thinly sliced, are gently tossed with sugar and cinnamon. The careful arrangement of these spiced apples onto the rolled-out crust is where the galette’s visual appeal truly shines. Starting about three inches from the edge, slices are overlapped in concentric circles, creating a beautiful spiral pattern. This border allows ample space to fold and pleat the dough, creating the signature rustic edge that encases the sweet apple filling.
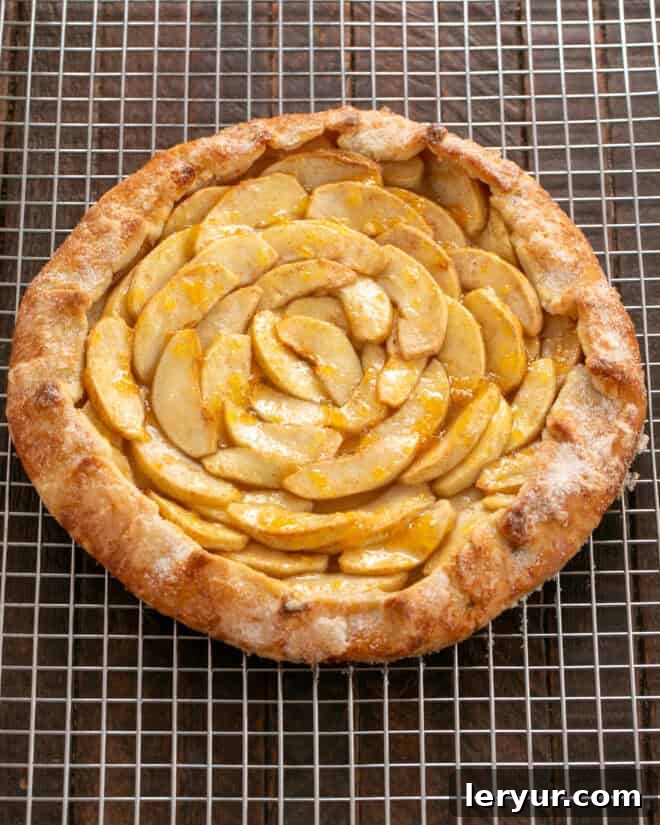
The dough’s edge is then artfully folded over the apples, gently pleated to create a beautiful, free-form border. This not only contains the filling but also adds to the galette’s homemade charm. Before baking, the exposed crust is brushed with egg white and generously sprinkled with sugar, which caramelizes in the oven to a gorgeous golden hue. The galette bakes in a hot oven until the crust is deeply golden and crisp, and the apples are wonderfully tender and bubbling. After a brief cooling period, a final optional brush of warm apricot jelly adds a beautiful sheen to the fruit, making your creation truly irresistible. The result is a stunning dessert that looks complex but is remarkably simple to achieve, ready to be enjoyed with a scoop of your favorite ice cream.
Unlocking Galette Perfection: Expert Tips for Success
While making a rustic apple galette is inherently simple, a few expert tips can elevate your baking experience and ensure a consistently perfect result every time. Pay attention to these details, and you’ll be baking like a pro!
- Choose Your Apples Wisely for Optimal Flavor and Texture: The choice of apples is paramount for a delicious galette. I strongly recommend using more than one variety to achieve a greater depth of flavor and a more interesting texture. For this particular recipe, a combination of Honeycrisp (for sweetness and a slight crispness even after baking) and Granny Smith apples (for a balancing tartness and firm texture that holds up well) creates an excellent pairing. Other fantastic combinations include Golden Delicious with Granny Smith, offering a balance of sweet, tangy, and firm characteristics. Experiment to find your favorite blend!
- Embrace the Power of Cold Ingredients for a Flaky Crust: This is perhaps the most crucial tip for any pastry crust, especially a galette. Always use exceptionally cold butter, cold cream cheese, and ice-cold water. These chilled ingredients prevent the butter from fully integrating with the flour, creating tiny pockets of butter that melt and release steam during baking. This steam is what creates those desirable layers, resulting in a wonderfully flaky and tender crust. If your kitchen is warm, consider chilling your mixing bowl and food processor blade before you start.
- PRO-Tip: Achieve a Perfectly Symmetrical Round Dough: For easier handling and a visually pleasing galette, aim for a well-shaped dough round. I find it incredibly helpful to use a large mixing bowl or a dinner plate (about 15 inches in diameter) as a guide to cut a clean, consistent circle from your rolled-out dough. Once you have your perfectly cut round, make a few superficial marks or a light indentation about 3 inches in from the edge of the pastry. This inner circle serves as a fantastic guideline for where to start layering your apples, ensuring you leave enough perimeter dough to fold over neatly.
- Master the Art of Apple Arrangement for Visual Appeal: While the galette is rustic, a beautiful arrangement of apples makes it truly special. I typically begin by placing 3-4 apple slices in the very center, then meticulously arrange subsequent slices in concentric circles, working outwards towards the guideline you marked earlier. Position the thicker sides of your apple slices facing outwards; this creates a more substantial edge and helps the galette maintain its shape. Remember to leave a clear border of a couple of inches uncovered at the perimeter, as this dough will be pleated and folded over the apples to contain the filling.
- Adjust Apple Quantity to Your Preference: The original Cook’s Illustrated recipe often calls for a more generous amount of apples. While delicious, I prefer using slightly fewer apples (around 4 medium ones) to allow for neater, more distinct concentric circles. However, feel free to add an extra apple if you desire a higher filling-to-pastry ratio. The beauty of a galette is its flexibility!
- The Finishing Touch: A Golden, Sugary Crust: For an irresistible crust that’s both beautiful and delicious, don’t skip the final steps before baking. Liberally brush the exposed dough border with a lightly beaten egg white. This egg wash helps the crust achieve a rich, golden-brown hue and provides a sticky surface for a generous sprinkling of sugar. The sugar will caramelize during baking, adding a delightful crunch and extra sweetness to every bite.
- PRO-Tip: The Secret Sheen – Apricot Glaze: This step isn’t typically in every galette recipe, but it’s a game-changer for presentation. After the galette has baked and cooled slightly, warm a small amount of apricot jelly or jam until it’s fluid (a quick microwave burst works wonders). Using a pastry brush, gently glaze the baked apples. This creates a stunning, professional-looking sheen on the fruit, making your galette truly sparkle and enhancing its vibrant color.
- Perfect Pairings for Serving: To complete the experience, serve each warm slice of galette with a generous scoop of vanilla ice cream. The cold, creamy ice cream melting into the warm, spiced apples is a match made in heaven. For an extra touch, consider caramel or even cinnamon ice cream to complement the flavors even further. A dollop of freshly whipped cream is also an excellent alternative.
Frequently Asked Questions About Apple Galettes
A galette is a beautiful and rustic French term that broadly refers to a flat, round cake or pastry. In the context of desserts, it’s most commonly known as a free-form tart with a pastry crust that’s folded casually over a fruit filling before baking. Unlike a traditional pie, a galette doesn’t require a pie dish or intricate crimping, making it inherently less formal and visually charming. While sweet fruit galettes are popular, there are also delicious savory variations, often filled with vegetables and cheese. One of the most famous types is the Galette des Rois, a puff pastry tart filled with frangipane, traditionally made for Epiphany. I’ve personally enjoyed making a variety, from Peach Raspberry Galette to Peach Blueberry Galette, but this Apple Galette remains my ultimate favorite! For another easy apple dessert, consider this Boozy Apple Crisp from Creative Culinary.
Pronouncing French culinary terms can sometimes be a bit tricky for English speakers. If you consult an English dictionary, you’ll typically find the pronunciation as /ɡælˈet/. To simplify it, especially if phonetic symbols aren’t your forte, think of it as “GUL-et” (rhymes with “cullet”). The emphasis is on the second syllable, and the ‘e’ at the end is silent. Practice saying it, and you’ll sound like a seasoned baker in no time!
Absolutely! An apple galette is a fantastic dessert for make-ahead convenience, especially when entertaining. You can prepare it a day in advance and store it at room temperature. If you prefer it warm when serving, simply pop it into a 350-degree Fahrenheit oven for about 5-10 minutes to gently reheat. Then, enhance the experience by topping each slice with a scoop of luscious vanilla ice cream just before serving – the contrast of warm galette and cold ice cream is truly divine.
Proper storage ensures your galette remains delicious. A baked galette can be stored at room temperature, loosely covered, for one to two days. During warmer, more humid months, it’s best to transfer it to the refrigerator after the first day to maintain freshness. Always bring it back to room temperature before serving for the best flavor and texture. For longer storage, a galette freezes beautifully for 2-3 months. To freeze, first place it uncovered on a baking sheet and freeze for an hour or two until firm. Then, transfer it to a cardboard round, wrap it tightly in plastic wrap and then foil, and store it in the freezer. When ready to enjoy, defrost it overnight in the refrigerator, and then gently warm it in the oven before serving.
More Delicious Recipes You’ll Love
If you’ve enjoyed the simplicity and deliciousness of this rustic apple galette, you’ll be thrilled to discover more delightful recipes that promise similar satisfaction. Explore these other fantastic galettes and pie/tart recipes:
- Fresh Strawberry Galette from The View from Great Island – A vibrant and sweet option for berry lovers.
- Maple Glazed Apple Galette – Another wonderful apple variation with a touch of maple sweetness.
- Berry Galette – A celebration of mixed berries encased in a flaky crust.
- Peach Galette – Perfect for summer, showcasing juicy, ripe peaches.
- More Pie and Tart Recipes – A diverse collection to satisfy any craving.

Stay connected and share your culinary adventures! Follow me on social media @ Instagram, Facebook, and Pinterest. Don’t forget to tag me when you try one of my delicious recipes! If you’re delighted with the results, please consider leaving a 5-star rating in the recipe card below. Your feedback and support mean the world to me!
Apple Galette
30 minutes
1 hour
1 hour 30 minutes
8 servings
A scrumptious rustic apple dessert with a tender, easy to roll out crust and a spiral of cinnamon-spiced apples!
Ingredients
Dough:
- 1 ¼ cups flour
- 2 tablespoons sugar
- ¼ teaspoon salt
- 8 tablespoons cold butter (1 stick), cut into ½-inch pieces
- 4 ounces cold cream cheese, cut into ½-inch pieces
- 2 teaspoons lemon juice
- 1-2 tablespoons ice water (I used closer to 2 tablespoons)
Filling:
- 4 medium apples (about 2 ½ pounds), peeled, cored and cut into ¼-inch slices (I used 3 Granny Smith and 3 Golden Delicious)
- 2 tablespoons lemon juice
- ¼ cup sugar
- ¼ teaspoon cinnamon
Glaze:
- 1 egg white, lightly beaten
- 2 tablespoons sugar
- Apricot jelly or jam, optional, to glaze the fruit
Instructions
- In a food processor, pulse flour, sugar, and salt. Add butter and cream cheese and pulse till the mixture looks like coarse cornmeal, about 10 pulses.
- Sprinkle with lemon juice and 1 tablespoon of water and pulse a few times till liquid is dispersed. Pinch a bit of the dough to see if it holds together; if not, sprinkle with the remaining water and pulse to combine.
- Turn the dough out onto the countertop and gently press it into a ball. Flatten into a 6-inch disk, wrap with plastic wrap, and refrigerate for at least 30 minutes.
- Preheat oven to 375º. Remove the dough from the refrigerator.
- Roll into a 15-inch circle between two sheets of parchment paper. Remove the top parchment and move the dough round with the parchment paper to a baking sheet.
- Toss apples with the sugar and cinnamon; and arrange apples overlapping in semicircles, starting about 3 inches in from the edge of the dough, placing the thicker sides of the apples facing out.
- Fold the outer dough border up over the apple filling, pleating as needed, then use cupped hands to press the sides of the dough so it adheres to the apples.
- Bake for 30 minutes, then brush the exposed crust with egg white and sprinkle the remaining sugar over the whole tart.
- Bake until the crust is golden and the apples are tender about 30 more minutes.
- Cool for 10 minutes, then slide the tart and parchment onto a cooling rack.
- If you’d like, brush some apricot jelly or jam over the apples to give them a slight sheen.
- Use a large spatula to remove the tart from the parchment onto a serving plate. Serve slices with vanilla ice cream or whipped cream.
Notes
Adapted from Cook’s Illustrated.
Recommended Products
As an Amazon Associate and member of other affiliate programs, I earn from qualifying purchases.
- Silicone Pastry Brush
- Reynolds Cookie Baking Sheets Non-Stick Parchment Paper, 25 Sheet, 4 Count
- USA Pan Bakeware Half Sheet Pan
Nutrition Information:
Yield:
8
Serving Size:
1 slice
Amount Per Serving:
Calories: 321Total Fat: 17gSaturated Fat: 10gTrans Fat: 0gUnsaturated Fat: 5gCholesterol: 45mgSodium: 212mgCarbohydrates: 41gFiber: 3gSugar: 23gProtein: 4g
HOW MUCH DID YOU LOVE THIS RECIPE?
Please leave a comment on the blog or share a photo on Pinterest