
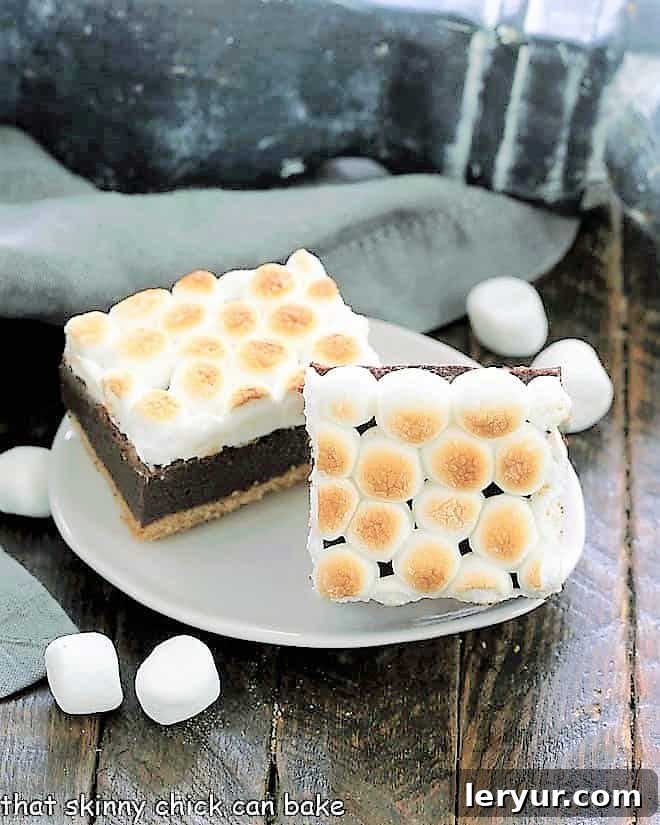
Imagine the irresistible taste of classic campfire s’mores, perfectly captured in a decadent brownie bar. With a buttery graham cracker crust, a rich, fudgy brownie center, and a golden, toasted mini marshmallow topping, these S’mores Brownies are truly a culinary masterpiece destined to become your new favorite treat!
Whether you’re yearning for that nostalgic campfire flavor without the hassle of building a fire, or you simply need a show-stopping dessert for your next gathering, these S’mores Brownie Bars are an absolute dream come true. They are as delightful to look at as they are to devour, offering a perfect blend of textures and tastes in every bite.
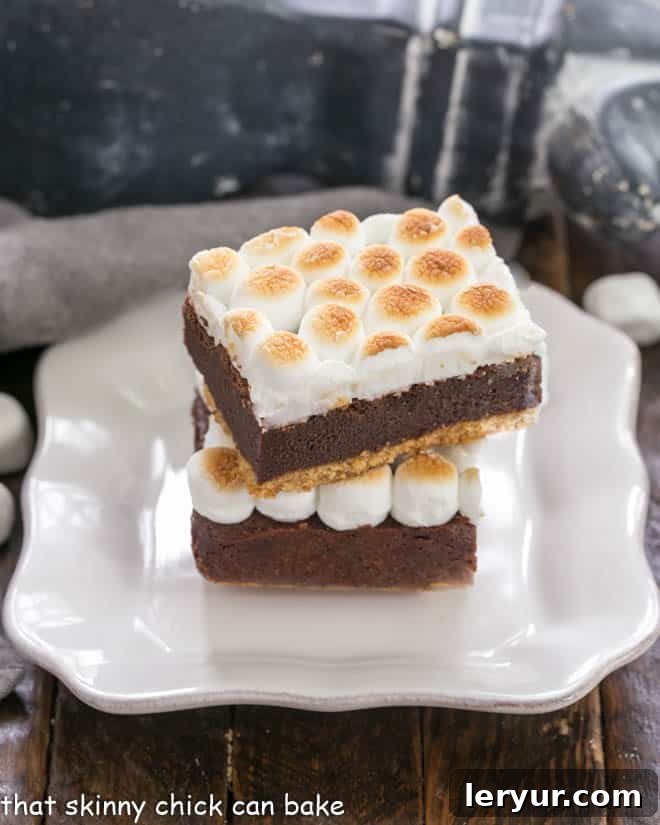
Why You Must Make These Incredible S’mores Brownies
These S’mores Brownies aren’t just another dessert; they’re an experience. Here’s why they deserve a top spot on your baking list:
- All the S’mores Magic, No Campfire Required: Enjoy the iconic layers of graham cracker, gooey chocolate, and perfectly toasted marshmallow without needing to venture outdoors or fuss with a fire pit. They deliver that classic flavor profile in a convenient, portable bar form.
- Effortless Entertaining: Perfect for summer picnics, barbecues, potlucks, or any occasion where you want to impress without stress. These bars are easy to transport, serve, and are always a crowd-pleaser, making them ideal for any social gathering.
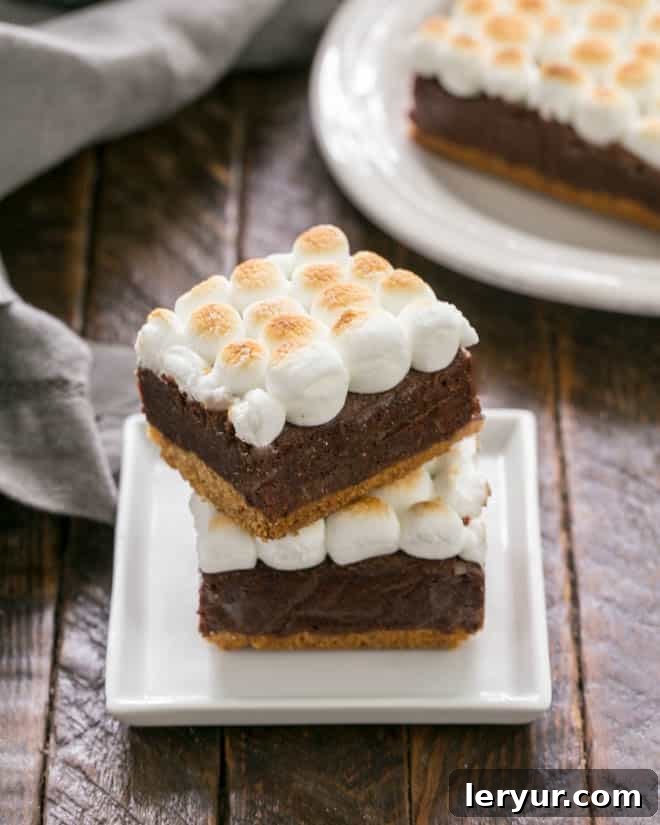
- Irresistible Three-Layer Indulgence: Each bite offers a symphony of textures and flavors – the crunchy, buttery graham cracker crust, the rich and decadent chocolate brownie, and the sweet, melt-in-your-mouth toasted marshmallow. It’s a triple threat of deliciousness that will have everyone reaching for “some more.”
- A Taste of Nostalgia: For many, s’mores evoke cherished memories of childhood summers, family camping trips, and joyful evenings under the stars. These brownies bring back all those warm, fuzzy feelings in an easy-to-make dessert.
My own family vacations were filled with unforgettable camping adventures out west. From the majestic Rockies to the breathtaking Grand Canyon, we explored national parks in our trusty Plymouth station wagon (lacking both a radio and air conditioner!) or our robust Big Blue Dodge van. No matter where we pitched our tent, s’mores were a guaranteed highlight of our outdoor dining experiences. My dad, with his trusty Swiss Army knife, would help us whittle sticks to perfectly toast our marshmallows, a ritual that always ended with me enjoying mine charred and gooey to perfection. While those memories are precious, I can confidently say that these S’mores Brownies offer an elevated, more refined take on our rustic campfire tradition – making them truly irresistible.
Expert Tips for Perfect S’mores Brownies
Crafting the perfect S’mores Brownies involves a few key techniques to ensure each layer is absolute perfection. Follow these expert tips for a truly spectacular result:
- Mastering the Baking Pan Prep: Start by lining your baking pan with non-stick foil. This simple step is a game-changer, especially when dealing with the incredibly gooey, broiled marshmallow topping. Non-stick foil prevents the marshmallows from sticking to the pan, making removal and clean-up a breeze. If non-stick foil isn’t available, regular foil sprayed generously with a non-stick cooking spray will also work effectively.
- Creating the Ideal Graham Cracker Crust:
- Combine the graham cracker crumbs, melted butter, and sugar thoroughly until the mixture resembles wet sand.
- Press this mixture firmly and evenly into the bottom of your prepared pan. A great pro-tip is to use the flat bottom of a measuring cup or a clean, flat glass to compact and smooth out the crust layer. This ensures a uniform thickness and a sturdy foundation for your brownies.
- Bake the crust as directed, then allow it to cool completely while you prepare the brownie batter. A fully cooled crust prevents the brownie layer from becoming soggy.
- Achieving a Flawless Brownie Layer:
- Once your brownie batter is mixed to perfection (remember not to overmix, which can lead to tough brownies!), use an offset spatula to spread it over the cooled graham cracker crust. This tool allows for much greater control, helping you achieve a smooth and perfectly level brownie layer.
- Bake the brownies according to the recipe, keeping an eye on them. You’ll know they’re nearing completion when your kitchen fills with an amazing, rich chocolate aroma.
- Check for doneness: the edges of the brownies should begin to pull away slightly from the sides of the pan, and the center should appear set, not liquidy. Avoid overbaking if you desire a fudgy texture.
- Perfecting the Marshmallow Topping:
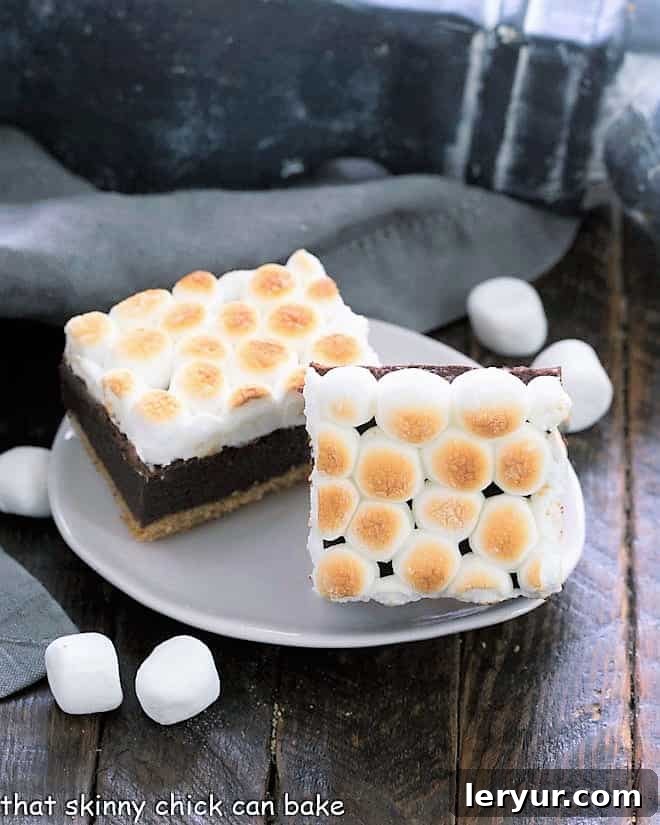
- After the brownies have cooled completely, generously cover the entire surface with mini marshmallows. For a truly professional and visually appealing finish, you can meticulously line them up so they are all upright (flat side down), creating a dense, even layer. However, simply scattering them to completely cover the brownies works just as well and is much faster!
- The Broiler Watch – Critical Step: Place the marshmallow-topped brownies under the broiler for a few minutes. This is where vigilance is key! Marshmallows can go from perfectly golden brown to burnt in mere seconds. Do not walk away from the oven. Keep the oven door slightly ajar and watch them continuously until they reach your desired level of toastiness – from lightly golden to beautifully charred.
- Cooling and Serving for Clean Cuts: Allow the S’mores Brownies to cool completely before attempting to cut them. This ensures clean, defined squares. For the cleanest cuts, use a sharp knife warmed under hot water, wiping it clean between each slice. This prevents the gooey marshmallow from sticking and tearing.
Frequently Asked Questions About S’mores Brownies
S’mores, a delightful contraction of “some more,” are a beloved American campfire treat with roots dating back to the 1920s. They first appeared in a cookbook as a graham cracker sandwich, though they were already a popular staple among Boy Scouts and Girl Scouts around that time. The classic s’more consists of two layers of crisp graham crackers encasing a perfectly toasted marshmallow and a piece of milk chocolate bar. The magic happens when the warmth of the freshly toasted marshmallow melts the chocolate, creating an incredibly gooey, sweet, and comforting treat that’s impossible to resist.
The best way to achieve that signature golden-brown, toasted marshmallow topping is by using your oven’s broiler function. Position the marshmallow-topped brownies on a middle oven rack, ensuring they are not too close to the heating element (typically about 4-6 inches below). Crucially, keep the oven door cracked slightly and remain vigilant. Marshmallows can transition from beautifully toasted to burnt in mere seconds, or even catch fire if left unattended. It generally takes only one to two minutes for the marshmallows to puff up, turn wonderfully golden, and develop those tempting charred spots. Watch carefully and remove them as soon as they reach your desired level of toastiness.
To maintain their freshness and deliciousness, store S’mores Brownies in an airtight container at room temperature for up to 2-3 days. While they are best enjoyed the day they are made, especially for that perfectly soft marshmallow topping, they will still be wonderful for a few days. If you prefer, you can refrigerate them, but the brownies might firm up slightly. Allow them to come to room temperature before serving for the best texture.
Yes, with a small caveat. You can prepare the graham cracker crust and the brownie layer a day in advance. Once the brownie layer is fully baked and cooled, cover the pan tightly and store it at room temperature. The marshmallow topping, however, is best added and broiled just before serving to ensure it’s beautifully gooey and toasted. If you top them too far in advance, the marshmallows can become hard or lose their fresh appeal.
Irresistible Desserts You May Also Like:
My youngest was home from college when I first made these S’mores Brownies, and it’s safe to say they disappeared remarkably fast! He hasn’t exactly raved about dorm food, so I have a feeling this kind of indulgent treat doesn’t make their cafeteria menu. I even managed to sample a couple myself – that buttery graham cracker crust gets me every single time!
If you love the magical combination of s’mores, or simply can’t get enough of decadent brownies and cookies, be sure to explore these other fantastic recipes:
- S’mores Cookie Bars: For those who crave the chewiness of a cookie with the classic s’mores layers.
- S’mores Cookies: A delightful twist, bringing the s’mores experience into a convenient, bite-sized cookie format.
- S’mores Fudge Bars: Indulge in an even richer, more dense chocolate experience with a s’mores twist.
- Don’t forget to check out all my Brownie Recipes and Cookie Recipes for even more sweet inspiration and baking adventures!
Stay connected with us for more delectable recipes and baking tips! Follow us on social media @ Instagram, Facebook, and Pinterest. We’d love to see your creations – don’t forget to tag us when you try one of our recipes! And if you absolutely adore the results, please consider giving it a 5-star rating in the recipe card below. Your feedback helps other bakers discover these amazing treats!
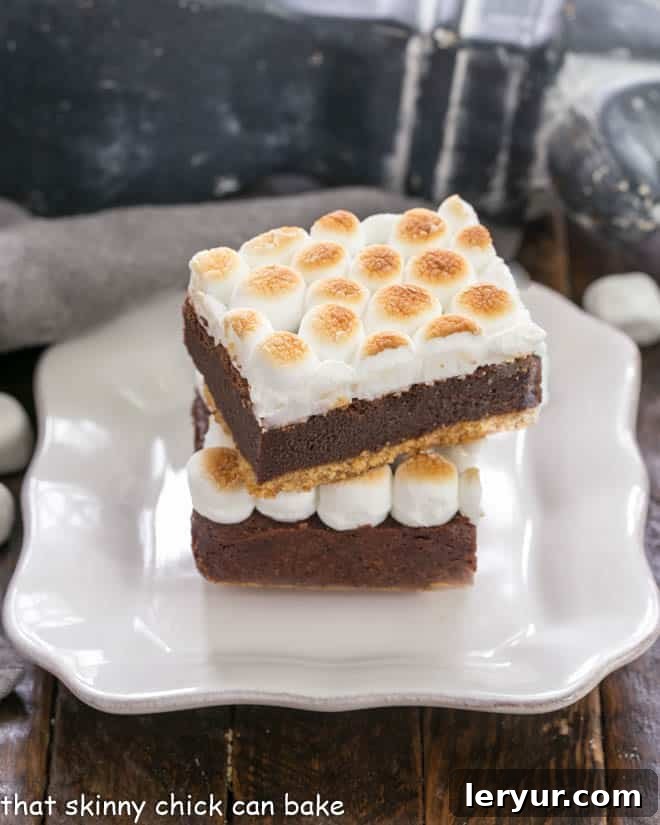
S’mores Brownies with a Graham Cracker Crust
20 minutes
27 minutes
47 minutes
16 bars
Indulge in these rich brownies inspired by the classic s’mores campfire treat, featuring a buttery graham cracker crust, fudgy chocolate, and toasted marshmallow topping.
Ingredients
For the Graham Cracker Crust:
- 1 1/2 cups graham cracker crumbs
- 6 tablespoons unsalted butter, melted
- 2 tablespoons granulated sugar
For the Fudgy Brownie Layer:
- 8 tablespoons (1 stick) unsalted butter
- 4 ounces unsweetened chocolate, finely chopped
- 1 1/4 cups granulated sugar
- 1 teaspoon vanilla extract
- 1/4 teaspoon salt
- 2 large eggs
- 1/2 cup all-purpose flour
For the Toasted Marshmallow Topping:
- Approximately 2 cups mini marshmallows
Instructions
- Prepare for Baking: Preheat your oven to 350ºF (175ºC). Line an 8×8-inch baking pan with non-stick foil, ensuring the foil extends over the sides to create “handles” for easy removal. Alternatively, use regular foil sprayed thoroughly with non-stick cooking spray. Set the prepared pan aside.
- Make the Graham Cracker Crust: In a medium bowl, combine the graham cracker crumbs, melted butter, and 2 tablespoons of sugar. Mix until the crumbs are well moistened and resemble wet sand. Press the mixture evenly and firmly into the bottom of the prepared pan. Bake for 7 minutes. Remove from the oven and allow the crust to cool completely while you prepare the brownie batter.
- Increase Oven Temperature: Once the crust is baked, increase your oven temperature to 400ºF (200ºC).
- Melt Chocolate and Butter: In a microwave-safe bowl, combine the 8 tablespoons of butter and chopped unsweetened chocolate. Microwave on medium power in 30-second intervals, stirring frequently, until smooth and fully melted. Be careful not to overheat.
- Prepare Brownie Batter: Stir the 1 1/4 cups sugar, vanilla extract, and salt into the melted chocolate mixture. Add the eggs one at a time, mixing well after each addition until fully incorporated. Finally, stir in the flour until just combined and the mixture is smooth and pulls away slightly from the sides of the bowl. Do not overmix. Spread the brownie batter evenly over the cooled graham cracker crust in the prepared pan. Bake for 18-22 minutes, or until the brownies begin to pull away from the sides of the pan and the center appears set but still fudgy. (Baking times can vary; refer to notes for more info).
- Cool and Top with Marshmallows: Let the brownies cool completely to room temperature. Once cool, sprinkle enough mini marshmallows over the entire surface of the brownies to form an even, dense layer.
- Broil the Marshmallows: Carefully place the pan under the broiler, about 4-6 inches from the heating element. Watch very carefully and broil for approximately 1-2 minutes, or until the marshmallows are golden brown and toasted to your liking. Keep the oven door slightly ajar and do not leave unattended, as marshmallows can burn very quickly.
- Cool and Serve: Allow the S’mores Brownies to cool completely before cutting into squares. For cleaner cuts, use a hot, sharp knife, wiping the blade clean between slices. Serve and enjoy!
Notes
If you prefer to use a box brownie mix as a substitution for the brownie layer, follow the baking instructions provided on the box for an 8×8 inch pan.
*Note: An 18-minute baking time worked perfectly in my oven for a fudgy brownie texture. However, oven temperatures and specific pan materials can vary, so some testers have found that their brownies required a few extra minutes of baking time to reach the desired doneness. Always test for a set center before removing from the oven.
Recommended Products
As an Amazon Associate and member of other affiliate programs, I earn from qualifying purchases.
- Nonstick Foil
- Set of Glass Mixing Bowls
- USA Pan Bakeware Square Cake Pan, 8 inch, Nonstick
Nutrition Information:
Yield:
16
Serving Size:
1 bar
Amount Per Serving:
Calories: 278
Total Fat: 15g
Saturated Fat: 9g
Trans Fat: 0g
Cholesterol: 47mg
Sodium: 88mg
Carbohydrates: 33g
Fiber: 2g
Sugar: 23g
Protein: 3g
HOW MUCH DID YOU LOVE THIS RECIPE?
Please leave a comment on the blog or share a photo on Pinterest