
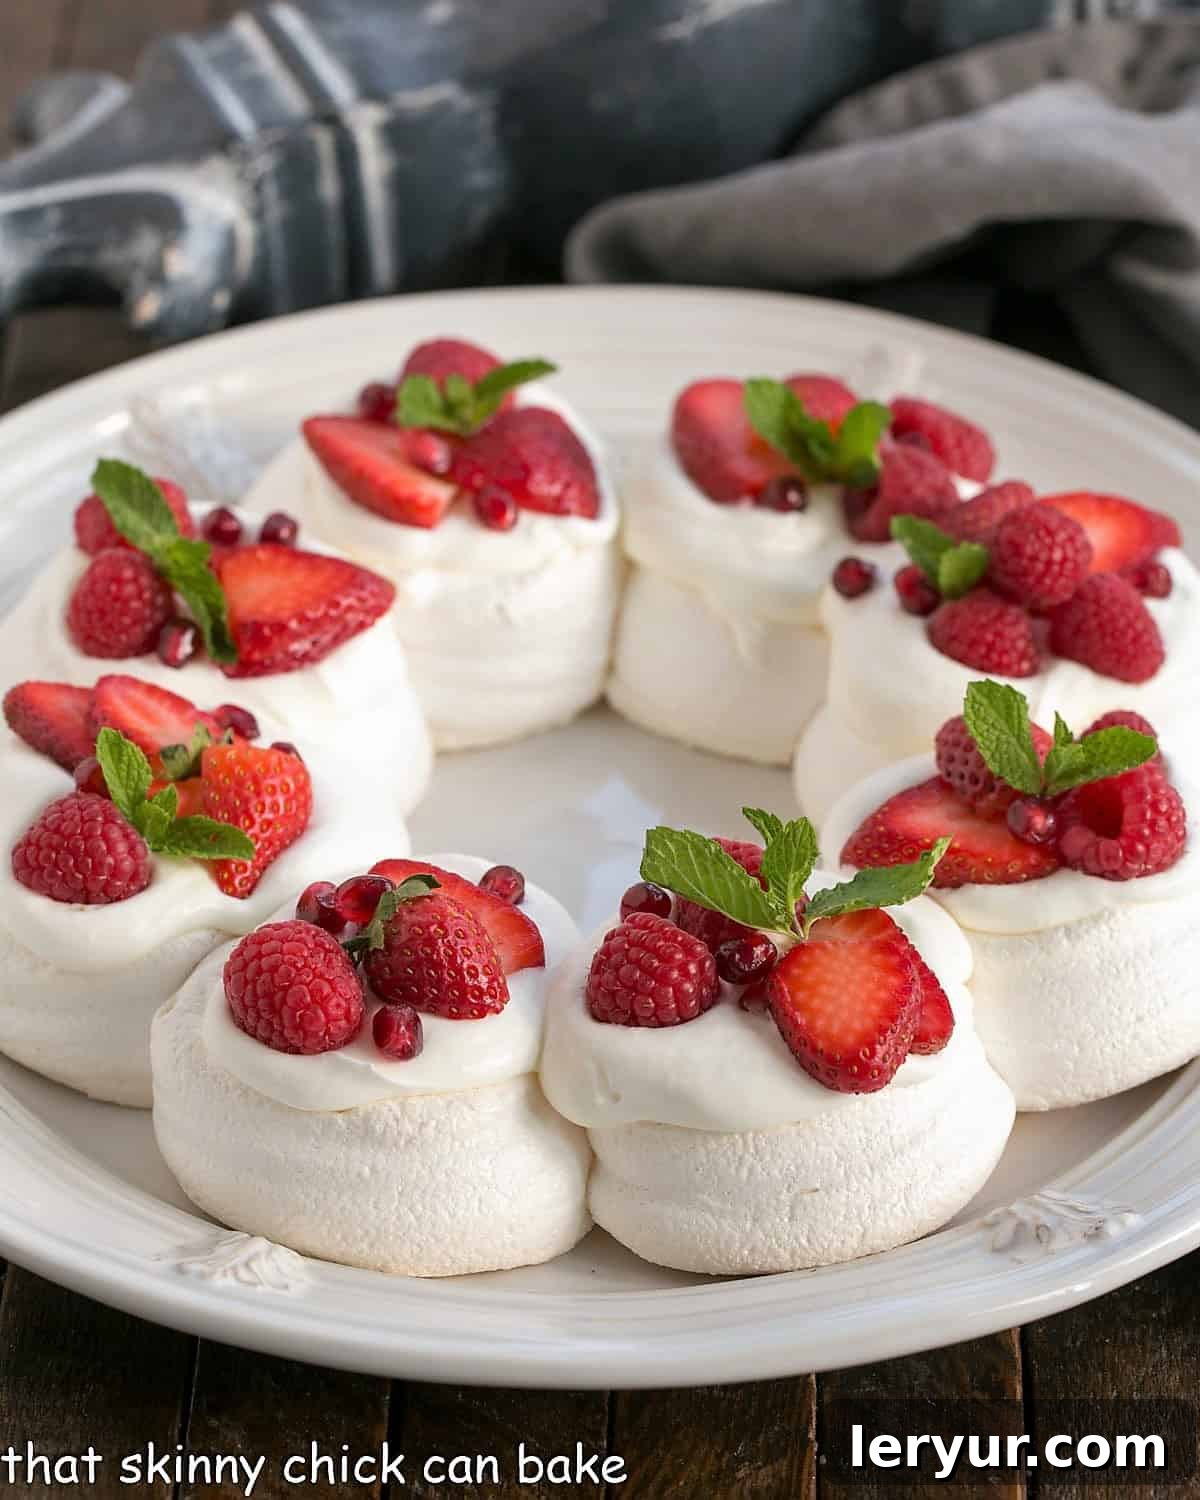
Elegant Christmas Pavlova Wreath: Your Guide to a Dazzling Holiday Dessert
This Christmas Pavlova Wreath is more than just a dessert; it’s a festive centerpiece, a gorgeous creation, and an absolutely delicious treat that will leave everyone captivated. Imagine a delicate meringue shell, crisp on the outside and wonderfully soft within, crowned with billows of fresh whipped cream and a vibrant array of red berries and green mint sprigs. This stunning dessert effortlessly captures the spirit of the holidays, making it an unforgettable addition to your festive table.
By shaping this exquisite Pavlova Dessert into a charming ring, reminiscent of a holiday wreath, and adorning it with the classic Christmas colors of ruby-red berries and emerald-green mint, we elevate a simple meringue into a spectacular holiday masterpiece. It’s a culinary work of art that tastes as good as it looks.
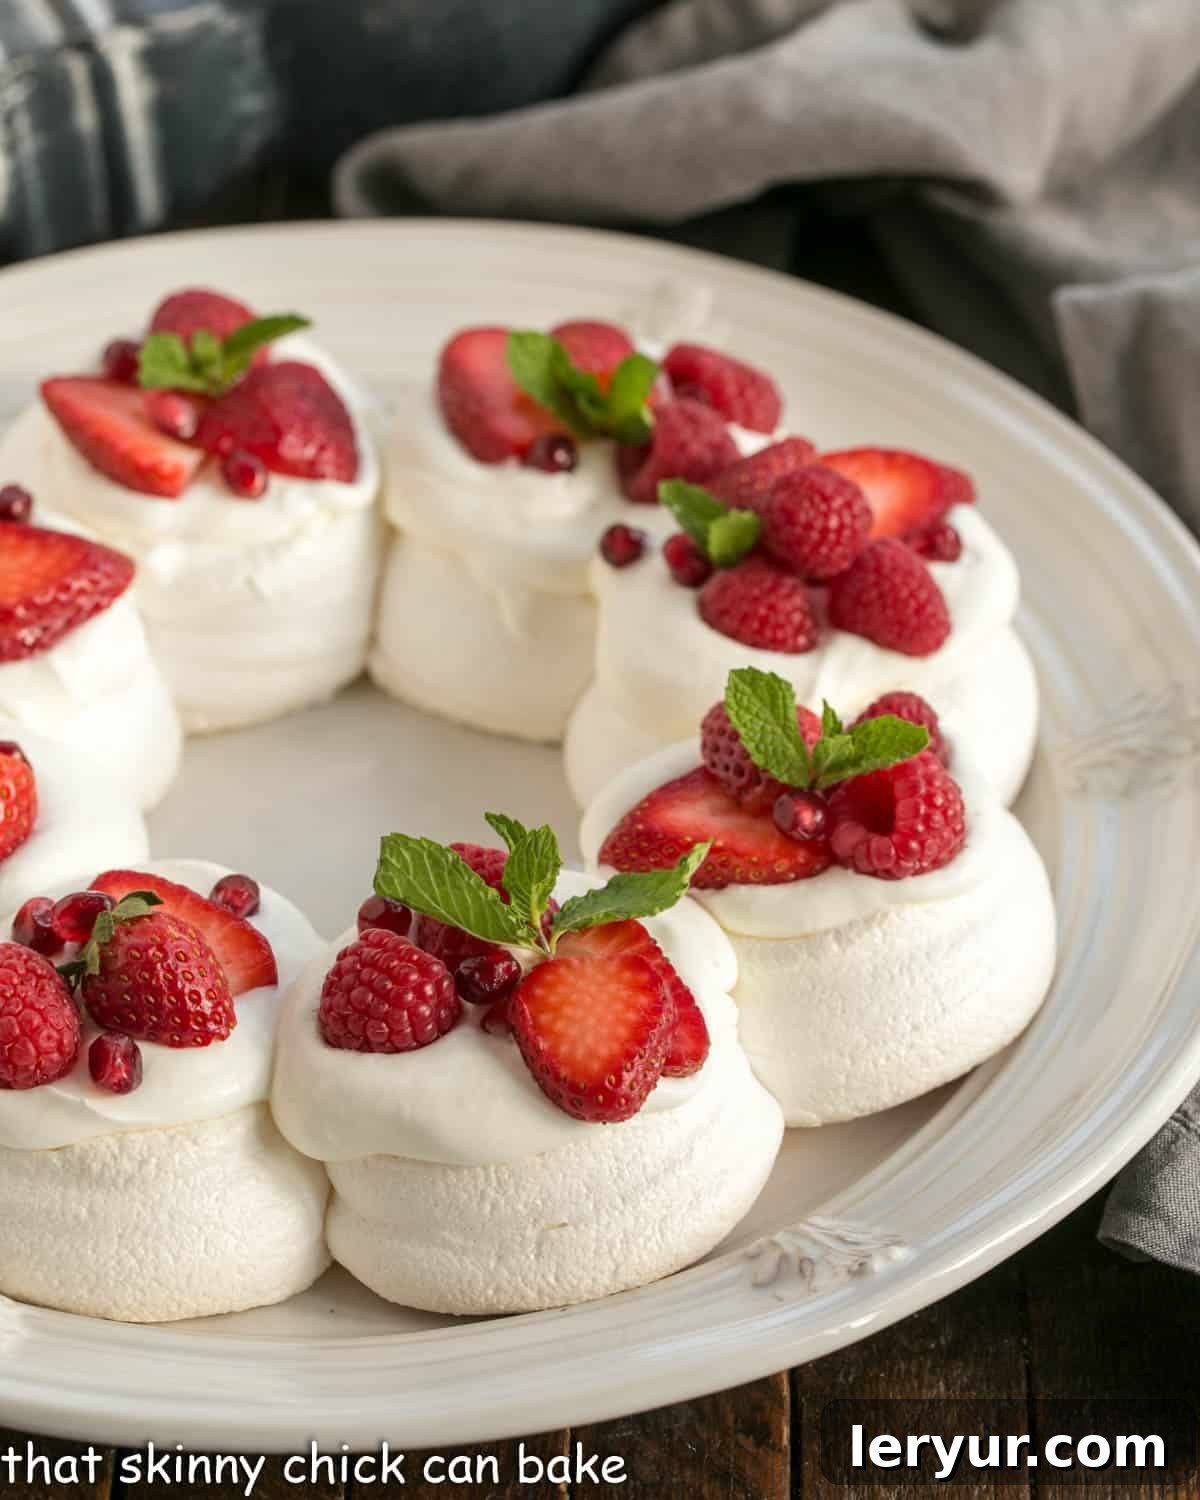
Why You’ll Adore This Christmas Pavlova
The Christmas Pavlova Wreath isn’t just another dessert; it’s an experience. Here’s why it’s destined to become your new holiday favorite:
- A Unique Culinary Delight: In many circles, Pavlova remains a delightful mystery. Serving this elegant dessert means you’ll be introducing your guests to something truly special, a conversation starter that’s as unique as it is delicious. It stands out from typical holiday cakes and pies.
- Surprisingly Approachable Baking: Don’t let its sophisticated appearance intimidate you. If you can master basic meringue cookies or a meringue topping for a pie, you absolutely possess the skills to create this impressive pavlova. It requires attention to detail but is far less complicated than many believe.
- Irresistibly Delicious & Visually Stunning: This isn’t merely a pretty face; it’s one of the most delightful desserts you’ll ever taste. The contrast of the crisp meringue exterior, the soft marshmallow-like interior, and the fresh, creamy toppings creates a symphony of textures and flavors. Coupled with its breathtaking presentation, it guarantees gasps of admiration at your holiday gathering.
- Versatile for Any Occasion: While perfectly suited for Christmas with its wreath shape and festive toppings, the core pavlova recipe is incredibly versatile. You can adapt toppings for any season or celebration, making it a year-round showstopper.
- Gluten-Free Indulgence: For those with dietary restrictions, a pavlova offers a naturally gluten-free option, allowing everyone at your table to enjoy a decadent holiday treat without compromise.
The Essential Ingredients for a Perfect Pavlova
Crafting a perfect pavlova requires careful attention to its core components. Each ingredient plays a vital role in achieving that signature crisp-on-the-outside, soft-on-the-inside texture. Let’s delve into the specifics:
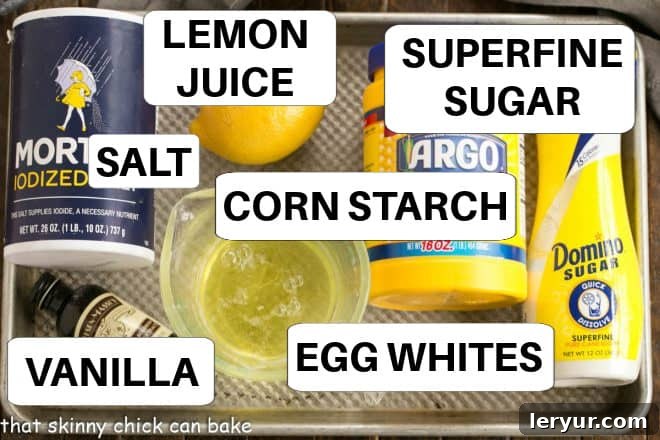
- Superfine Sugar (Caster Sugar): This is paramount. Unlike regular granulated sugar, superfine sugar dissolves much more readily into the egg whites, leading to a smoother, more stable meringue and a less grainy texture in the final product. While you can try to blitz regular sugar in a food processor, this can create sharp edges on the sugar crystals, which some bakers believe can interfere with the meringue’s structure. Opt for a store-bought superfine variety like Domino’s if possible.
- Cornstarch: A secret weapon in pavlova making, cornstarch is crucial for achieving the characteristic marshmallowy, soft center. It helps to keep the meringue’s interior tender and chewy, preventing it from drying out completely while the exterior bakes to a delightful crispness.
- Large Egg Whites: The foundation of any meringue. For optimal volume and stability, ensure your egg whites are at room temperature. Cold egg whites are denser and won’t whip up as light and airy. Crucially, make sure all bowls and utensils that come into contact with the egg whites are immaculately clean and completely free of any oil or grease. Even a tiny speck of yolk or fat can prevent the whites from whipping properly, leaving you with a flat, deflated meringue. A run through the dishwasher is an excellent precaution for your mixer bowl and whisk.
- Fresh Lemon Juice or White Vinegar: The acid in lemon juice or white vinegar plays a critical role in stabilizing the whipped egg whites. It helps the protein structure hold air more effectively, resulting in a robust, voluminous meringue that maintains its shape and doesn’t collapse during baking.
- Table Salt: Often overlooked in sweet recipes, a pinch of salt is a vital flavor enhancer. It balances the sweetness of the sugar and elevates the overall taste profile, ensuring your dessert doesn’t taste bland or “flat.”
- Pure Vanilla Extract: For the best flavor, always opt for pure vanilla extract. Imitation vanilla simply doesn’t offer the same depth and richness that pure vanilla provides, which is essential for a dessert where vanilla is a prominent note.
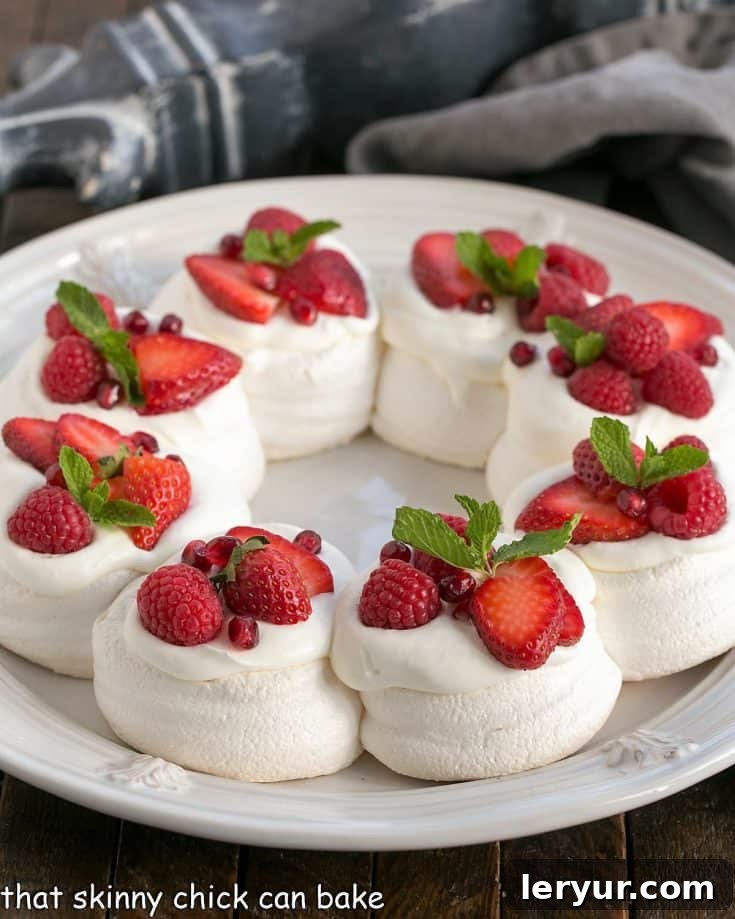
- Heavy Whipping Cream and Fresh Berries: These are your key garnishes, transforming the baked meringue shell into its festive Christmas wreath form. The cream provides a luscious, cooling contrast to the meringue, while the vibrant red berries (raspberries, strawberries, pomegranate arils) and fresh green mint sprigs add a burst of flavor, color, and undeniable holiday cheer.
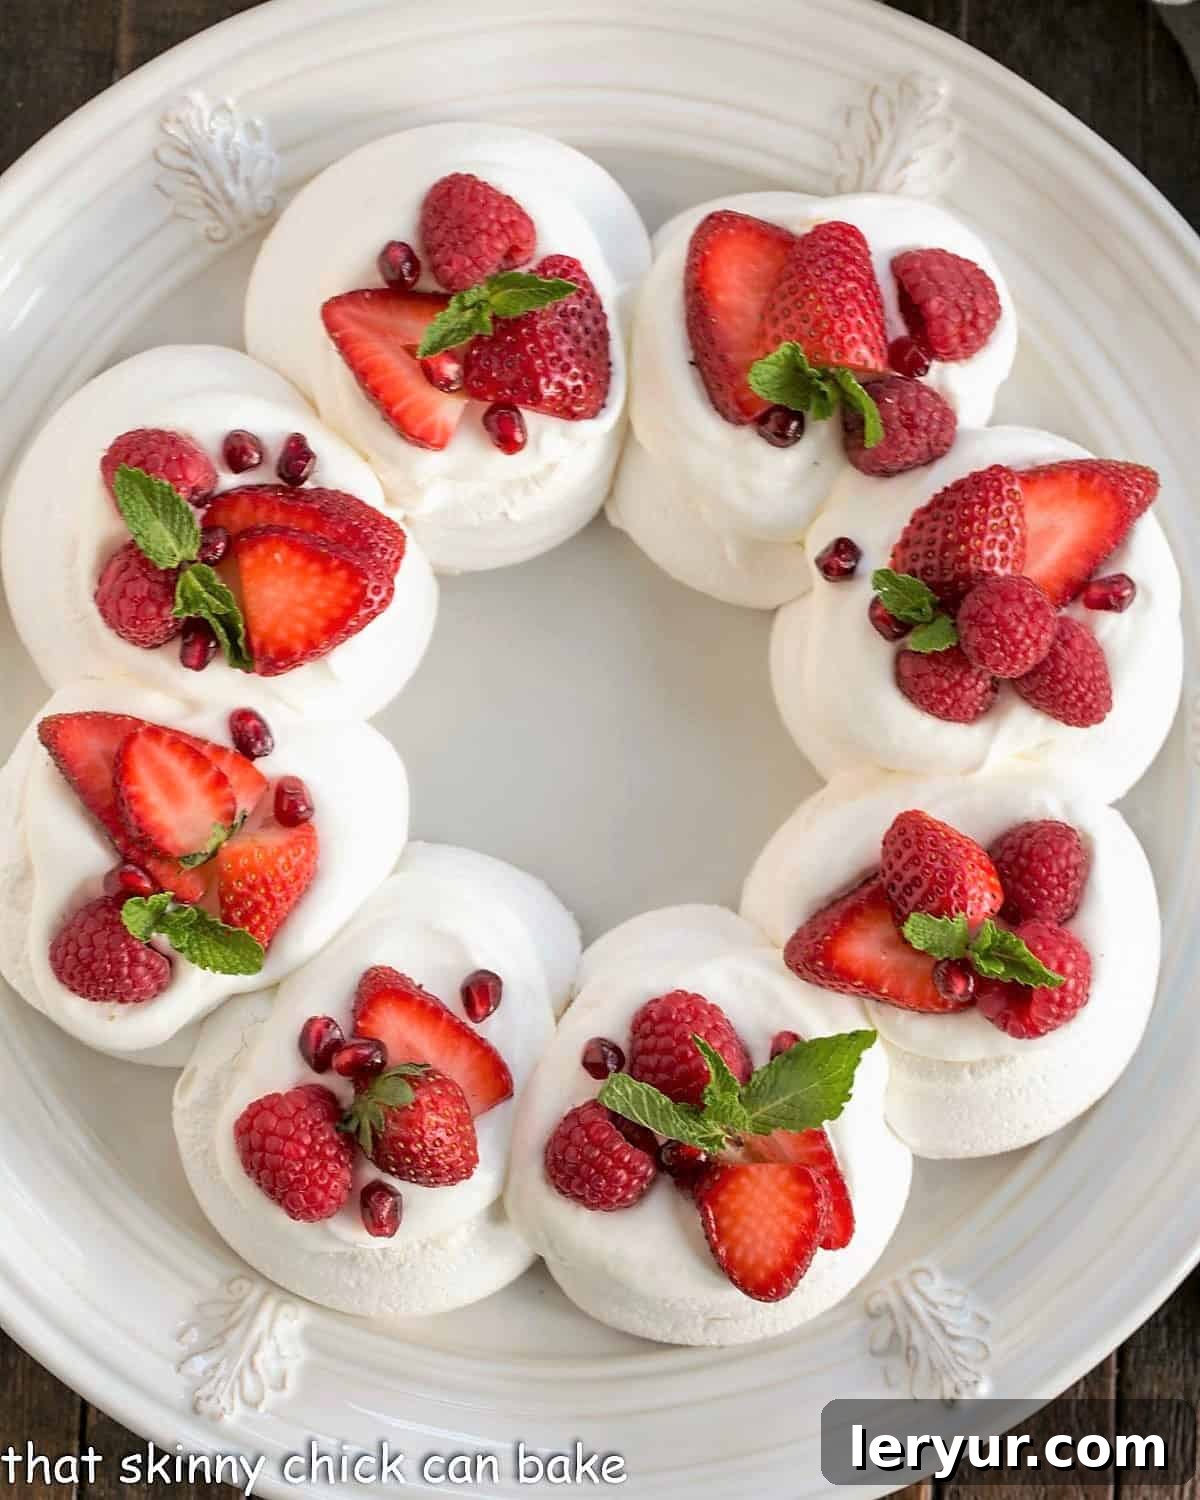
Expert Tips for a Flawless Christmas Pavlova Wreath
Achieving pavlova perfection is all about technique and a few insider secrets. Many of these tips are applicable to any meringue-based dessert, ensuring your success:
- The Art of Egg Separation: This is perhaps the most critical step. Always separate your eggs one at a time, using three bowls: one for the whole egg, one for the yolk, and one for the whites. First, separate the yolk from the white over the “yolk” bowl. Only once you are absolutely certain no yolk has contaminated the white, transfer the clean white to your “whites” bowl. This meticulous process prevents a single ruined egg from spoiling your entire batch of whites.
- PRO-Tip: Cold Eggs Separate Best: While room temperature egg whites whip up beautifully, cold eggs are actually easier to separate. The yolk is firmer and less likely to break when chilled. Separate them cold, then let the whites come to room temperature before whipping.
- PRO-Tip: Pristine Equipment is Non-Negotiable: Any trace of oil or grease is the nemesis of meringue. Fat prevents egg whites from whipping properly, resulting in a flat, dense texture. To be absolutely sure, run your mixer bowl and whisk attachment through the dishwasher or wash them thoroughly with hot, soapy water and dry completely. “Scrupulously clean” is the mantra here.
- The Superiority of Superfine Sugar: As mentioned, superfine sugar (caster sugar) dissolves more quickly and completely into the egg whites. This leads to a more stable meringue with a glossy finish and a perfectly smooth texture, devoid of gritty sugar crystals. If you only have regular granulated sugar, you can pulse it briefly in a food processor, but be careful not to turn it into powdered sugar.
- Slow and Steady Sugar Addition: Never dump all the sugar into your egg whites at once. Gradually add the sugar, one tablespoon at a time, while the mixer is running on medium-high speed. This allows the sugar to dissolve properly and integrate into the egg white structure, building a strong, stable foam. My mother taught me a classic test: rub a tiny bit of the meringue between your fingers. If you still feel sugar grains, continue mixing until it’s as smooth as possible. While a few granules might remain, the goal is significant dissolution.
- Mind the Moisture: Timing Your Toppings: This bears repeating for emphasis: Do not top your meringue with whipped cream and berries until approximately one hour before serving. Meringue is highly susceptible to moisture. The cream, with its water content, will cause the crisp meringue to absorb moisture and become chewy, losing its desirable texture. You want that delightful contrast of crisp and soft.
- PRO-Tip: Store Your Meringue in a Dry Environment: Humidity is the arch-enemy of a crisp meringue. Any moisture in the air will soften your pavlova. Therefore, do not store your ungarnished pavlova in the refrigerator, as it is a very humid environment.
- The Oven as a Dry Storage Solution: A fantastic trick for storing your unadorned pavlova shell is inside a turned-off oven. It’s a dark, dry, and stable environment. Just be sure to place a prominent note on the oven door to prevent anyone from accidentally preheating it with your beautiful pavlova inside! This ensures it stays perfectly crisp until you’re ready to decorate.
- Cooling is Key: After baking, turn off the oven and leave the pavlova inside with the door slightly ajar. This gradual cooling process helps prevent sudden temperature changes that can lead to cracking and ensures the meringue sets properly.
Frequently Asked Questions About Christmas Pavlova Wreaths
What exactly is a Pavlova?
Pavlova is a truly iconic dessert, named in honor of the Russian ballerina Anna Pavlova. While its exact origins are hotly debated between Australia and New Zealand, both countries proudly claim its invention. At its heart, a pavlova is a large meringue — an egg white dessert sweetened with sugar and stabilized with a touch of acid (like lemon juice or vinegar) and cornstarch. It’s baked slowly at a low temperature, which gives it its signature texture: a wonderfully crisp, melt-in-your-mouth exterior that gives way to a soft, ethereal, almost marshmallow-like interior (a texture often described by Nigella Lawson as “squidgy”). Unlike a dense, uniformly crisp meringue, pavlova offers a delightful textural contrast that makes it utterly irresistible and a favorite for celebrations.
Can I prepare a Pavlova in advance?
Yes, absolutely! The meringue shell of your pavlova can be made a day or even two days in advance. However, the golden rule of pavlova is to avoid topping it with whipped cream, fresh fruit, or any other moist garnishes until just before serving. Moisture is the enemy of a crisp meringue. Store the baked and completely cooled meringue shell in a low-humidity location, such as your turned-off oven, or an airtight container at room temperature. Never refrigerate an unadorned pavlova, as the humidity will quickly compromise its delicate texture, making it chewy and sticky.
When is the best time to decorate a Pavlova?
To ensure your pavlova remains at its peak crispness and visual appeal, aim to decorate it no more than an hour before you plan to serve it. This allows the meringue to maintain its structural integrity and delightful crunch. If you’ve prepared the meringue shell in advance, simply assemble the whipped cream, berries, and mint sprigs in the final hour leading up to dessert time. Any leftovers that have been topped with cream and fruit should be refrigerated, as the dairy and fresh produce require it for safety and freshness, though the meringue’s texture will soften significantly once refrigerated.
How do I pipe a beautiful Meringue Wreath?
Creating a perfectly shaped meringue wreath is simpler than it looks with a good template. Here’s a step-by-step guide:
- Create Your Template: Lay a sheet of parchment paper flat on your counter. Using a 10-inch cake pan as a guide, draw a large circle in the center of the parchment. Then, using a smaller 4-inch mixing bowl or cookie cutter, draw a concentric circle in the middle of the larger one. This creates your wreath outline.
- Prepare Your Baking Sheet: Flip the parchment paper over so the drawn lines are on the underside. Place it on a baking sheet. To prevent the parchment from sliding, use small dabs of your raw meringue mixture to “glue” each corner of the paper to the pan.
- Choose Your Piping Tool: For a clean, uniform look, use a large piping bag fitted with a large open star or round tip. If you don’t have one, a large Ziploc bag with a corner snipped off works perfectly well, though it might yield a slightly more rustic, charming appearance.
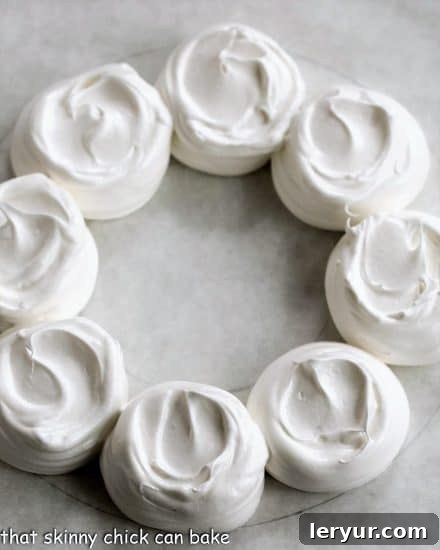
- Pipe the Mounds: Carefully pipe round mounds of meringue between the two lines of your template. Start by piping one mound, then pipe a second directly opposite it on the other side of the wreath. Continue this pattern, piping 8-10 evenly spaced mounds around the circle until the wreath outline is filled. You can always go back and add more meringue to any mound to build height and volume.
- Create Divots: Once all the mounds are piped, use the back of a spoon to gently create a small indentation or “divot” in the center of each meringue mound. These divots will serve as perfect little nests for holding your generous spoonfuls of whipped cream and berries once the pavlova is baked and cooled.
The Magic of Meringue: Understanding Pavlova’s Structure
A pavlova is essentially a baked meringue, but with a crucial difference in texture. The magic lies in the delicate balance of ingredients and the slow baking process. When egg whites are whipped, proteins unravel and re-form, trapping air and creating a stable foam. Sugar is then gradually added, which strengthens this foam, making it glossy and firm. The acid (lemon juice or vinegar) acts as a stabilizer, helping the proteins hold their structure, preventing the meringue from collapsing. The cornstarch is the key to that unique “squidgy” interior; it acts as a thickening agent that prevents the meringue from drying out completely during the long, low-temperature bake. This slow baking process allows the exterior to dehydrate and become brittle-crisp, while the interior remains moist and soft, almost like a marshmallow. Cooling the pavlova slowly in the oven further contributes to its structural integrity, minimizing cracking and ensuring that perfect dual texture.
Serving Suggestions and Presentation Ideas
While the classic red berries and green mint offer a timeless Christmas aesthetic, don’t hesitate to get creative with your pavlova’s presentation:
- Classic Christmas: Stick to raspberries, strawberries, pomegranate arils, and vibrant mint sprigs for that iconic holiday look.
- Winter Wonderland: Dust the finished pavlova with a light snowfall of powdered sugar for an elegant, frosty appearance. Add candied cranberries or sugared rosemary for extra sparkle.
- Chocolate Lover’s Dream: Drizzle the whipped cream with melted dark chocolate or scatter chocolate shavings before adding berries.
- Citrus Burst: Incorporate orange segments or candied orange peel for a zesty, bright counterpoint to the sweet meringue.
- Tropical Twist: For a less traditional but equally delicious option, top with kiwi slices, passion fruit pulp, and mango for a summery feel, even in winter.
- Edible Glitter: A sprinkle of edible gold or silver glitter can add a touch of festive glamour that truly makes your wreath shine.
Remember to place your finished pavlova on a beautiful serving plate to truly highlight its wreath shape and colorful toppings. A dessert this stunning deserves to be admired!
Troubleshooting Common Pavlova Problems
Even experienced bakers can encounter issues with meringue. Here are some common problems and how to solve them:
- Cracked Pavlova: This is often due to a too-high oven temperature or rapid cooling. Ensure your oven temperature is accurate and let the pavlova cool completely inside the turned-off oven with the door ajar.
- Weeping (Sticky, Syrupy Liquid): Weeping occurs when the sugar hasn’t fully dissolved in the egg whites or if the meringue is underbaked. Ensure you add sugar slowly and mix until smooth (the “finger test” is key). Bake for the full recommended time and cool slowly.
- Soft, Chewy, or Flat Pavlova: This can be caused by grease in your equipment, yolk contamination, under-whipped egg whites, or too much humidity. Double-check your equipment, ensure perfect egg separation, whip until stiff, glossy peaks form, and store in a dry place.
- Dry, Brittle Throughout: If your pavlova lacks the marshmallowy interior, it might have been baked for too long or at too high a temperature. The cornstarch helps, but precise baking time and temperature are crucial for that dual texture.
You May Also Like: Other Meringue Masterpieces
If you’ve fallen in love with the delicate charm of pavlova, you’ll be thrilled to explore these other meringue-based delights:
- Peppermint Meringue Cookies from Shugary Sweets – festive and melt-in-your-mouth.
- Simple Egg White Cookies – a classic, airy treat.
- Individual Pavlovas – perfect for personal servings.
- Chocolate Raspberry Pavlova – a rich and fruity combination.
- Layered Chocolate Meringue Cake – an impressive tiered dessert.
- Discover more of the Best Dessert Recipes for every occasion.
Stay in touch and share your creations! Follow me on Instagram, Facebook, and Pinterest. Don’t forget to tag me when you try one of my recipes! If you love the results, please consider giving it a 5-star rating in the recipe card below.
Christmas Pavlova Wreath Recipe
30 minutes
1 hour 30 minutes
1 hour
3 hours
8 Servings
A truly beautiful and festive meringue wreath topped with luscious sweetened whipped cream, vibrant red berries, and fresh mint. This dazzling dessert is an absolute showstopper, making it truly perfect for your Christmas celebrations.
Ingredients
For the Pavlova Meringue:
- 1 cup plus 2 teaspoons of superfine sugar
- 2 teaspoons cornstarch
- 4 large egg whites, at room temperature
- 2 teaspoons fresh lemon juice or white vinegar
- ¼ teaspoon table salt
- ½ teaspoon pure vanilla extract
For the Festive Topping:
- 1 cup heavy cream
- ¼ cup powdered sugar, sifted
- Fresh raspberries, strawberries, pomegranate arils, and mint sprigs (for garnish)
Instructions
- Preheat Oven: Preheat your oven to 275°F (135°C). Prepare your baking sheet by lining it with parchment paper.
- Create Wreath Template: On the parchment paper, draw a 10-inch circle in the middle. Then, draw a 4-inch circle in the center of the larger circle to create the inner edge of your wreath. Flip the parchment paper over so the drawn lines are on the bottom side, preventing graphite from touching your food.
- Combine Dry Ingredients: In a small bowl, whisk together the 2 teaspoons of superfine sugar and the cornstarch. Set this mixture aside.
- Whip Egg Whites to Soft Peaks: In the very clean bowl of your stand mixer (or a large bowl with a hand mixer), combine the room-temperature egg whites, lemon juice (or vinegar), and salt. Beat on medium-high speed with the whisk attachment until soft peaks begin to form, which usually takes about 2 minutes.
- Gradually Add Sugar: With the mixer still running, slowly add the remaining 1 cup of superfine sugar, one tablespoon at a time. This process should take approximately 5 minutes, allowing the sugar to dissolve properly. Periodically scrape down the sides of the bowl to ensure all sugar is incorporated.
- Add Cornstarch & Vanilla: Once the sugar is mostly incorporated and the meringue is glossy, add the reserved cornstarch mixture and vanilla extract. Scrape down the bowl once more, then continue mixing until the meringue forms stiff, glossy peaks. This additional mixing usually takes about one minute. The meringue should be thick and hold its shape.
- Secure Parchment: Use a small dab of the prepared meringue to “glue” each corner of the underside of the parchment paper to your baking pan, preventing it from shifting during piping.
- Pipe the Wreath: Transfer the meringue to a large piping bag fitted with a large open star or round tip (or use a Ziploc bag with a corner snipped off). Pipe 8-10 distinct, round mounds of meringue between the two circular lines drawn on your parchment. Start with one mound, then pipe the next directly opposite it, continuing around the circle until the wreath outline is evenly filled. You can add more meringue to any mound to build desired height.
- Create Divots: Gently use the back of a spoon to create a small indentation or “divot” in the center of each meringue mound. These will serve as natural wells to hold your delicious whipped cream and berries later.
- Bake the Pavlova: Carefully place the baking sheet with the meringue into the preheated oven. Immediately reduce the oven temperature to 250°F (120°C).
- Slow Bake: Bake the pavlova until it is dry and crisp on the outside, which typically takes about 1 ½ hours. For even baking, rotate the pan halfway through the baking time.
- Cool in Oven: Once baking is complete, turn off the oven completely. Prop the oven door open slightly with a wooden spoon and allow the pavlova to cool slowly inside the oven for at least 1 hour, or until the oven is completely cool. This gradual cooling prevents cracking and helps maintain its crispness.
- Prepare Whipped Cream (Just Before Serving): When you are ready to serve, combine the heavy cream and sifted powdered sugar in a clean, chilled bowl. Whip with a mixer until stiff peaks form. Be careful not to overbeat, or it will turn to butter.
- Assemble and Serve: Carefully transfer the cooled pavlova wreath onto your chosen serving plate. Add a generous spoonful of the freshly whipped cream into each divot on the pavlova. Artfully arrange the fresh raspberries, strawberries, pomegranate arils, and mint sprigs over the cream to create a festive Christmas wreath design. Serve within an hour to enjoy its optimal texture and freshness.
Recipe Notes
For a successful pavlova, remember that cleanliness is paramount. Ensure all your bowls and utensils are meticulously free of any grease, and your egg whites contain not even a molecule of yolk. Any contamination will prevent your egg whites from whipping properly.
When creating your template, a 10-inch cake pan for the outer circle and a 4-inch mixing bowl for the inner circle provide ideal dimensions for a festive wreath shape.
Store your baked and completely cooled pavlova shell in a dry location, such as your oven (turned off, with a note on the door to prevent accidental preheating), but never in the refrigerator, as humidity is its enemy.
This recipe has been adapted from a classic Pavlova with Rhubarb and Strawberries recipe from Fine Cooking, ensuring reliable and delicious results.
Watch the Video: How to Make a Christmas Pavlova Wreath
This festive Christmas Pavlova Wreath tutorial shows you how to create a ring of meringues topped with sweet whipped cream and berries – perfect for dazzling your holiday guests!
Recommended Products for Pavlova Perfection
As an Amazon Associate and member of other affiliate programs, I earn from qualifying purchases, helping to support this blog.
- KitchenAid KSM150PSER Artisan Tilt-Head Stand Mixer with Pouring Shield, 5-Quart, Empire Red
- Reynolds Kitchens Non-Stick Baking Parchment Paper Sheets – 12×16 Inch, 22 Count
- USA Pan Bakeware Half Sheet Pan
Nutrition Information:
Yield:
8
Serving Size:
1
Amount Per Serving (Estimated):
Calories: 165
Total Fat: 11g
Saturated Fat: 7g
Trans Fat: 0g
Unsaturated Fat: 3g
Cholesterol: 34mg
Sodium: 103mg
Carbohydrates: 14g
Fiber: 2g
Sugar: 11g
Protein: 3g
Thatskinnychickcanbake.com occasionally offers nutritional information for recipes contained on this site. This information is provided as a courtesy and is an estimate only. This information comes from online calculators. Although thatskinnychickcanbake.com attempts to provide accurate nutritional information, these figures are only estimates.
Varying factors such as product types or brands purchased can change the nutritional information in any given recipe. Also, many recipes on thatskinnychickcanbake.com recommend toppings, which may or may not be listed as optional and nutritional information for these added toppings is not listed. Other factors may change the nutritional information such as when the salt amount is listed “to taste,” it is not calculated into the recipe as the amount will vary. Also, different online calculators can provide different results.
To obtain the most accurate representation of the nutritional information in any given recipe, you should calculate the nutritional information with the actual ingredients used in your recipe. You are solely responsible for ensuring that any nutritional information obtained is accurate.
How much did you love this recipe?
Please leave a comment on the blog or share a photo on Pinterest!