
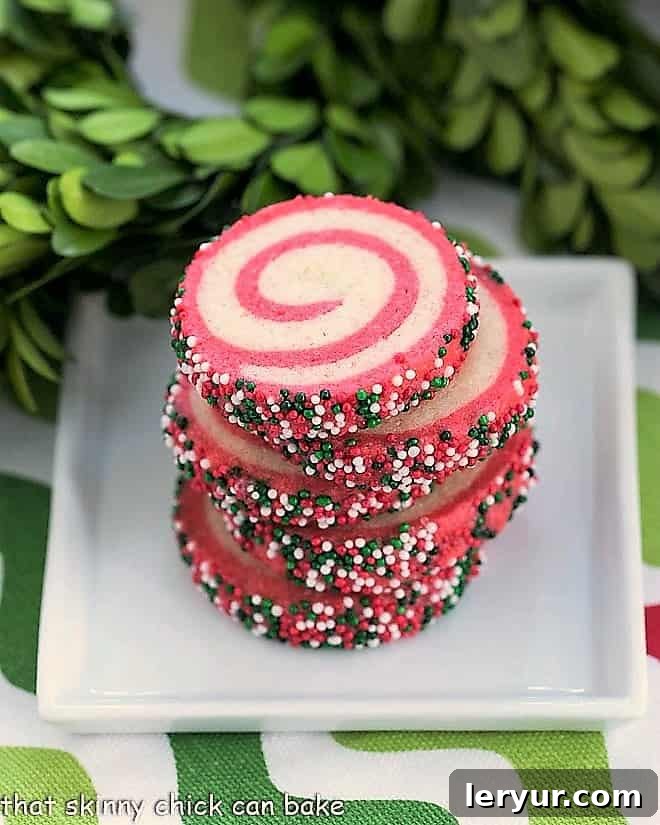
Welcome to the enchanting world of holiday baking, where tradition meets delightful innovation! As the festive season approaches, the quest for that perfect treat to share with loved ones begins. Look no further than these utterly charming and irresistibly buttery Holiday Pinwheel Cookies. Decked in vibrant swirls of red and green, these cookies are more than just a dessert; they are edible art, a symphony of flavor and visual appeal that promises to make your Christmas cookie platter truly unforgettable.
These unique and captivating Christmas cookies are designed to elevate your holiday treat game. While they might require a touch more attention and a sprinkle of patience, the joyous reactions and rave reviews from family and friends will undoubtedly make every moment spent in the kitchen worthwhile. Imagine the delight as guests discover the intricate spirals, each bite a perfect balance of sweet, tender cookie with a hint of festive magic. These pinwheel cookies aren’t just baked; they’re crafted to create lasting holiday memories.
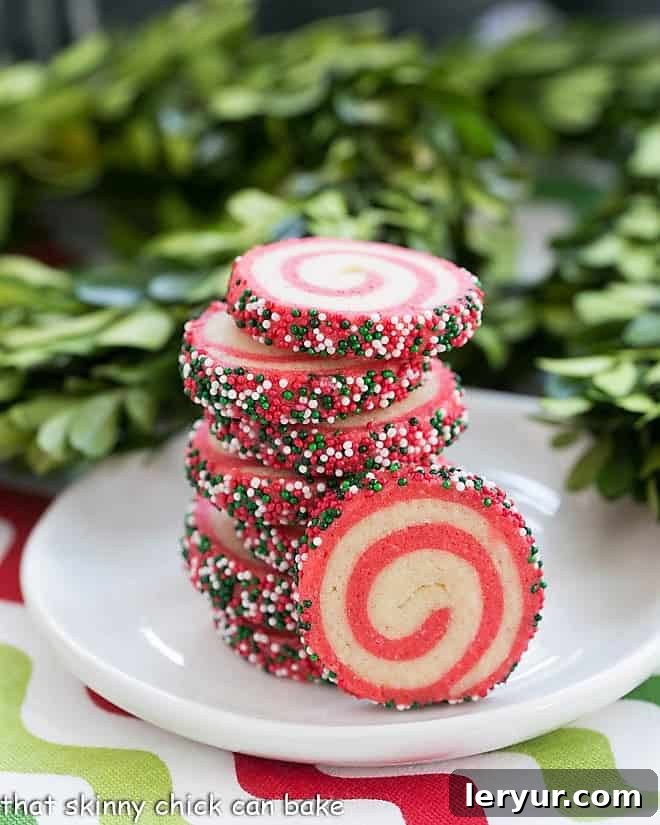
Why These Pinwheel Cookies Are a Holiday Essential
The holiday season is synonymous with special treats, and these pinwheel cookies are an absolute must-bake for several compelling reasons:
- Visually Stunning & Impressive: Last year, social media feeds were flooded with perfectly spiraled pinwheel cookies, their red and green layers creating breathtaking patterns. This recipe delivers that exact “wow” factor. These cookies aren’t just delicious; they are a showstopper, guaranteeing to impress anyone who sees or tastes them. They transform a simple cookie exchange into a display of culinary artistry.
- A Masterpiece Adapted from a Guru: This exceptional recipe is thoughtfully adapted from the renowned dessert expert, Gale Gand. We’ve taken her classic vanilla and chocolate pinwheels and infused them with the joyful spirit of the holidays, transforming them into these festive red and green delights. The best part? You can prepare the dough in advance, store the logs in your freezer, and slice and bake them fresh whenever a craving strikes or unexpected guests arrive. This convenience is a game-changer during the busy holiday season.
- Perfect for Gifting & Entertaining: Holiday Pinwheels make for exquisite homemade gifts. Their unique appearance and delightful flavor demonstrate thoughtfulness and care, making them a much-appreciated present. Beyond gifting, they are ideal for holiday parties, potlucks, and family gatherings. If you’re looking for variations, explore delightful alternatives like date pinwheel cookies for a classic twist or these festive cranberry pecan pinwheels for a fruity, nutty flavor. While there’s a small investment of time for rolling and chilling, the spectacular results undeniably justify the effort. These cookies truly embody the joy of the season.
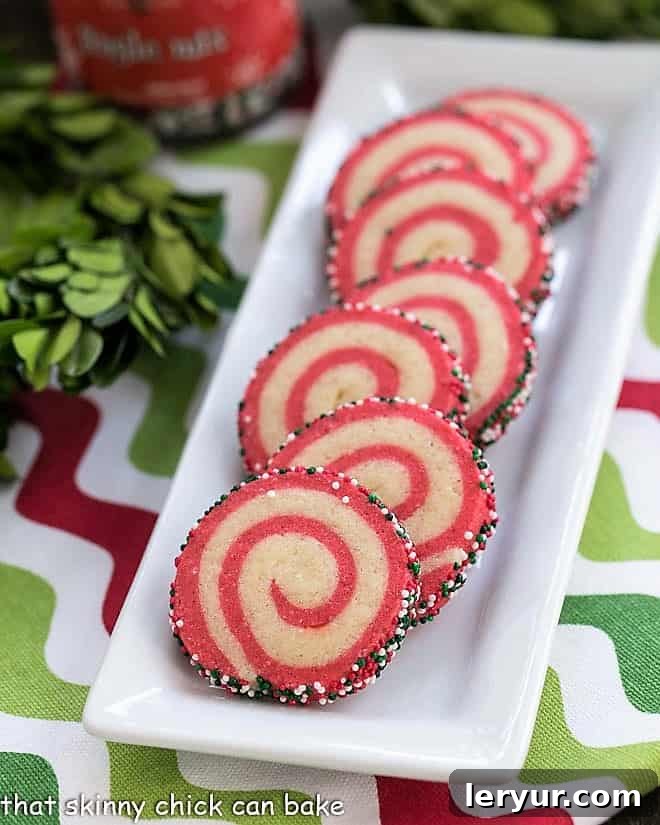
Expert Tips for Crafting Perfect Pinwheel Cookies
Achieving those picture-perfect spirals and delightful textures is simpler than you might think, especially with these insider tips:
- Precision in Dough Division: After your buttery cookie dough is mixed to perfection, the first crucial step is to divide it evenly. A kitchen scale is your best friend here, ensuring that each half is precisely the same weight. This meticulous division is key to creating balanced layers and consistent pinwheel patterns.
- Achieving Vibrant Color: One half of your dough will remain its natural, inviting vanilla hue, while the other will be transformed into a festive red. When adding red gel food coloring, be generous! You’ll likely need significantly more coloring than you’d use for frosting to achieve a deep, rich red dough that truly pops against the white. Gel food coloring is recommended over liquid for its concentrated pigment that won’t alter dough consistency.
- Mastering Measurements for Rolling: Precision extends to rolling the dough. Keep a clear plastic ruler handy to guide your efforts. As you roll each strip of dough into its target 6 x 7-inch rectangle, having the ruler nearby allows you to constantly check and adjust, ensuring uniform dimensions. For even greater ease, try marking these dimensions on the back of your parchment paper. This creates a helpful visual guide as you roll.
- The Art of Stacking and Trimming: When it’s time to stack the plain dough rectangle over the red dough rectangle, their similar sizes are paramount. Use your ruler and a sharp knife to carefully trim any excess dough, creating clean, straight edges. This ensures a tight, even roll, which is essential for beautifully defined spirals.
- The Golden Rule: Keep Dough Cold: Maintaining a cold dough temperature is absolutely imperative for pinwheel success. Cold dough is firm and stable, allowing for clean, crisp slices without squishing or distorting the delicate spiral pattern. If your dough log develops a flat side from resting in the refrigerator, simply re-roll it gently on the counter to restore its perfect cylindrical shape just before slicing. This guarantees beautifully round cookies every time.
- Freezer-Friendly Convenience: One of the greatest advantages of these pinwheel cookies is their make-ahead potential. Well-wrapped cylinders of pinwheel dough can be stored in the freezer for up to three months. When you’re ready for freshly baked cookies, simply defrost the log in the refrigerator overnight, then slice and bake as directed. This convenience is a lifesaver during busy holiday periods.
- Tip of the Day for Gifting: Frozen cookie dough logs make incredible, thoughtful holiday gifts. Wrap the chilled logs snugly in parchment paper, twist the ends decoratively, and secure them with festive ribbons. Attach a coordinating tag with simple baking instructions, and you’ve created a unique, personalized present that offers the gift of warm, fresh-baked cookies with minimal effort for the recipient.
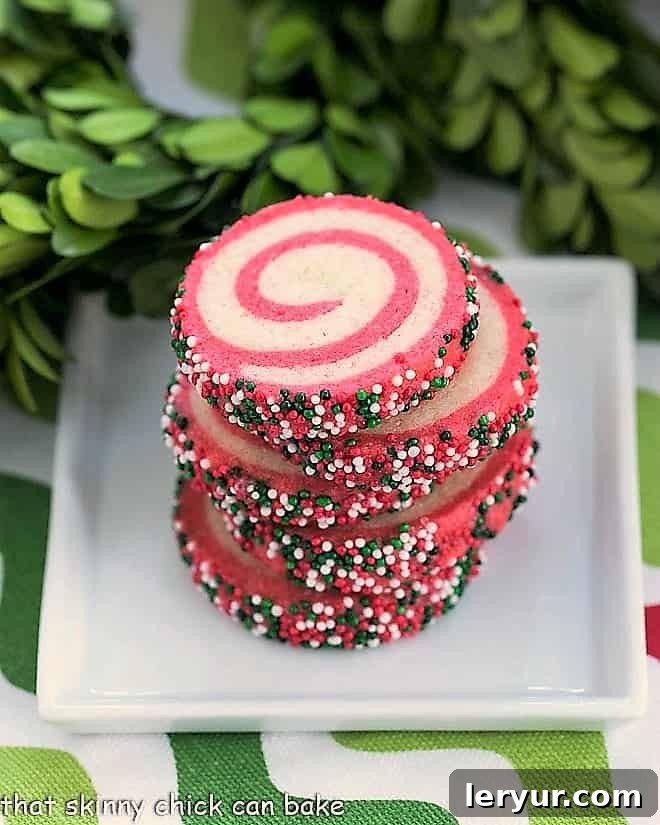
A Step-by-Step Guide to Making Holiday Pinwheel Cookies
Let’s walk through the enchanting process of creating these stunning Holiday Pinwheel Cookies. These visual steps will guide you from prepared dough to beautifully baked treats, ensuring every spiral is perfect.
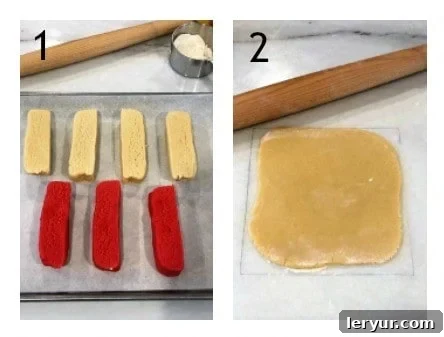
- Prepare Dough Squares: Begin by forming your prepared dough into manageable 4×4-inch squares and chilling them. Once firm, you will then Cut these dough squares into four even strips or “logs” before you begin rolling. This pre-division ensures consistent cookie sizes later.
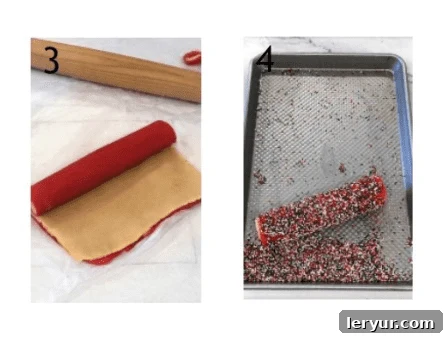
- Roll the First Layer: On a lightly floured piece of parchment paper, take one strip of your plain (vanilla) dough. Using a rolling pin, carefully Roll it out into a precise 6 x 7-inch rectangle. A crucial tip: make light pencil markings of the desired dimensions on the back of your parchment paper to guide your rolling, ensuring perfect rectangles every time.
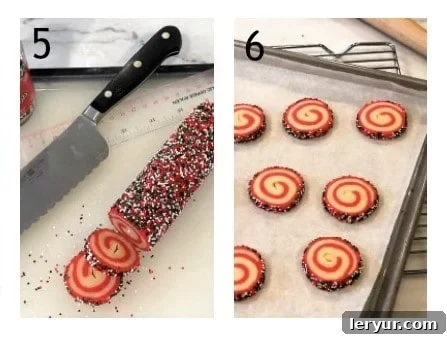
- Layer and Roll into a Cylinder: Once both your plain and red dough rectangles are rolled to the exact same dimensions, carefully Place the plain dough sheet directly over the red dough sheet, aligning all edges perfectly. Then, starting from one of the longer sides, gently but firmly Roll the layered dough into a tight cylinder. The parchment paper will assist you in creating a smooth, even log.
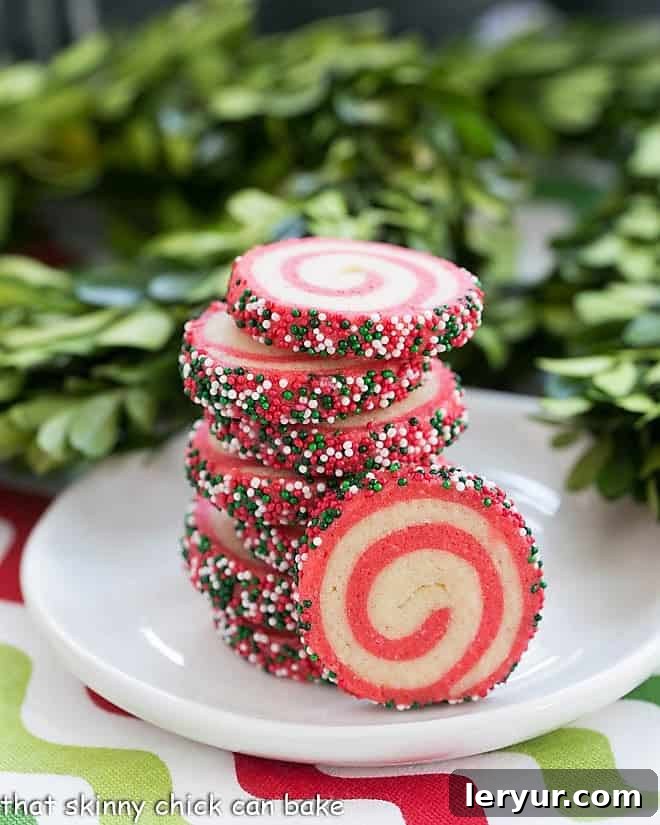
- Add Festive Sprinkles (Optional but Recommended!): For an extra festive touch, gently Roll the dough log in your choice of holiday sprinkles or colored sugar. If you find the sprinkles aren’t adhering well in certain spots, lightly dampen your finger and gently dab those areas to make the dough slightly tackier, allowing the sprinkles to stick perfectly. This creates a beautiful, sparkling edge on your baked cookies.
- Slice Chilled Dough: After the dough log has been sufficiently chilled and is very firm (this is crucial for clean cuts!), retrieve it from the refrigerator. Using a sharp knife, carefully Slice the dough log into uniform 1/4-inch thick cookie rounds. The cold dough will ensure these slices hold their perfect spiral shape.
- Bake to Golden Perfection: Finally, Place the sliced cookie rounds onto a baking sheet that has been lined with parchment paper, ensuring they are spaced about 1.5 inches apart. Bake them in a preheated oven according to the recipe’s instructions until the vanilla dough edges are lightly golden. The aroma filling your kitchen will be a delightful reward for your efforts!
Frequently Asked Questions About Holiday Pinwheel Cookies
Pinwheel cookies are a delightful type of rolled cookie characterized by their distinctive spiral pattern. This spiral is typically created by layering two different colored or flavored doughs (like the red and white in our holiday version) and then rolling them together into a log. Alternatively, they can be made with a single dough rolled around a flavorful filling, such as the classic date pinwheels.
They’re surprisingly easier than they look, especially with a good recipe! For these vibrant holiday pinwheels, you start by preparing a single, versatile cookie dough. This dough is then divided, with one half tinted a festive red using food coloring, while the other remains a classic vanilla. The core technique involves rolling out sections of each colored dough, stacking them precisely, and then carefully rolling the layered dough into a firm log. After a crucial chilling period, which allows the dough to firm up and integrate, the log is sliced into rounds. These rounds can then be rolled in sprinkles for extra holiday cheer, and finally, baked to golden perfection. The process emphasizes precision but is very manageable for home bakers.
Parchment paper is your best friend when rolling pinwheel dough into logs. After stacking your colored dough layers, use the parchment paper underneath and on top to assist you in rolling. This technique prevents the dough from sticking to your hands or the counter, keeps the surface smooth, and helps maintain a perfectly cylindrical shape without unwanted indentations. Once the log is formed and chilled, you can gently roll it back and forth a few times while still wrapped in parchment. This light rolling helps eliminate any flat spots that might have developed during refrigeration, ensuring your pinwheel slices are consistently round and beautiful.
Once baked and completely cooled, these holiday pinwheel cookies can be stored in an airtight container at room temperature for up to 5-7 days. For longer storage, you can freeze the baked cookies for up to 2-3 months. Simply place them in a freezer-safe container, separating layers with parchment paper to prevent sticking. Thaw at room temperature before serving.
Absolutely! While red and green are perfect for Christmas, the beauty of pinwheel cookies lies in their adaptability. You could use blue and white for Hanukkah, pastel colors for Easter, or even school colors for a graduation celebration. For flavors, consider adding a touch of almond extract to one dough, or cocoa powder to create a chocolate swirl instead of a colored one. The possibilities are endless, allowing you to customize these cookies for any occasion.
Explore More Festive & Delicious Recipes
If you’ve fallen in love with these Holiday Pinwheel Cookies, you’re in for a treat! Discover more delightful recipes perfect for any occasion:
- Over 30 Irresistible Christmas Cookies
- Decadent Turtle Thumbprint Cookies
- Classic Italian Ricotta Cookies
- Elegant Rosettes
- Spiced Chewy Gingersnaps
- Magical Stained Glass Cookies
- Plus, essential tips on How to Host a Festive Cookie Exchange
- Discover more amazing Cookie Recipes
- And an array of delightful Holiday Recipes
Join our vibrant baking community! Stay in touch through social media @ Instagram, Facebook, and Pinterest. We’d absolutely love to see your creations, so don’t forget to tag us when you try one of our recipes! And if these Holiday Pinwheel Cookies bring joy to your kitchen, please show your love by giving them a 5-star rating in the recipe card below. Your feedback helps other bakers discover these wonderful treats!
Holiday Pinwheel Cookies
30 minutes
11 minutes
41 minutes
80 cookies
Delight in these sweet, buttery holiday cookies, a festive adaptation of a classic recipe by dessert guru Gale Gand. Perfect for gifting, cookie exchanges, or simply enjoying with a warm cup of cocoa.
Ingredients You’ll Need
- 3 cups all-purpose flour
- 1/2 teaspoon baking powder
- 1/2 teaspoon salt
- 1 cup unsalted butter, softened to room temperature
- 1 1/3 cups granulated sugar
- 2 large eggs
- 2 teaspoons pure vanilla extract
- Red gel food coloring paste
- Colored sugar or festive sprinkles of your choice
Step-by-Step Instructions for Pinwheel Perfection
- In the bowl of a standing mixer fitted with the paddle attachment, cream the softened butter on medium speed until it is light and fluffy, typically about 3 minutes. Gradually add the granulated sugar and continue beating for another 2 minutes until the mixture is light and aerated.
- Add the large eggs one at a time, beating well after each addition to incorporate. Stir in the vanilla extract. In a separate bowl, whisk together the flour, baking powder, and salt. Gradually add the dry ingredients to the wet ingredients in the mixer, beating on low speed just until combined and no dry streaks remain. Be careful not to overmix.
- Divide the dough evenly in half using a kitchen scale for precision. Form one half into a 4- by 4-inch square, wrap it tightly in plastic wrap, and set aside. Return the remaining half of the dough to the mixer. Add red food coloring paste, a little at a time, beating until you achieve a deep, vibrant red color. This may require more coloring than you anticipate.
- Form the red dough into a 4- by 4-inch square, wrap it in plastic wrap, and refrigerate both squares of dough for at least 30 minutes to firm up.
- Line a large baking sheet with parchment paper. Cut each chilled 4×4-inch dough square into 4 even strips. Place 3 strips of the red dough and 4 strips of vanilla dough back onto the baking sheet and refrigerate to keep them cold. On a lightly floured piece of parchment paper, roll out one strip of red dough into a precise 6- by 7-inch rectangle. Use a ruler to ensure exact dimensions for clean spirals.
- Remove one strip of vanilla dough from the refrigerator. On another lightly floured piece of parchment, roll it out into a matching 6- by 7-inch rectangle. Carefully transfer one dough sheet on top of the other (using the parchment paper to assist with flipping), aligning all edges perfectly. Lightly run a rolling pin over the stacked doughs to gently adhere them.
- Using the parchment paper to help guide and tighten the roll, carefully and tightly roll up the layered dough into a log, starting from one of the longer sides. Wrap the log tightly in plastic wrap and refrigerate. Repeat this process with the remaining strips of dough to form a total of 4 logs.
- Refrigerate the dough logs for a minimum of 1 hour to allow them to firm up. After this initial chilling, remove them from the refrigerator and gently roll each log on the counter several times to prevent the bottom from flattening. If desired, roll the logs in sprinkles or colored sugar for an extra festive touch. Rewrap the logs in fresh plastic wrap and refrigerate for an additional 3 hours, or until they are very firm, which is essential for clean slicing.
- Preheat your oven to 350°F (175°C) and line two large baking sheets with parchment paper. Using a sharp knife, carefully slice the very firm dough logs into uniform 1/4-inch-thick rounds. Place the cookie slices approximately 1 1/2 inches apart on the prepared baking sheets. Bake for 9 to 11 minutes, or until the edges of the vanilla dough are slightly golden. Allow cookies to cool on the baking sheet for a few minutes before transferring to a wire rack to cool completely.
Helpful Notes for Bakers
Total active preparation time: approximately 30-45 minutes. Total time including chilling: 4+ hours. The chilling steps are crucial for the cookies to hold their shape and for easy slicing. Don’t rush them!
For best results, use gel food coloring for vibrant colors, as liquid food coloring can thin the dough. If freezing dough logs, ensure they are tightly wrapped to prevent freezer burn. Thaw them in the refrigerator overnight before slicing and baking.
Recommended Baking Essentials
As an Amazon Associate and member of other affiliate programs, I earn from qualifying purchases.
- Reynolds Cookie Baking Sheets Non-Stick Parchment Paper
- USA Pan X-Large Bakeable Nonstick Cooling Rack
- Wilton Red-Red Icing Gel (1-Ounce)
- Wilton Bulk Nonpareils Christmas Sprinkles
- Cuisinart SmartStick Immersion Hand Blender
- USA Pan Bakeware Half Sheet Pan (Nonstick, Warp Resistant)
- French Rolling Pin
Nutrition Information:
Yield:
40
Serving Size:
2 cookies
Amount Per Serving:
Calories: 106Total Fat: 5gSaturated Fat: 3gTrans Fat: 0gUnsaturated Fat: 2gCholesterol: 22mgSodium: 73mgCarbohydrates: 14gFiber: 0gSugar: 7gProtein: 1g
HOW MUCH DID YOU LOVE THIS RECIPE?
Please leave a comment on the blog or share a photo on Pinterest