
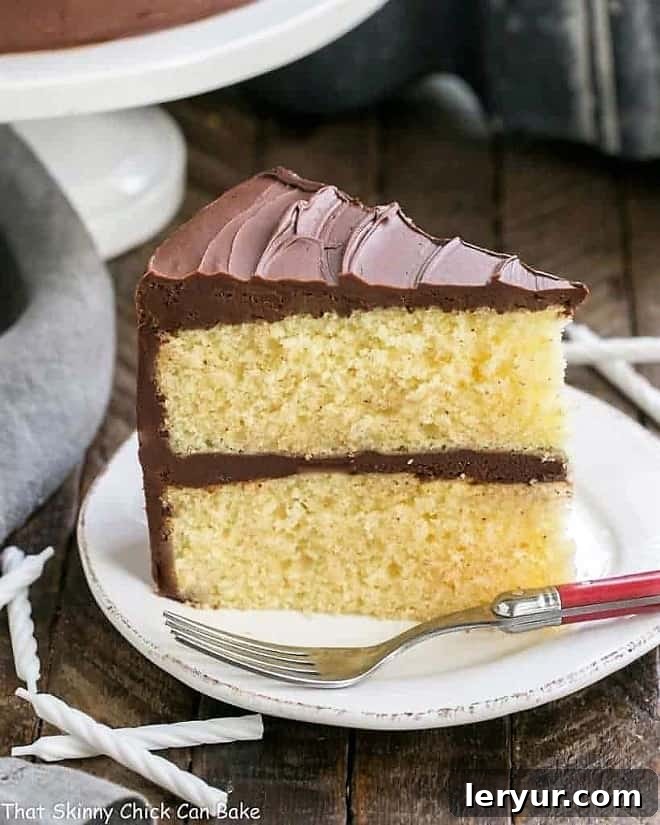
If you’re searching for the ultimate celebratory dessert that promises both comfort and sophistication, this Yellow Cake from Scratch is an absolute masterpiece. It’s a tender, incredibly buttery cake crowned with a truly decadent, glossy chocolate frosting that epitomizes classic indulgence. Perfectly suited for birthdays, anniversaries, baby showers, or any moment that calls for something truly special, few desserts evoke such a sense of cherished tradition and pure joy, solidifying its place as a timeless choice for any significant occasion. Its simple elegance and profound deliciousness make it a dessert that pleases every palate.
This beloved Yellow Cake Recipe holds a special place in my heart, originally baked with immense love for my daughter’s birthday celebration. Beyond that, it also played a delightful and heartwarming role as part of a surprise online baby shower for our wonderful blogger friend, Angie of Big Bear’s Wife, welcoming her adorable new son. This dual purpose perfectly highlights the cake’s incredible versatility and universal appeal, proving it brings smiles and sweetness to any gathering, from intimate family moments to grand virtual celebrations.
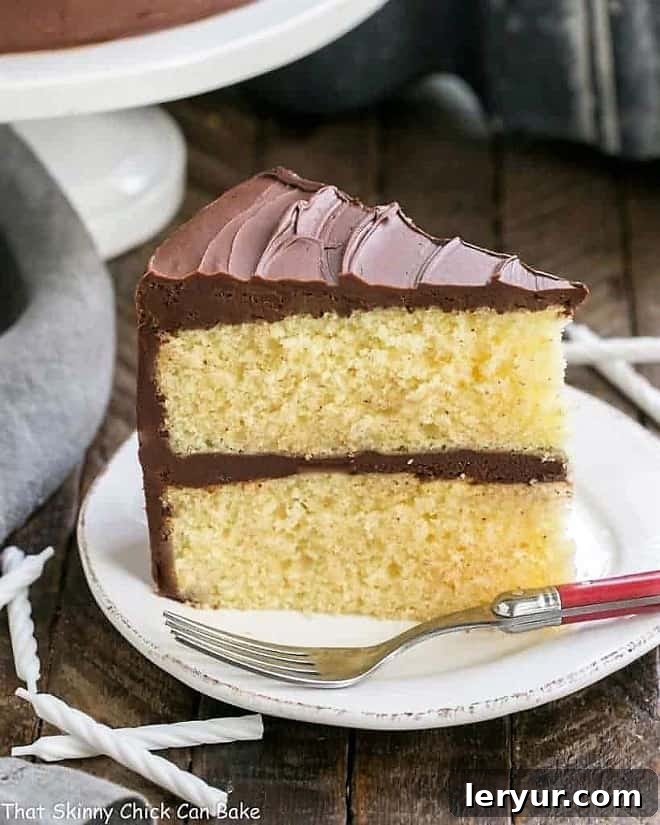
Why You’ll Absolutely Love This Classic Yellow Cake Recipe
There are countless compelling reasons why this particular yellow cake recipe stands out as a true crowd-pleaser and will quickly become a cherished staple in your baking repertoire. It’s more than just a dessert; it’s an experience that delivers on every front: exquisite taste, luxurious texture, and captivating visual appeal. Here’s an in-depth look at why this recipe will undoubtedly become your go-to for all future celebrations and everyday indulgences:
- **The Quintessential Flavor Pairing:** The harmonious marriage of a subtly rich, buttery yellow cake and a deeply satisfying, intensely chocolatey frosting is an undeniable classic, a flavor profile that has stood the test of time. It’s a combination that evokes nostalgic memories of childhood birthdays and cherished family gatherings, making it universally beloved and instantly comforting. This perfect balance ensures neither component overwhelms the other, creating a symphony of flavors.
- **Unrivaled Texture and Moistness:** Prepare for a cake that boasts an incredibly moist, tender, and delicate fine crumb. Each forkful melts in your mouth, a testament to meticulous ingredient selection, precise measurements, and expert baking techniques. This isn’t a dry, crumbly cake that requires a glass of milk; it’s a moist, luxurious treat that remains fresh and delightful for days, thanks to its carefully balanced composition.
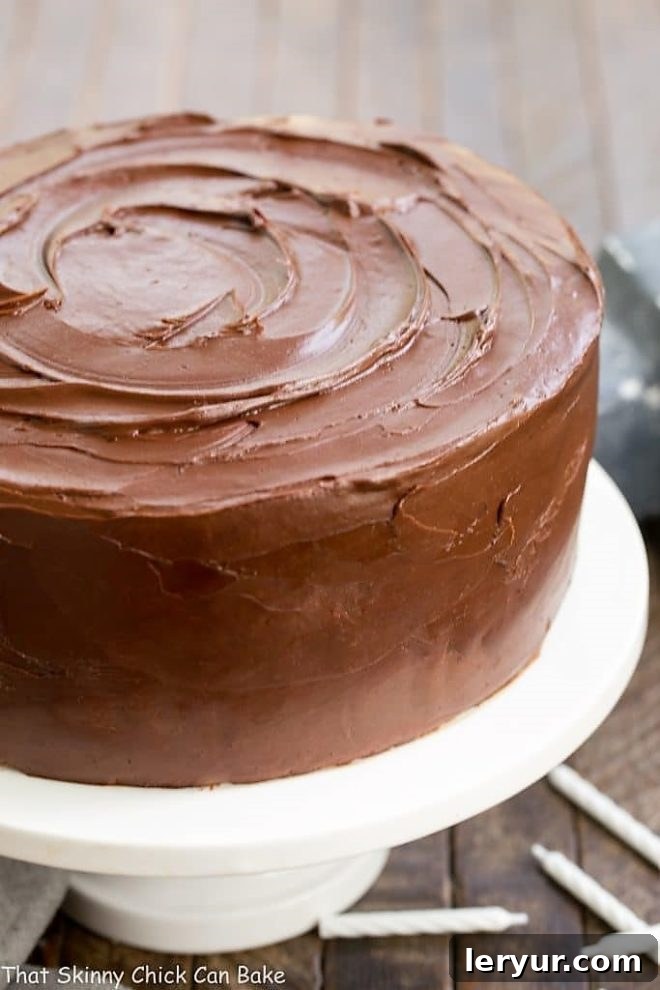
- **Double the Chocolate Indulgence in Every Frosting Swirl:** Our chocolate frosting isn’t just an afterthought; it’s a luscious, glossy, and deeply flavorful dream. Crafted with a full pound of high-quality semi-sweet chocolate, combined with the rich, dark notes of Dutch-process cocoa powder, it delivers an intense chocolate experience that perfectly complements the buttery yellow cake without overpowering its delicate vanilla undertones. This ensures a frosting that is wonderfully fudgy, impeccably smooth, and profoundly satisfying, appeasing even the most ardent chocoholics.
- **Perfect for Any Occasion, Grand or Intimate:** Whether you’re planning a casual get-together with friends, a sophisticated dinner party, a joyous birthday celebration for any age, an elegant baby shower, or simply craving a comforting treat for Sunday supper, this classic yellow cake fits seamlessly into any event. Its timeless charm and undeniable deliciousness effortlessly elevate any occasion, making it feel more special and memorable.
- **A Recipe That Guarantees Success:** With clear, detailed instructions and expert tips embedded within the guide, even novice bakers can achieve professional-quality results. We demystify the baking process, ensuring your journey from ingredients to a beautifully frosted cake is smooth and rewarding.
This enduring combination of the best yellow cake recipe paired with its magnificent fudgy chocolate icing is, without exaggeration, the most frequent and almost insistent birthday request in my household. I distinctly recall a recent conversation with my husband when I, ever the adventurous food blogger, tried to gently steer him towards a new, experimental creation for his special day. As someone constantly exploring innovative recipes, the urge to try something different is strong, but some classics, it seems, are simply non-negotiable for certain family members!
His playful, yet incredibly firm, retort involved the humorous (but impactful!) promise of receiving a chainsaw for *my* next birthday if his beloved yellow cake with chocolate frosting wasn’t delivered. After a delightful back-and-forth, punctuated by fits of hysterical laughter and even a few hiccups on my part from amusement, I happily and willingly conceded. Because, at the end of the day, some traditions are simply too sweet and too deeply ingrained in our hearts to break, and the sheer joy this perfectly baked cake brings to my loved ones is, truly, immeasurable.
Expert Baking Tips for a Perfect Layer Cake
Achieving a truly show-stopping layer cake—one with a beautifully fine, tender crumb, perfectly even layers, and a luscious, marvelous frosting—is an art form that becomes much simpler with a few key insights and attention to detail. These expert tips will guide you through every step of the baking and decorating process, ensuring your homemade yellow cake is nothing short of perfection, a testament to your newfound baking prowess.
- **Impeccable Pan Preparation is Paramount:** The absolute foundation of a successful cake begins with ensuring it doesn’t stubbornly stick to the pan. Start by generously buttering your cake pans, making sure every crevice is coated. Next, cut perfect circles of parchment paper to line the bottoms of the pans and carefully place them inside. Butter the top of the parchment as well, and then lightly dust the entire interior of the pans with a small amount of flour, tapping out any excess. This multi-layered non-stick barrier guarantees your cakes will release cleanly and effortlessly, preserving their beautiful structure.
- **Achieving Perfectly Even Layers:** For a visually appealing and uniformly baked cake, distributing the batter precisely between your prepared pans is crucial. The simplest and most precise way to achieve this consistency is by using a kitchen scale. Weigh your total batter, then divide it equally by weight into each pan. This ensures each layer bakes to the same depth and consistency, preventing lopsided cakes and promoting even cooking.
- **Harness the Power of the Paddle Attachment:** When mixing your cake batter, always opt for the paddle attachment on your stand mixer (or use a hand mixer with regular beaters on a low setting). This specific attachment is designed to cream butter and sugar efficiently, creating a light and fluffy base without incorporating an excessive amount of air. Too much air can lead to a coarse, open crumb texture. The paddle attachment also minimizes gluten development, which is critical for achieving that signature tender and delicate cake texture we all adore.
- **The Crucial Technique of Alternating Wet and Dry Ingredients:** This classic baking technique is fundamental for creating an incredibly tender and moist cake. Adding the dry flour mixture in three parts, alternating with the milk, allows the flour particles to be thoroughly coated by the fat (butter) before they come into extensive contact with the liquid. This process prevents over-mixing and inhibits excessive gluten formation, both of which can lead to a tough, chewy cake. Always remember the golden rule: begin and end with the dry ingredients.
- **Mastering the Art of Bake Time:** Over-baking is the arch-nemesis of a moist cake. To avoid a dry outcome, begin checking for doneness a few minutes before the recipe’s suggested minimum bake time. Insert a clean wooden skewer or a toothpick into the very center of the cake; if it comes out clean or with only a few moist crumbs clinging to it, your cake is perfectly baked. The edges should appear lightly golden brown and the top should spring back gently when lightly touched.
- **Proper Cooling is Absolutely Key:** Once baked, it’s vital to allow your cakes to cool in their pans on a wire rack for approximately 10-15 minutes. This allows the cake’s delicate structure to set and firm up slightly, making them much easier to handle without crumbling. After this initial cooling period, carefully invert the cakes onto cooling racks, gently peel off the parchment paper from the bottoms, and then allow them to cool completely to room temperature before even thinking about frosting. Attempting to frost a warm cake will inevitably lead to a melted, sliding, and utterly messy disaster.
- **Temperature Matters: The Golden Rule for Ingredients:** For optimal results, ensure all your cold ingredients, especially butter and eggs, are at room temperature before you begin mixing. Room temperature ingredients emulsify much more effectively, meaning they blend together smoothly and evenly. This creates a superior, more uniform batter and ultimately contributes to a finer-textured, more consistent cake. Plan ahead by taking them out of the refrigerator at least an hour or two before you intend to start your baking process.
- **Don’t Over-Cream Your Frosting:** While the cake calls for light and fluffy butter and sugar, for the chocolate frosting, you want a rich, dense consistency. Over-creaming the butter and powdered sugar for the frosting can incorporate too much air, making it less stable and harder to spread smoothly. Beat just until combined and fluffy, then proceed with adding the melted chocolate and cocoa mixture.
A Delightful Menu for a Virtual Baby Shower Celebration
We recently had the immense pleasure of celebrating the arrival of a precious new life! Our dear blogger friend, Angie, of Big Bear’s Wife, welcomed her adorable son to the world, surrounded by the joy and love of her parents. To mark this beautiful and significant occasion, a wonderful group of her blogger friends and I collaborated to organize a surprise virtual baby shower. This celebration was brimming with delicious recipes perfect for welcoming a new arrival, and the menu we curated showcased a delightful variety of appetizers, entrees, and, of course, an irresistible array of desserts. Here’s a detailed glimpse into the joyous culinary spread:
Refreshing Beverages:
No party, virtual or otherwise, is truly complete without a selection of delicious and refreshing drinks to toast to new beginnings and sweet moments. These delightful options are perfect for mingling and celebrating:
- Baby Blue Punch from Or Whatever You Do – A charming and vibrantly colored non-alcoholic punch, ideal for a baby shower with its thematic hue and sweet, fruity flavor profile.
- Easy Fall Party Punch from Miss in the Kitchen – A simple yet wonderfully flavorful punch, perfect for autumn celebrations, blending seasonal fruits and spices into a warm or chilled beverage.
- Simple & Fun Mimosa Bar from My Life Well Loved – An interactive and elegant option, allowing guests to customize their bubbly drinks with various fruit juices and garnishes, adding a touch of personalized festivity.
Scrumptious Appetizers & Salads:
These delightful starters and fresh salads are designed to set the perfect tone for a fantastic meal, offering a tantalizing mix of sweet, savory, and comforting flavors that awaken the palate.
- Creamy Grape Salad with Toasted Pecans from Unsophisticook – A unique and surprisingly delicious salad featuring crisp, sweet grapes coated in a rich, creamy dressing and topped with crunchy, toasted pecans for an unexpected textural contrast.
- Mini Chicken and Waffles from Sweet Beginnings – A delightful Southern comfort food classic, scaled down into perfect, savory-sweet appetizer bites, combining crispy fried chicken with fluffy mini waffles.
- Spicy Southern Deviled Eggs from This Gal Cooks – A zesty and flavorful twist on a beloved party snack, offering a delightful hint of heat that elevates this classic creamy appetizer.
Hearty Entrees:
For something more substantial and satisfying, these entrees offer comforting and flavorful options that are sure to please all appetites and make for a fulfilling main course.
- American Pierogi Casserole from Rants From My Crazy Kitchen – A warm, hearty, and comforting casserole inspired by classic pierogi flavors, featuring tender pasta, potatoes, and cheese baked to golden perfection.
- Chicken Satay Skewers with Peanut Butter Sauce from Culinary Adventures with Camilla – Succulent, flavorful grilled chicken skewers served with a rich, creamy, and savory homemade peanut butter dipping sauce, a perfect blend of sweet and savory.
- Pimento Cheese Tomato Ham Sliders from Honey and Birch – Irresistible mini sandwiches packed with classic Southern pimento cheese, fresh slices of ripe tomato, and savory deli ham, all nestled in soft slider buns.
Irresistible Desserts:
No celebration, especially a baby shower, is truly complete without a lavish and tempting spread of sweet treats. Our dessert table was absolutely brimming with delightful choices, crafted to satisfy every possible craving and perfect for a joyful, memorable occasion.
- Brookies from Baked Bree – The ultimate hybrid dessert, ingeniously combining the rich, fudgy goodness of brownies with the chewy perfection of chocolate chip cookies into one utterly delicious bite.
- Caramel Corn from The Redhead Baker – A delightfully sweet and crunchy homemade caramel corn, offering an addictive blend of buttery caramel coating over crispy popcorn kernels.
- Caramel Pecan Cheesecake from Cooking with Carlee – A truly rich and creamy cheesecake, generously topped with luscious, homemade caramel sauce and toasted pecans for an irresistible nutty crunch.
- Chocolate Chip Clouds from All Day I Dream About Food – Light, airy, and a fantastic low-carb option, these delicate chocolate chip “clouds” offer a guilt-free indulgence without compromising on flavor.
- Lemon Donuts with Raspberry Glaze from Ashlee Marie – Bright and zesty lemon-infused donuts crowned with a vibrant, sweet-tart raspberry glaze, providing a burst of fresh, summery flavor in every bite.
- Pumpkin Cheesecake Brownie Bars from The Bitter Side of Sweet – A delightful autumnal treat that perfectly marries rich, chocolatey brownies with a creamy, spiced pumpkin cheesecake layer for seasonal bliss.
- Small Batch Rhubarb Strawberry Jam from The JavaCupcake Blog – A sweet and tangy homemade jam, crafted in small batches to preserve the fresh flavors of rhubarb and strawberries, perfect for spreading on scones or toast.
- Classic Yellow Butter Cake with Fudgy Chocolate Icing from That Skinny Chick Can Bake – The very star of this article, a timeless favorite that was a highlight of our dessert spread!
- The Perfect White Birthday Cake Recipe from That Skinny Chick Can Bake – Another elegant and equally delicious option for celebrations, renowned for its pristine white appearance and delicate, sophisticated flavor profile.
And for those occasions demanding a more portable and equally delicious dessert option, you’ll absolutely adore this Yellow Cupcakes with Ganache Frosting Recipe – these individual treats are perfect for grab-and-go indulgence at any party or gathering!
Frequently Asked Questions About Yellow Cake
Delving into the delightful world of yellow cake often brings up a few common and insightful questions. Here, we address some of the most frequently asked queries to help you better understand and appreciate the history, characteristics, and nuances of this beloved classic dessert, ensuring your baking journey is as informed as it is delicious.
Yellow cake is primarily characterized by its rich, inviting butter and classic vanilla flavorings. Compared to other cake types, it possesses a mild, almost neutral yet deeply satisfying taste, making it incredibly versatile. The inclusion of whole eggs, specifically the yolks (as opposed to just egg whites used in white cake), contributes significantly to its richer texture, subtle golden hue, and a more profound flavor. This also imparts a delicate, almost vanilla-custard like undertone, which creates an ideal, balanced canvas for bolder toppings and frostings. This inherent richness and perfectly balanced flavor profile is precisely why it pairs so exceptionally well with the intense sweetness and profound depth of a fudgy chocolate frosting, creating a truly iconic flavor combination.
The origins of what we recognize today as the classic yellow cake can be traced back to the burgeoning culinary innovations of the 19th century. This period was particularly significant due to the widespread introduction of new chemical leavening agents, such as baking powder and baking soda. Prior to these advancements, cakes largely relied on yeast or numerous eggs for their rise, often resulting in denser, heavier textures. These new leaveners revolutionized baking, making it possible to create lighter, fluffier, and more tender cakes. The earliest known “yellow cake” recipes emerged in the 1800s and were sometimes affectionately referred to as “celebration cakes.” It is widely believed that their foundational structure and composition may have been inspired by traditional British pound cakes, which were similarly rich in butter and eggs, but adapted with the exciting new leavening techniques to produce a distinctly lighter and more tender crumb. Its popularity quickly soared, solidifying its place as a quintessential and enduring American dessert.
The fundamental difference between yellow cake and white cake lies almost entirely in their egg content and, consequently, their appearance and flavor profile. Yellow cakes typically utilize whole eggs, incorporating both the yolks and whites. The egg yolks are responsible for the cake’s characteristic golden color, its richer, more buttery flavor, and a denser, more moist texture. White cakes, in contrast, use only egg whites, deliberately omitting the yolks. This results in a much lighter, paler, almost pristine white crumb and a more delicate, less rich flavor profile that often highlights vanilla or almond extracts. While both are classic and popular choices for celebrations, yellow cake often boasts a more pronounced, comforting buttery and vanilla taste due to the enriching presence of the egg yolks.
To ensure your homemade yellow cake remains as fresh, moist, and delicious as possible, proper storage is key. For cakes frosted with a butter-based icing (like the chocolate frosting in this recipe), you can store any leftovers in an airtight container at cool room temperature for up to 2-3 days. If your frosting contains more perishable ingredients such as cream cheese or a significant amount of fresh dairy that requires refrigeration, it’s best to store the cake in the refrigerator for up to 5 days. Always be sure to bring refrigerated cake to room temperature for at least 30-60 minutes before serving, as this allows the flavors to fully develop and the cake and frosting to soften to their ideal texture. For longer-term storage, individual slices of cake can be securely wrapped first in plastic wrap, then in aluminum foil, and frozen for up to 2-3 months. To enjoy, thaw frozen cake slices in the refrigerator overnight before allowing them to come to room temperature prior to serving.
Stay wonderfully connected with us across all our social media platforms to discover more delightful recipes, baking tips, and culinary inspiration! You can easily find us @ Instagram, Facebook, and Pinterest. We absolutely adore seeing your magnificent culinary creations, so please don’t hesitate to tag us when you try one of our delicious recipes – your baking triumphs truly make our day! And if you’re absolutely thrilled with the results and this recipe earned a special, cherished place in your heart, please take a brief moment to give it a well-deserved 5-star rating in the recipe card below – your invaluable feedback means the world to us and helps other bakers discover this joy!
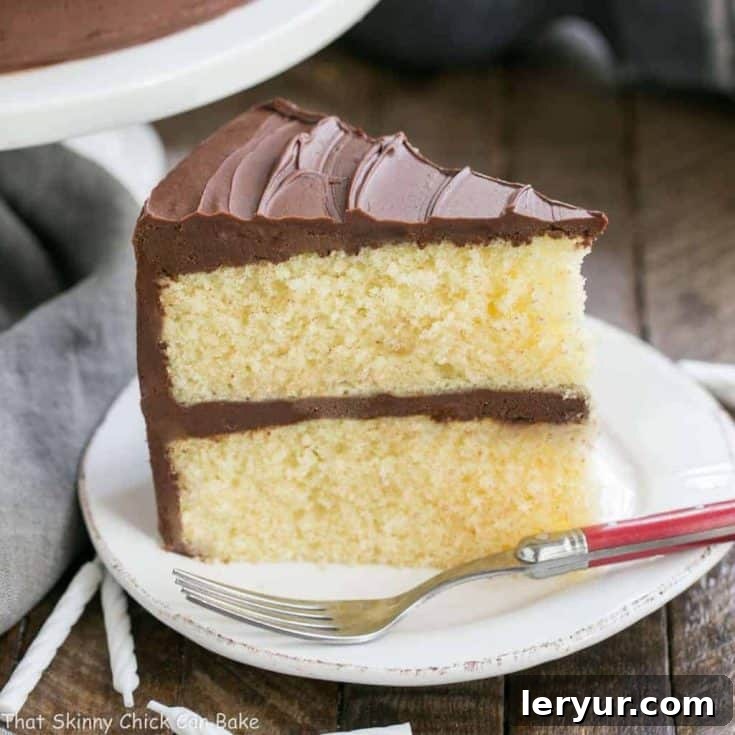
Yellow Butter Cake Recipe with Decadent Chocolate Icing
40 minutes
35 minutes
1 hour 15 minutes
12 generous servings
Indulge in the timeless charm of a classic yellow butter cake, exquisitely paired with a rich, fudgy, and utterly decadent chocolate icing. This iconic flavor combination creates a truly unforgettable celebratory dessert that’s simply perfect for birthdays, holidays, anniversaries, and every special moment in between, promising pure delight with every slice.
Overall Rating: 4.6 out of 5 stars based on 27 enthusiastic reviews.
Ingredients You’ll Need for Baking Perfection
For the Moist and Tender Yellow Cake:
- 1 cup unsalted butter (which equals 2 sticks), softened perfectly to room temperature, plus extra for meticulously greasing your pans
- 1 ½ cups all-purpose flour, carefully measured, plus a little more for lightly dusting your prepared pans
- 1 ½ cups cake flour, essential for achieving that signature tender and delicate crumb
- 1 full tablespoon baking powder, crucial for ensuring a perfect, airy rise
- ½ teaspoon fine sea salt, to subtly enhance and balance all the sweet flavors
- 1 ¾ cups granulated sugar, providing the ideal level of sweetness and moisture
- 4 large eggs, brought to room temperature, for richness, structure, and binding
- 2 full teaspoons pure vanilla extract, for that classic, comforting yellow cake flavor
- 1 ¼ cups whole milk, brought to room temperature, for ultimate moisture and a smooth batter consistency
For the Decadent and Fudgy Chocolate Frosting:
- 1 pound (approximately 2 cups) high-quality semi-sweet chocolate, finely chopped for easy melting
- 6 tablespoons Dutch-process cocoa powder, for an intensely deep and rich chocolate flavor and color
- 6 tablespoons boiling water, to bloom the cocoa and create a smooth paste
- 1 ½ cups unsalted butter (3 sticks), softened perfectly to room temperature, for a creamy, spreadable frosting
- ½ cup confectioners’ sugar (also known as powdered sugar), finely sifted to prevent lumps in your smooth frosting
- 1 teaspoon pure vanilla extract, to complement and deepen the chocolate notes
Step-by-Step Baking Instructions for Your Perfect Yellow Cake
Follow these detailed steps carefully to achieve a beautifully baked yellow cake with luscious, creamy chocolate frosting. Precision and patience are your best allies in the kitchen!
- **Prepare Your Pans and Dry Ingredients:** Begin by preheating your oven to an exact 350ºF (175ºC). Generously butter two 9-inch round cake pans, ensuring every inch is coated. Cut two perfect circles of parchment paper to precisely fit the bottoms of the pans and carefully place them inside. Butter the top of the parchment paper as well, then lightly dust the entire interior of the pans with a small amount of flour, tapping out any excess. Set these meticulously prepared pans aside. In a separate, medium-sized bowl, whisk together the all-purpose flour, cake flour, baking powder, and salt until all ingredients are thoroughly combined and evenly distributed. Set this dry mixture aside.
- **Cream Butter and Sugar to Perfection:** In the spacious bowl of a stand mixer fitted with the paddle attachment (or using a reliable hand mixer), beat the 1 cup of softened room-temperature butter and the granulated sugar on medium speed. Continue beating for approximately 3 minutes, or until the mixture transforms into a light, airy, and pale fluffy consistency. Remember to frequently scrape down the sides of the bowl with a spatula as needed to ensure all ingredients are evenly incorporated.
- **Incorporate Eggs and Vanilla for Richness:** Add the 4 room-temperature eggs to the creamed butter and sugar mixture, one at a time, beating thoroughly after each individual addition until each egg is fully incorporated into the batter. Once all eggs are added, mix in the 2 teaspoons of pure vanilla extract. Give the bowl one final scrape down to ensure uniformity.
- **Alternate Dry and Wet Ingredients Carefully:** With the mixer speed set to low, gradually add the whisked flour mixture in three separate additions, alternating seamlessly with the 1 ¼ cups of milk. Always begin and end this process with the flour mixture. Beat just until combined and smooth after each addition, taking extreme care not to overmix. Overmixing can unfortunately develop gluten, which will lead to a tough, less tender cake. The final batter should be smooth and uniform.
- **Fill the Pans Evenly:** Carefully pour the prepared cake batter evenly into your two meticulously buttered and floured 9-inch cake pans. Use an offset spatula to gently smooth and level the tops of the batter, ensuring perfectly even layers that will bake uniformly.
- **Bake to Golden Perfection:** Transfer the filled cake pans to the preheated oven. Bake for approximately 30-35 minutes. The cakes are perfectly done when they are golden brown on top, spring back lightly when gently touched in the center, and a clean wooden skewer or cake tester inserted into the center comes out completely clean or with only a few moist crumbs attached. Avoid over-baking.
- **Cool the Cakes Properly:** Once baked, promptly remove the cakes from the oven and place them on wire cooling racks. Allow them to cool in their pans for a crucial 10-15 minutes. This step helps the cakes set and firm up slightly, making them much easier to handle without breakage. After this initial cooling, carefully invert the cakes onto the cooling racks, gently peel off the parchment paper from the bottoms, and allow the cakes to cool completely to room temperature before even thinking about applying frosting. Frosting a warm cake will inevitably lead to a melted, sliding, and very messy disaster.
- **Begin Icing Preparation:** Only begin preparing your delicious, fudgy chocolate icing once the cake layers have completely cooled to room temperature. This is essential to prevent the icing from melting or sliding off your beautifully baked cake.
- **Melt the Chocolate Gently:** In a microwave-safe bowl, gently melt the 1 pound of finely chopped semi-sweet chocolate. Heat in short 30-second increments, stopping and stirring well after each interval, until the chocolate is fully melted and beautifully smooth. Be extremely careful not to overheat, as this can cause the chocolate to seize. Once melted, set the chocolate aside to cool completely to room temperature (this usually takes about 15 minutes), ensuring it’s no longer warm to the touch before adding to the butter mixture.
- **Create the Cocoa Paste:** In a small separate bowl, stir together the 6 tablespoons of Dutch-process cocoa powder and 6 tablespoons of boiling water until the cocoa powder is completely dissolved and a smooth, thick paste forms. Set this aside to cool slightly.
- **Cream Butter and Powdered Sugar for Frosting:** In the clean bowl of your stand mixer fitted with the paddle attachment (or using a hand mixer), beat the 1 ½ cups of softened room-temperature butter and the ½ cup of sifted powdered sugar until the mixture is light, fluffy, and perfectly creamy. This should take approximately 2-3 minutes of beating.
- **Add Vanilla and Cooled Chocolate:** Add the 1 teaspoon of pure vanilla extract to the butter mixture and mix until just combined. Then, carefully pour in the completely cooled melted chocolate and beat on medium speed until well combined and beautifully smooth, stopping to scrape down the sides of the bowl as needed to ensure everything is incorporated.
- **Incorporate Cocoa Mixture for Deep Color:** Finally, add the cooled cocoa paste to the frosting mixture. Beat on medium speed until the frosting is incredibly light, airy, and uniformly chocolatey, with a rich, deep color. This may take another 2-3 minutes to achieve the desired consistency and aeration.
- **Frost Your Masterpiece:** For the absolute best results and a smooth, professional-looking finish, frost your completely cooled cake layers while the chocolate frosting is fresh, pliable, and at its ideal, spreadable consistency. Spread generously between the layers and all over the top and sides of the cake. Enjoy your magnificent creation!
Recipe Notes & Expert Tips for Ultimate Success
This exquisite Yellow Butter Cake recipe is lovingly adapted from the highly regarded Martha Stewart’s Baking Handbook, a true classic and indispensable resource in the culinary world. Her precision, meticulous attention to detail, and foundational techniques have been a profound inspiration for many of my favorite baking endeavors, including the development of this particular recipe. For optimal results, always ensure your ingredients, especially butter and eggs, are at perfect room temperature, as this promotes ideal emulsification and a smoother batter. Furthermore, to preserve that signature tender crumb, make a conscious effort to avoid overmixing the batter – mix just until combined, no more.
Feel free to experiment with different types of chocolate for your decadent frosting to perfectly customize the sweetness and intensity to your liking. Using a high-quality dark chocolate will yield a richer, less sweet, and more intense frosting experience, while opting for milk chocolate will offer a creamier, milder, and sweeter flavor profile. Always prioritize using high-quality ingredients, as they truly make a discernible difference in the final taste, texture, and overall enjoyment of your homemade cake. A good quality vanilla extract, fresh eggs, and European-style butter can elevate this classic to an extraordinary level.
Recommended Baking Products for This Recipe
As an Amazon Associate and member of other affiliate programs, I earn from qualifying purchases. Please know that these affiliate links help support this blog, allowing me to continue sharing delicious recipes, all at no extra cost to you.
- 9-inch Parchment Rounds
- 9-inch USA Pan Bakeware Round Cake Pan
- KitchenAid KSM150PSER Artisan Tilt-Head Stand Mixer
Detailed Nutrition Information:
Yield:
12 generous servings
Serving Size:
1 slice
Approximate Amount Per Serving:
Calories: 821 kcal
Total Fat: 52g
Saturated Fat: 32g
Trans Fat: 2g
Unsaturated Fat: 17g
Cholesterol: 166mg
Sodium: 557mg
Carbohydrates: 87g
Fiber: 3g
Sugar: 55g
Protein: 8g
Thatskinnychickcanbake.com occasionally provides nutritional information for recipes contained on this site as a courtesy and convenience. Please note that these figures are strictly estimates only, typically derived from widely available online calculators. Variables such as specific product types or brands purchased, slight variations in measuring, or ingredient substitutions can significantly alter the actual nutritional content in any given recipe. Additionally, many recipes on thatskinnychickcanbake.com may recommend toppings, which may or may not be listed as optional, and nutritional information for these added toppings is generally not included in the primary calculation. Other factors, such as when the salt amount is listed “to taste,” may also change the nutritional information as the amount used will vary. Furthermore, different online calculators can sometimes provide different results. Therefore, for the most accurate and precise representation of the nutritional information in any given recipe, it is highly recommended that you calculate the nutritional information independently using the exact ingredients and brands you use in your own recipe. You are solely responsible for ensuring that any nutritional information obtained and relied upon is accurate and appropriate for your dietary needs.
How Much Did You Love This Recipe? Share Your Thoughts!
Your feedback is incredibly invaluable and truly inspires us! Please take a moment to leave a thoughtful comment on the blog below, sharing your experience and any insights. Even better, share a gorgeous photo of your magnificent creation on Pinterest – we absolutely can’t wait to see your delightful yellow cake and how you made it your own!