
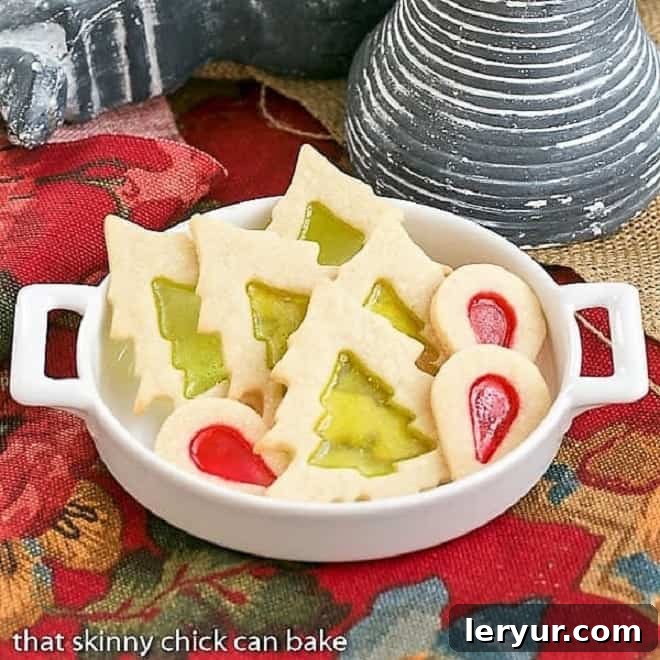
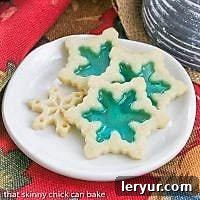
Welcome to the enchanting world of stained glass cookies, where simple sugar cookies are transformed into dazzling, edible works of art. These holiday treats are not just delicious; they are true showstoppers that will capture the hearts and imaginations of everyone who sees them. Imagine the gasps of delight and genuine admiration when you reveal that these intricate, jewel-toned beauties were lovingly handcrafted in your own kitchen! Perfect for any festive occasion, these cookies bring a touch of magic to your holiday table, making them an unforgettable centerpiece or a cherished gift.
Every year, the anticipation for our neighborhood cookie exchange builds, and I always look forward to contributing a truly special recipe. This year, my quest led me to a delightful revelation: the Stained Glass Sugar Cookies made by the “Tuesdays with Dorie” baking group. The moment I saw their vibrant, picture-perfect creations, I knew these were the ideal candidates for our annual gathering. Their unique beauty promised to elevate our cookie exchange from a simple collection of sweets to a gallery of edible masterpieces, and they certainly delivered on that promise.
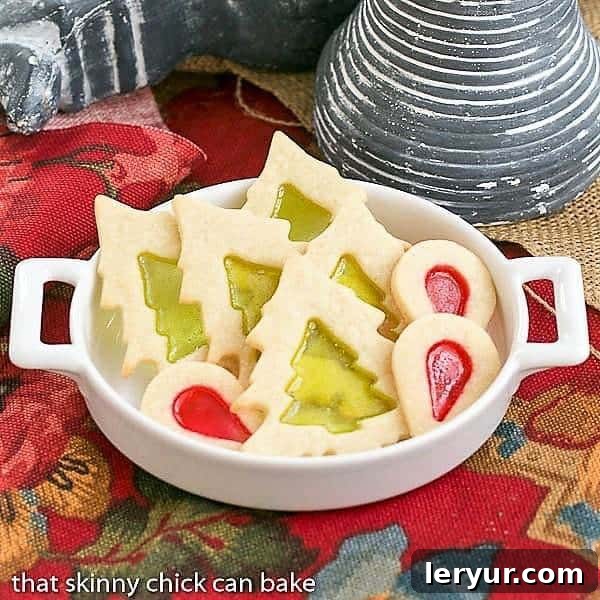
Why These Stained Glass Cookies Are an Absolute Must-Bake This Season
If you’re looking to impress without the stress, these remarkable cookies are your answer. They are surprisingly simple to create, yet possess an elegance that belies their ease. Here’s why these “Church Window Cookies” should be at the top of your holiday baking list:
- Effortless Elegance: Don’t be fooled by their sophisticated appearance! Crafting these Church Window Cookies is no more challenging than making classic cut-out sugar cookies. The magic happens with a simple addition of crushed hard candy, which melts into translucent, colorful “windows,” giving them their signature stained glass effect. You don’t need advanced baking skills to achieve this stunning outcome.
- Guaranteed Conversation Starters: Prepare for an avalanche of compliments and curious inquiries! These cookies are the ultimate party showstoppers. Everyone, especially those who aren’t avid bakers, will be captivated by their beauty and will undoubtedly ask how you managed to create such intricate designs. Be ready to share your secret (or keep them guessing!).
- Perfect for Any Holiday Celebration: Their festive glow makes them incredibly versatile. While often associated with Christmas, they are also ideal as enchanting Hanukkah cookies. Imagine cutting out round cookies and then using a small dreidel cookie cutter in the center to create a symbolic and beautiful treat. You can adapt the shapes and candy colors to suit any holiday or special occasion, making them a personalized delight.
- A Delightful Baking Experience: Beyond their impressive aesthetics, the process of making these cookies is genuinely fun and rewarding. From choosing your favorite candy colors to seeing the “glass” form in the oven, it’s a memorable experience that brings joy to the kitchen.
When it was time for our annual neighborhood cookie exchange, I desperately needed a fresh recipe that would stand out. I love sifting through holiday cookie roundups, like “50 of the Best Holiday Cookies” or “25 of The Best Christmas Cookies Recipes,” for inspiration. This year, the timing was perfect as my “Dorista” pals from the Tuesdays with Dorie group were tackling Dorie Greenspan’s recipe for stained glass sugar cookies. Their enthusiasm and Dorie’s renowned expertise sealed the deal for me. It was a sign that these unique cookies were meant to be my star contribution, and I was excited to put my own spin on them.
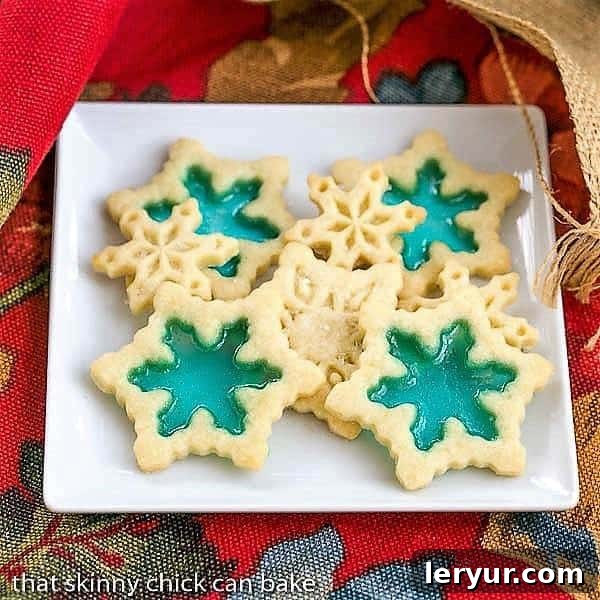
Mastering Stained Glass Cookies: Essential Expert Tips for Flawless Results
Achieving those perfectly clear, jewel-like centers in your stained glass cookies is simpler than you think, but a few key techniques can make all the difference. Here are some invaluable tips to ensure your cookies turn out beautifully every time, captivating everyone with their radiant charm:
- Crushing the Candy Just Right: The aroma of smashing Jolly Ranchers instantly transported me back to childhood hikes in Colorado. For the best results, it’s crucial that your candies are pulverized to nearly a powder. While a few slightly larger pieces might melt, a fine, powdery consistency ensures a smooth, clear “glass” effect. To do this effectively and minimize mess, place candies inside *two* sturdy Ziploc bags, then pound them with a metal meat mallet or rolling pin. Be prepared for shards – the double bagging is essential! Alternatively, a cleaned coffee grinder or food processor can achieve a finer powder more easily.
- Choose Your Candies Wisely: Not all hard candies are created equal for this task. Jolly Ranchers are highly recommended because they melt beautifully clear and retain their vibrant colors. Lifesavers, while tempting, often don’t melt as clearly, resulting in a cloudy finish. Other good options include suckers like Dum Dums (removed from sticks) for their clear melting properties and bright hues. Experiment with different colors to create stunning, multi-hued windows.
- The Foundation: A Non-Spreading Sugar Cookie Dough: The success of these cookies hinges on a dough that holds its shape. A reliable, non-spreading roll-out sugar cookie recipe is absolutely imperative. If your dough spreads too much, your intricate “windows” will distort or close up. Chilling the dough thoroughly before rolling it out is another crucial step, helping it firm up and prevent spreading during baking.
- Optimal Dough Thickness for Perfect Windows: Don’t roll your dough too thin. You’ll want a deep enough “well” in the middle to hold the crushed candy without it spilling over or creating a too-thin, fragile candy layer. A thickness of about ¼-inch works wonderfully, providing a sturdy cookie base and a good depth for the candy. If you prefer a slightly thinner cookie, ⅛-inch can also work, but be more cautious with your candy filling.
- Creative Cookie Cutter Combinations: The beauty of these cookies lies in their customizability. You can use any shape of cookie cutter you desire for the outer cookie. Then, find a smaller cookie cutter that complements your chosen shape to cut out one or two “windows” in the center. For example, a star within a larger star, or a small circle within a square. Don’t forget, you can bake the mini cookies cut from the centers as delightful little treats too!
- Precision in Filling and Cleaning: This step requires a delicate touch. Carefully spoon the candy dust into the center cut-outs. Any candy particles that land on the dough outside the well will bake onto the cookie and mar its appearance. A small, clean silicone brush or a dry pastry brush is the perfect tool to gently sweep any errant candy crumbs back into the center or off the dough completely. A pointed grapefruit spoon can also be helpful for precise placement of the powdered candy into the window openings.
- The Importance of Parchment Paper or Silpat: To prevent the melted candy from sticking to your baking sheet, always bake your stained glass cookies on parchment paper or a silicone baking mat (Silpat). This ensures easy removal and preserves the integrity of your beautiful candy windows.
- Patience During Cooling: This is a non-negotiable step. Once the cookies come out of the oven, they need to cool completely on the baking sheet for several minutes. The candy middle needs ample time to solidify and harden into its glass-like state. Moving them too soon will cause the fragile candy windows to crack or break.
- Transforming into Edible Ornaments or Gift Tags: Want to take your holiday presentation to the next level? Before baking, use a skewer or toothpick to create a small hole in your cookie. After baking and while the cookies are still warm and pliable, you may need to widen the hole slightly with the skewer if it appears too small. Once cooled, thread a ribbon through the hole, and voilà – you have stunning edible ornaments or personalized gift tags!
For my sugar cookie recipe, I turned to the reliable Alton Brown, and his dough performed beautifully, holding its shape perfectly. I also consulted Dorie Greenspan’s recipe in “Baking Chez Moi,” gleaning some fantastic tips, especially regarding baking times. The combination proved to be a winner, and my friends at the cookie exchange were genuinely impressed with these Stained Glass Cookies. They truly are so VERY festive and add a unique sparkle to the holiday spread!
Frequently Asked Questions About Stained Glass Cookies
Are These Cookies Hard to Eat?
It’s a common concern, knowing how hard candies like Jolly Ranchers can be. However, when baked into these cookies, the candy windowpane becomes remarkably thin. This ensures that you can easily bite through the candy centers without any difficulty, enjoying both the crisp cookie and the delightful crunch of the “glass” without fear of breaking a tooth!
Can You Use Different Shapes?
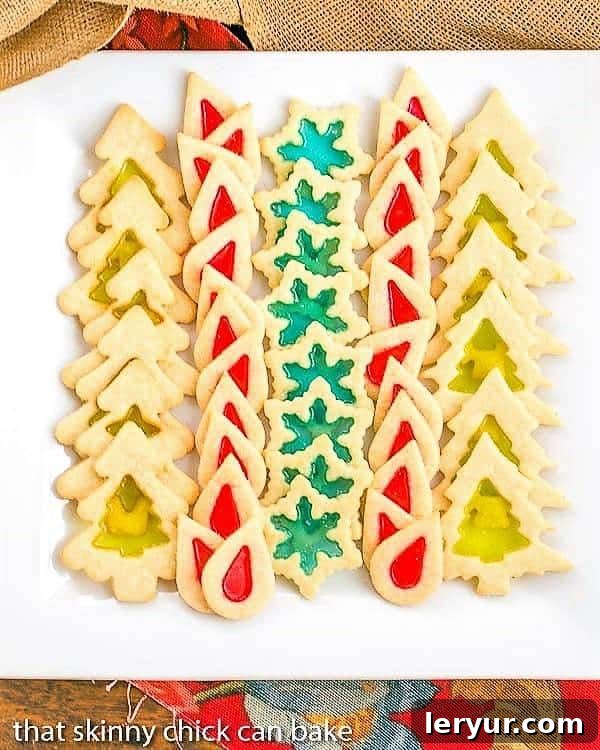
Absolutely! The beauty of these cookies lies in your creative freedom. Feel free to use any shaped cookie cutters that inspire you. The smaller cookie cutter used for the “window” can be the same shape as the larger outer cutter, creating a cohesive design, or you can mix and match for playful contrasts. Think stars within circles, hearts within squares, or even tiny trees inside larger wreaths. The possibilities are endless!
Can You Use Different Candies?
While Jolly Ranchers are highly recommended for their vibrant colors and consistently clear melt, other hard candies can be used with varying results. As mentioned in the tips, Lifesavers often bake up cloudy rather than perfectly transparent. Candies like Dum Dums (with the sticks removed) are another good option, often melting cleanly. Avoid opaque or chewy candies, as they won’t create the desired stained glass effect. Always test a small batch if trying a new candy to ensure it melts clear and doesn’t burn.
Can You Freeze Stained Glass Cookies?
Given that the “glass portion” of these cookies can become sticky, especially in humid conditions, I generally do not recommend freezing them. While I haven’t extensively tested it, there’s a strong possibility that the candy centers could become quite sticky or even melt slightly upon defrosting, compromising their beautiful texture and appearance. For optimal freshness and visual appeal, it’s best to enjoy these cookies within a few days of baking, stored in an airtight container at room temperature.
Explore More Holiday Cookie Recipes
If you’ve fallen in love with these stained glass wonders, you’ll be thrilled to discover more delightful cookie recipes perfect for your next cookie exchange or holiday gathering. Each of these offers unique flavors and textures to add variety and excitement to your festive spread:
- Best Sugar Cookie Recipe Ever from In Katrina’s Kitchen: A foundational recipe for perfectly tender and flavorful sugar cookies, ideal for decorating.
- Rolo Double Chocolate Chip Christmas Cookies from Living Locurto: Indulge in rich chocolate and gooey caramel with these irresistible holiday cookies.
- 30+ Christmas Cookies: A comprehensive collection offering a wide array of festive cookie ideas to inspire your baking.
- Holiday Pinwheel Cookies: Visually striking and fun to make, these swirled cookies add a burst of color and flavor.
- White Chocolate Candy Cane Cookies: A refreshing combination of cool peppermint and creamy white chocolate, perfect for winter.
- Linzer Cookie Recipe: Elegant, delicate, and filled with sweet jam, these classic cookies are always a hit.
- Chewy Gingersnaps plus 40+ Holiday Cookie Recipes: For those who love a spicy, chewy cookie, this recipe delivers, along with many more holiday favorites.
- Plus, don’t miss our guide on How to Host a Cookie Exchange: Everything you need to know to organize a successful and fun holiday event.
- Discover even More Holiday Recipes: Explore a broader selection of festive dishes and treats for all your celebrations.
Stay in touch and share your baking adventures with us on social media! Find us on Instagram, Facebook, and Pinterest. We absolutely love seeing your creations, so don’t forget to tag us when you try one of our recipes! If you’re delighted with the results, please consider giving it a 5-star rating in the recipe card below. Your feedback and support mean the world to us!
Print Recipe
Stained Glass Cookies
40 minutes
8 minutes
48 minutes
48 cookies
These perfectly festive cookies are a holiday marvel! With their dazzling candy windows, they transform a classic sugar cookie into a true centerpiece. This reliable sugar cookie recipe is expertly adapted from Alton Brown, ensuring a sturdy base that won’t spread, making it ideal for creating those intricate stained glass effects. Prepare to impress everyone with these edible works of art!
Ingredients
- 3 cups all-purpose flour
- ¾ teaspoon baking powder
- ¼ teaspoon salt
- 1 cup unsalted butter, softened
- 1 cup granulated sugar
- 1 large egg
- 1 tablespoon milk
- Powdered sugar, for rolling out dough
- Jolly Ranchers candies, separated into colors and finely crushed into a powder (approximately 15-20 total candies)
Instructions
- In a medium bowl, whisk together the flour, baking powder, and salt. Set this dry mixture aside.
- In the bowl of a stand mixer fitted with the paddle attachment, beat together the softened butter and granulated sugar on medium speed until the mixture is light in color and fluffy.
- Add the egg and milk to the butter mixture, beating until just combined and smooth. Scrape down the sides of the bowl as needed.
- With the mixer on low speed, gradually add the dry flour mixture to the wet ingredients. Continue to beat until the dough comes together and pulls away from the sides of the bowl. Be careful not to overmix.
- Divide the dough into two equal portions. Wrap each portion tightly in plastic wrap and refrigerate for at least 2 hours, or until firm. Chilling is crucial for easy rolling and to prevent spreading.
- Preheat your oven to 350ºF (175ºC). Line baking sheets with parchment paper or silicone baking mats.
- Lightly sprinkle your work surface with powdered sugar. Roll out one portion of the chilled dough to an even thickness of approximately ¼-inch (or ⅛-inch if you prefer thinner cookies).
- Using your desired cookie cutters, cut the dough into various shapes. Carefully transfer the cut-out cookies to the prepared baking sheets, spacing them about 1 inch apart.
- Next, using a smaller cookie cutter of a similar or complementary shape, cut out a center section from each larger cookie to create the “window” for your candy.
- Carefully spoon some of the finely crushed Jolly Ranchers into the middle of each cookie’s cut-out “window.” Be precise; use a small, dry pastry brush or a clean paintbrush to gently push any stray candy particles that land on the dough back into the center. This ensures clean, clear windows.
- Bake for 7 to 8 minutes, or until the edges of the cookies are just beginning to turn a light golden brown. The candy should be completely melted and bubbly.
- Once baked, remove the baking sheets from the oven and allow the cookies to cool for several minutes on the sheet. This crucial step allows the melted candy to solidify into a hard, glass-like state.
- Carefully transfer the cooled cookies to a wire rack to finish cooling completely. Store the cooled stained glass cookies in an airtight container at room temperature.
Notes
For these stunning cookies, you will need a set of coordinating cookie cutters: one larger shape for the cookie’s outer perimeter, and a smaller, similar shape to create the central opening for your vibrant candy “window.” Ensure your hard candies are crushed to a very fine powder for the clearest “glass” effect.
Watch a video tutorial for Stained Glass Cookies to guide you through each step and see the magic unfold!
Recommended Products
As an Amazon Associate and member of other affiliate programs, I earn from qualifying purchases.
- 2-inch Snowflake Cookie Cutters
- 4-inch Snowflake Cookie Cutters
- French Rolling Pin
- Reynolds Kitchens Non-Stick Baking Parchment Paper Sheets – 12×16 Inch, 22 Count
Nutrition Information:
Yield:
24
Serving Size:
2 cookies
Amount Per Serving:
Calories: 224Total Fat: 10gSaturated Fat: 6gTrans Fat: 0gUnsaturated Fat: 4gCholesterol: 28mgSodium: 141mgCarbohydrates: 31gFiber: 1gSugar: 14gProtein: 2g
HOW MUCH DID YOU LOVE THIS RECIPE?
Please leave a comment on the blog or share a photo on Pinterest
As I meticulously separated the cherry, sour apple, and blue raspberry candies from the bag of Jolly Ranchers to create the vibrant “windows” for these cookies, a wave of nostalgia washed over me. The sweet and tangy fruity aromas instantly transported me back to the winding trails near Aspen, Colorado, where my family and I would embark on our annual hiking adventures. My dad, ever the prepared outdoorsman, always had a secret stash of lemon drops and Jolly Ranchers tucked away in the exterior pocket of his backpack.
I distinctly remember being partial to the grape flavor, needing a continuous supply as we huffed and puffed our way over challenging switchbacks, through sun-dappled meadows, and into whispering forests. Those tiny bursts of sweetness were our fuel, our reward, and a cherished part of our mountain explorations. Recreating these stained glass cookies with those familiar flavors brings a piece of that cherished past into my present holiday baking, making each bite not just a treat for the palate, but a sweet memory for the soul. They are truly more than just cookies; they are edible jewels that carry stories and bring immense joy.