
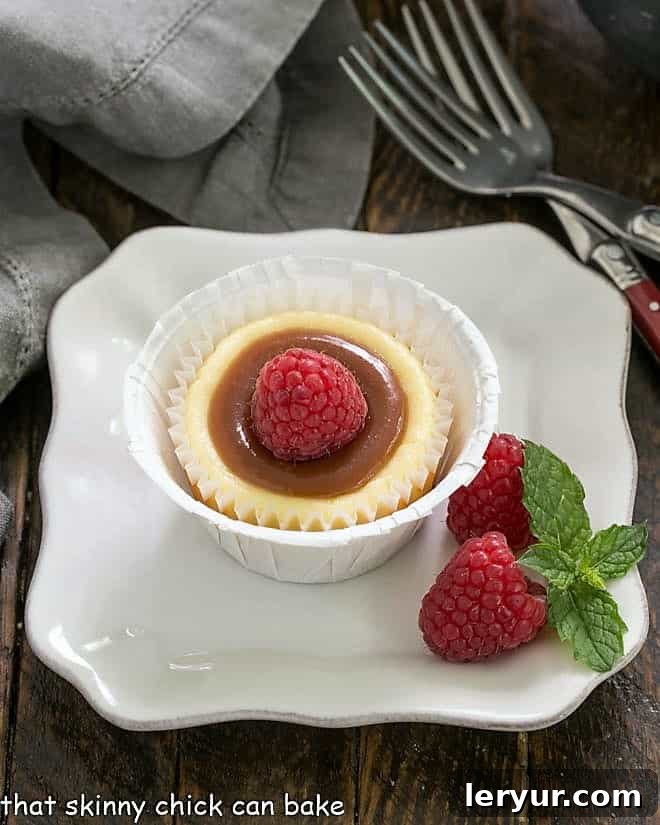
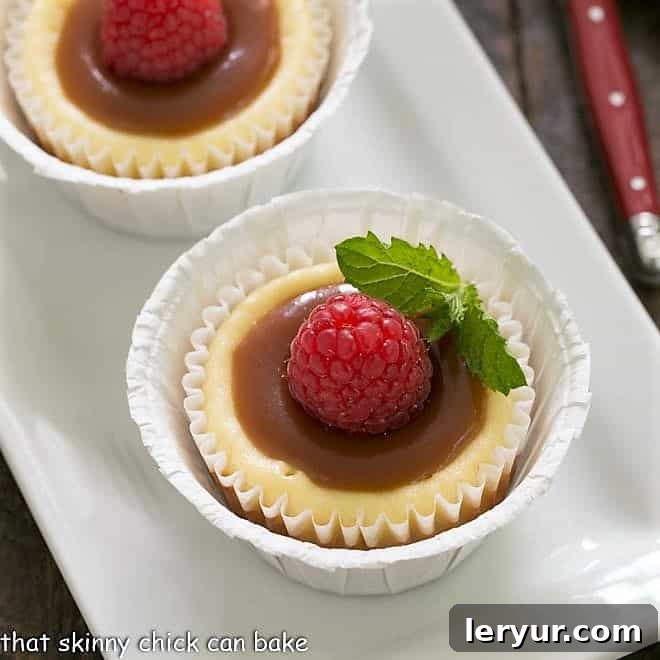
Caramel Topped Mini Cheesecakes are a divine fusion of two universally adored dessert elements: the rich, buttery sweetness of caramel and the luscious, creamy perfection of classic homemade cheesecake. Crafting these delectable treats in individual muffin tins offers the ultimate indulgence, providing perfectly sized portions that are as charming to look at as they are delightful to eat. This approach ensures everyone gets their own little slice of heaven, making portion control effortless and enjoyable.
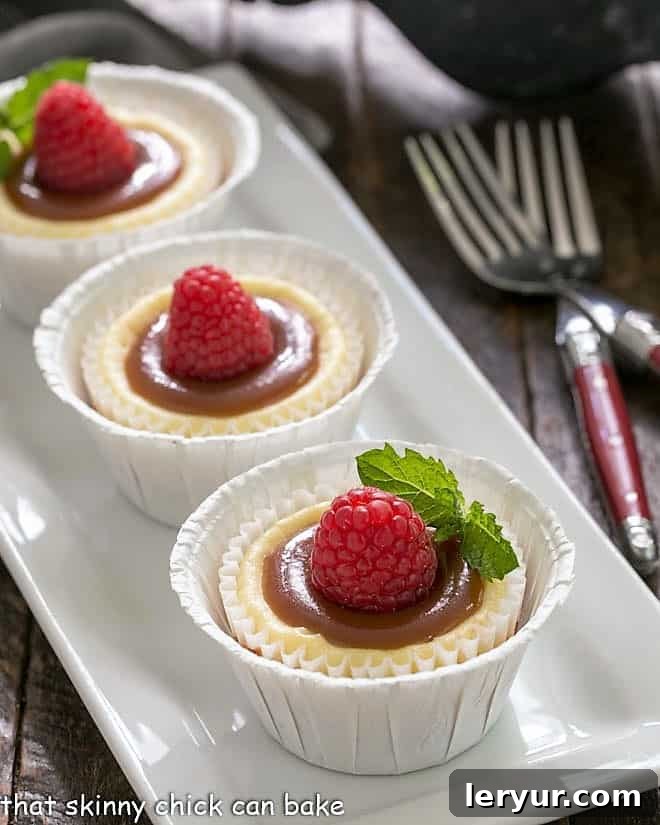
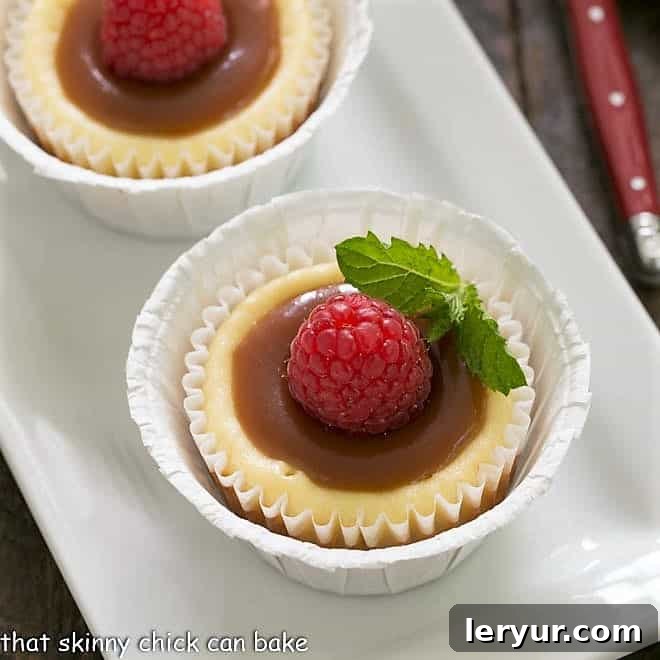
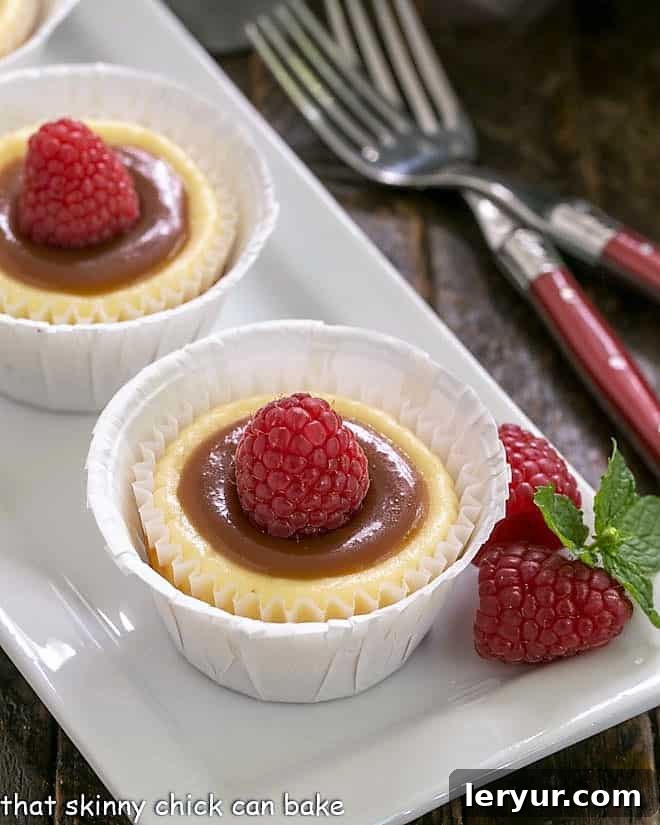
Imagine sinking your spoon into these exquisite Individual Caramel Cheesecakes. Each begins with a delicately sweet, buttery graham cracker crust that provides a satisfying crunch. This foundation gives way to an ultra-creamy, velvety vanilla cheesecake filling, baked to perfection. The grand finale for each mini cheesecake is a generous drizzle of glistening homemade caramel sauce, adding a layer of sophisticated sweetness and a hint of chewiness, crowned with a vibrant, ripe raspberry. This combination of textures and flavors creates a dessert that is truly unforgettable. These elegant individual cheesecakes are not just a dessert; they are an experience, making them an impeccable choice for any gathering, from intimate family dinners to festive celebrations with friends. They are sure to impress and satisfy every sweet tooth. For those who appreciate effortless baking, you might also adore these No-Bake Mini Cheesecakes, offering a different yet equally delightful approach to individual dessert enjoyment.
The Irresistible Appeal of Mini Cheesecakes: Why Go Small?
Mini cheesecakes offer a host of benefits that make them a preferred choice for many bakers and dessert lovers alike. They simplify serving, impress guests, and offer a delightfully consistent experience. Here’s why these individual treats are truly superior:
- Everyone Admires Individual Desserts: There’s something inherently charming and sophisticated about a personal-sized dessert. It feels special, curated, and eliminates the mess of slicing and serving a large cake. Guests will appreciate the elegant presentation and the ease of enjoying their own perfect treat.
- Built-In Portion Control: For those mindful of their dessert intake, mini cheesecakes are a game-changer. Each person receives a perfectly portioned dessert, allowing for indulgence without overdoing it. This makes them ideal for events where you want to offer a treat that everyone can enjoy responsibly.
- A Symphony of Flavors: The creamy, rich texture of cheesecake finds its perfect partner in the sweet, decadent embrace of caramel sauce. This pairing is a classic for a reason – the slightly tangy cheesecake cuts through the sweetness of the caramel, creating a balanced and deeply satisfying flavor profile that keeps you coming back for more.
- Faster Baking and Cooling: Unlike their larger counterparts, mini cheesecakes bake in significantly less time, which is a huge bonus when you’re short on time or eager to enjoy your creations. They also cool down faster, getting you closer to that delicious first bite sooner.
- Reduced Cracking Risk: Large cheesecakes are notoriously prone to cracking during baking and cooling. Mini cheesecakes, with their smaller surface area and quicker baking time, are much less likely to develop these aesthetic imperfections, ensuring a beautiful result every time.
- Versatility for Any Occasion: Whether it’s a casual backyard BBQ, an elegant dinner party, a holiday gathering, or even just a treat for yourself, mini cheesecakes fit seamlessly into any event. Their size makes them easy to transport and display.
These Caramel Topped Mini Cheesecakes truly hit all the right notes! They’ve earned enthusiastic “thumbs up” from my entire family, and I have no doubt they’ll be a hit with yours too. If you find yourself gravitating towards individual desserts, these Mini Vanilla Bean Cheesecakes are another delightful winner you’ll want to add to your repertoire!
Mastering Your Mini Cheesecake Baking: Essential Tips for Success
Achieving that perfectly smooth, creamy, and crack-free cheesecake texture requires attention to a few key details. Whether you’re making a classic large cheesecake or these convenient mini versions, following these guidelines will elevate your baking game and ensure delicious results every time.
- Embrace Room Temperature Ingredients: This is perhaps the most crucial rule for cheesecake success. Ensure your cream cheese, eggs, and any other dairy ingredients (like sour cream or heavy cream) are at room temperature. Cold ingredients don’t emulsify properly, leading to a lumpy batter that can result in a grainy texture in the final product. Room temperature ingredients blend smoothly and uniformly, creating a cohesive, velvety cheesecake batter.
- Choose Your Mixer Attachment Wisely: When using a stand mixer, the paddle attachment is your best friend for cheesecake batter. The paddle gently incorporates ingredients without whipping in too much air. Using a whisk attachment, or over-mixing, can incorporate excess air into the batter. This air expands during baking, causing the cheesecake to puff up, and then collapse and crack as it cools, leading to a less dense and traditional texture. If you’re using a hand mixer, always mix on the lowest speed possible to achieve smoothness without aeration.
- Incorporate Eggs One at a Time: Patience is key when adding eggs to your cheesecake batter. Mix in each egg individually, on low speed, just until it is fully incorporated before adding the next. This ensures proper emulsification and prevents over-mixing, which, as mentioned, can introduce too much air. After each egg, remember to scrape down the sides of the bowl to ensure all ingredients are evenly combined.
- Understanding the Water Bath (Bain-Marie): A water bath is a technique often employed for baking large cheesecakes. The steam created by the surrounding water bath helps to regulate the oven temperature, ensuring a gentle, even bake and preventing the cheesecake from drying out. This moist environment is excellent at minimizing cracks. For individual cheesecakes, however, a water bath is usually not necessary. Their smaller size and quicker baking time make them less susceptible to the cracking issues that plague larger cheesecakes, allowing for a simpler baking process.
- Avoid Over-Baking: Over-baking is another common culprit for dry or cracked cheesecakes. Mini cheesecakes are done when the edges are set, but the center still has a slight jiggle. They will continue to set as they cool.
- Gradual Cooling is Essential: Once baked, resist the urge to immediately remove your cheesecakes from the muffin tin. Allow them to cool in the tin for a period (e.g., one hour) before transferring them to a wire rack to cool completely to room temperature. This gradual cooling prevents sudden temperature changes that can shock the cheesecake and lead to cracks.
Crafting the Perfect Caramel Topping: Tips for Microwave Caramel Sauce
A silky, rich caramel sauce elevates these mini cheesecakes from delicious to extraordinary. While you can certainly use a high-quality store-bought caramel, making your own microwave caramel sauce is surprisingly simple and incredibly rewarding. Here are some pointers for achieving caramel perfection:
- Microwave Variations are Key: If you’re trying my favorite microwave caramel sauce recipe, don’t be discouraged if your first batch isn’t perfect. All microwaves have different wattage and heat differently, which significantly impacts caramelization time. It can be challenging to accurately gauge the sugar’s color change through the appliance window. The ideal color you’re aiming for when you remove it from the microwave is a pale yellow, just starting to show a hint of golden.
- Beware of Over-Darkening: If the sugar mixture is already an amber or dark golden color when you pull it from the microwave, it’s likely overcooked. Caramel continues to cook and darken from residual heat as it sits on your countertop. A dark caramel will taste bitter and burnt. The goal is a rich, buttery flavor, not bitterness.
- Note Your Success Time: The best way to master microwave caramel is to experiment with your specific appliance. Once you achieve a perfect pale yellow color that turns into a beautiful amber on the counter, make a precise note of the exact microwaving time. This will be your reliable guide for all future batches, allowing you to whip up fresh caramel sauce in mere minutes whenever the craving strikes!
- New Microwave, New Learning Curve: I recently acquired a new microwave with a darker window, which initially presented a challenge in monitoring the caramel’s color. This reinforced the importance of adjusting cooking times to your specific appliance. The good news is that the ingredients for caramel are relatively inexpensive, so a “practice” batch or two is a small price to pay for perfectly homemade caramel.
- Safety First When Adding Cream: When it’s time to add the hot heavy cream to the caramelized sugar, do so slowly and carefully, a couple of tablespoons at a time. The mixture will bubble up intensely and steam vigorously. Adding it slowly helps to control this reaction and prevents splattering, ensuring your safety and a smooth incorporation.
Frequently Asked Questions About Mini Cheesecakes
Once your baked caramel topped mini cheesecakes have cooled completely to room temperature, it’s crucial to store them properly to maintain their freshness and safety. Cover them tightly with plastic wrap or place them in an airtight container to prevent them from drying out or absorbing odors from the refrigerator. Store them in the refrigerator, where they will remain safe and delicious to eat for up to 4 days. For optimal freshness and flavor, it’s best to add the caramel topping and fresh fruit garnish just before serving, or a few hours prior if chilling with topping.
Absolutely! Most cheesecakes, especially mini versions, freeze exceptionally well, making them an excellent make-ahead dessert. To freeze them, ensure the cheesecakes have cooled thoroughly to room temperature. Do not add any caramel topping or fresh fruit garnish before freezing. For best results, individually wrap each mini cheesecake in plastic wrap, then place them in an airtight freezer-safe container. This method helps prevent freezer burn and preserves their delicate texture. They can be safely frozen for up to 6 weeks. When you’re ready to enjoy them, simply defrost the cheesecakes overnight in the refrigerator. Once defrosted, you can add your homemade caramel sauce, fresh raspberries, or any other desired garnishes and serve.
PRO-Tip: To experience the most luscious and creamy texture from your cheesecake, it’s highly recommended to bring it out of the refrigerator about an hour before serving. Allowing the cheesecake to come to a slightly cooler room temperature softens the cream cheese and enhances its velvety mouthfeel, making each bite even more delightful. However, always remember food safety guidelines: perishable food should not be left at room temperature for more than 2 hours. After serving, promptly return any leftover mini cheesecakes to the refrigerator to ensure they remain safe and delicious.
Explore More Individual Desserts You’ll Love:
Who can resist the charm and convenience of a personal-sized dessert? There’s a special joy in having a treat that’s perfectly portioned just for you. If you adore these mini cheesecakes, you’ll undoubtedly appreciate these other fantastic individual dessert creations:
- Mini Tiramisu Trifles from Life Love and Sugar
- Mini Vanilla Bean Cheesecakes
- Molten Lava Cakes
- Individual Mascarpone Cheesecakes
- Margarita Cheesecakes
- White Chocolate Lava Cakes
- Individual Pavlovas
- Discover more of the Best Desserts
Stay connected and share your culinary adventures with me on social media! Find me @ Instagram, Facebook, and Pinterest. Don’t forget to tag me when you try one of my delicious recipes! If you love the results and enjoyed creating this dish, please show your appreciation by giving it a 5-star rating in the recipe card below. Your feedback helps other bakers discover these wonderful recipes!
Caramel Topped Mini Cheesecakes Recipe
30 minutes
28 minutes
58 minutes
12 mini cheesecakes
This recipe for Caramel Topped Mini Cheesecakes is adapted from treasured recipes by Making Memories With Your Kids and Cook’s Illustrated, ensuring a perfect balance of flavor and texture for these delightful individual desserts.
Ingredients
For the Mini Cheesecakes
- 1 cup plus 2 tablespoons graham cracker crumbs
- 1 1/2 tablespoons granulated sugar (approximately 1 1/2 teaspoons)
- 3 1/2 tablespoons unsalted butter, melted
- 2 (8 ounce) packages cream cheese, softened to room temperature
- 3/4 cup granulated sugar
- 1 1/2 tablespoons all-purpose flour
- 2 large eggs, at room temperature
- 1 teaspoon pure vanilla extract
- 1/4 cup sour cream
- 1/4 cup heavy cream
For the Microwave Caramel Sauce (or use a premium store-bought caramel sauce):
- 1 cup granulated sugar
- 2 tablespoons corn syrup
- 2 tablespoons water
- 1/8 teaspoon lemon juice
- 1/2 cup hot heavy cream
- 1 tablespoon unsalted butter
Instructions
- Preheat your oven to 350ºF (175ºC). Line a 12-cup muffin tin with paper liners; set aside.
- In a medium bowl, thoroughly mix together the graham cracker crumbs, 1 1/2 tablespoons sugar, and melted butter until well combined and moistened. Place a well-rounded tablespoon of this mixture into the bottom of each prepared muffin cup and tamp it down into an even, compact layer. Allow these crusts to cool while you prepare the cheesecake filling.
- In a large bowl, using a stand mixer with the paddle attachment (or a hand mixer on low speed), mix the softened cream cheese, 3/4 cup sugar, and flour until completely smooth and lump-free. Gradually mix in the eggs, one at a time, on low speed, scraping down the sides of the bowl after each addition to ensure everything is well incorporated. Finally, add the vanilla extract, sour cream, and heavy cream, mixing just until combined. Be careful not to overmix the batter.
- If your cheesecake batter appears to have numerous air bubbles, gently tap your mixing bowl several times on the counter. This action helps to release any trapped air, resulting in a denser and smoother cheesecake texture. Alternatively, using the paddle attachment of your stand mixer from the start is an effective way to minimize air bubbles.
- Divide the cheesecake mixture evenly among the muffin cups, being careful not to overfill them (you may have a small amount of batter left over, depending on how much you fill each cup). Bake for 20-23 minutes. The centers of the cheesecakes may still appear slightly jiggly, which is normal as they will continue to set as they cool.
- Remove the muffin tin from the oven and allow the mini cheesecakes to cool in the tin for 1 hour at room temperature. After this initial cooling, transfer them to the refrigerator and chill for at least 2 hours, or until thoroughly set. Serve chilled, topped with a generous spoonful of the caramel sauce and a fresh raspberry.
- To prepare the microwave caramel sauce, combine 1 cup sugar, corn syrup, water, and lemon juice in a 2-cup capacity Pyrex measuring cup. Microwave the mixture, watching carefully, until it just begins to take on a pale yellow color. This typically takes 4-5 minutes, but microwave timings vary significantly. For example, my previous microwave would burn it at 5 minutes, while my current one requires almost a full 5 minutes to reach the desired pale amber hue.
- Carefully remove the hot cup to your countertop. The mixture will continue to bubble and darken to a beautiful amber color from residual heat. Slowly and cautiously, add the hot heavy cream a couple of tablespoons at a time (be aware that the mixture will bubble intensely upon contact, so add slowly and stir gently). Once all the cream is incorporated, stir in the tablespoon of butter until melted and smooth. Allow the caramel to cool slightly before using. Store any leftover caramel sauce in an airtight container in the refrigerator for up to 2 weeks.
Notes
Recommended Products
As an Amazon Associate and member of other affiliate programs, I earn from qualifying purchases.
- Tassie Tamper (for perfect crusts)
- KitchenAid Artisan Tilt-Head Stand Mixer
- Standard 12-Cup Muffin/Cupcake Tin
Nutrition Information:
Yield:
12
Serving Size:
1 cheesecake
Amount Per Serving:
Calories: 256Total Fat: 12gSaturated Fat: 7gTrans Fat: 0gUnsaturated Fat: 4gCholesterol: 65mgSodium: 66mgCarbohydrates: 36gFiber: 0gSugar: 34gProtein: 2g
HOW MUCH DID YOU LOVE THIS RECIPE?
Please leave a comment on the blog or share a photo on Pinterest!