
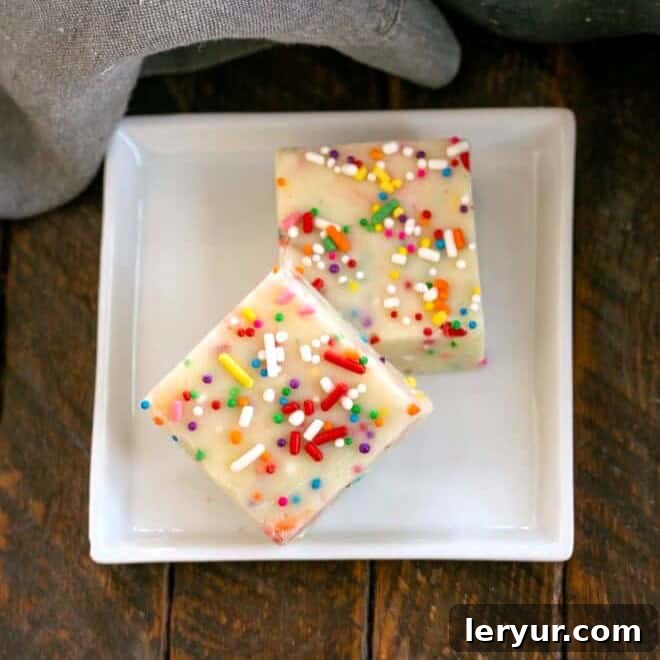
Prepare to be enchanted by one of the most delightfully unique and utterly irresistible treats you’ll ever encounter: our **White Chocolate Fudge with Sprinkles**. This isn’t just any ordinary fudge; it’s a vibrant celebration infused with the unmistakable flavor of white cake mix, elevating a classic confectionery to an extraordinary new level. Forget bland and boring; this recipe promises a burst of color and a creamy, cake-like essence that will have everyone asking for more.
Perfect for any festivity, this **Funfetti-style Dessert** is your go-to for adding a touch of whimsical charm to celebrations. Whether it’s a birthday bash, a holiday gathering, or just a Tuesday that needs a little sparkle, you can easily customize the look by simply changing the colors of your sprinkles. Imagine festive red and green for Christmas, pastel hues for Easter, or vibrant rainbow sprinkles for a birthday – the possibilities are endless for creating a visually stunning and delicious treat.
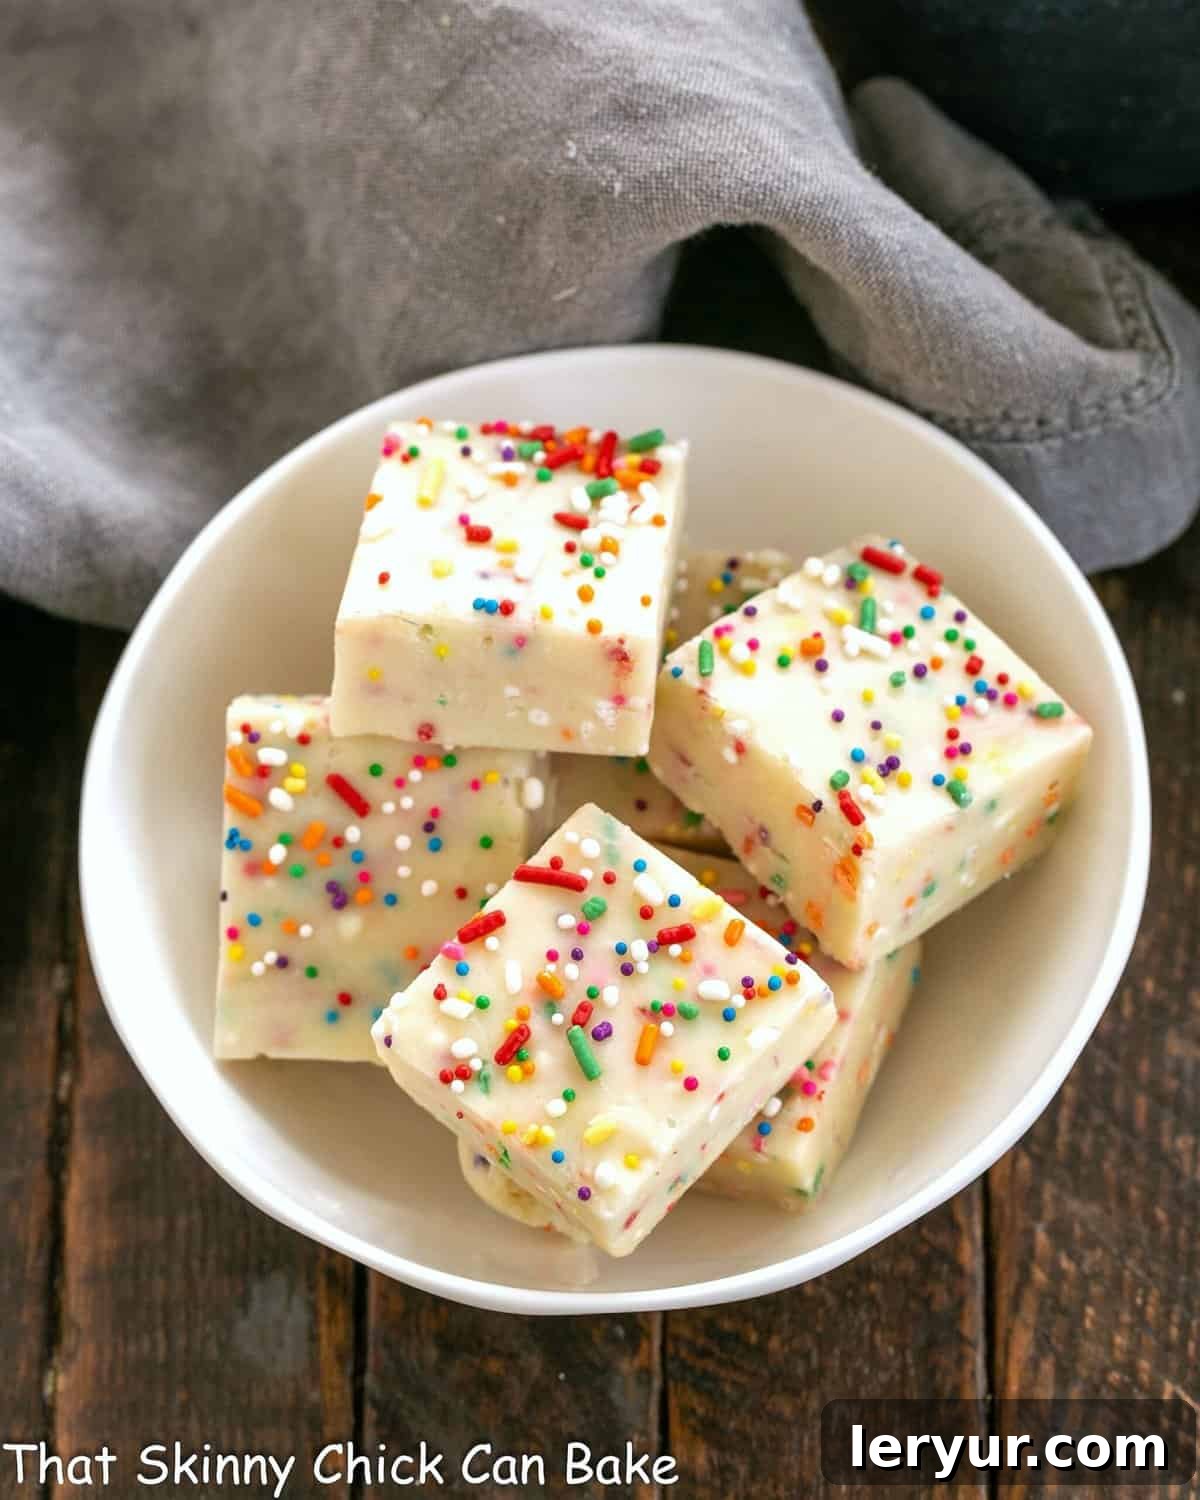
Why You Must Make This Irresistible White Chocolate Fudge
If you’re looking for a dessert that’s both impressive and incredibly simple, your search ends here. This white chocolate fudge recipe is a game-changer for home bakers and sweet enthusiasts alike.
- Effortless & Quick: This easy white chocolate fudge takes mere minutes to prepare, making it an ideal choice when you need a fantastic treat in a hurry. With only 6 simple ingredients, it’s a fuss-free dessert that delivers maximum flavor with minimal effort.
- Unique Cake Batter Flavor: The secret ingredient—white cake mix—infuses this fudge with a delightful, nostalgic cake batter taste. Paired with rich white chocolate and an abundance of colorful sprinkles, it results in a truly festive and unexpectedly delicious treat that stands out from traditional fudges.
- Perfect for Any Celebration: This **Funfetti Fudge** is more than just a dessert; it’s a celebration in every bite. Its vibrant appearance and delightful flavor make it a perfect menu item for birthdays, holidays, potlucks, or any special occasion where a touch of joy is welcome. It’s also an excellent choice for edible gifts!
- No-Bake Convenience: Skip the oven! This is a fantastic **No-Bake Dessert** that is perfect for warm weather or when you just don’t want to turn on your oven. The simple stovetop method makes it accessible for cooks of all skill levels.
- Impressive Presentation: With its creamy white base studded with colorful sprinkles, this fudge is incredibly appealing to the eye. It’s a treat that looks as good as it tastes, guaranteed to brighten any dessert table.
Essential Ingredient Notes for Perfect Fudge
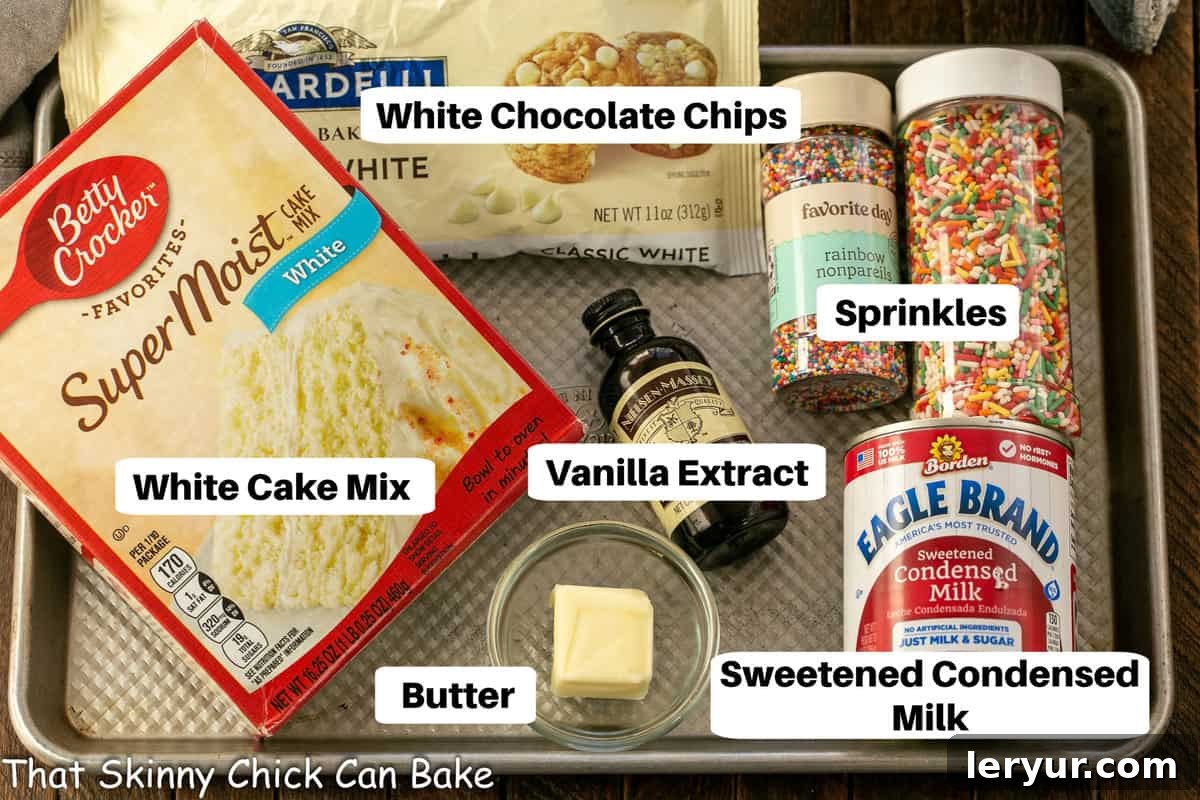
Achieving the perfect, creamy, and sliceable fudge relies on using the right ingredients and understanding their roles. Here’s a breakdown of what you’ll need and why:
- Sweetened Condensed Milk: This is a crucial foundation for many quick fudge recipes, lending both intense sweetness and a wonderfully rich, creamy texture that sets beautifully. **DO NOT** substitute evaporated milk, which is unsweetened and much thinner, leading to a fudge that won’t set properly. Always ensure you grab the “sweetened condensed” variety.
- White Chocolate Chips: The quality of your white chocolate chips significantly impacts the final texture and set of your fudge. I highly recommend using a reputable brand like **Ghirardelli’s white chocolate chips**. Some other brands may contain less cocoa butter or different stabilizers, resulting in a fudge that remains too soft even after thorough chilling. High-quality chips ensure a firm, smooth consistency.
- Butter: You can use either salted or unsalted butter. Salt plays an excellent role as a flavor enhancer, even in sweet desserts, subtly balancing the sweetness of the fudge. It also contributes to the fudge’s overall richness and smooth mouthfeel.
- White Cake Mix: You’ll only need about ½ cup of standard white cake mix for this recipe. This magical ingredient is what gives the fudge its signature cake batter flavor. For optimal freshness and to prevent clumping, you can store any leftover cake mix in a sealed Ziploc bag in the freezer, ready for your next batch of this delightful treat.
- Vanilla Extract: For the best flavor, make sure to use real vanilla extract, not artificially flavored versions. The genuine vanilla taste complements the white chocolate and cake batter beautifully. If you desire an exceptionally bright, whiter appearance for your fudge, you can omit the vanilla extract, as it can sometimes impart a slight off-white tint. Rest assured, the fudge will still be incredibly tasty!
- Multicolored Sprinkles: These are essential for the “Funfetti” look and add a playful texture. A crucial tip: sprinkles, like other ingredients, can go rancid over time. If you have had the same container of sprinkles sitting in your pantry for years, it’s wise to taste a few first to ensure they are fresh and won’t impart an unpleasant flavor to your fudge. Fresh sprinkles truly make a difference in taste and appearance.
Simple Steps: How to Make White Chocolate Fudge with Sprinkles
Creating this delicious fudge is incredibly straightforward. Follow these easy steps for a perfect batch every time:
- Prepare Your Pan: Begin by lining an 8×8-inch baking pan with nonstick foil or parchment paper, ensuring extra overhang on the sides. This thoughtful step is crucial for effortlessly lifting the chilled fudge from the pan later, making cutting a breeze.
- Combine Ingredients: In a medium saucepan, combine the sweetened condensed milk, white chocolate chips, and butter. Place the saucepan over medium-low to medium heat.
- Melt Gently: Stir the mixture continuously and gently until the white chocolate chips are completely melted and the mixture becomes smooth and uniform. Avoid high heat, which can scorch the chocolate.
- Introduce Cake Mix & Vanilla: Once the chocolate is fully melted and smooth, remove the saucepan from the heat. Stir in the white cake mix and vanilla extract (if using) until they are thoroughly combined and no dry streaks of cake mix remain.
- Fold in Sprinkles: Allow the mixture to cool for just a minute off the heat, then gently fold in ¼ cup of your colorful sprinkles. Mixing them off the heat helps prevent excessive color bleeding.
- Transfer to Pan: Quickly scrape the warm fudge mixture into your prepared pan. Use an offset spatula or the back of a spoon to smooth the top surface evenly. Work efficiently, as the fudge will begin to set as it cools.
- Garnish with More Sprinkles: For an extra festive touch, immediately sprinkle additional multicolored sprinkles over the top of the fudge before it has a chance to fully set. This ensures they adhere nicely.
- Chill to Perfection: Place your pan of cake batter fudge in the refrigerator to chill for at least 2-3 hours, or until completely firm. Proper chilling is essential for clean, precise cuts and perfectly formed squares.
Expert Tips for Flawless White Chocolate Sprinkle Fudge
Mastering fudge-making is easier than you think with these professional insights and clever tricks:
- Sweetened Condensed Milk is Key: As reiterated, using sweetened condensed milk is non-negotiable for this recipe. Evaporated milk will not allow your fudge to achieve the correct consistency or set firmly. Double-check your can before you begin!
- Cake Mix Varieties: While white cake mix creates a classic “cake batter” flavor, feel free to experiment! You could also use a Funfetti cake mix for an extra sprinkle boost. If you opt for a Funfetti mix, consider reducing the amount of additional sprinkles called for in the recipe to avoid overdoing it. Other light-colored cake mixes, like yellow or even vanilla pudding mixes, could offer interesting variations.
- Prevent Scorching: Always cook your fudge mixture over medium-low to medium heat, and stir constantly and frequently. This prevents the bottom from sticking and burning, ensuring a smooth, evenly melted mixture without any burnt taste. Patience is key here!
- Holiday Magic with Sprinkles: This is where the fun truly begins! There are countless Wilton sprinkle sets available for every holiday and season imaginable. By simply swapping out the multicolored sprinkles for themed ones, you can easily transform this recipe into festive Christmas fudge, vibrant Easter fudge, spooky Halloween fudge, patriotic Fourth of July fudge, or even elegant New Year’s Eve fudge. It’s an effortless way to customize your dessert for any occasion.
- Sprinkle Bleeding: Be aware that some colored sprinkles, especially darker reds or blues, may experience a minimal amount of color bleeding into the white fudge base. This is generally quite minor and often adds to the charm, creating a watercolor effect. I’ve found minimal bleeding with most standard sprinkles, not enough to detract from the fudge’s beautiful appearance.
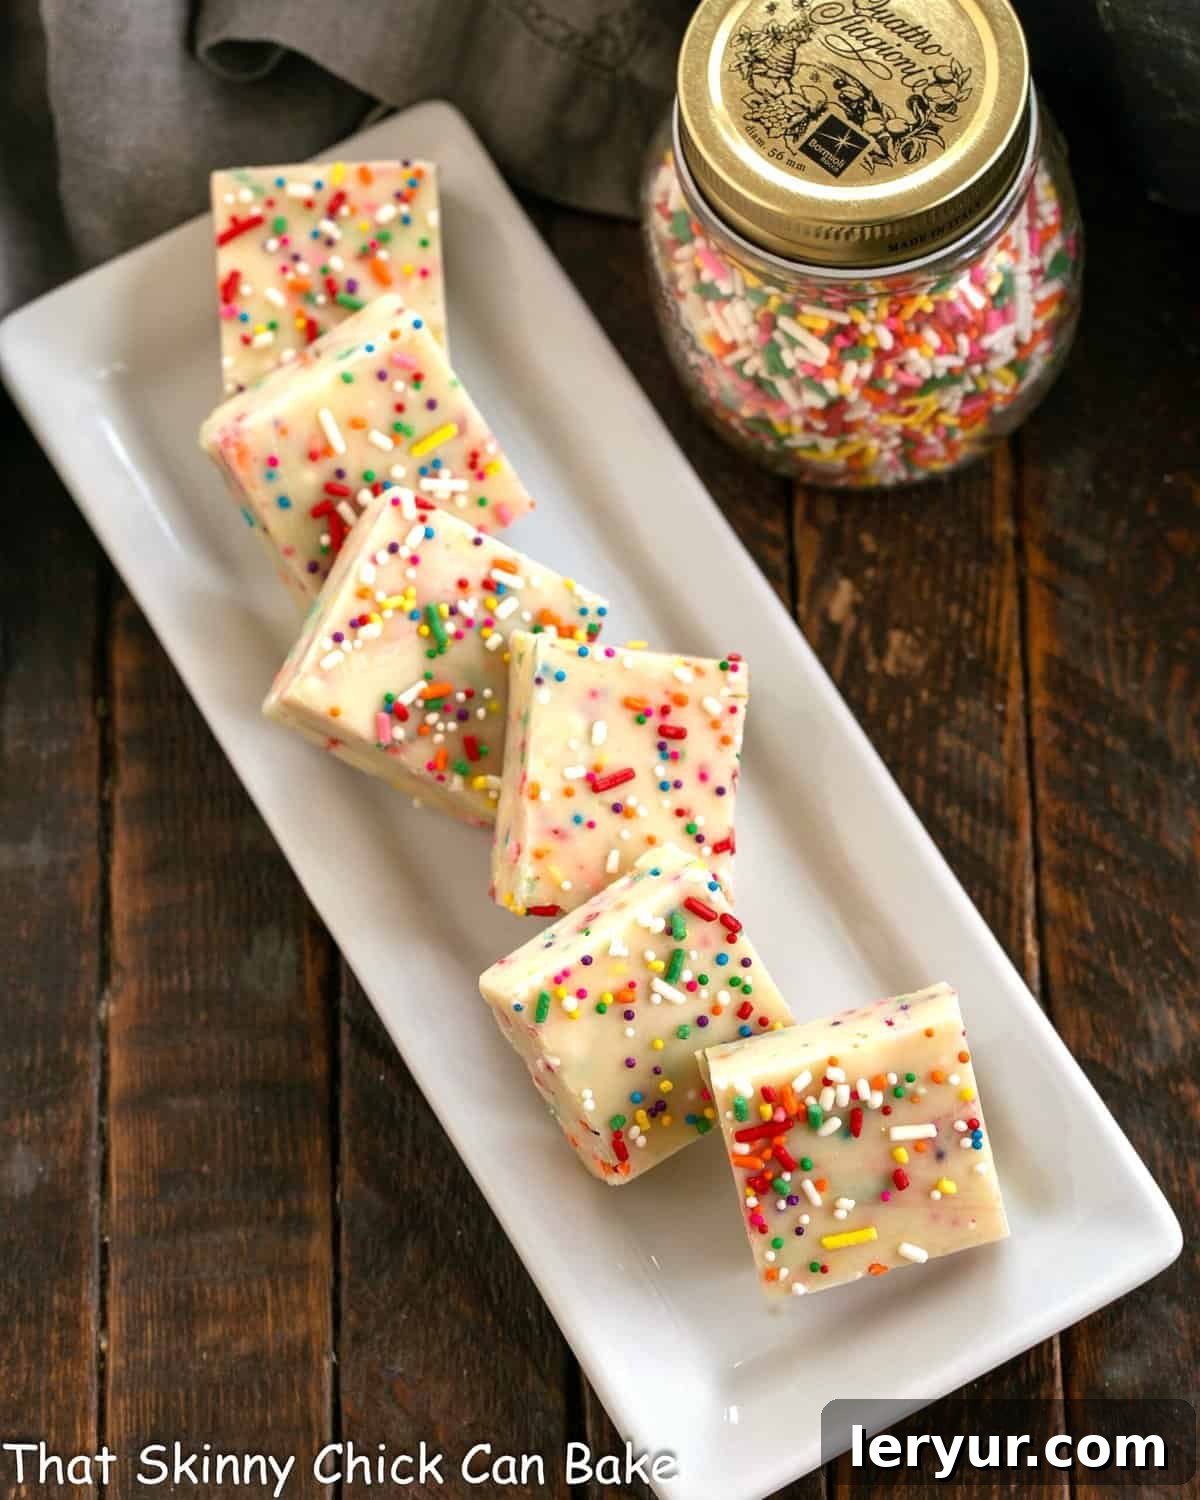
- Achieving Clean Cuts: For perfectly neat squares, ensure your fudge is thoroughly chilled and firm. Use a sharp knife that has been run under hot water and wiped dry before each cut. This creates clean, crisp edges. This recipe typically yields 64 1-inch squares, but you can certainly cut them larger or into different shapes if desired.
- Storage and Shelf Life: Store your homemade fudge in an airtight container at room temperature for up to a week, or in the refrigerator for up to two weeks. For longer storage, fudge freezes beautifully for up to 3 months. Wrap individual pieces or the whole slab tightly in plastic wrap, then place in a freezer-safe bag or container. Thaw in the refrigerator or at room temperature.
- Creative Garnishing Ideas: Beyond the initial sprinkle topping, get creative! You could melt a small amount of extra white chocolate and drizzle it decoratively back and forth over the set fudge squares. For a truly decadent touch, pipe a small swirl of vanilla buttercream frosting onto each square and top with even more sprinkles for an explosion of color and flavor.
- Edible Gift Idea: This white chocolate sprinkle fudge makes an absolutely wonderful homemade gift. Package it in pretty boxes or cellophane bags tied with a festive ribbon. It’s a thoughtful and delicious present that friends and family will adore.
- Don’t Overcook: Unlike some traditional fudge recipes that require precise temperature readings and extended cooking, this condensed milk fudge sets beautifully with minimal cooking. Once the chocolate chips are melted and smooth, and the cake mix is incorporated, remove it from the heat promptly. Overcooking can lead to a grainy texture.
Frequently Asked Questions About Homemade Fudge
“Funfetti” is a trademarked brand name belonging to Pillsbury, specifically for their cake mixes and related products that include colorful sprinkles. When generally describing desserts with sprinkles, it’s best to use the more generic term “confetti” or “sprinkle dessert” to avoid trademark infringement.
Yes, for this particular quick fudge recipe, sweetened condensed milk is absolutely essential. Many easy, no-fail fudge recipes rely on the combination of sweetened condensed milk and chocolate chips to achieve a perfect set and creamy texture without requiring extensive cooking or candy thermometers. There is no direct substitute for a can of sweetened condensed milk in this recipe.
The possibilities are endless! Beyond adding more sprinkles over the surface of the fudge before it sets, you can melt some additional white chocolate and drizzle it back and forth for an elegant touch. For a more indulgent garnish, pipe a small swirl of vanilla buttercream frosting onto each fudge square, then top with even more sprinkles! You could also press small candies, mini chocolate chips, or edible glitter onto the surface.
While this recipe specifically calls for white chocolate chips to achieve the “white cake” look and flavor, you can certainly adapt it with other chocolate chip varieties. Using milk chocolate or semi-sweet chocolate chips would result in a chocolate cake batter fudge. Just ensure you use high-quality chips that melt smoothly for the best results.
The most common reason for fudge not setting is using evaporated milk instead of sweetened condensed milk, or using low-quality white chocolate chips that lack sufficient cocoa butter to firm up. Ensure your ingredients are correct and that you’ve chilled the fudge for the recommended amount of time, preferably in the refrigerator.
You May Also Love These Dessert Recipes
- Rainbow Pancakes from I Am Baker
- Rainbow Sprinkle Cookies
- Jello Rainbow Salad
- Chocolate Marshmallow Fudge
- Oreo Fudge
- Stained Glass Window Fudge
- Discover more of the Best Dessert Recipes
Stay in touch through social media! Follow us on Instagram, Facebook, and Pinterest for more delightful recipes and baking inspiration. Don’t forget to tag us when you try one of our recipes! And if you love the results, please consider leaving a 5-star rating and comment below.
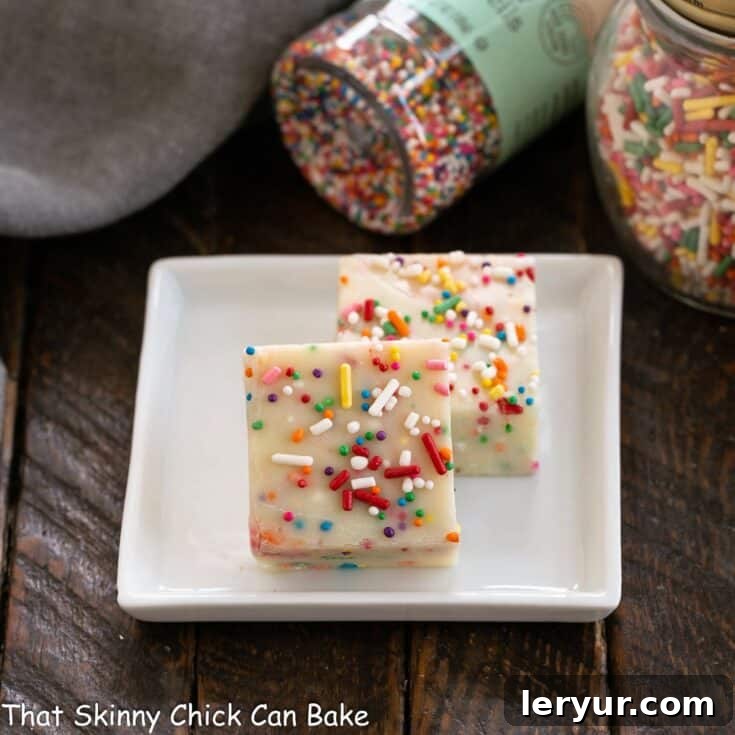
White Chocolate Fudge Recipe with Sprinkles
10 minutes
2 minutes
12 minutes
64 Squares
A super easy white chocolate fudge that tastes wonderfully like cake and is bursting with colorful sprinkles!
Ingredients
- 1 14-ounce can sweetened condensed milk
- 2 cups white chocolate chips (Ghirardelli recommended)
- 2 tablespoons butter
- ½ cup white cake mix
- 1 teaspoon vanilla extract (optional, for whiter fudge)
- ¼ cup multicolored sprinkles, plus more for garnishing
Instructions
- Line an 8×8-inch pan with non-stick foil or parchment paper, leaving an overhang on the sides for easy removal. Set aside.
- In a medium saucepan, combine the sweetened condensed milk, white chocolate chips, and butter.
- Heat over medium-low to medium heat, stirring frequently, until the chocolate chips are completely melted and the mixture is smooth and well combined. Do not boil or scorch.
- Remove the saucepan from the heat. Stir in the white cake mix and vanilla extract (if using) until thoroughly combined and smooth.
- Let the mixture cool for a moment off the heat, then gently fold in ¼ cup of sprinkles.
- Scrape the fudge mixture into the prepared pan and quickly smooth the top surface with an offset spatula or the back of a spoon.
- Garnish with additional sprinkles over the top, if desired, before the fudge begins to harden.
- Chill the fudge in the refrigerator for at least 2-3 hours, or until completely firm, before cutting.
Notes
Use the foil or parchment paper overhang to easily lift the chilled fudge from the pan to a cutting board. For the cleanest cuts, use a sharp knife that has been run under hot water and wiped dry before each slice. This fudge can be stored in an airtight container at room temperature for up to a week, or in the refrigerator for up to two weeks. It also freezes well for up to 3 months.
Recommended Products
As an Amazon Associate and member of other affiliate programs, I earn from qualifying purchases.
- Ghirardelli White Chocolate Chips
- Nonstick Foil
- 8 x 8-inch Baking Pan
Nutrition Information:
Yield:
64
Serving Size:
1
Amount Per Serving:
Calories: 68
Total Fat: 3g
Saturated Fat: 2g
Trans Fat: 0g
Unsaturated Fat: 1g
Cholesterol: 5mg
Sodium: 24mg
Carbohydrates: 9g
Fiber: 0g
Sugar: 9g
Protein: 1g
This nutritional information is provided as a courtesy and is an estimate only. It is derived from online calculators and may vary based on specific product brands and preparation methods. To obtain the most accurate nutritional data, we recommend calculating it with the actual ingredients used in your recipe. You are solely responsible for ensuring the accuracy of any nutritional information relied upon.