
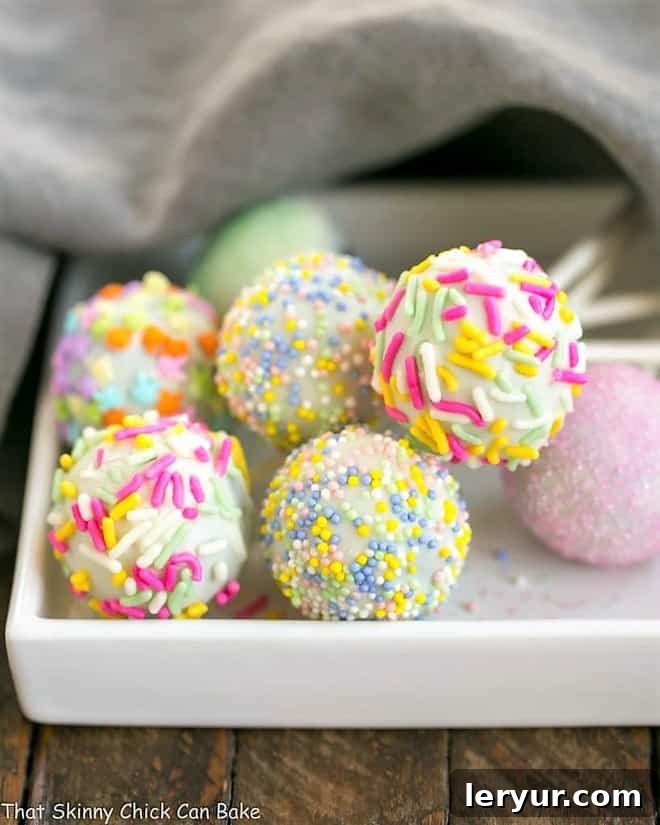
Easter Cake Pops are the ultimate festive holiday treat, effortlessly made with just four simple ingredients! While perfectly themed for Easter with colorful sprinkles, their versatile nature means you can easily switch up the decorations to celebrate any occasion throughout the year. These delightful no-bake dessert bites are incredibly easy to prepare, making them a fantastic project for both seasoned bakers and kitchen novices alike, and a guaranteed crowd-plepleaser for all ages.
This **No-Bake Cake Pops Recipe** stands out as the ideal confection for any Spring gathering, from Easter brunches to Mother’s Day celebrations, or even casual get-togethers. They are not only incredibly delicious but also require no oven time, as their luscious centers are crafted from crushed Oreos and cream cheese. The simplicity of their preparation, combined with their charming appearance, makes them a highly sought-after dessert that consistently impresses without demanding hours in the kitchen.
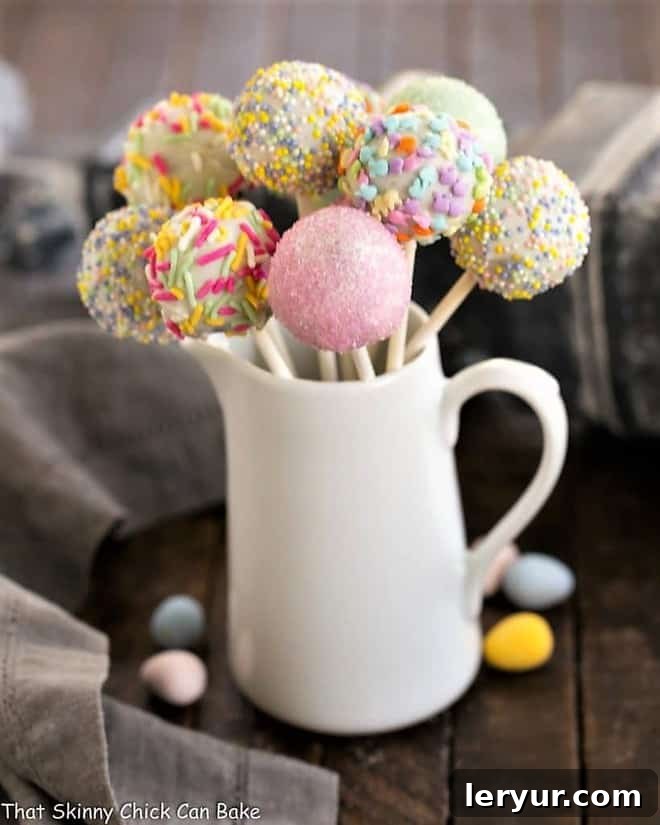
Why These Easy No-Bake Cake Pops Are a Must-Try
If you’re searching for a dessert that combines ease with irresistible charm, look no further. Our homemade cake pops offer a delightful experience for both the maker and the eater. Here’s why these treats deserve a spot on your next celebration table:
- **Effortless Preparation:** These simple homemade cake pops are an absolute breeze to prepare. Forget complicated baking steps; the process involves just a few straightforward actions that yield impressive results. It’s an ideal recipe for busy schedules or when you want a show-stopping dessert without the fuss.
- **Simple & Fun Process:** The magic begins by whirling together Oreos and cream cheese in a food processor until a cohesive, delectable mixture forms. This mixture is then rolled into perfect bite-sized balls, which are subsequently dipped into a smooth, melted chocolate coating. To ensure your cake pop journey is as smooth as possible, we’ve included expert tips to guide you through each stage, particularly the dipping process which can sometimes be tricky for beginners.
- **Unmatched Versatility for Any Event:** One of the greatest advantages of this recipe is its incredible adaptability. By simply changing the color and style of your sprinkles, these cake pops can be transformed to suit any holiday, theme, or special occasion. Imagine vibrant rainbow sprinkles for a birthday party, spooky designs for Halloween, or elegant gold dust for a New Year’s Eve bash. This allows you to have a go-to recipe that always feels fresh and appropriate.
- **Kid-Friendly Activity:** The no-bake nature and simple steps make this an excellent recipe to involve children. From crushing Oreos (under supervision!) to rolling the balls and, of course, adding the sprinkles, kids will love contributing to and enjoying these treats.
While the dipping might require a touch of patience and practice – sometimes leading to what I affectionately call “charming rejects” – the end result is always a universally loved chocolate bonbon on a stick. My family adores these, imperfections and all, proving that homemade goodness always triumphs.
Expert Tips for Perfect Cake Pops Every Time
Achieving perfectly coated, beautifully decorated cake pops is easier than you might think with these insider tips. Even if the dipping process feels like an art form, these guidelines will help you create professional-looking treats that will impress everyone.
- **The Ideal Filling Base:** For the rich and decadent center of these cake pops, I use the same simple, tried-and-true filling as my popular Oreo Truffles. This involves one package of regular Oreos and an 8-ounce block of full-fat cream cheese. Be mindful that package sizes of Oreos can sometimes vary; if your package is slightly less than 15 ounces, simply add a couple of extra Oreos to your food processor to ensure the perfect texture and consistency for your cake pop mixture.
- **PRO-Tip: Temperature Control is Key:** If, after mixing, your Oreo and cream cheese mixture feels too soft or sticky to roll into balls, don’t fret! Simply refrigerate it for 20-30 minutes until it firms up slightly. This will make rolling much easier and less messy. You can also refrigerate the rolled Oreo balls while you prepare your dipping chocolate and organize your sprinkles. However, I strongly advise against freezing your Oreo balls just before dipping. The extreme temperature difference will cause the chocolate coating to harden almost instantly, making it difficult for sprinkles to adhere properly and potentially leading to a cracked coating.
- **Secure Sticks with Chocolate Glue:** To prevent your cake pops from slipping off their sticks, a crucial step is to dip the tip of each lollypop stick into a small amount of melted chocolate before inserting it halfway into each Oreo ball. This creates a secure “glue” that binds the stick to the cake pop, providing stability during dipping and handling. While I’ve occasionally skipped this step, using the chocolate glue consistently ensures a more reliable and less frustrating experience.
- **Choosing the Right Coating:** For the smoothest, most professional-looking finish, I highly recommend using Ghirardelli white chocolate melts or other high-quality candy melts instead of standard white chocolate chips or bars. Melting wafers are specifically formulated to melt smoothly, coat evenly, and set quickly without “blooming” (the grayish streaks that can appear on cooled chocolate due to improper tempering). While blooming is less noticeable with white chocolate, using wafers guarantees a superior result.
- **The Smart Dipping Vessel:** To maximize the efficiency of your dipping process and ensure your cake pops are fully submerged in chocolate, use a liquid measuring cup (like a 2-cup Pyrex measuring cup) to melt your chocolate wafers. Its tall, narrow shape creates a deeper pool of chocolate compared to a wide mixing bowl, making it easier to fully coat each cake pop without using an excessive amount of melting chocolate.
- **Decorate Instantly with Sprinkles:** The key to vibrant, well-adhered sprinkles is speed. Chocolate melts dry incredibly fast once removed from the warm dipping bath. Therefore, it’s essential to add your colored sugars or festive sprinkles immediately after dipping each individual cake pop. Have your sprinkles ready and waiting beside your dipping station. I often find unique Easter sprinkles at stores like Target, but you can always find a fantastic selection of seasonal sprinkles on Amazon.
Detailed Ingredient Notes for Perfect Cake Pops
Understanding the role of each ingredient and selecting the right products can make all the difference in the success of your Easter Cake Pops. Here’s a closer look at what you’ll need:
- Oreos: You’ll need one standard package, typically around 15 ounces. If you encounter a package that is slightly smaller due to manufacturing changes, simply compensate by adding a couple of extra cookies from another package to ensure you have the full 15 ounces. The classic chocolate Oreo works best for this recipe, providing the foundational flavor and texture for the cake pop center. You can experiment with different Oreo flavors for unique twists, like Golden Oreos for a vanilla base or mint Oreos for a holiday variation.
- Cream Cheese: An 8-ounce brick of full-fat cream cheese is essential. For optimal mixing and a smooth, lump-free filling, ensure your cream cheese is at room temperature. This will allow it to blend seamlessly with the crushed Oreos in your food processor, creating a pliable and easy-to-roll mixture. Avoid using low-fat or whipped cream cheese, as their different consistencies can alter the final texture of your cake pop centers.
- White Melting Wafers: I highly recommend using 1 ½ packages of Ghirardelli White Melting Wafers (approximately 18 ounces total). These wafers are designed to melt smoothly and provide a flawless, stable coating that hardens quickly without cracking or requiring tempering. While other brands of candy melts or almond bark can be used, Ghirardelli offers a superior flavor and texture that elevates the final product.
- Lollypop Sticks: You’ll need about 36-42 lollypop sticks, which are typically 4 or 6 inches long. These can be easily found at most craft stores, such as Michael’s or Jo-Ann Fabrics, or in the baking aisle of larger supermarkets. Choose sticks that are sturdy enough to support the weight of the cake pop.
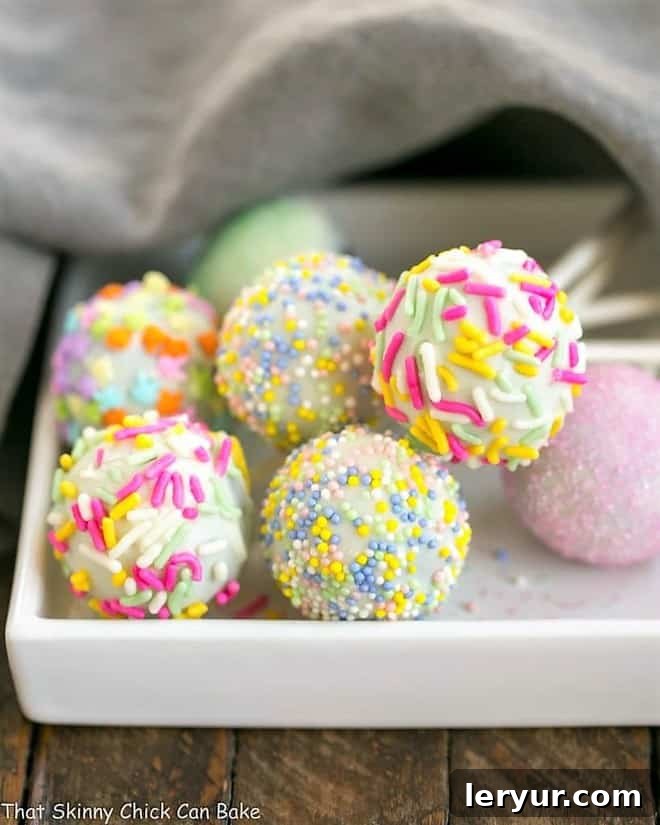
- Sprinkles: Sprinkles are optional but highly encouraged for garnish, especially for holiday-themed treats. Select colorful Easter-themed sprinkles, pastel jimmies, or nonpareils to add a festive touch. The type of sprinkle can drastically change the look of your cake pops, making them adaptable for various celebrations.
Frequently Asked Questions About Cake Pops
Whether you’re a first-timer or looking to perfect your cake pop technique, these common questions and detailed answers will help you troubleshoot and succeed.
The secret to perfectly dipped cake pops lies in several key steps. First, ensure your cake balls are thoroughly chilled, ideally for at least one hour or even overnight in the refrigerator. This firmness prevents them from falling apart and helps the coating set quickly. For added security, dip the lollypop stick tip into a little melted chocolate before inserting it into the cake ball. Second, use a quality candy coating or melting wafers (like Ghirardelli) rather than regular chocolate, which can “bloom” or create streaks as it cools unless properly tempered. Third, use a deep, narrow vessel (like a liquid measuring cup) for your melted coating to ensure full submersion. Finally, don’t make your cake balls too large; about 1-inch in diameter works perfectly, as larger balls are heavier and more prone to falling off the stick or cracking the coating.
Cake balls typically fall apart during dipping for a few common reasons. The most frequent culprit is making them too large; excessively big balls are heavier and create more leverage on the stick, leading to breakage. Aim for consistently sized 1-inch balls. Another reason is insufficient chilling; if the balls are too soft or warm, they won’t hold their shape in the warm coating. Ensure they are well-chilled and firm. Lastly, improper stick insertion can cause issues. Always use a dab of melted chocolate as “glue” when inserting the stick, and push it in about halfway to provide adequate support.
To maintain their freshness, texture, and appearance, store your finished cake pops in an airtight container in the refrigerator. If they are decorated with delicate sprinkles or designs, consider arranging them in a single layer or placing them upright in a container with a fitted lid to prevent smudging. You can also stand them upright in a block of styrofoam or a tall glass for optimal display and preservation.
When stored properly in an airtight container in the refrigerator, your homemade cake pops will stay deliciously fresh for up to a week. The cream cheese in the filling requires refrigeration, so it’s important not to leave them at room temperature for extended periods. For longer storage, you can freeze undecorated cake pop balls for up to one month in an airtight container, then thaw and dip them when ready to serve.
Absolutely! While this recipe specifically uses Oreos for a no-bake convenience, traditional cake pops are made from crumbled baked cake mixed with frosting. If you prefer to use real cake, simply bake a cake from a box mix or your favorite recipe, let it cool completely, then crumble it into fine crumbs. Mix the crumbs with a few spoonfuls of frosting until you achieve a moldable consistency. The dipping and decorating steps would then be the same as this recipe.
Cracked chocolate coating is a common issue often caused by extreme temperature differences. If your cake balls are too cold (e.g., straight from the freezer) and dipped into warm chocolate, the sudden temperature shock can cause the coating to crack as it sets. Ensure your cake balls are chilled in the refrigerator, not the freezer, for about an hour before dipping. Also, make sure your melted chocolate isn’t too hot, as this can also contribute to cracking and a too-thin coating. It should be just warm enough to be fluid.

Explore More Delicious Desserts You’ll Love
If you enjoyed making these Easter Cake Pops, you’ll love exploring these other delightful recipes perfect for any occasion. From elegant treats to simple indulgences, there’s something here for every sweet tooth:
- For an elegant and unique dessert perfect for a bridal shower or special event, try these luscious White Chocolate Dipped Cheesecake Pops. They offer a sophisticated twist on the classic cake pop.
- If you’re a fan of the Oreo and cream cheese combination, then these indulgent Oreo Truffles are a must-make. They were so popular, they even made their way down to my son’s college apartment!
- Embrace the traditions of Easter with this charming Fudge Lamb, a required and beloved treat for the holiday table.
- Indulge in layers of creamy goodness with a refreshing Berry Tiramisu, perfect for a light yet decadent dessert.
- Master the art of classic baking with a recipe for Perfect Vanilla Cheesecake, a timeless dessert that always impresses.
- For more creative inspiration, check out these 10 Creative Cake Pops from Living Locurto, offering unique ideas for themes and designs.
- Learn a stunning decorating technique with the Ruffle Cake Pop Tutorial from Pint Sized Baker, adding an elegant touch to your creations.
- Plus, explore all my Holiday Recipes for a vast collection of seasonal delights and celebratory treats for every time of year!
Stay connected and share your culinary adventures through social media! Follow me on Instagram, Facebook, and Pinterest. Don’t forget to tag me when you try one of my delicious recipes! If you love the results and enjoyed creating these delightful treats, please consider giving it a 5-star rating in the recipe card below.
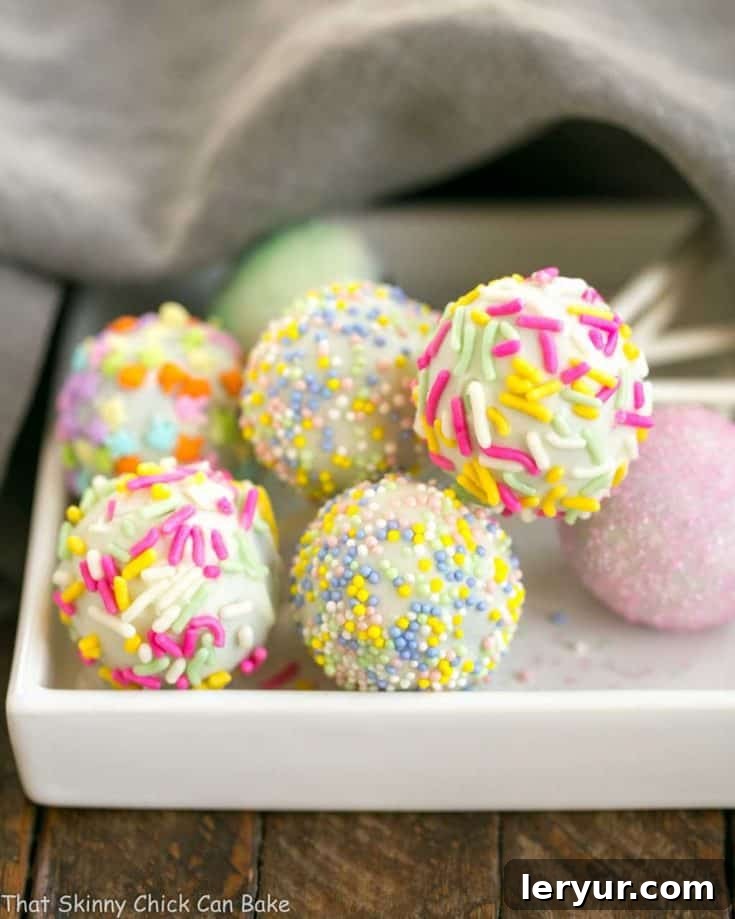
No-Bake Easter Cake Pops
30 minutes
2 minutes
32 minutes
18 delicious cake pops
Easter Cake Pops are a remarkably easy and festive no-bake holiday treat, perfect for any Spring celebration. Made with just four core ingredients, these delightful dessert bites feature a rich Oreo and cream cheese center, coated in smooth white chocolate and adorned with colorful sprinkles. This recipe is designed for simplicity and maximum enjoyment, offering a versatile treat that can be customized for any occasion.
Ingredients for Easter Cake Pops
- 15 ounces Oreos (classic chocolate sandwich cookies)
- 8 ounces of full-fat cream cheese, softened at room temperature
- 18 ounces White Melting Wafers (such as 1 ½ packages of Ghirardelli White Melting Wafers for best results)
- 36-42 lollypop sticks (4-inch or 6-inch)
- Festive sprinkles, optional, for colorful garnish
Step-by-Step Instructions
- **Prepare Oreo Crumbs:** Place the entire package of Oreos into a food processor. Process until fine, uniform crumbs form. Ensure there are no large chunks remaining.
- **Combine with Cream Cheese:** Cut the softened cream cheese into 6-8 smaller pieces and add them directly into the food processor with the Oreo crumbs.
- **Form the Mixture:** Process the mixture again until it is thoroughly combined and forms a cohesive, slightly sticky dough-like consistency, typically about 1-2 minutes.
- **Roll into Balls:** Using a small cookie scoop or your hands, shape the mixture into tightly packed, uniform 1-inch balls. Place these balls onto a baking sheet lined with parchment paper.
- **Chill Thoroughly:** Refrigerate the Oreo balls for at least one hour, or preferably overnight, until they are firm. This crucial step prevents them from falling apart during dipping.
- **Melt White Wafers:** Melt the Ghirardelli Melting Wafers according to the package directions. For best results, use a deep, narrow liquid measuring cup and microwave in 30-second intervals, stirring until smooth and fluid.
- **Dip and Coat:** Dip the tip of each lollypop stick into a little melted chocolate before inserting it halfway into an Oreo ball. Then, dip each entire ball into the melted white coating, turning gently to ensure it’s fully covered. Allow any excess coating to drip off.
- **Garnish Immediately:** Garnish with your chosen sprinkles *immediately* after dipping each cake pop, before the coating has a chance to harden. Place the finished cake pops on a parchment-lined baking sheet to cool and set completely.
- **Final Chill & Serve:** Refrigerate the cake pops for about an hour before serving to ensure the coating is fully set and the centers are firm. Store any leftovers covered in the refrigerator.
Recipe Notes & Tips
*If your Oreo package is slightly less than 15 ounces, add a couple of extra Oreos to the food processor to reach the desired weight for optimal consistency.
*For serving suggestions, consider placing cake pops upright in small shot glasses or a styrofoam block for an elegant presentation.
*The stated serving size is 2 cake pops per individual.
Recommended Products for Easy Cake Pop Making
As an Amazon Associate and member of other affiliate programs, I earn from qualifying purchases, helping to support more delicious recipes.
- Reynolds Cookie Baking Sheets Non-Stick Parchment Paper
- USA Pan Bakeware Half Sheet Pan
- Efficient Food Processor
Nutrition Information:
Yield:
18
Serving Size:
1
Amount Per Serving:
Calories: 341Total Fat: 14gSaturated Fat: 6gTrans Fat: 0gUnsaturated Fat: 7gCholesterol: 13mgSodium: 251mgCarbohydrates: 52gFiber: 1gSugar: 28gProtein: 3g
HOW MUCH DID YOU LOVE THIS RECIPE?
Please leave a comment on the blog or share a photo on Pinterest