
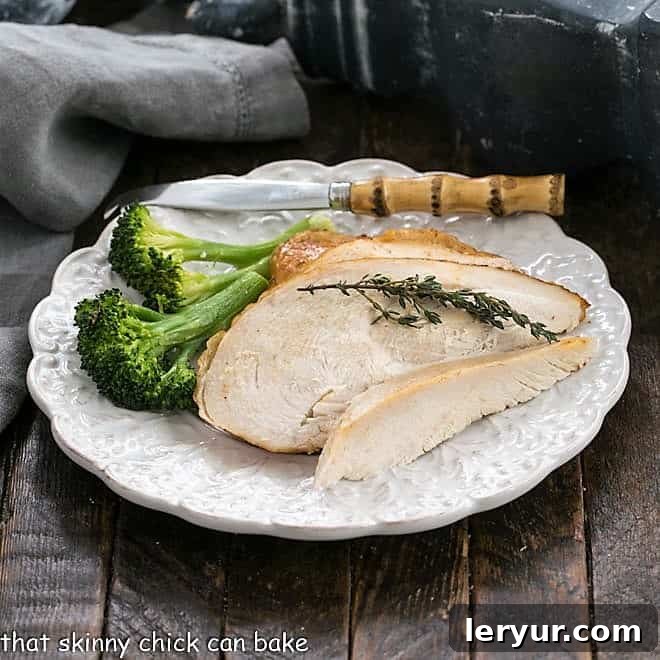
Experience the unparalleled flavor and tenderness of a perfectly roasted Rotisserie Style Chicken, prepared right in your own kitchen oven! Bid farewell to artificial ingredients and embrace a juicy, aromatic, and incredibly satisfying meal that promises to become a family favorite.
There’s nothing quite like the aroma of a whole chicken slow-roasting to perfection, filling your home with an inviting scent. This recipe for Homemade Rotisserie Style Chicken delivers an exceptional culinary experience, rivaling any store-bought option. With our carefully crafted Rotisserie Chicken Seasoning, every bite is infused with deep, savory notes, making it one of the Best Roast Chicken Recipes you’ll ever master. Prepare to be delighted – you might even want to roast two at once! One for an unforgettable dinner, and another for a week’s worth of delicious leftovers, perfect for transforming into hearty soups, comforting casseroles, fresh chicken salads, savory tacos, or quick sandwiches.
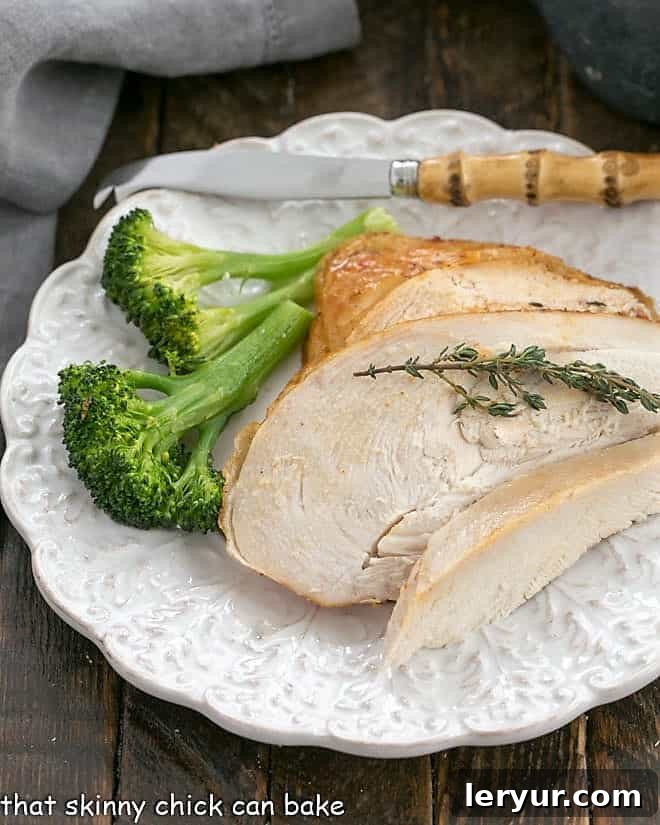
Why You Need This Homemade Rotisserie Chicken Recipe
Ditch the deli counter and discover the myriad benefits of crafting your own rotisserie-style chicken at home. This recipe isn’t just about cooking; it’s about control, quality, and a superior flavor experience that you simply can’t get from pre-made options.
- Unmatched Flavor Control & Health Benefits: Unlike commercially prepared rotisserie chickens, which often contain excessive sodium, preservatives, and artificial flavors, this homemade version puts you in the driver’s seat. You have complete control over the amount and quality of salt, spices, and other ingredients, allowing you to tailor the flavor profile to your preference and ensure a healthier meal for your family. It’s an ideal choice for those managing dietary restrictions or simply seeking a cleaner, more wholesome meal.
- Effortless Preparation & Meal Planning Potential: Despite its gourmet taste, this recipe is surprisingly simple to execute. The majority of the work involves mixing a straightforward spice rub and allowing time for it to work its magic. What’s more, you can easily prepare a double or triple batch of the spice rub in advance, storing it for future use. This foresight makes subsequent chicken roasts even quicker, streamlining your meal prep and making weeknight dinners a breeze. The initial dry brining process also means less hands-on time later!
- Guaranteed Tender, Juicy, and Flavorful Results: The combination of our expertly blended dry rub and a gentle, low-and-slow roasting technique yields truly remarkable results. The chicken emerges from the oven with incredibly moist and tender meat that practically falls off the bone, encased in a beautifully seasoned, golden-brown skin. Each mouthful is bursting with a complex, savory flavor that will impress even the most discerning palates. This method ensures maximum moisture retention, preventing the dry, sometimes rubbery texture associated with overcooked chicken.

Mastering Your Oven Rotisserie Chicken: Essential Tips for Success
Achieving that coveted rotisserie-quality chicken at home is simpler than you think. You don’t need fancy equipment, just a few key techniques and a little patience. Follow these expert tips to ensure your homemade roasted chicken is consistently juicy, tender, and incredibly flavorful:
- The Power of the Dry Brine (Spice Rub): The cornerstone of this recipe is the aromatic spice rub, which acts as a dry brine. There’s no need for special rotisserie equipment; this robust blend of seasonings is where the magic truly happens. By thoroughly coating the chicken with this mix of salt, paprika, multiple peppers, thyme, garlic, and onion powder, and allowing it to rest for at least 6 hours (or ideally overnight), you enable the flavors to deeply infuse into the meat. The salt in the rub draws moisture out of the chicken, then reabsorbs it, carrying the dissolved spices deep into the muscle fibers, resulting in a more seasoned and tender bird.
- Flavor & Moisture Boost with an Onion: Don’t overlook the simple yet effective step of stuffing the chicken’s cavity with a quartered onion. As the chicken roasts, the onion slowly releases its aromatic compounds and moisture, further enhancing the internal flavor of the chicken and contributing to its overall juiciness. It’s a natural way to add depth without overpowering the delicate chicken flavor.
- The Art of Low-and-Slow Roasting: The secret to an unbelievably moist and tender chicken lies in roasting it at a lower temperature for an extended period. By setting your oven to a gentle 250ºF (120ºC) and cooking for 3½ hours or more, you allow the chicken to cook evenly without drying out the exterior. This “low-and-slow” technique gently breaks down tough connective tissues, rendering the meat incredibly succulent while still achieving that beautiful golden-brown skin without scorching it.
- Optional Basting for Ultimate Crispness: While the low-and-slow method helps keep the chicken moist, an optional basting step can elevate its crispness and add another layer of richness. Once the chicken comes out of the oven, you can spoon some of the flavorful pan juices over the skin, or for an extra luxurious touch, carefully rub a tablespoon of unsalted butter across the hot skin. The residual heat will melt the butter, creating a beautiful sheen and enhancing the skin’s texture. Remember, basting during the cooking process can sometimes lower the oven temperature and prolong cooking time, so it’s best reserved for after the roast.
My family consistently raves about this meal. Its comforting familiarity combined with its exceptional flavor makes it a true crowd-pleaser. I even shared one with a friend needing a break from cooking, and her delight was confirmation of its universal appeal! In fact, it’s become a standard practice for me to roast two chickens at a time now. The abundance of succulent leftovers is a gift that keeps on giving, opening up a world of culinary possibilities for future meals.
How to Make Homemade Rotisserie Style Chicken: A Step-by-Step Guide
Creating this perfectly tender and flavorful rotisserie-style chicken at home is a rewarding process. Follow these straightforward steps to achieve a truly impressive meal:
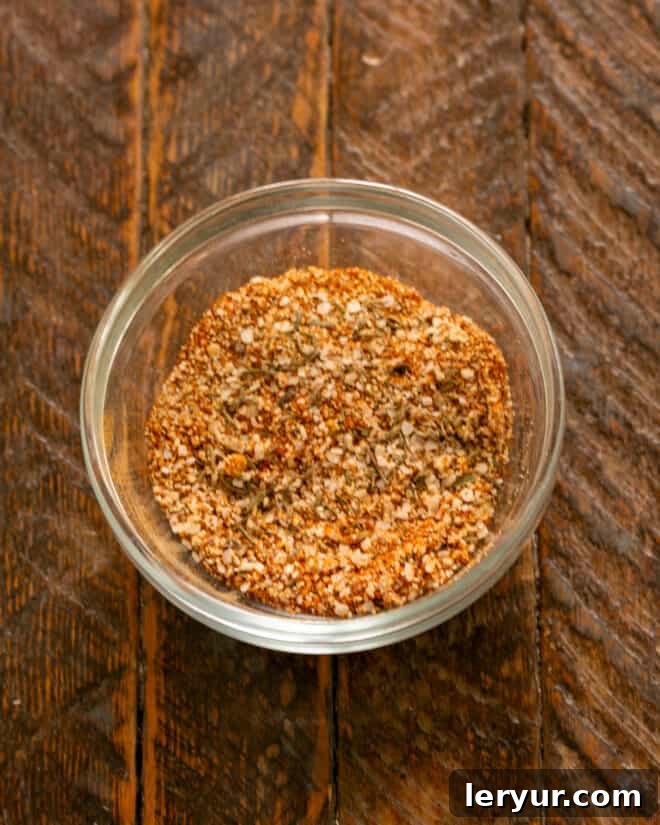
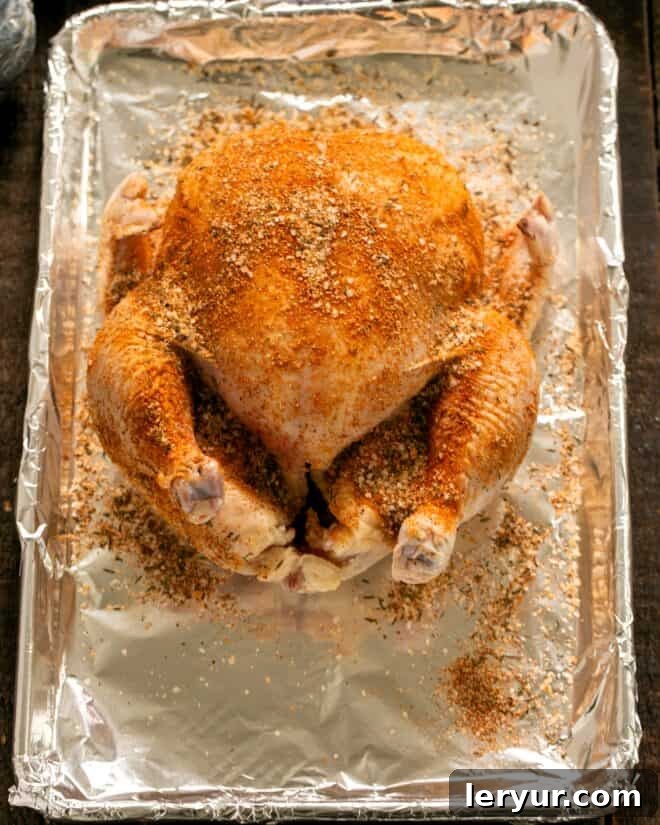

Step 1: Craft Your Signature Spice Rub. In a small bowl, combine all the dry seasoning ingredients: kosher salt, paprika, onion powder, dried thyme, white pepper, cayenne pepper, and garlic powder. Mix them thoroughly until they form a consistent blend. This perfectly balanced rub is the heart of your rotisserie chicken’s incredible flavor.
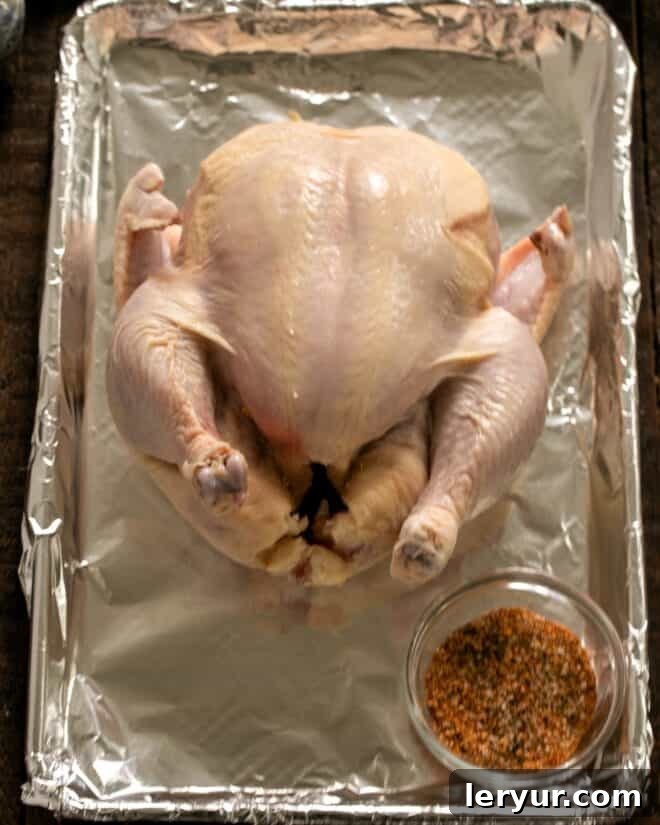
Step 2: Prepare and Season the Chicken. Begin by placing your whole roasting chicken on a clean, rimmed baking sheet. Using paper towels, meticulously pat the entire surface of the chicken dry – inside and out. This crucial step helps create crispy skin. Once dry, generously apply the prepared spice rub all over the exterior of the chicken, ensuring every crevice is covered. Don’t forget to toss some of the rub inside the cavity as well for an extra layer of flavor.
Step 3: Dry Brine for Maximum Flavor. Loosely wrap the seasoned chicken in a double layer of plastic wrap, ensuring it’s well-sealed. Place the wrapped chicken back on the rimmed baking sheet to catch any moisture that may be released during the resting period. Transfer it to the refrigerator for a minimum of 6 hours; however, for the most profound flavor penetration and tender texture, allowing it to dry brine overnight (12-24 hours) is highly recommended. This process is key to achieving that deep, infused taste.
Step 4: Slow Roast to Perfection. Approximately 30-45 minutes before you’re ready to roast, remove the chicken from the refrigerator and discard the plastic wrap, allowing it to come closer to room temperature. Preheat your oven to a low 250ºF (120ºC). Insert a medium onion (quartered) or onion halves into the chicken’s cavity. Place the chicken directly into a roasting pan, breast-side up, and slow roast uncovered until it reaches an internal temperature of 180ºF (82ºC) when a meat thermometer is inserted into the thickest part of the thigh, avoiding the bone. This typically takes about 3½ hours, but the exact time will vary based on your chicken’s size and your oven’s calibration. The low temperature ensures a moist interior while allowing the skin to slowly crisp.
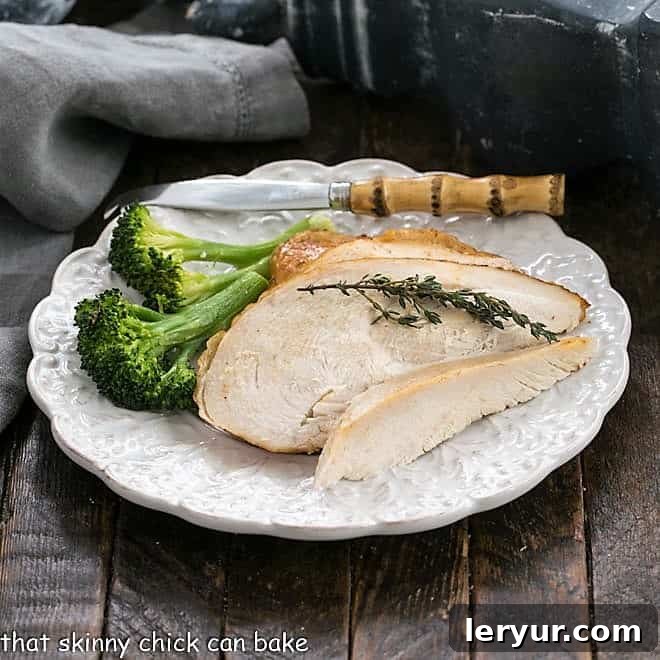
Step 5: Rest, Slice, and Serve. Once cooked, remove the chicken from the oven and let it rest, tented loosely with foil, for at least 10-15 minutes before carving. This resting period allows the juices to redistribute throughout the meat, ensuring every slice is incredibly juicy. Then, carve your perfectly roasted chicken and serve immediately with your favorite sides!
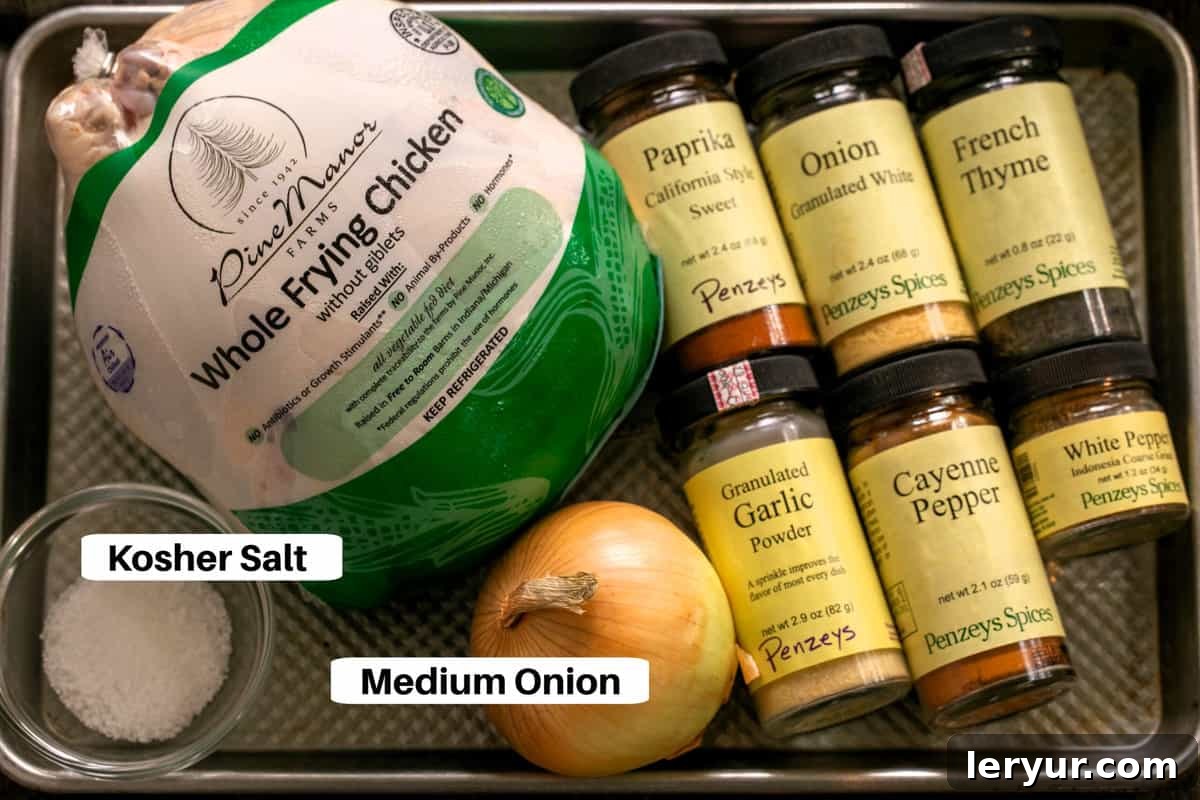
Key Ingredients for the Best Oven-Roasted Rotisserie Chicken
The secret to an outstanding rotisserie-style chicken starts with high-quality ingredients and a balanced seasoning blend. Our specifically designed rotisserie chicken seasoning ensures every bite is bursting with flavor. Remember, the dry brine (rub) needs to be generously applied well before roasting for optimal results. Any leftover seasoning can also be placed inside the internal cavity before you add the onion, further enhancing the chicken’s aromatics.
- Essential Kitchen Staples for the Rub:
- Kosher Salt: This is critical! Do NOT substitute with table salt, as its finer texture and higher density will make the chicken excessively salty. Kosher salt provides a better brining effect and a more balanced seasoning.
- Freshly Ground Black Pepper: For a pungent, earthy kick.
- Garlic Powder: Offers a consistent garlic flavor without the risk of burning fresh garlic.
- Dried Thyme: Contributes a delicate, earthy, and slightly floral note that complements poultry beautifully.
- Smoked Paprika: Provides a rich, vibrant color and a mild, smoky undertone, enhancing the “rotisserie” feel.
- The Whole Roasting Chicken: Aim for a chicken weighing between 3½ and 4½ pounds. This size is ideal for even cooking using the low-and-slow method. Always remember to remove the giblets and neck from the chicken’s cavity before seasoning.
- Flavor Enhancers:
- Onion Powder: Adds a foundational, sweet onion flavor that rounds out the spice blend.
- White Pepper: Offers a subtle, slightly sharper heat than black pepper, contributing to the overall complexity without visible flecks.
- Cayenne Pepper: Provides a gentle warmth and a hint of spice, elevating the flavor profile. Adjust to your preference for more or less heat.
- Medium Onion (for cavity): Quartered, it releases steam and aromatics internally, keeping the chicken moist and fragrant from the inside out.
Frequently Asked Questions About Roasting Chicken
Here are answers to some common questions about making this delicious rotisserie-style chicken at home:
What is a Rotisserie?
A rotisserie is a cooking method and often, a piece of equipment that cooks food, typically meat, by rotating it slowly over or next to a heat source. The food is typically skewered on a spit and held in place with prongs. This continuous rotation ensures even cooking and allows the meat to self-baste in its own juices, resulting in a beautifully moist interior and a perfectly crisped exterior. While many grocery stores sell rotisserie chickens cooked using this method, our recipe aims to achieve a similar delicious result right in your home oven, without specialized equipment.
Should You Wash a Chicken Before Roasting?
No, it is generally recommended NOT to wash your chicken before roasting. Raw chicken can harbor bacteria like salmonella, and washing it under a faucet can cause these bacteria to splash and spread across your sink, countertops, and other kitchen surfaces, potentially contaminating your kitchen. Proper cooking to the correct internal temperature will kill any harmful bacteria, making washing an unnecessary and potentially risky step.
How Do You Know When a Whole Chicken is Done?
The most accurate and safest way to determine if a whole chicken is fully cooked is by using a reliable meat thermometer. Insert the thermometer into the thickest part of the thigh, making sure it doesn’t touch the bone. The chicken is done when the internal temperature reads between 165°F (74°C) and 175°F (79°C). It’s a good practice to check the temperature in a few different spots to ensure even cooking. Additionally, when you cut into the chicken, the juices should run clear, not appear bloody, pink, or red. Trusting a thermometer is far more reliable than relying solely on visual cues.
Can I Get Crispy Skin with the Low-and-Slow Method?
Absolutely! While the low-and-slow method is excellent for juicy meat, you can achieve wonderfully crispy skin. The key is the initial patting dry of the chicken and the continuous, dry heat of the oven over several hours. For an extra crispy finish, after the chicken has reached its internal temperature and before resting, you can briefly increase the oven temperature to 400-425°F (200-220°C) for 10-15 minutes, watching it closely to prevent burning. This high-heat burst will crisp up the skin beautifully without drying out the interior, as the meat is already cooked.
What Can I Do with Leftover Rotisserie Chicken?
The possibilities are endless! Leftover rotisserie chicken is incredibly versatile. Shred or dice it to use in chicken salads, wraps, sandwiches, quesadillas, tacos, enchiladas, or stir-fries. It’s also fantastic for adding protein to soups, stews, casseroles, pasta dishes, or even pizza. Don’t discard the carcass either; it makes an excellent base for homemade chicken broth or stock, extending the value and flavor of your roast even further.
Explore More Delicious Chicken Recipes
If you loved this homemade rotisserie-style chicken, you’ll be thrilled to discover more incredible ways to prepare chicken. Here are some other fantastic recipes to inspire your next meal:
- 5 Tips for Juicy Roast Chicken from Foodie Crush
- Roast Chicken with Mustard Potatoes
- Chicken with Garlic and Parsley
- Creamy Chicken Marsala
- Slow Cooker Chicken Enchilada Soup
- Chicken Saltimbocca Pinwheels
- Discover more of the Best Chicken Recipes
Stay connected and share your culinary creations with us! Follow @thatskinnychickcanbake on Instagram, Facebook, and Pinterest. Don’t forget to tag us when you try one of our recipes! Your success stories and beautiful food photos inspire us. If you love the results, please consider leaving a 5-star rating in the recipe card below to help other home cooks discover this amazing recipe.
Rotisserie Style Chicken Recipe
10 minutes
3 hours 30 minutes
3 hours 40 minutes
4 servings
Make rotisserie style chicken at home!! Tender, juicy and flavorful!
Ingredients
- 3 teaspoons kosher salt
- 1 teaspoon paprika
- ½ teaspoon onion powder
- ½ teaspoon dried thyme
- ½ teaspoon white pepper
- ¼ teaspoon cayenne pepper
- ¼ teaspoon black pepper
- ¼ teaspoon garlic powder
- 1 medium onion, quartered
- 4-pound roasting chicken, giblets removed
Instructions
- In a small bowl, mix together salt, paprika, onion powder, thyme, white pepper, black pepper, cayenne pepper, and garlic powder.
- Pat chicken dry with paper towels. Rub the spice mixture all over the chicken, inside and out.
- Place 1 onion into the cavity of the chicken.
- Double wrap with plastic wrap. Refrigerate overnight or at least 6 hours.
- Preheat oven to 250ºF (120ºC).
- Place chicken in a roasting pan. Bake uncovered for 3 ½ hours or until its internal temperature reaches 180ºF (82ºC) in the thickest part of the thigh.
- Baste with some of the pan drippings or rub the skin with a tablespoon of butter, then let the chicken stand for 10 minutes before carving.
Notes
Total time indicated above does not include the essential dry brining overnight or for at least 6 hours.
Recipe adapted from AllRecipes.com
Recommended Products
As an Amazon Associate and member of other affiliate programs, I earn from qualifying purchases.
- Measuring Spoons
- Thermapen Instant Read Thermometer
- Roasting Pan
Nutrition Information:
Yield:
4
Serving Size:
1
Amount Per Serving:
Calories: 728Total Fat: 21gSaturated Fat: 6gTrans Fat: 0gUnsaturated Fat: 8gCholesterol: 2005mgSodium: 1892mgCarbohydrates: 4gFiber: 1gSugar: 1gProtein: 124g
HOW MUCH DID YOU LOVE THIS RECIPE?
Please leave a comment on the blog or share a photo on Pinterest