
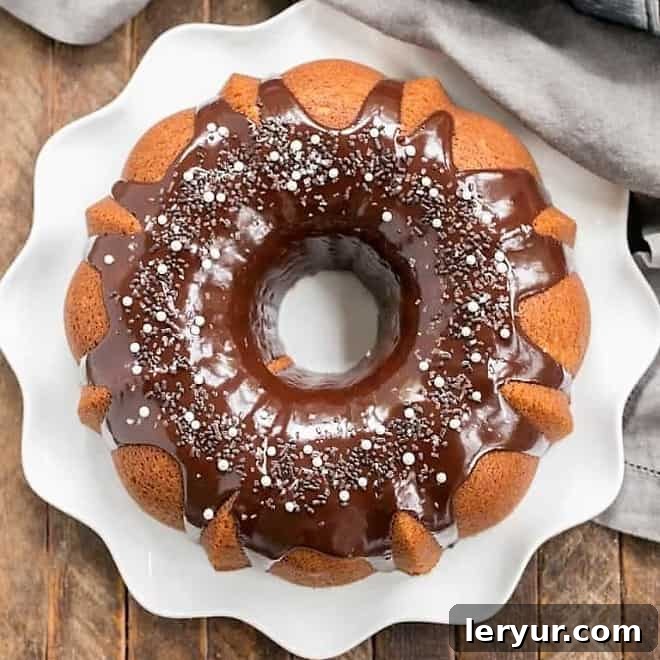
Prepare to embark on a delightful culinary journey into the world of one of America’s most beloved desserts: the Tunnel of Fudge Cake. This iconic creation is not just a cake; it’s an experience. Imagine a beautifully sculpted Bundt cake, its exterior a tender, moist vanilla sponge, giving way to a hidden core of rich, gooey chocolate fudge. Each slice offers a perfect balance of textures and flavors, promising a surprise with every bite. Whether you’re seeking a show-stopping dessert for a special occasion or a comforting treat for a quiet evening, this cake delivers unparalleled indulgence. For those who love a touch of seasonal flair, transform it into a spooky Tunnel of Doom Halloween Cake, perfect for adding a touch of eerie elegance to your Halloween celebrations with just a sprinkle of festive decorations.
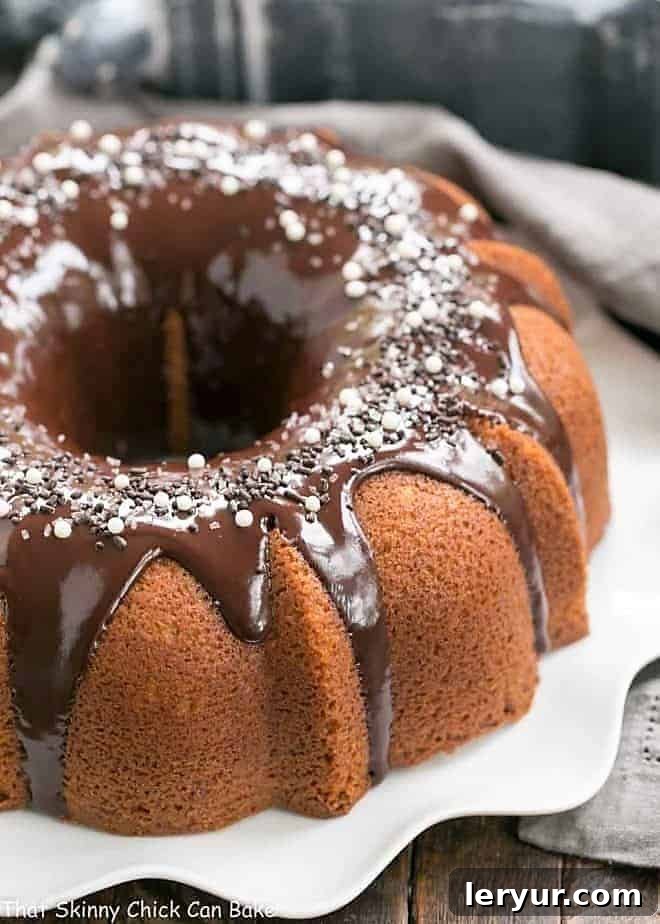
Why This Decadent Tunnel of Fudge Cake Is an Absolute Must-Bake
The allure of a Tunnel of Fudge Cake is undeniable. For years, the mere mention of this classic dessert has sent me on a quest to find the perfect recipe. Many versions feature a generous amount of chopped nuts, which, while traditional, isn’t always a hit with every family member. That’s why I was thrilled when a fellow foodie friend shared this particular recipe: a sublime, nut-free rendition crowned with a shimmering, glossy chocolate glaze. This cake isn’t just good; it’s a revelation.
Here’s why this Tunnel of Fudge Cake will quickly become a cherished favorite in your recipe collection:
- Unrivaled Versatility: It’s a stellar dessert any time of the year. Its sophisticated appearance and rich flavor make it ideal for dinner parties, holiday gatherings, or simply elevating an ordinary weeknight. And for Halloween enthusiasts, a simple scattering of seasonal sprinkles instantly transforms it into a captivating “Tunnel of Doom” cake, adding a fun, spooky twist to your festivities.
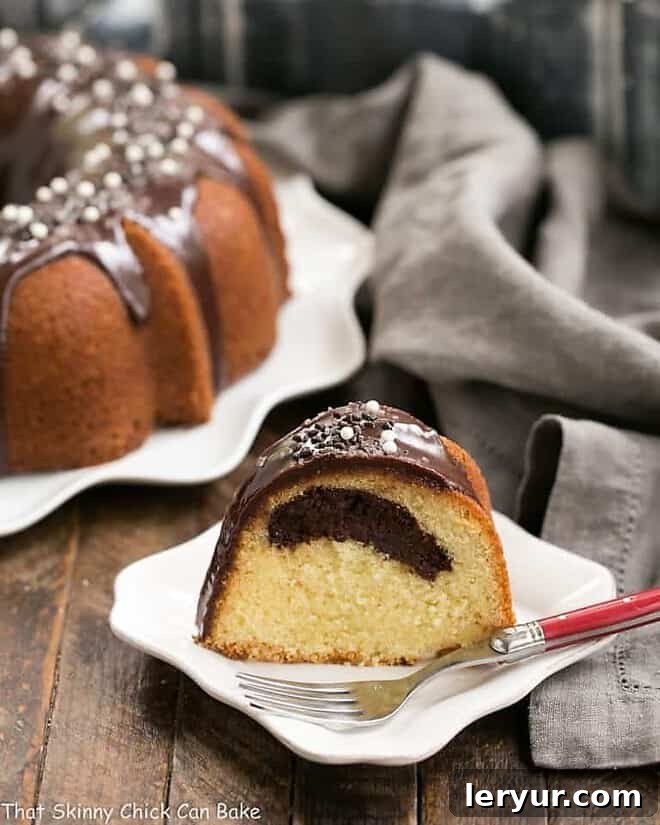
- The Ultimate Surprise Center: The fudgy, molten center is the star of the show. Slicing into this cake reveals a stunning ribbon of chocolate that runs through its core, creating an exciting visual and a delightful textural contrast. This unexpected bonus is sure to impress your guests and bring smiles all around.
- Double the Chocolate, Double the Joy: For the true chocoholics, this cake offers a magnificent double dose of their favorite treat. The rich chocolate tunnel, perfectly complemented by a luscious chocolate glaze, ensures every bite is infused with deep, satisfying cocoa notes. It’s an experience that truly satisfies those intense chocolate cravings.
- A Nut-Free Delight: Unlike many traditional Tunnel of Fudge recipes, this version is intentionally nut-free, making it a wonderful choice for families or gatherings where nut allergies or preferences are a concern. Everyone can indulge in its glorious layers without hesitation.
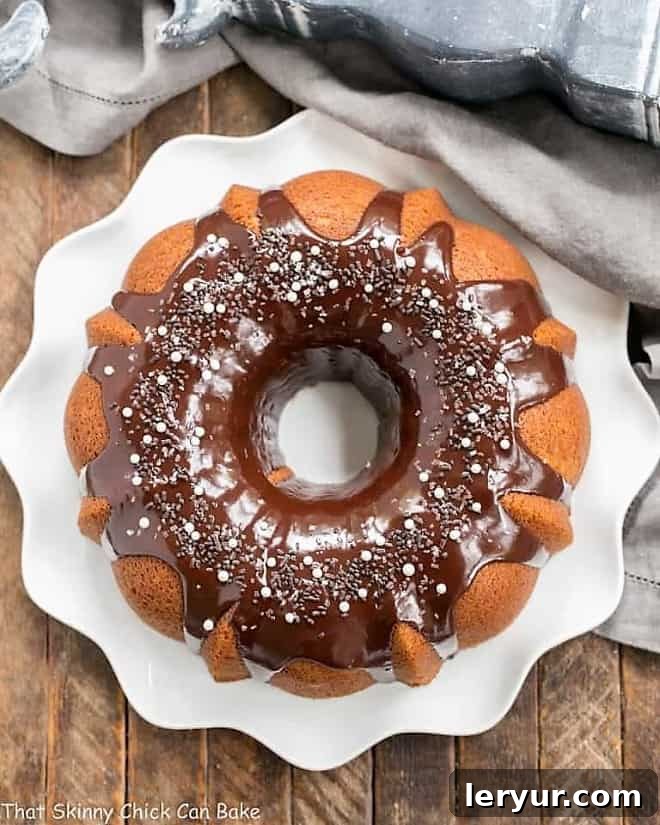
Crafting Your Perfect Tunnel of Fudge Cake: Expert Tips for Success
Achieving bakery-quality results with your Tunnel of Fudge Cake is entirely within reach with these invaluable tips and tricks:
- The Importance of Fresh Baking Powder: Before you begin, a crucial check is for your leavening agents. This recipe specifically calls for baking powder, not baking soda. Baking powder, unlike baking soda, can lose its potency over time, especially if it’s been sitting in your pantry for a while. To ensure your cake rises beautifully, test your baking powder by placing a spoonful in a cup of hot water. If it bubbles vigorously, it’s still active and ready to perform. If not, it’s time to replace it.
- Mastering Bundt Pan Preparation: A well-prepped Bundt pan is the secret to a perfectly released cake. Bundt pans, especially older ones, can be notoriously sticky due to their intricate designs and worn finishes. A thorough coating is essential. We highly recommend using Baker’s Joy, a convenient baking spray that combines oil and flour, offering superior non-stick properties. Alternatively, you can meticulously butter and flour every crevice of your pan.
- Layering for the Perfect Tunnel: The iconic “tunnel” effect is created through careful layering. First, pour a little more than half of the plain vanilla batter into your meticulously prepared Bundt pan. Next, gently spoon the chocolate batter in a distinct ring over the plain batter. It’s important to keep this chocolate ring slightly away from both the inner and outer edges of the Bundt pan, leaving a strip of plain batter visible on both sides. This strategic placement ensures the chocolate bakes perfectly into the center of each slice. Finally, gently cover the chocolate layer with the remaining plain batter, smoothing the top if necessary with an offset spatula.
- The Critical Cooling Time: Patience is key, but timing is everything when cooling your Bundt cake. After baking, allow the cake to cool in the pan for precisely 10 to 15 minutes. This window is crucial; it allows the sides of the cake to firm up sufficiently, making it strong enough to release from the pan in one piece without crumbling. Cooling for too long can cause the cake to stick firmly to the pan, while cooling for too short a time might result in a fragile cake that breaks upon inversion. After this initial cooling, invert the cake onto a wire rack to cool completely.
Frequently Asked Questions About the Tunnel of Fudge Cake
The magic of the tunnel lies in a simple yet strategic layering technique. First, scoop slightly more than half of your plain vanilla cake batter into the bottom of your well-greased Bundt pan. Next, carefully pour the chocolate batter in a ring directly over the plain batter. Make sure this chocolate ring is positioned equidistantly from both the center tube and the outer edge of the pan. This ensures that as the cake bakes, the chocolate forms a distinct, delicious tunnel right in the middle. Finally, gently spoon the remaining plain batter over the chocolate layer, completely covering it. The different densities of the batters will work together during baking to maintain this beautiful separation and create the iconic fudgy ribbon.
Successfully releasing a Bundt cake starts long before baking. Proper pan preparation is paramount: generously coat the entire interior of your Bundt pan with a layer of softened butter (ensuring it reaches every intricate design), then dust it thoroughly with flour, tapping out any excess. Alternatively, use a high-quality baking spray that contains both flour and oil, like Baker’s Joy. Always inspect your pan for signs of wear; if the non-stick finish is compromised, sticking is more likely.
After baking, the cooling time is critical. Allow the cake to cool in the pan for approximately 10-15 minutes. This cooling period permits the cake’s crust to firm up sufficiently, helping it hold its shape upon removal. If you attempt to remove it too soon, the cake may be too delicate and fall apart. However, waiting too long can cause the cake to cool too much and contract, making it stick to the pan. Once the ideal cooling time has passed, place a wire rack over the top of the Bundt pan. Using oven mitts if needed, gently but firmly invert the pan and rack together. You might feel the cake drop slightly. Give the pan a gentle jiggle back and forth to encourage release, then carefully lift the pan away to reveal your perfectly formed Bundt cake. Let it cool completely on the wire rack before glazing or serving.
Determining doneness for a Bundt cake is crucial to avoid a dry or underbaked result. Start checking your cake about 5-10 minutes before the timer is expected to go off. The most reliable method is the toothpick test: insert a long, thin toothpick or wooden skewer into the deepest part of the cake, making sure to test in several spots, especially near the center. If the toothpick comes out completely clean, your cake is done. If you see wet batter clinging to the toothpick, continue baking and recheck in 5-10 minute intervals.
It’s perfectly acceptable for the toothpick to come out with a few moist crumbs attached; this indicates a perfectly tender and moist cake. Remember that the residual heat from the pan will continue to bake the cake slightly even after it’s removed from the oven, so avoid overbaking. A cake that is just done will be moist and delicious, while an overbaked cake can become dry and crumbly.
The original Tunnel of Fudge Cake holds a storied place in American baking history. It was the grand prize winner of the prestigious Pillsbury Bake-Off competition in 1966, an event that captivated home bakers nationwide. The winning recipe, created by Ella Helfrich, famously utilized a package of Pillsbury’s Double Dutch Frosting Mix, which contributed to its signature fudgy tunnel. However, when Pillsbury later discontinued this specific frosting mix, the original recipe became difficult, if not impossible, to replicate. This led to a culinary challenge and a wave of home bakers developing their own versions to recreate the beloved cake. The recipe shared here is a modern adaptation, thoughtfully refined by a blogger friend (whose blog is no longer active). What makes this particular adaptation special is its deliberate omission of nuts, making it an ideal, universally appealing treat for families, including mine, who prefer a nut-free indulgence while still delivering that nostalgic, irresistible tunnel of fudge experience.
Tunnel of Fudge Cake Recipe
This recipe yields a generous 12 servings of pure delight, making it perfect for entertaining or enjoying over several days. With a prep time of just 30 minutes and a cook time of 1 hour, you can have this stunning cake ready in approximately 1 hour and 30 minutes.
Ingredients
For the Cake:
- 3 cups all-purpose flour
- 2 ½ teaspoons baking powder
- ½ teaspoon baking soda
- 1 teaspoon salt
- 10 ounces semi-sweet chocolate, divided (6 ounces for the cake batter, 4 ounces for the glaze)
- 1 ½ cups (3 sticks) unsalted butter, at room temperature
- 1 ⅔ cups granulated sugar
- 1 teaspoon pure vanilla extract
- 3 large eggs, at room temperature
- 1 cup whole milk
- ½ cup sour cream
For the Glaze:
- 2 tablespoons light corn syrup
- ½ cup heavy cream
- Remaining 4 ounces semi-sweet chocolate, reserved from above
Instructions
- Prepare the Bundt Pan: Generously butter and flour a 12-cup capacity Bundt pan, ensuring every crevice is coated. Alternatively, use a flour and oil baking spray like Baker’s Joy for best results. Set the prepared pan aside. Preheat your oven to 350ºF (175ºC).
- Combine Dry Ingredients: In a medium bowl, whisk together the flour, baking powder, baking soda, and salt until well combined. Set this dry mixture aside.
- Melt Chocolate for Cake: In a microwave-safe bowl, melt 6 ounces of the semi-sweet chocolate. Heat in 30-second intervals, stirring after each, until the chocolate is completely melted and smooth. Set aside to cool slightly.
- Cream Butter and Sugar: In a large mixing bowl, using an electric mixer, beat the room temperature butter, sugar, and vanilla extract until light and fluffy. This process incorporates air, giving the cake a tender crumb. Add the eggs one at a time, beating well after each addition until fully incorporated into the mixture.
- Prepare Wet Ingredients: In a separate small bowl or a Pyrex 2-cup glass measuring cup, whisk together the milk and sour cream until smooth.
- Combine Batters: With the mixer on low speed, alternately add the prepared flour mixture and the milk mixture to the butter-sugar-egg mixture, beginning and ending with the flour mixture. Mix until just combined and smooth, being careful not to overmix.
- Create Chocolate Batter: Stir 1 cup of the plain batter into the slightly cooled melted chocolate until fully blended. Ensure the melted chocolate is warm, not hot, before adding the batter to prevent cooking the eggs. This will be your fudgy tunnel batter.
- Layer the Cake: Spoon slightly more than half of the plain batter into the bottom of the prepared Bundt pan, spreading it evenly. Next, carefully spoon the chocolate batter in a ring over the plain batter, ensuring it’s equidistant from the edges to form the ‘tunnel’. Finally, spoon the remaining plain batter over the chocolate layer, gently spreading it to cover completely. If needed, use an offset spatula to smooth the top.
- Bake the Cake: Bake for 55-60 minutes, or until a toothpick inserted into the center of the plain cake portion (avoiding the chocolate tunnel) comes out clean or with a few moist crumbs.
- Cool and Release: Let the cake cool in the Bundt pan for exactly 10-15 minutes. This allows the cake to firm up. After 10-15 minutes, invert the cake onto a wire rack to cool completely.
- Prepare the Glaze: To make the luscious glaze, combine the remaining 4 ounces of semi-sweet chocolate with the light corn syrup and heavy cream in a microwave-safe bowl. Heat in the microwave for 1-2 minutes, stopping and stirring every 30 seconds until the chocolate is melted and the mixture is smooth and glossy. Let the glaze cool slightly to a pourable consistency.
- Glaze the Cake: Place the completely cooled cake on the wire rack, positioning a baking sheet lined with parchment paper underneath to catch any drips. Spoon the slightly cooled glaze evenly over the cake, allowing it to drizzle down the sides.
- Serve: Let the glaze firm up at room temperature before slicing and serving. For a festive touch, especially if making a “Tunnel of Doom” cake, sprinkle with seasonal decorations immediately after glazing.
Notes for Perfection
For a beautiful presentation, you may add sprinkles or other decorative toppings after drizzling on the frosting, while it’s still slightly wet to ensure adhesion.
Always ensure your baking powder is fresh! It’s not used as frequently as baking soda and often expires in the pantry before it’s fully used. An old baking powder will result in a cake that doesn’t rise properly, affecting its texture and appearance. A quick test with hot water will confirm its freshness.
Beyond the Bundt: More Decadent Desserts You May Also Like
If you’ve fallen in love with the art of Bundt cakes and rich, chocolatey delights, explore these other fantastic recipes:
- White Layer Cake with Fudgy Brownie and Decorators Buttercream from I Am Baker
- White Chocolate Bundt Cake
- Kahlua Bundt Cake
- Raspberry Amaretto Bundt Cake
- Greek Lemon Bundt Cake
- Discover more incredible Chocolate Recipes on the blog!
Stay connected and share your baking creations! Follow me on Instagram, Facebook, and Pinterest. Don’t forget to tag me when you try one of my recipes! If you love the results, please consider leaving a 5-star rating and comment on the blog or sharing a photo on Pinterest.
Recommended Baking Products
As an Amazon Associate and member of other affiliate programs, I earn from qualifying purchases.
- Baker’s Joy Baking Spray
- Pyrex Glass Measuring Cups
- 12-Cup Bundt Pan
Nutrition Information:
Yield:
12 servings
Serving Size:
1 slice
Amount Per Serving:
Calories: 431
Total Fat: 15g
Saturated Fat: 8g
Trans Fat: 0g
Unsaturated Fat: 5g
Cholesterol: 65mg
Sodium: 371mg
Carbohydrates: 72g
Fiber: 2g
Sugar: 45g
Protein: 7g