
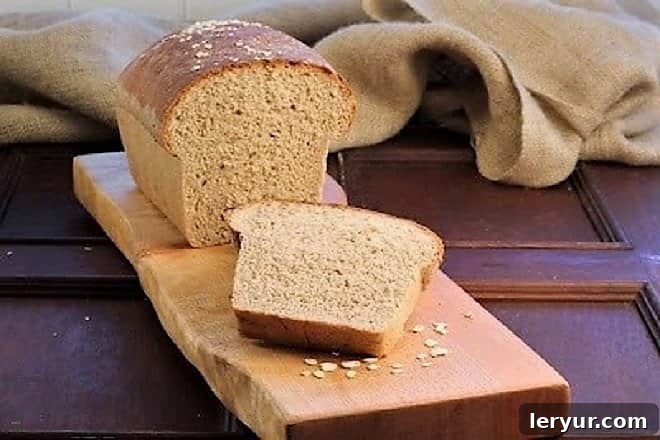
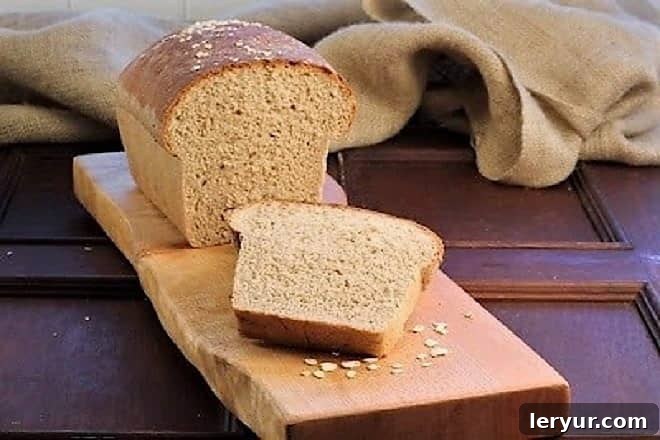
Homemade Honey Oatmeal Bread is a true comfort food, delivering a delightful blend of sweetness and wholesome goodness in every slice. Perfect for starting your day as part of breakfast or brunch, it also makes an incredible base for sandwiches, or a warm, inviting accompaniment to any dinner. Imagine it slathered with creamy butter, a dollop of your favorite jam, or even a drizzle of extra honey – a simple pleasure that elevates any meal. This incredibly soft, subtly sweet, and wonderfully satisfying yeast bread is more than just a recipe; it’s an experience that fills your home with an irresistible aroma and your belly with warmth.
Baking the Perfect Honey Oatmeal Bread at Home
There’s a special kind of magic that happens when you bake bread at home. The aroma alone is enough to transport you to a simpler, cozier place. For me, that magic was often found in the honey oat bread from my favorite local bakery. Weekly trips were a cherished ritual, not just for their delectable honey oat loaves but also for their delightful challah knots. So, when the unfortunate day arrived and their doors closed permanently, it left a noticeable void, not just in my diet, but in a small part of my routine.
The Quest for the Ultimate Honey Oat Bread Recipe
Determined to recreate that beloved flavor and texture, I embarked on a mission to find the perfect honey oatmeal bread recipe. The internet is a treasure trove of culinary inspiration, and it wasn’t long before I stumbled upon a Honey Wheat Oatmeal Bread recipe on The Slow Roasted Italian blog. With high hopes and a sense of culinary adventure, I immediately printed it, eager to give it a try.
From the moment I started mixing, the dough proved to be a dream to work with. It came together beautifully, achieving that smooth, elastic consistency that Donna, the recipe creator, had so perfectly described. The process itself was therapeutic, a testament to the simple joys of hands-on baking. While the resulting loaves weren’t an exact replica of my old bakery favorite – perhaps a touch less sweet and dense – they received resounding praise from my toughest critics: my husband and our children. Their approval was all the encouragement I needed.
With just a few minor adjustments – primarily incorporating a bit more honey to cater to our family’s sweet tooth – this oatmeal loaf quickly became a new household staple. It’s a recipe truly worth baking again and again, each time bringing that same joy and deliciousness to our table. A huge thank you to Donna for providing such wonderful inspiration and a fantastic starting point!
If you’re as passionate about homemade bread as I am, be sure to explore my full collection of Bread Recipes for more delightful baking adventures.
Why You’ll Love Baking This Homemade Honey Oatmeal Bread
Baking your own bread, especially something as comforting as honey oatmeal bread, offers a myriad of benefits beyond just the incredible taste. It’s an opportunity to connect with your food, understanding exactly what goes into each bite. This particular recipe stands out for several reasons:
- Unbeatable Flavor: The natural sweetness of honey combined with the hearty, nutty flavor of oats creates a complex yet approachable taste profile that appeals to everyone.
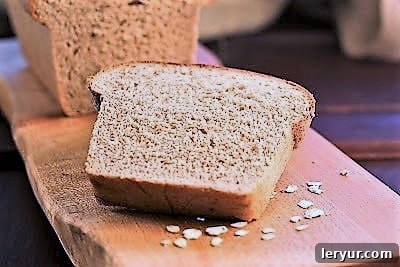
- Wonderful Texture: Thanks to the yeast and the careful balance of flours, this bread boasts a soft, tender crumb that’s ideal for slicing without crumbling. The oats add a delightful chewiness that enhances the overall experience.
- Versatility: Whether you’re making a classic sandwich, toasting it for breakfast, serving it alongside a hearty soup, or transforming it into a delicious bread pudding, this bread is incredibly adaptable.
- Aromatic Experience: The smell of freshly baked bread wafting through your home is truly unparalleled. It creates an inviting and cozy atmosphere that store-bought bread simply cannot replicate.
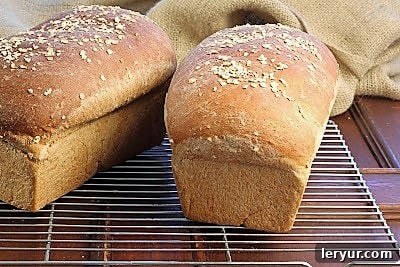
- Sense of Accomplishment: There’s immense satisfaction in pulling two perfectly golden-brown loaves from your oven, knowing you created them from scratch.
This honey oatmeal bread is not just food; it’s a labor of love that nourishes both body and soul. It’s a wonderful way to bring homemade goodness to your family’s table.
Essential Tips for Perfect Homemade Bread
Achieving bakery-quality bread at home is easier than you might think, especially with a few key tips:
- Yeast Activation is Key: Ensure your warm water is between 105-115°F (40-46°C). Water that’s too hot will kill the yeast, and water that’s too cold won’t activate it effectively. You’ll know it’s working when a foamy layer forms on the surface after 5-10 minutes.
- Kneading for Structure: Kneading develops the gluten in the flour, which gives bread its structure and chewy texture. Whether by hand or with a stand mixer, knead until the dough is smooth and elastic. It should spring back slowly when poked.
- The Perfect Rise: A warm, draft-free environment is crucial for rising. Place your covered bowl in a slightly warm oven (turned off, with just the light on), or near a warm spot in your kitchen. Patience is a virtue here; allow the dough to double in size.
- Flour Power: Using unbleached bread flour provides excellent gluten development for a sturdy yet tender loaf. The addition of whole wheat flour not only boosts nutrition but also adds a lovely depth of flavor and a slightly denser texture. Don’t be afraid to adjust flour slightly if your dough feels too sticky or too dry; humidity can play a role.
- Doneness Test: Bread is typically done when it’s golden brown and sounds hollow when tapped on the bottom. For ultimate precision, an internal temperature of 190-200°F (88-93°C) indicates it’s perfectly baked.
- Cool Completely: Resist the urge to slice into warm bread immediately. Allowing it to cool on a wire rack prevents it from becoming gummy and ensures the internal structure sets properly.
Following these simple guidelines will set you up for success and help you produce consistently delicious loaves of honey oatmeal bread every time.
Creative Variations and Serving Suggestions
While this Honey Oatmeal Bread recipe is fantastic as is, don’t hesitate to get creative and customize it to your liking. Here are a few ideas to inspire you:
- Add-ins: Fold in a handful of chopped walnuts, pecans, or sunflower seeds during the last few minutes of kneading for added texture and nutrition. A sprinkle of dried cranberries or raisins can also add a delightful fruity sweetness.
- Spiced Bread: A pinch of cinnamon, nutmeg, or allspice can add a warm, inviting flavor profile, especially perfect for fall or winter mornings.
- Seed Topping: Before the second rise, brush the shaped loaves with a little milk or egg wash and sprinkle with a mix of rolled oats, sesame seeds, or flax seeds for an appealing crust.
- Sweetener Swap: While honey is the star, you could experiment with a portion of maple syrup for a different nuanced sweetness, though the flavor and texture might vary slightly.
As for serving, the possibilities are endless:
- Breakfast Delight: Toast slices and spread with butter, cream cheese, or a drizzle of honey. It’s also fantastic with homemade fruit compotes.
- Sandwich Perfection: Its sturdy yet soft texture makes it ideal for savory sandwiches with deli meats and cheeses, or even sweet sandwiches with peanut butter and banana.
- Accompaniment: Serve warm slices alongside hearty stews, chilis, or roasted chicken for a comforting meal.
- Dessert Transformation: Day-old bread can be cubed and used in a rustic bread pudding, or even toasted and seasoned for homemade croutons.
This versatile bread is a testament to the fact that homemade truly is best. It’s a rewarding baking project that yields delicious results, making it a wonderful addition to any baker’s repertoire.
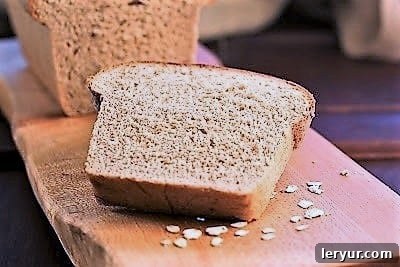
Honey Oatmeal Bread
30 minutes
40 minutes
1 hour 10 minutes
2 loaves
This incredibly soft, sweet, and delicious homemade honey oatmeal bread is perfect for any occasion! Enjoy it for sandwiches, toast, or as a delightful side.
Ingredients
- 4 1/2 teaspoons dry active yeast (equivalent to 2 envelopes)
- 1/2 cup honey
- 4 tablespoons unsalted butter, plus an additional 1 tablespoon for greasing the bowl
- 2 1/4 cups warm water (ensure temperature is around 110ºF / 43°C; water hotter than 120ºF / 49°C will kill the yeast)
- 1 tablespoon salt
- 2 3/4 cups unbleached bread flour
- 4 cups whole wheat flour
- 1 cup quick-cooking oats
- 1 whole large egg, lightly beaten
Instructions for Baking
- Begin by melting 4 tablespoons of butter. Transfer the melted butter along with the honey into the bowl of a stand mixer. Add the warm water, ensuring the mixture’s temperature is approximately 110-120ºF (43-49°C) for optimal yeast activation. Sprinkle the dry active yeast evenly over the water and honey mixture. Stir briefly to combine. Set the bowl aside for about 5-10 minutes, allowing the yeast to bloom and become foamy, indicating it is active.
- In a separate large mixing bowl, thoroughly combine the salt, 2 cups of whole wheat flour, and 1 cup of bread flour. Attach the dough hook to your stand mixer. Gradually add the prepared flour mixture to the yeast mixture in the stand mixer. Mix on low speed until all the liquid is completely absorbed and a shaggy dough forms. Increase the speed to medium and continue to beat for 2 minutes, periodically scraping down the sides of the bowl with a spatula to ensure even mixing.
- Next, add the lightly beaten egg and one additional cup of whole wheat flour to the dough. Blend on low speed until the egg is fully incorporated into the dough. Then, increase the speed to medium and beat for another 2 minutes. Incorporate the quick-cooking oats, the remaining 1 cup of whole wheat flour, and the remaining 1 cup of bread flour. Continue mixing for several more minutes until the dough becomes smooth, elastic, and pulls away from the sides of the bowl.
- If the dough feels excessively sticky, you may add up to one more cup of bread flour, a tablespoon at a time, until the desired consistency is achieved (I found this step unnecessary for my dough). Place 1 tablespoon of butter in a large, clean bowl and microwave for about 30 seconds, just enough to melt it and warm the bowl. Transfer the dough to the warm, greased bowl, rolling it around to coat the bottom of the dough with butter, then flip it over. Cover the bowl tightly with plastic wrap and then with a clean kitchen towel. Allow the dough to rise in a warm, draft-free spot until it has doubled in size, which typically takes about one hour.
- Once the dough has risen, gently punch it down to release the air. Turn the dough out onto a lightly floured surface. Cover it with the inverted bowl and let it rest for 15 minutes; this helps relax the gluten, making the dough easier to shape. Divide the dough into two equal halves. Shape each half into a neat loaf. Place each shaped loaf into a greased 9 x 5-inch loaf pan. If desired, sprinkle the tops of the loaves with a few oats for aesthetic appeal. Cover the pans with plastic wrap, then with a towel, and let them rise again for approximately one hour, or until they have nearly doubled in size.
- Preheat your oven to 350ºF (175°C). Bake the loaves for 35-40 minutes. The bread is done when it is golden brown and sounds hollow when tapped on the bottom. For a precise reading, the internal temperature should reach 190ºF (88°C). Carefully remove the baked bread from the pans immediately and transfer them to a wire cooling rack to cool completely before slicing. This step is crucial for achieving the best texture.
Chef’s Notes
This recipe has been thoughtfully adapted from a wonderful original found on The Slow Roasted Italian blog, with minor tweaks for enhanced flavor and texture.
For best results, use fresh yeast. The temperature of your water is critical; always use a thermometer. If you don’t have quick-cooking oats, old-fashioned rolled oats can be pulsed briefly in a food processor to achieve a similar consistency.
Store cooled bread in an airtight container at room temperature for up to 3-4 days, or freeze for longer storage. To freeze, wrap individual loaves or slices tightly in plastic wrap, then in foil, and place in a freezer-safe bag for up to 3 months. Thaw at room temperature or gently warm in the oven.
Nutrition Information:
Yield:
12 servings
Serving Size:
2 slices
Amount Per Serving (estimated):
Calories: 206Total Fat: 4gSaturated Fat: 2gTrans Fat: 0gUnsaturated Fat: 1gCholesterol: 10mgSodium: 34mgCarbohydrates: 47gFiber: 0gSugar: 46gProtein: 0g
LOVED THIS RECIPE? SHARE THE JOY!
Your feedback means the world to us! Please take a moment to leave a comment on the blog below, or better yet, share a photo of your beautiful Honey Oatmeal Bread creation on Pinterest and tag us! We love seeing your baking success!