
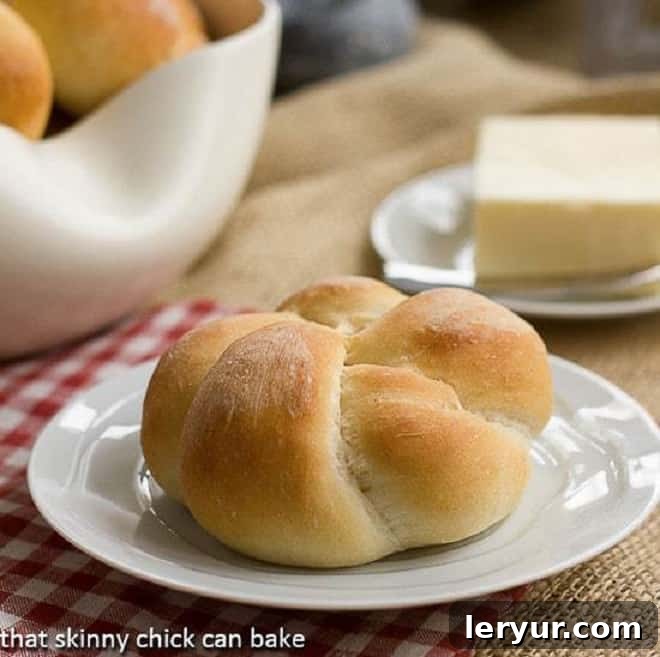
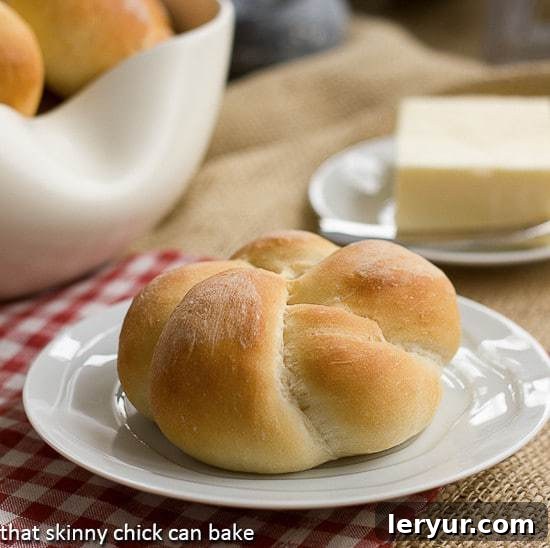
Welcome to the world of incredible homemade bread! These Yeast Roll Knots, lovingly known as Moomie’s Buns, are more than just a recipe; they are a cherished tradition and a testament to the joy of baking. Imagine soft, tender, and incredibly fluffy buns that melt in your mouth – perfect for any occasion. Whether you’re planning an elaborate holiday feast, grilling up some burgers for a backyard barbecue, or simply looking for the ideal accompaniment to a simple weeknight dinner, these winning yeast dinner rolls are guaranteed to impress. Their delicate texture and rich flavor make them an instant favorite, earning rave reviews from everyone who tries them.
Crafting these delightful Moomie’s Buns is a surprisingly easy and rewarding experience. From mixing the dough to shaping the elegant knots, each step is straightforward, making this recipe accessible even for novice bakers. The result? Bakery-worthy Yeast Rolls that boast an irresistible aroma and an unparalleled tenderness. You’ll take immense pride in knowing these exceptional rolls came straight from your kitchen, ready to elevate any meal and gather compliments from family and friends alike.
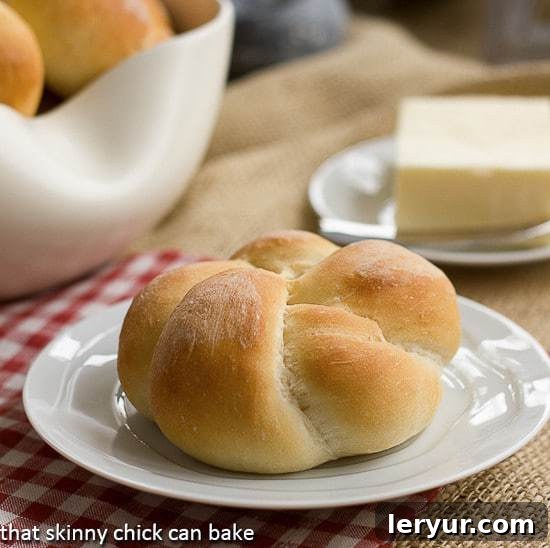
Why These Yeast Rolls Will Become Your Go-To Recipe
There’s something truly special about homemade bread, and these Yeast Roll Knots are no exception. They embody comfort, tradition, and the simple pleasure of sharing delicious food with loved ones. Here’s a closer look at why this recipe deserves a permanent spot in your baking repertoire:
- A Proven Family Favorite: This particular recipe for Moomie’s Buns has been tried, tested, and enthusiastically praised by a dedicated group of foodie friends for many years. It’s not just a recipe; it’s a culinary legend within our circles, consistently delivering perfect results that bring smiles to every table. The collective endorsements speak volumes about their consistent deliciousness and ease of preparation.
- Inspired by a Baking Giant: The journey to perfecting these rolls led back to the highly respected King Arthur Flour online community, where they originated as “Beautiful Burger Buns.” This foundational recipe provided the perfect starting point, inspiring countless home bakers with its reliable methods and outstanding outcomes. It’s a testament to the quality and expertise behind its creation.
- Beyond Just Buns – A World of Possibilities: These Yeast Roll Knots have garnered numerous rave reviews, highlighting their versatility and irresistible appeal. The same talented bread baker behind these buns also shared an exquisite cinnamon bun recipe. Once you master these rolls, you’ll be eager to explore other delightful creations from this trusted source, expanding your baking skills and delighting your palate. The success of this recipe is a gateway to further baking adventures!
These reasons, combined with the sheer joy of pulling warm, fragrant rolls from your oven, make this recipe an absolute must-try. Get ready to experience baking satisfaction and culinary delight!
Essential Ingredients for Perfect Yeast Roll Knots
Achieving the perfect tender, fluffy texture of these yeast rolls starts with understanding each ingredient and how it contributes to the final product. Here’s a detailed breakdown of what you’ll need and some crucial tips for success:
- Kitchen Staples – Sugar: Granulated sugar not only adds a touch of sweetness to your rolls but also acts as essential food for the yeast. It helps activate the yeast and fuels its activity, contributing to a robust rise and tender crumb.
- Water – The Right Temperature is Key: You’ll need 1 cup of water, precisely at 110ºF (about 43ºC). This temperature is crucial: if the water is too hot, it will kill the yeast, preventing your dough from rising. If it’s too cold, the yeast won’t activate properly. Always use a reliable cooking thermometer to verify the water temperature for optimal yeast activity and a perfect rise. This small step makes a significant difference.
- Salt – Enhancing Flavor and Structure: Standard table salt is perfect for this recipe. Salt is vital for balancing the flavors in your bread, enhancing its taste, and contributing to the dough’s structure. It also helps to regulate the yeast’s activity, ensuring a controlled and even rise.
- Butter – For Richness and Tenderness: Ensure your 2 tablespoons of butter are at room temperature. Softened butter incorporates smoothly and evenly into the dough, leading to a richer flavor, a softer crumb, and a more tender texture in your finished rolls. Cold butter will be difficult to mix in and can leave streaks.
- Egg – The Secret to a Softer Crumb: One large egg, lightly beaten, adds richness, moisture, and elasticity to the dough. It also contributes to the beautiful golden-brown color of the crust and helps create a wonderfully soft and airy interior.
- Flour – The Foundation of Your Rolls: Use 3 ¼ cups of all-purpose flour. The type of flour significantly impacts the texture of your bread. I highly recommend King Arthur brand flour for its consistent quality, which always yields excellent results in baking. Proper measurement is also key – use the “spoon and level” method rather than scooping directly from the bag to avoid over-measuring.
- Instant Yeast – Quick and Reliable: 1 tablespoon of instant yeast is specified, and I personally prefer Red Star Platinum Yeast for its reliability and consistent performance. Instant yeast is finely ground and designed to be mixed directly into dry ingredients without pre-hydrating (proofing), saving you a step and ensuring a faster rise. Always check the expiration date on your package to guarantee active yeast; expired yeast will result in a flat, dense dough.
By paying close attention to these ingredients and their preparation, you’re well on your way to baking the most delicious and tender yeast rolls you’ve ever made.
How to Make These Irresistible Yeast Roll Knots
While this exceptional dough recipe is frequently used for creating fantastic hamburger buns, I opted to transform it into elegant yeast dinner rolls for a special family meal. It was a perfect occasion as my son, Nick, was enjoying his last night home from college spring break, and our oldest son, Tom, also joined us for dinner. To give these rolls their distinctive and appealing shape, I employed a creative technique for making rosette dinner rolls, inspired by a helpful YouTube Video. The knotting process might seem intricate at first glance, but with a little practice, you’ll be shaping beautiful rolls in no time!
- Prepare the Dough: Begin by making the bread dough. While a stand mixer with a dough hook makes the process effortless and efficient, achieving a perfectly kneaded dough by hand is also entirely possible and deeply satisfying. Combine your dry ingredients first, then gradually add the wet components, mixing until a cohesive, slightly sticky dough forms.
- First Rise (Proofing): Once the dough is kneaded to perfection, it’s time for its first proof. Place the dough in a lightly greased bowl, cover it tightly with plastic wrap or a clean kitchen towel, and let it rise in a warm, draft-free spot as directed in the recipe. This crucial step allows the yeast to work its magic, developing flavor and volume. The dough should nearly double in size, indicating it’s ready for the next stage.
- Deflate and Divide: After the first rise, gently deflate the dough. This releases the accumulated gases and helps create an even texture in your final rolls. Turn the dough out onto a lightly floured surface and divide it into equal portions. For standard dinner rolls, aiming for 8-12 pieces usually works well, depending on your desired roll size.
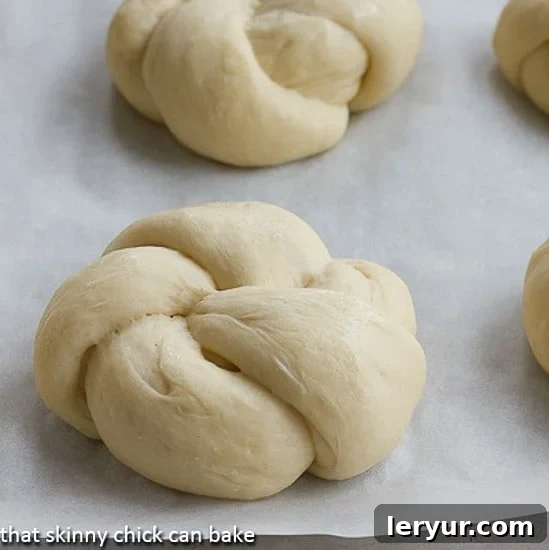
- Shaping the Knots – The “Snake” Method: To create the distinctive knot shape, take one piece of dough and roll it out into a long, thin “snake.” Aim for a length of at least a foot (about 30 cm) – the longer and more even the snake, the prettier your knot will be.
-
Tying the Knot – A Step-by-Step Guide:
- Lay your dough snake flat.
- Tie a simple overhand knot in the middle of the snake.
- You will now have two “tails” of dough extending from the knot.
- Take the tail that is coming from the bottom of the knot and gently tuck it up into the middle of the knot, pressing lightly to secure it.
- Next, take the other tail, which is coming from the top of the knot, and tuck it under the knot, pressing it into the middle.
- The goal is to create a neat, compact knot with no loose ends.
This process is much easier to visualize than to describe, so watching the linked YouTube video will indeed make the procedure significantly clearer and help you master the technique with confidence.
- Final Shaping and Second Rise: After tying each knot, gently cradle the bun in your hands and pat it lightly to round it out and ensure a pleasing shape. Place your shaped rolls on a parchment-lined baking sheet, allowing adequate space between each for expansion. Cover them again and let them undergo their second, shorter rise before baking. This final proof ensures maximum fluffiness.
With these detailed steps, you’re equipped to create beautiful and delicious Yeast Roll Knots that will be the star of any meal.
Expert Tips for Foolproof Yeast Roll Baking Success
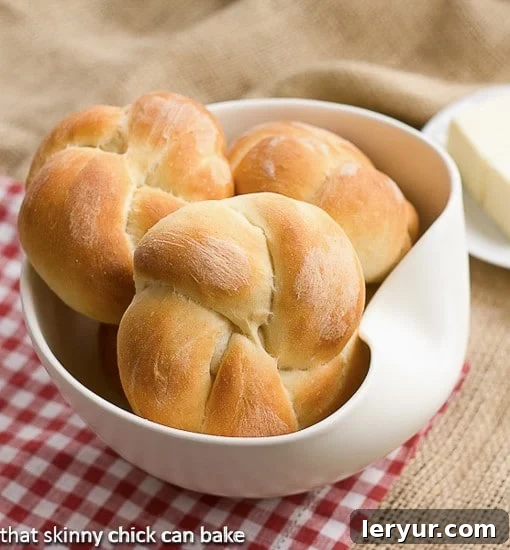
These easy yeast rolls are such a crowd-pleaser that my family couldn’t wait to dig in! The compliments flowed freely at dinner, and I even sent some of these incredible Moomie’s Buns home with Nick and Tom. I truly wished I had made a double batch – they were declared “Best. Rolls. Ever!” The beauty of these Yeast Roll Knots is how remarkably quick they are to prepare, thanks to the magic of instant yeast. To ensure your baking experience is as successful and delicious as ours, here are some expert tips:
- Verify Yeast Freshness: Before you even start measuring ingredients, make it a habit to check the expiration date on your yeast package. Active yeast is the foundation of any successful bread recipe; old or expired yeast will lead to a dense, flat loaf, no matter how perfectly you follow the other steps.
- Understand Instant Yeast: As the recipe specifies, look for instant yeast. This type of yeast is specifically manufactured with smaller granules, allowing it to dissolve almost immediately upon contact with the moisture in your bread dough. This key feature eliminates the traditional step of “proofing” or rehydrating the yeast in warm water, saving you time and simplifying the process. It’s designed for direct incorporation into dry ingredients.
- Resist Adding More Flour: The dough for these rolls will naturally be a bit sticky – this is perfectly normal and actually desirable! It contributes significantly to the final tender, delicate crumb that makes these rolls so beloved. Resist the temptation to add more flour than specified in the recipe, even if the dough seems challenging to handle. Adding excess flour can result in tough, dry rolls, diminishing their tender quality. A lightly floured surface for shaping is usually sufficient.
- Shape Versatility: While the knotted shape is charming, remember that this recipe was originally used for making hamburger buns. Feel free to shape the dough into traditional round buns instead of knotting them. This makes them perfect for slider buns, classic hamburger buns, or even hot dog buns. The flavor and texture will be equally fantastic, regardless of the shape!
- Bread Machine Compatibility: While I haven’t personally tested it, this dough recipe should be adaptable for use in a bread machine on the dough cycle. If using a bread machine, simply add the ingredients in the order recommended by your machine’s manufacturer, then proceed with shaping and baking as outlined in steps 6-9 of this recipe.
- Flavor Variations for Savory Buns: For an extra layer of savory flavor, particularly if you are shaping these into hamburger buns, consider adding a teaspoon of onion powder and about ½ teaspoon of dried onion flakes to the dry ingredients. These additions impart a subtle, aromatic quality that pairs wonderfully with grilled meats.
By keeping these tips in mind, you’ll be well-equipped to bake delicious, tender, and perfectly proofed yeast rolls every single time.
Frequently Asked Questions About Yeast Rolls
Instant Yeast is a type of active dry yeast that has been processed into smaller granules compared to traditional active dry yeast. This fine granulation means it absorbs liquid much more quickly and efficiently. Consequently, there’s no need to “proof” or rehydrate it in warm water with sugar before adding it to your bread dough, saving you a step and time in the baking process. It can be mixed directly with the dry ingredients. Its reliable and consistent performance makes it a favorite among many home bakers for quick and easy bread recipes.
Yes, it is definitely possible to over-proof yeast dough, and it can negatively impact the final texture and rise of your baked goods. When dough is over-proofed, the yeast has consumed too much of its food (sugar), and the carbon dioxide bubbles that give bread its airy texture have expanded too much and then started to collapse or “pop” before baking. This loss of gas makes it difficult for the dough to expand further in the oven (known as oven spring), resulting in a loaf that is dense, flat, and often has a strong, yeasty, or even alcoholic flavor. Conversely, under-proofing is also a common problem, as not enough carbon dioxide has formed, preventing the bread from achieving its full potential rise and resulting in a dense, tight crumb.
The best way to determine if your yeast dough has finished its second proofing and is ready for the oven is by performing the “poke test.” Gently take your index finger and lightly flour it. Then, press it into the bread dough about half an inch deep, and quickly release. Observe the indentation:
- If the dough springs back slowly, leaving a slight indent, it is perfectly proofed and ready to bake.
- If the dough springs back quickly and completely, it is under-proofed and needs more time to rise. Cover it and let it proof for another 15-30 minutes, then re-test.
- If the indentation remains and doesn’t spring back at all, the dough is likely over-proofed. Don’t despair! For over-proofed dough, you can often “save” it by gently punching it down to release the gases, reshaping it, and allowing it to rise again for a shorter period before baking. While it might not achieve the same airy texture as perfectly proofed dough, it will still yield a delicious result.
To keep your yeast rolls fresh, store them at room temperature in an airtight container or a plastic bag. They will stay soft and delicious for 2-3 days. For longer storage, you can freeze baked rolls. Once completely cooled, place them in a freezer-safe bag, removing as much air as possible, and freeze for up to 2-3 months. Thaw at room temperature and warm gently in the oven or microwave before serving for that freshly baked taste.
Yes, you can substitute active dry yeast for instant yeast, but you’ll need to adjust the method slightly. Active dry yeast typically needs to be “proofed” or activated first. To do this, dissolve the active dry yeast in the warm water (110°F/43°C) along with a pinch of sugar from the recipe, and let it sit for 5-10 minutes until foamy. This indicates the yeast is active. Once foamy, proceed with adding it to your dry ingredients as instructed in the recipe. Generally, you’d use the same amount of active dry yeast as instant yeast by weight, or slightly more by volume (e.g., 1.25 times the amount of instant yeast, but 1:1 by volume usually works fine for most recipes).
Explore More Delicious Bread Recipes You’ll Love
If you’ve enjoyed baking these amazing Yeast Roll Knots, you’re sure to love exploring other homemade bread creations. Here are some more of my favorite recipes to inspire your baking adventures, from comforting classics to unique delights:
- Homemade Potato Bread Recipe – Incredibly soft and flavorful.
- The Best Cinnamon Rolls – A truly decadent treat for breakfast or brunch.
- Classic Pizza Dough – Your base for perfect homemade pizza nights.
- Parmesan Prosciutto Bread – A savory and aromatic loaf perfect with soup or salad.
- Braided Challah – Beautiful, rich, and slightly sweet Jewish bread.
- Authentic Homemade Bagels – Chewy and delicious, just like your favorite deli.
- Traditional Easter Bread – A festive and beautifully decorated sweet bread.
- Plus, don’t miss more of my diverse Bread Recipes for every occasion!
Stay connected and share your baking journey with me through social media! Find me on Instagram, Facebook, and Pinterest. Don’t forget to tag me when you try one of my recipes – I absolutely love seeing your delicious creations! And if you’re thrilled with the results of these Yeast Roll Knots, please show your support by giving it a 5-star rating in the recipe card below. Your feedback helps other bakers discover these fantastic recipes!
Yeast Roll Knots (Moomie’s Buns)
30 minutes
15 minutes
45 minutes
8 delicious rolls
These irresistible Moomie’s Buns are famously tender, incredibly fluffy yeast roll knots that are perfect for elevating any meal! Whether for festive holiday gatherings, as soft burger buns, or simply a comforting addition to a weeknight dinner, these rolls are sure to be a beloved staple in your kitchen.
Rated 4.9 out of 5 stars by 23 happy bakers!
Ingredients
- 1 cup water (at 110ºF / 43ºC)
- 2 tablespoons unsalted butter, softened to room temperature
- 1 large egg, lightly beaten
- 3 ¼ cups all-purpose flour (King Arthur brand recommended)
- ¼ cup granulated sugar
- 1 teaspoon table salt
- 1 tablespoon instant yeast (Red Star Platinum Yeast preferred)
Instructions
- In the large bowl of a stand mixer, thoroughly whisk together the all-purpose flour, granulated sugar, salt, and instant yeast.
- Measure the water and heat it precisely to 110ºF (43ºC). Add this warm water to the dry flour mixture. Using the paddle attachment, mix on low speed until the ingredients are just moistened. Then, add the lightly beaten egg and softened butter.
- Continue to mix with the paddle attachment just until the egg and butter are incorporated into the dough. Switch to the dough hook attachment and knead in the mixer for approximately 5 minutes until the dough is smooth and elastic.
- Lightly grease a clean bowl. Turn the dough out into the greased bowl, then flip it over once to ensure all sides of the dough are lightly coated with oil. Cover the bowl tightly with plastic wrap and let the dough rise in a warm, draft-free place until it has almost doubled in size, which typically takes about an hour.
- Once the dough has risen sufficiently, gently deflate it by pressing down lightly to release the trapped gases.
- Turn the dough out onto a lightly floured surface. Divide the dough into 8 equal pieces. Shape each piece as desired; for knots, roll a piece into a foot-long snake, tie an overhand knot, and tuck the ends. (Refer to the “How to Make” section above for detailed knot-shaping instructions).
- Place the shaped rolls onto cookie sheets lined with parchment paper, ensuring enough space between each roll for expansion. Cover the rolls loosely with plastic wrap or a clean kitchen towel and let them rise for a second time, for about 30-40 minutes, until visibly puffy.
- While the rolls are undergoing their second rise, preheat your oven to 375ºF (190ºC).
- Bake the rolls for 12 to 15 minutes, or until they achieve a beautiful golden-brown color on top. Once baked, transfer the rolls to wire racks to cool completely before serving.
Notes
Always ensure your instant yeast is fresh and not expired for the best rise. If your dough is too sticky, resist the urge to add more flour; a slightly sticky dough yields a more tender roll. For savory burger buns, consider adding 1 tsp onion powder and ½ tsp dried onion flakes to the dry ingredients.
Recommended Baking Products
As an Amazon Associate and member of other affiliate programs, I earn from qualifying purchases.
- USA Pan Bakeware Half Sheet Pan, Warp Resistant Nonstick Baking Pan, Made in the USA from Aluminized Steel – 1050HS
- Reynolds Cookie Baking Sheets Non-Stick Parchment Paper, 25 Sheet, 4 Count
- Red Star Platinum Superior Baking Yeast
Nutrition Information:
Yield:
8
Serving Size:
1 Roll
Amount Per Serving (estimated):
Calories: 293Total Fat: 4gSaturated Fat: 2gTrans Fat: 0gUnsaturated Fat: 2gCholesterol: 31mgSodium: 300mgCarbohydrates: 55gFiber: 2gSugar: 6gProtein: 8g
HOW MUCH DID YOU LOVE THIS RECIPE?
Please leave a comment on the blog or share a photo on Pinterest!