
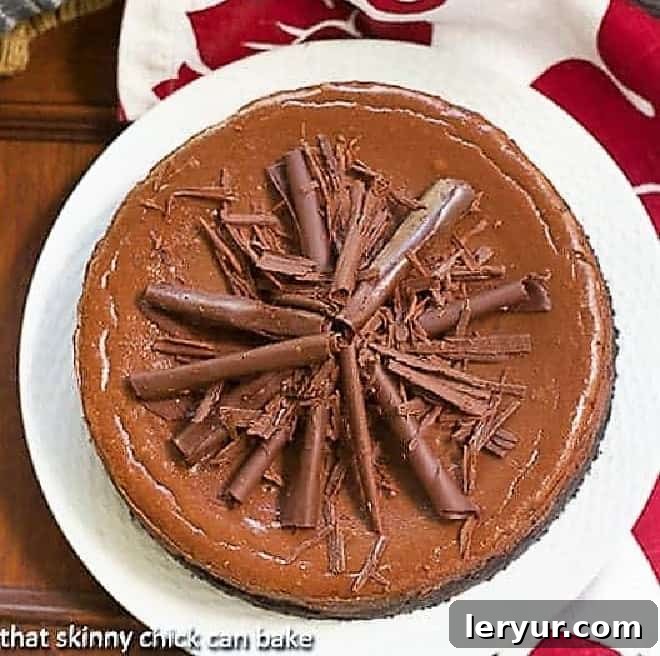
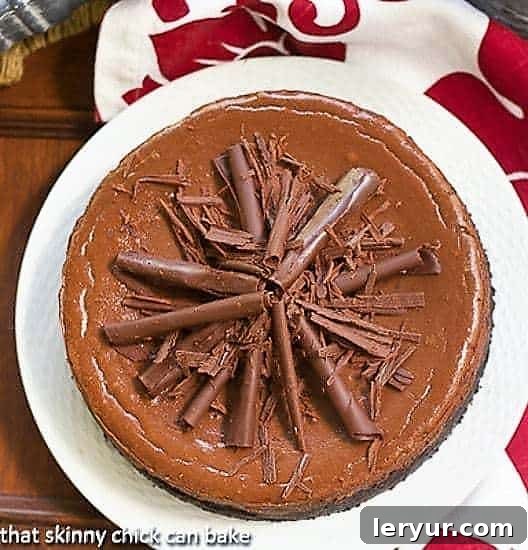
Prepare to impress and delight with the ultimate dessert masterpiece: a super decadent Double Chocolate Cheesecake, exquisitely topped with delicate chocolate curls. This isn’t just a dessert; it’s a show-stopping declaration of love for all things chocolate, guaranteed to make jaws drop and hearts swoon. If you’re seeking an extraordinary treat for true chocoholics, look no further – this recipe has you covered in the most delicious way imaginable.
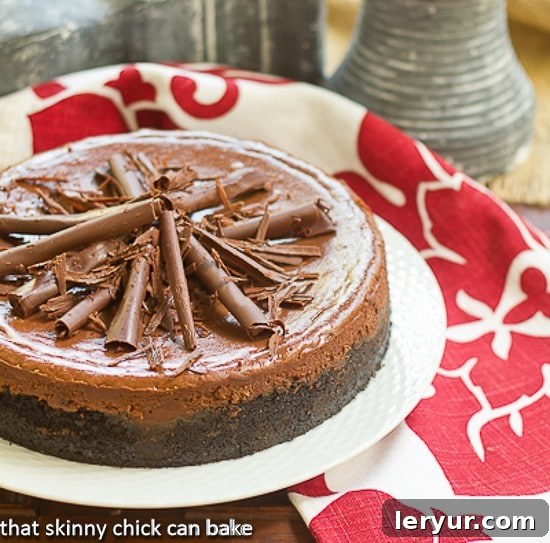
This incredibly rich and creamy Chocolate Cheesecake Recipe features a harmonious blend of textures and flavors. It begins with a robust chocolate cookie crust, providing a deep, crumbly foundation. The star of the show is a velvety, semi-sweet chocolate-infused cheesecake filling, baked to perfection. Finally, it’s crowned with an abundance of sweet, luxurious chocolate garnishes, elevating it to an art form.
Why This Double Chocolate Cheesecake Is an Absolute Must-Make
Every once in a while, you need a dessert that transcends the ordinary—something truly special that leaves a lasting impression. This Double Chocolate Cheesecake is precisely that. It’s a rich, show-stopping dessert designed not just to satisfy a sweet craving, but to create a memorable experience. My personal motivation for mastering this recipe stemmed from a need for a reliable, impressive treat I could prepare in advance, particularly when juggling travel and social commitments. Imagine flying home, knowing you have a magnificent dessert patiently waiting in your freezer for an upcoming gathering. This cheesecake offers that unparalleled convenience and wow-factor.
- Unforgettable Decadence: This isn’t merely a chocolate cheesecake; it’s a double chocolate experience, inspired by a renowned recipe from Abby Dodge, originally featured in Fine Cooking. It promises a depth of flavor and a creamy texture that is simply divine and perfectly balanced.
- A Guaranteed Crowd-Pleaser: Witnessing the pure delight in the eyes of your friends and family as you unveil this stunning creation is truly gratifying. Its elegant appearance and intensely satisfying taste ensure it stands out among any array of sweet offerings, sparking conversations and compliments.
- The Ultimate Make-Ahead Marvel: Planning for future events can be stressful, but your dessert shouldn’t be. This cheesecake is a dream for meal prep; it freezes beautifully for up to three months without compromising its exquisite taste or texture. Simply wrap it well and thaw in the refrigerator on serving day, making it an ideal choice for holidays, parties, or any spontaneous celebration.
The compliments you’ll receive are testament to its allure. I’ve personally experienced the thrill of someone asking if I had actually made it myself (the ultimate compliment for any home baker!). Even more surprisingly, the delicate chocolate curls, often a concern for make-ahead desserts, remained perfectly intact and beautiful after a week in the freezer. There’s an undeniable satisfaction in presenting a dessert that could easily be mistaken for a professional bakery masterpiece. This cheesecake empowers you to achieve just that, without the stress!
Mastering the Art of Cheesecake: Essential Tips for Success
Creating a perfectly creamy, un-cracked, and utterly delicious cheesecake might seem daunting, but with a few key techniques, you can achieve professional results every time. The foundation of a superior cheesecake lies in meticulous preparation, particularly regarding ingredient temperature and mixing methods. By following these pro tips, you’ll ensure a smooth batter, an even bake, and a truly unforgettable dessert.
- The Secret to Make-Ahead Success: Freezing Like a Dream: Cheesecakes are, hands down, one of the best desserts for making in advance. They freeze exceptionally well, often improving in texture and flavor as they settle. To ensure optimal preservation, wrap your cooled cheesecake thoroughly. I recommend starting with a snug layer of plastic wrap, followed by a layer of heavy-duty aluminum foil. When ready to serve, simply transfer the wrapped cheesecake from the freezer to the refrigerator and allow it to defrost slowly, preferably overnight. This gradual thawing prevents condensation and maintains its creamy consistency. For those eager to master the intricate art of chocolate curls for garnish, explore my detailed guide on creating stunning chocolate decorations here.
- PRO-Tip: Embrace Room Temperature Ingredients: This is perhaps the most critical tip for a smooth cheesecake batter. Plan ahead and take your cream cheese and eggs out of the refrigerator at least an hour, or even two, before you begin mixing. Warm ingredients emulsify more effectively, meaning your cream cheese will blend beautifully with the other components without forming lumps. This results in a silky, uniform batter, which is key to a perfectly smooth and crack-free finished cheesecake.
- PRO-Tip: The Paddle Attachment is Your Best Friend: When it comes to mixing cheesecake batter, your stand mixer’s paddle attachment is superior to the whisk attachment. The paddle gently incorporates ingredients, ensuring a smooth, dense batter without over-aerating it. Excessive air introduced during mixing can lead to a “soufflé-like” rise in the oven, followed by a dramatic fall and unsightly cracks as the cheesecake cools. The paddle helps maintain that signature rich, creamy texture without introducing unnecessary air bubbles.
- The Water Bath Advantage (Bain-Marie): Baking your cheesecake in a water bath is a game-changer. This technique provides a moist, humid environment in your oven, which is essential for gentle, even baking. The consistent, indirect heat from the water bath prevents the edges of the cheesecake from baking faster than the center, significantly reducing the risk of cracks and ensuring a consistently creamy texture from edge to center.
- Protecting Your Crust: The Foil Shield: If you’re utilizing a water bath, it’s absolutely crucial to protect your springform pan from moisture seepage. Wrap the bottom and sides of your springform pan tightly with at least two layers of heavy-duty aluminum foil. Ensure the foil extends well above the waterline of your water bath. This creates an impenetrable barrier, preventing water from seeping into the pan and turning your delicious chocolate cookie crust into a soggy disappointment.
- Explore More Cheesecake Delights: Eager to expand your cheesecake repertoire? Click the link for a wealth of additional homemade cheesecake recipes and expert tips, designed to inspire and guide you. And for those moments when you crave a smaller, yet equally potent, chocolate dessert, don’t miss these irresistible Double Chocolate Tartlets. They deliver a concentrated burst of chocolate flavor in a charming, individual serving.
Ultimate Double Chocolate Cheesecake Recipe
40 minutes
1 hour 5 minutes
1 hour 45 minutes
12 servings
An impressive, truly decadent chocolate dessert that promises rich flavor and a melt-in-your-mouth texture, perfect for any special occasion or simply to indulge your deepest chocolate cravings.
Ingredients
For the Crust:
- 8 ounces chocolate wafers (such as Nabisco Famous Chocolate Wafers)
- 3 tablespoons granulated sugar
- 7 tablespoons unsalted butter, melted
For the Cheesecake Filling:
- 24 ounces full-fat cream cheese, softened to room temperature
- 10 ounces good quality semisweet chocolate, melted and cooled slightly
- 2 tablespoons all-purpose flour
- Pinch of fine sea salt
- 1 ¼ cups granulated sugar
- 1 tablespoon pure vanilla extract
- 4 large eggs, at room temperature
- Chocolate shards or elegant chocolate curls, for garnish (optional)
Instructions
- Prepare for Baking: Preheat your oven to 375°F (190°C). If using a water bath, ensure you have a large roasting pan ready that can accommodate your springform pan.
- Craft the Chocolate Cookie Crust: In a food processor, pulse the chocolate wafers until they form fine, even crumbs. Alternatively, you can crush them finely in a sturdy ziplock bag using a rolling pin. Add the granulated sugar to the crumbs and pulse to combine. Pour in the melted butter and process again until the mixture is well combined and resembles wet sand.
- Form the Crust: Press the chocolate crumb mixture evenly into the bottom of a 9-inch springform pan. Extend the crust about 2 inches up the sides of the pan, creating a slight rim. Use the bottom of a glass or your knuckles to ensure it’s firmly packed and even.
- Par-Bake the Crust: Bake the prepared crust in the preheated oven for approximately 10 minutes. This helps to set the crust and prevents it from becoming soggy. Once baked, remove the pan from the oven and let it cool completely on a wire rack. While the crust cools, decrease your oven temperature to 300°F (150°C).
- Prepare the Cheesecake Batter (Initial Mix): In a stand mixer fitted with the paddle attachment, beat the softened cream cheese on medium speed for about 2 minutes until it’s light and fluffy. Add the melted and cooled semisweet chocolate, flour, and a pinch of table salt. Continue beating on medium speed for about 5 minutes, stopping frequently (every minute or so) to scrape down the sides and bottom of the bowl. This ensures all ingredients are thoroughly incorporated and the mixture is incredibly smooth.
- Add Sugar and Blend: Gradually add the 1 ¼ cups of granulated sugar to the cream cheese mixture, continuing to beat on medium-low speed until it is well blended and smooth. Be careful not to overmix at this stage, as too much air can lead to cracks.
- Incorporate Eggs and Vanilla: Pour in the vanilla extract. Then, add the eggs one at a time, beating just until each egg is fully incorporated before adding the next. Stop mixing as soon as the last egg is blended – overbeating the eggs can introduce too much air. Gently pour the smooth cheesecake filling into the cooled, par-baked crust and use a spatula to gently smooth the top surface.
- Bake the Cheesecake (with Water Bath): Carefully place your foil-wrapped springform pan into the larger roasting pan. Fill the roasting pan with hot water, ensuring the water level comes about halfway up the sides of the springform pan (but not higher than your foil wrap). Transfer the roasting pan to the preheated 300°F (150°C) oven. Bake for 55 to 65 minutes, or until the edges are set but the very center of the cheesecake still has a slight jiggle when gently nudged. Do not overbake! Remove the roasting pan from the oven, then carefully lift the springform pan out of the water bath. Set the cheesecake on a wire rack to cool completely at room temperature. Once entirely cool, cover the cheesecake with plastic wrap and refrigerate until thoroughly chilled, for at least 8 hours, or ideally overnight. Once chilled, this cheesecake is ready to be wrapped again (plastic wrap then foil) and frozen for future enjoyment.
- Unmold, Garnish, and Serve: To unmold your chilled cheesecake, carefully run a thin, sharp knife around the perimeter of the pan to loosen the edges. Release and remove the springform ring. Use a wide, sturdy spatula to transfer the cheesecake to your chosen serving plate. For an elegant finish, garnish generously with homemade chocolate curls, delicate chocolate shards, or a dusting of cocoa powder. For clean, professional-looking slices, use a long, thin knife dipped in hot water and wiped clean between each cut. Enjoy this magnificent double chocolate creation!
Notes
Total time indicated above does not include the essential cooling and chilling times, which are crucial for the cheesecake to set properly and develop its ultimate creamy texture. Allow ample time for refrigeration before serving, typically 8 hours or overnight.
Nutrition Information:
Yield:
12
Serving Size:
1 slice
Amount Per Serving (estimated):
Calories: 581Total Fat: 38gSaturated Fat: 21gTrans Fat: 0gUnsaturated Fat: 13gCholesterol: 138mgSodium: 379mgCarbohydrates: 58gFiber: 2gSugar: 47gProtein: 8g
HOW MUCH DID YOU LOVE THIS RECIPE?
Please leave a comment on the blog below or share a photo of your masterpiece on Pinterest – we’d love to see your creations!