
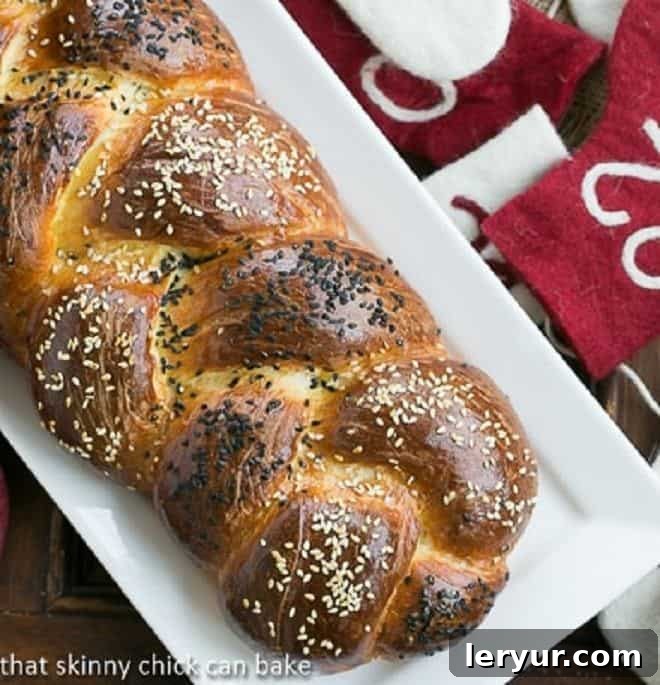
There’s something truly magical about homemade bread, and this glorious Braided Challah Bread is no exception. This particular recipe, inspired by the masterful techniques from “Baking with Julia,” instantly transports me back to childhood memories – to the very first bites of this delightful, dense, and irresistibly chewy loaf. More than just a bread, challah is a cultural cornerstone, a Rich Egg Bread traditionally served on the Sabbath and during certain Jewish holidays, symbolizing blessings and continuity.
Imagine filling your home with the warm, comforting aroma of freshly baked bread. That’s exactly what awaits when you try this exquisite Challah recipe. Prepare to dazzle your friends and family not only with its stunning braided appearance but also with its incredible taste and tender texture. This Jewish bread promises to be a centerpiece at any meal, leaving a lasting impression and a yearning for more.
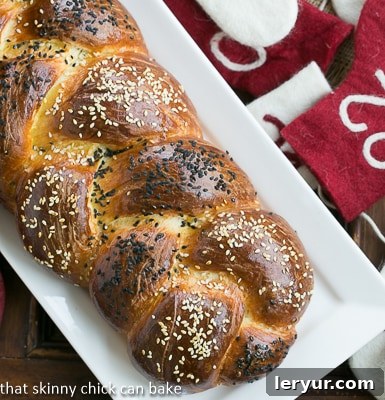
Why This Braided Challah Recipe is a Must-Try
Challah holds a special place in my heart, rooted deeply in nostalgia and flavor. As a child, braided challah was, without a doubt, my absolute favorite bread. Its unique combination of softness, chewiness, and rich eggy flavor captivated me from the very first bite, making every encounter a memorable culinary experience.
- Unforgettable Flavor & Texture: This challah delivers an unparalleled taste – a rich, subtly sweet, and buttery flavor profile complemented by a wonderfully soft, yet resilient, chewy texture. It’s truly a delight for the senses.
- Incredibly Versatile: While it’s perfect for a simple slice smeared with creamy butter, challah is also the star ingredient for epic French toast, indulgent breakfast casseroles, or even savory sandwiches. Its structure holds up beautifully to various preparations.
- A Rewarding Baking Experience: The process of making challah, from mixing the dough to the meditative art of braiding, is incredibly satisfying. Watching it rise and bake into a golden, aromatic masterpiece is a joy that few other breads can offer.
- Impressive Presentation: The iconic braided shape of challah makes it visually stunning. It’s a showstopper that instantly elevates any table, proving that homemade bread can be both delicious and incredibly beautiful.
- Connect with Tradition: For many, baking challah is a way to connect with cultural heritage and a long-standing tradition of communal celebration and family gatherings.
A Childhood Memory: My First Taste of Challah
Growing up in Ames, Iowa, a loaf of braided challah wasn’t a common sight in our local bakeries. My introduction to this magnificent bread came during our annual family summer vacation to Aspen, Colorado – a journey etched in my memory. The night before departure, my three sisters and I, wired with anticipation, could never sleep. The excitement of the upcoming adventure was almost too much to bear.
Piled into the back of our trusty green Plymouth Satellite station wagon, dosed with banana-flavored Dramamine for the winding mountain roads, we embarked on the 12-hour ride. My dad at the helm, my mom by his side, the car was a world unto itself. No seat belts, no radio, no air conditioning – just the four of us singing off-key, bickering good-naturedly, and constantly bugging our parents with “Are we there yet?” The endless stretch across Nebraska felt interminable, but then, a glorious moment: a glimpse of the foothills of the Rockies. Our excitement became palpable, a collective gasp of joy, knowing our mountain adventure – and perhaps another taste of that incredible challah – was just around the corner.
That first taste of challah in Aspen was revelation. Its rich, slightly sweet, and unbelievably tender crumb was unlike any bread I had ever experienced. It became a beloved vacation treat, a culinary highlight I looked forward to every year. Recreating that flavor and texture in my own kitchen today brings those cherished memories flooding back, making this recipe not just a bread, but a journey through time.
Essential Ingredients for Perfect Challah
Crafting the perfect challah begins with selecting high-quality ingredients. Each component plays a crucial role in achieving the desired richness, flavor, and texture that makes this bread so special. Here’s a closer look at what you’ll need and why:
- Kitchen Staples: You’ll start with basics like granulated sugar, lukewarm water (around 110°F is ideal for activating yeast), salt, and warm milk. These form the foundation of our rich dough.
- Active Dry Yeast: Two packets of active dry yeast are essential for a good rise and a light, airy crumb. I highly recommend a reliable brand like Red Star Yeast for consistent results. Ensure your yeast is fresh and active for the best outcome.
- Unsalted Butter: This recipe calls for unsalted butter, both thinly sliced for the dough and melted for greasing the bowl and brushing the loaf. The addition of butter contributes significantly to the bread’s tender texture and rich flavor. It’s important to note that because of the butter, this challah recipe is not considered *pareve* (dairy-free), making it more akin to a brioche in terms of richness.
- Honey: A touch of honey adds a subtle sweetness and helps to keep the bread moist, enhancing its overall depth of flavor. If available, local honey may even offer some seasonal allergy benefits!
- Extra Large Eggs (plus one Yolk): Eggs are a defining characteristic of challah, contributing to its signature golden color, incredible richness, and tender crumb. Using extra-large eggs ensures ample moisture and structure. The additional egg yolk in the glaze gives the finished loaf a beautiful, deep golden sheen.
- Bread Flour: For that desirable chewy texture, bread flour is key. Its higher protein content develops stronger gluten, which is crucial for the structure of a rich, yeasted bread like challah. King Arthur Brand is a personal favorite for its consistent quality.
- Cornmeal: A light dusting of cornmeal on your baking sheets prevents sticking and provides a lovely, subtle crunch on the bottom of the loaf.
- Sesame Seeds and/or Poppy Seeds (Optional Garnish): For a classic finish, sprinkle your unbaked loaves with sesame seeds or poppy seeds after brushing them with an egg wash. This adds visual appeal and a delicate nutty flavor.
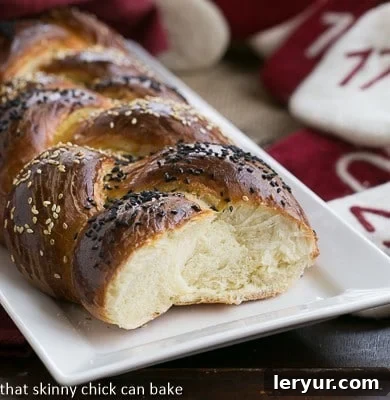
A Note on Pareve: The term “pareve” (or “parve”) is a Yiddish word referring to foods that contain neither meat nor dairy ingredients, making them neutral according to Jewish dietary laws (kashrut). Traditional challah is often pareve, using oil instead of butter to allow it to be served with either meat or dairy meals. However, this specific recipe incorporates butter for an undeniably rich and tender crumb, making it a “dairy” bread (milchig) and thus not pareve. While not strictly traditional in the kosher sense, its deliciousness is a universal winner!
Looking for more challah variations? I’ve experimented with several delightful twists. My Challah Pretzels, made with half of this very dough, disappeared even faster than the loaf itself! For a wholesome alternative, Whole Wheat Challah is wonderfully robust, and for an autumnal treat, my Pumpkin Challah offers a delicious seasonal twist.
Expert Tips for a Beautifully Braided Challah
Braiding challah might seem intimidating at first, but with a few simple techniques and a little practice, you’ll be creating stunning loaves in no time. While I haven’t had formal training, these tips have been invaluable in my challah-braiding journey. If you grew up braiding hair, you’re already ahead of the game, but even if you’re a complete novice, it’s simple enough to master.
- Start Simple: Master the 3-Strand Braid First: While there are impressive 6-stranded or even more intricate loaves, they’re best left for the advanced bread baker. Begin with the easier, yet equally beautiful, 3-stranded braid. It provides a solid foundation and confidence boost.
- Practice Makes Perfect (Without Wasting Dough): A fantastic trick is to practice your braiding technique with defrosted frozen bread dough. The results won’t be as tasty as real challah, but it allows you to learn the plaiting method without the added pressure of simultaneously perfecting the dough. I’ve used this method successfully when teaching friends how to braid bread.
- Form Even Ropes: Begin by dividing your dough into three perfectly evenly sized pieces. On a very lightly floured work surface, roll each piece into a rope of uniform length and diameter. Avoid stretching the dough too much; gentle rolling is key.
- Secure the Start: Place all three ropes parallel on a parchment-lined baking sheet. Firmly pinch one end of the three ropes together. This anchor point will keep your braid stable.
- The Classic Braiding Motion: Start the braiding process by taking the rope on the right and crossing it over the center rope. Then, take the rope on the left and cross it over the new center rope. Repeat this simple “right over center, left over center” pattern, maintaining even tension, until the braid is complete.
- Finishing Touch: Once you’ve braided to the end, firmly pinch the ends of the ropes together. For a clean, professional look, gently tuck these pinched ends underneath the loaf.
- Final Proofing and Glazing: Allow your braided bread to proof according to the recipe’s instructions – this final rise is crucial for a light texture. Before baking, brush generously with an egg wash for that characteristic golden, shiny crust.
- Garnish for Elegance: For an extra touch of beauty and flavor, sprinkle the top of your challah with sesame or poppy seeds immediately after applying the egg glaze. This ensures the seeds adhere well during baking.
Frequently Asked Questions About Challah
What Makes Challah Different from Other Bread?
Challah is a distinctive yeast bread known for its richness, primarily due to the generous inclusion of eggs and often oil or butter. This gives it a beautifully light, airy texture and a characteristic slightly yellow hue. It’s a traditional Jewish bread, deeply rooted in cultural and religious practices.
What’s the Difference Between Challah and Brioche?
Both challah and brioche are rich, often sweet, yeast breads, but they originate from different culinary traditions and have distinct characteristics. Brioche is a French creation, recognized for its exceptionally high butter and egg content, resulting in a very tender, almost cake-like crumb. It can be made into loaves, but is famously formed into small buns, particularly the “brioche à tête” with its signature top knot. Challah, on the other hand, is a Jewish bread, traditionally served on the Sabbath and holy days. It is typically braided but can take on various shapes. Crucially, traditional challah is made without butter, using oil instead, to ensure it is kosher and pareve (dairy-free), allowing it to be served with both meat and dairy meals. This particular recipe, however, does contain butter, making it a richer, more brioche-like challah and not kosher-pareve.
How Do You Braid Challah?
Braiding challah is quite similar to braiding hair, and often a very meditative part of the baking process. For a classic 3-strand braid (the most common and easiest to master), the dough for one loaf is divided into three equal-length ropes. These ropes are then lined up side by side. To braid, you simply cross one outer rope over the center rope, then the other outer rope over the new center rope, repeating this pattern until the loaf is formed. The ends are then pinched and tucked for a neat finish.
What Do the 3 Braids Symbolize?
While challah can be braided with varying numbers of strands, the traditional three-strand braid is often said to symbolize fundamental values. These braids are commonly understood to represent truth, peace, and justice, adding a layer of spiritual meaning to this beloved bread.
How Do You Serve Challah?
Challah is incredibly versatile and delicious in many forms! A simple slice is perfect with a drizzle of honey, dipped in flavored olive oil, or, as I particularly love it, smeared with creamy butter. Jam makes another wonderful accompaniment. Beyond serving it fresh, challah is fantastic for making the most luxurious French toast you’ll ever taste, bread puddings, or even as the base for incredible sandwiches. It’s truly a bread that complements almost any meal.
Expand Your Baking Repertoire
If you’ve enjoyed the process of making this beautiful challah, you might be ready to explore other delightful bread recipes. Baking homemade bread is a rewarding journey, and there are countless delicious variations to discover:
- Homemade Pretzel Rolls: Perfect for sandwiches or alongside a hearty soup.
- Fluffy Whole Wheat Dinner Rolls: A wholesome addition to any family meal.
- Swiss Butter Braid: Another stunning braided loaf, rich with butter.
- Hearty Whole Wheat Country Bread: Rustic and satisfying for everyday enjoyment.
- Soft Homemade Pita Bread: Ideal for dips, falafel, or wraps.
- Classic Potato Bread Recipe: Known for its incredibly soft texture.
- Heavenly Japanese Milk Bread: Famous for its unbelievably airy and tender crumb.
- Find even more incredible Bread Recipes to inspire your next baking adventure!
Stay in touch through social media @ Instagram, Facebook, and Pinterest. Don’t forget to tag me when you try one of my recipes! And if you love the results, please give it a 5-star rating in the recipe card below.
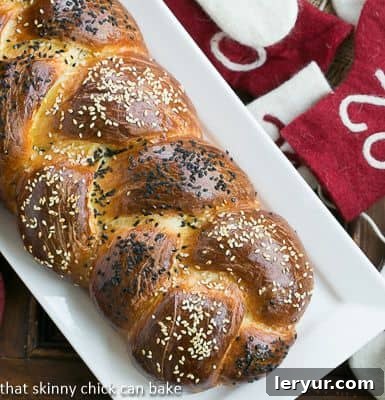
The Recipe:
Braided Challah
30 minutes
35 minutes
1 hour 5 minutes
2 loaves
A delicious braided egg bread, perfect for any occasion. This recipe yields two magnificent loaves of rich, tender, and chewy challah.
Rated 5 stars by 61 reviewers.
Ingredients
- 2 packages of active dry yeast
- ½ cup lukewarm water (about 110°F)
- ⅓ cup sugar, plus a pinch for yeast activation
- 1 stick (4 ounces) unsalted butter, thinly sliced, plus 2 tablespoons, melted (for bowl and brushing)
- 1 cup warm milk
- 1 tablespoon honey
- 2 ½ teaspoons salt
- 4 extra-large eggs, at room temperature, plus 1 extra-large egg beaten with 1 extra-large egg yolk and 1 tablespoon water, for glazing
- About 6 cups of bread flour (King Arthur brand recommended)
- Cornmeal, for dusting baking sheets
- Sesame seeds, Poppy seeds, optional (for garnish)
Instructions
- In a small bowl, dissolve the active dry yeast in the lukewarm water with a pinch of sugar. Let it stand for 5-10 minutes until it becomes foamy and starts to bubble, indicating the yeast is active.
- In a medium saucepan, combine the thinly sliced unsalted butter and the warm milk. Heat over low flame just until the butter melts, stirring occasionally. Do not boil.
- Pour the warm milk and butter mixture into a large mixing bowl. Stir in the remaining ⅓ cup of sugar, honey, and salt until dissolved. Then, add the activated yeast mixture and the 4 room-temperature eggs, stirring well to combine.
- Gradually add the bread flour, ½ cup at a time, stirring vigorously after each addition. Continue adding flour until the dough begins to pull away from the sides of the bowl and becomes too stiff to stir by hand. You may not need all 6 cups of flour.
- Grease a clean large bowl with 1 ½ tablespoons of the melted butter. Transfer the dough to the buttered bowl, turning once to coat. Brush the top of the dough with the remaining ½ tablespoon of melted butter.
- Cover the bowl tightly with plastic wrap and then with a thin towel. Let the dough rise in a warm, draft-free spot until it has doubled in size, which typically takes about 2 hours.
- Once doubled, gently punch down the dough to release the air. Recover the bowl and let the dough rise again until doubled, approximately 1 ¼ hours. This second rise develops more flavor and improves texture.
- Line two rimmed baking sheets with parchment paper and lightly sprinkle the paper with cornmeal. On a lightly floured work surface, carefully divide the dough in half.
- Cover one half of the dough with plastic wrap to prevent it from drying out. Divide the other half into 3 equal pieces.
- Using lightly floured hands, roll each of these three pieces into a 10-inch-long rope with slightly tapered ends. Aim for uniform thickness along the length of each rope.
- Arrange the three ropes side by side and gently touching on one of the prepared baking sheets. Firmly pinch the three ropes together at one end to secure the braid. Starting from the pinched end and working towards the other, braid the ropes together by bringing the outside rope over the center one. Continue this pattern until the braid is complete.
- Once braided, firmly pinch the ends of the ropes together and gently tuck them under the loaf for a clean, finished appearance. Repeat steps 9-11 with the remaining dough to create a second loaf.
- Cover the braided loaves loosely with thin towels and let them rise for a final 35 minutes in a warm spot. During this time, preheat your oven to 375°F (190°C).
- After the final rise, brush the loaves generously with the egg glaze (1 beaten extra-large egg with 1 extra-large egg yolk and 1 tablespoon water). Let them stand uncovered for 10 minutes to allow the glaze to set slightly, then brush again for an extra glossy finish.
- If desired, sprinkle the top of each loaf with sesame seeds or poppy seeds immediately after the second glaze application, ensuring they adhere well.
- Bake the loaves in the preheated oven on the upper and lower thirds, switching the pans halfway through baking to ensure even browning. Bake for 35 to 45 minutes, or until the challah is a beautiful golden brown and sounds hollow when tapped on the bottom.
- If the loaves start to brown too quickly during baking, loosely tent them with aluminum foil to prevent over-browning.
- Once baked, transfer the challah loaves to a wire rack and let them cool thoroughly before slicing. This helps the crumb to set and prevents a gummy texture.
Notes
Please note that the total time listed for this recipe does not include the essential proofing times, which are crucial for developing the challah’s rich flavor and airy texture. Additionally, this recipe explicitly contains butter, meaning it is not dairy-free and therefore not considered kosher-pareve. It’s a deliciously rich, dairy challah.
Recommended Products
As an Amazon Associate and member of other affiliate programs, I earn from qualifying purchases.
- Nesting Mixing Bowls
- Reynolds Cookie Baking Sheets Non-Stick Parchment Paper, 25 Sheet, 4 Count
- USA Pan Bakeware Half Sheet Pan
Nutrition Information:
Yield:
24 servings
Serving Size:
2 slices
Amount Per Serving:
Calories: 186
Total Fat: 3g
Saturated Fat: 1g
Trans Fat: 0g
Unsaturated Fat: 1g
Cholesterol: 56mg
Sodium: 250mg
Carbohydrates: 33g
Fiber: 1g
Sugar: 4g
Protein: 7g