
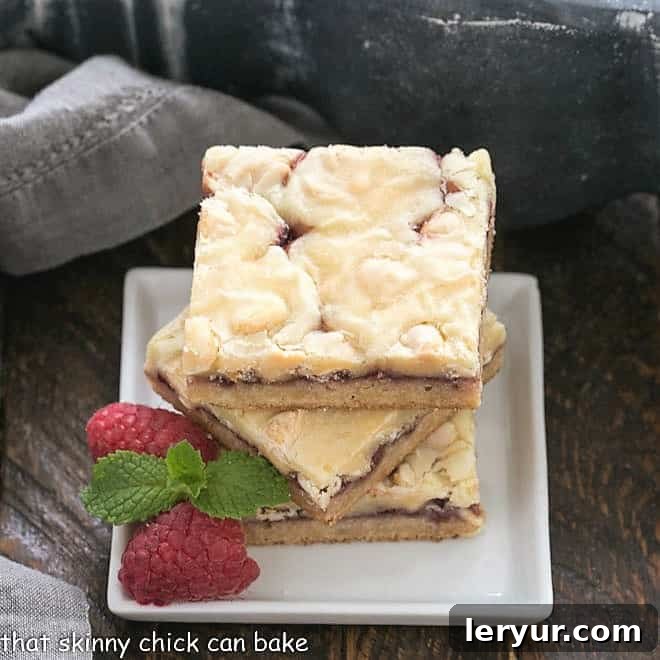
A few summers ago, I embarked on a journey to the serene Northwoods of Minnesota for a cherished family reunion. The expectation, as always, was a spread of delightful homemade treats. Tucked carefully in my luggage, these remarkable White Chocolate Raspberry Bars successfully navigated TSA checkpoints and the long car ride to a cozy lake house near the Canadian border. To my absolute joy, they were met with resounding acclaim, receiving rave reviews from everyone who sampled them. By the time I headed back home, all that remained was an empty container—not a single crumb left behind!
This tried-and-true Raspberry Cookie Bars Recipe isn’t just a sweet indulgence; it’s a testament to resilience and exquisite flavor. Each bite offers a harmonious blend of sweet, rich, and tangy notes, encased in a sturdy bar that proves perfectly capable of surviving the rigors of travel. Whether you’re planning a cross-country trip, a local potluck, or simply craving a comforting homemade dessert, these bars are designed to impress and endure. Their undeniable deliciousness makes them a standout at any gathering, promising smiles and satisfied palates all around.
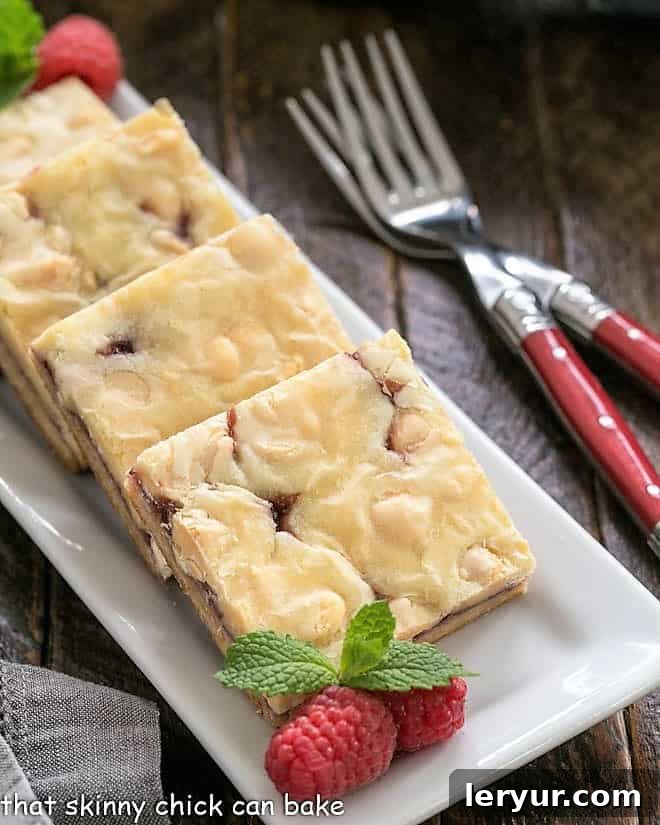
Why These White Chocolate Raspberry Bars Are a Must-Make
There are countless reasons why these White Chocolate Raspberry Bars deserve a prime spot in your baking repertoire. Beyond their ability to travel, their flavor profile is truly exceptional, making them an instant crowd-pleaser and a personal favorite.
- A Symphony of Flavors: The combination of vibrant raspberries and creamy white chocolate is simply divine. These two ingredients come together in perfect harmony, creating a dessert that’s both fruity and decadent. The slight tartness of the raspberries beautifully balances the sweetness of the white chocolate, resulting in a complex and utterly satisfying taste experience. I confess, during the preparation, I couldn’t resist licking the bowl – a crucial step in “quality control,” of course! The flavors were truly just perfect, promising pure delight with every mouthful.
- The Secret Almond Boost: What truly elevates these bars is a touch of almond extract. This subtle addition doesn’t just add flavor; it amplifies and deepens the overall aroma and taste profile, lending a sophisticated, almost gourmet quality to the bars. It’s a magnificent boost that takes these from delicious to unforgettable. As someone who rarely passes up a white chocolate dessert, I can confidently say this touch makes all the difference.
- Endorsement from a Sweet Dream: Perhaps the most compelling reason to make these bars comes from my sister, Maddy. She indulged in one of these raspberry bars right before bed, and the next morning, she recounted a vivid, crazy dream about eating the most incredible desserts of her life. If a dessert can inspire such delightful dreams, I think that truly says it all! They are not just good; they are dream-worthy.
- Perfect for Any Occasion: Whether you’re looking for a delightful treat for a casual family gathering, an elegant addition to a dessert table, or a comforting snack for a quiet evening, these bars fit the bill. They are versatile, beloved by all ages, and always receive enthusiastic praise.
- Simple Yet Impressive: Despite their luxurious taste, these homemade raspberry bars are surprisingly straightforward to prepare. The recipe utilizes common ingredients and easy-to-follow steps, making it accessible for bakers of all skill levels. The result is a dessert that looks and tastes incredibly impressive, without demanding hours of intricate work in the kitchen.
Glowing Reader Endorsement: A Testament to Perfection
There’s nothing quite as reassuring as a glowing review from a fellow home baker, especially one who has put a recipe through its paces multiple times. Leanne, a loyal reader, shared her experience in the comments, and her endorsement speaks volumes about the consistent excellence of these White Chocolate Raspberry Bars:
“I have made these about 15 times. These are excellent. They come out perfectly every time and are absolutely delicious. Everyone raves over them. The only tricky part is how to divide the sticky batter into thirds. I have found that ¾ cup of batter is the amount to reserve for the topping. Also, I butter the pan, spread parchment in the pan, crease the sides, then sprinkle the parchment with sugar. The bars lift right out. These are TOTALLY worth the effort. 5 stars.”
Leanne’s feedback is invaluable, highlighting both the recipe’s consistent quality and offering brilliant insights for achieving perfect results. Her dedication to making these bars 15 times confirms their undeniable appeal and deliciousness. She also tackles a common challenge—dividing the batter—providing a precise measurement (¾ cup) that simplifies the process for others. Furthermore, her ingenious method of buttering the pan, lining it with parchment, creasing the sides, and sprinkling with sugar ensures the bars lift out effortlessly, making cleanup and serving a breeze. This tip alone is a game-changer for anyone who has struggled with sticky bar desserts. Her “5 stars” rating is a testament to the fact that these truly are the best raspberry bars recipe you’ll encounter, truly worth every bit of effort for a truly delicious reward.
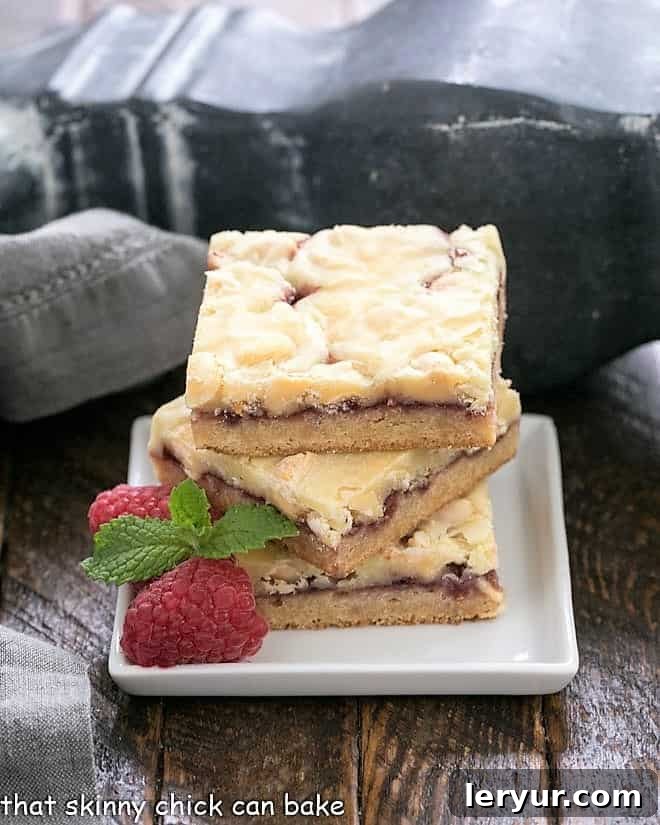
Expert Tips for Crafting Perfect White Chocolate Raspberry Bars
Achieving bakery-quality White Chocolate Raspberry Bars is within reach with a few clever tricks and insights. These expert tips will help you navigate the baking process with confidence, ensuring your bars are not only delicious but also beautifully presented and easy to manage.
- The Magic of Non-Stick Foil: To ensure your raspberry and white chocolate bars lift out of the pan effortlessly and to simplify cleanup, I highly recommend lining your baking pan with non-stick foil. Raspberry preserves, while delicious, can be quite sticky and prone to adhering to the pan, even if it’s sprayed with cooking spray. The non-stick foil creates a barrier, preventing any stubborn sticking. Plus, once baked and cooled, the foil provides handy “handles” to easily pull the entire batch of bars out of the pan for neat cutting, transforming a potentially messy task into a simple one.
- Perfectly Melted White Chocolate: When melting your white chocolate for the batter, a common pitfall is overheating, which can cause it to seize. A fantastic trick is to let your white chocolate (chips or chopped bars) sit directly in the hot, melted butter while you’re busy mixing the other dough ingredients. The residual heat from the butter will gently and gradually melt the chocolate. Once slightly softened, use a whisk to combine them into a smooth, lump-free mixture. If you notice any stubborn chunks remaining, a quick 10-15 second zap in the microwave, followed by a stir, will usually do the trick. Remember, white chocolate bars tend to melt more smoothly than chips, so opting for a high-quality chopped white chocolate bar is often an excellent option for a silky texture.
- Endless Jam Variations: While raspberry jam is the star of this recipe, these raspberry bar cookies are incredibly versatile! Don’t hesitate to experiment with different jams and preserves to create unique flavor profiles. Imagine the possibilities with a rich blackberry jam, an exotic black currant, or a sunny apricot preserve. Each swap will give you a distinctly delicious dessert, perfect for customizing to your preference or the season.
- Almond vs. Vanilla: The almond extract provides a wonderfully nuanced flavor, but if you’re not a fan, or simply prefer a classic taste, vanilla extract makes an equally delicious substitute. Feel free to use 1/2 teaspoon of pure vanilla extract in place of the almond extract for a familiar and comforting aroma that will still complement the white chocolate and raspberry beautifully.
- A Nutty Crunch: For those who love a bit of texture and a nutty flavor contrast, consider sprinkling a few slivered almonds on top of the bars before their final bake. The almonds will toast lightly in the oven, adding a delightful crunch and an extra layer of flavor that complements the almond extract within the bars. It’s an optional, but highly recommended, touch for nut lovers!
- Cooling for Clean Cuts: Patience is key when it comes to cutting perfect bars. Ensure your White Chocolate Raspberry Bars are completely cooled in the pan on a wire rack before attempting to cut them. Warm bars will be soft and crumbly, leading to uneven and messy cuts. Chilling them slightly in the refrigerator for 20-30 minutes after they’ve cooled to room temperature can also make for even cleaner, sharper edges.
- Storage Solutions: Once cooled and cut, these bars store beautifully. Keep them in an airtight container at room temperature for up to 3-4 days, or in the refrigerator for up to a week. For longer storage, they freeze exceptionally well for up to 2-3 months. Thaw them at room temperature for a few hours before serving.
Frequently Asked Questions About White Chocolate Raspberry Bars
Delving deeper into the ingredients and techniques will help you master these delicious bar cookies. Here are some commonly asked questions to enhance your baking knowledge:
Melting white chocolate properly is crucial for a smooth batter. While there are a few methods, I typically opt for the microwave for its speed and convenience. Place white chocolate chips or finely chopped white chocolate in a microwave-safe bowl. Heat on HIGH power for 20-30 seconds, then remove and stir thoroughly. Repeat this process in short intervals, stirring after each, until the mixture is smooth and completely melted. It’s important to stir frequently to distribute the heat evenly and prevent scorching. Remember that white chocolate is more delicate and melts faster than dark chocolate due to its higher cocoa butter content and lack of cocoa solids, so it requires less time and more vigilance. In this particular recipe, the instructions suggest melting butter first in a heat-safe bowl and then adding the chocolate chips to melt in the residual heat of the hot butter. While this is a gentle method, chocolate chips, especially larger ones, can be reluctant to melt completely this way. To ensure a perfectly smooth integration, I highly recommend chopping your chocolate chips into smaller bits before adding them to the hot butter. This increases their surface area, allowing them to melt much more easily and uniformly. Another excellent and safe alternative for melting chocolate, especially if you’re prone to overheating, is using a double boiler. This indirect heat method provides gentle and even melting, greatly reducing the risk of seizing or burning the chocolate.
Despite its name and its common placement alongside other chocolate varieties in grocery stores, white chocolate is, technically speaking, not “true” chocolate. The defining characteristic of true chocolate (like milk or dark chocolate) is the presence of cocoa solids, also known as chocolate liquor. According to culinary references like my Food Lovers’ Companion, white chocolate lacks these cocoa solids. This distinction is important for understanding its unique flavor and melting properties. However, its creamy texture and sweet vanilla notes have made it an incredibly popular ingredient in confectionery and desserts, offering a distinct profile that complements many flavors, especially fruits like raspberries.
The primary components that make up white chocolate are sugar, cocoa butter, milk solids, lecithin, and vanilla. Cocoa butter, derived from the cocoa bean, is the fat component that gives white chocolate its signature smooth, melt-in-your-mouth texture and richness. Sugar contributes to its characteristic sweetness. Milk solids (often in the form of powdered milk) provide a creamy texture and dairy notes. Lecithin, typically soy lecithin, acts as an emulsifier, helping to bind the ingredients together and give it a uniform consistency. Finally, vanilla extract or vanillin imparts the distinct aromatic flavor we associate with white chocolate. Because it doesn’t contain cocoa liquor, white chocolate notably lacks the deeper, more bitter “chocolatey” flavor found in dark or milk chocolate, offering instead a delicate, sweet, and milky profile.
Absolutely! While raspberry jam offers a delightful tartness that beautifully cuts through the sweetness of the white chocolate, this recipe is wonderfully adaptable. You can easily substitute it with any other fruit preserve or jam you love. Strawberry, apricot, cherry, or even a mixed berry jam would work beautifully. Just ensure the jam you choose has a good consistency – not too watery, to prevent it from soaking into the crust too much. Heating the jam slightly before spreading, as instructed in the recipe, helps achieve an even layer regardless of the flavor you choose.
There are two baking stages for these bars. For the first bake, the crust should be lightly golden brown around the edges, but the center will still be soft. This usually takes 15-17 minutes. For the second bake, after adding the jam and remaining batter, the bars are done when the edges are visibly browned and the top appears set and lightly golden. A toothpick inserted into the cake-like topping (avoiding the jam layer) should come out with moist crumbs, but not wet batter. Total baking time for the second stage is typically 25-30 minutes. Keep an eye on them, as oven temperatures can vary.
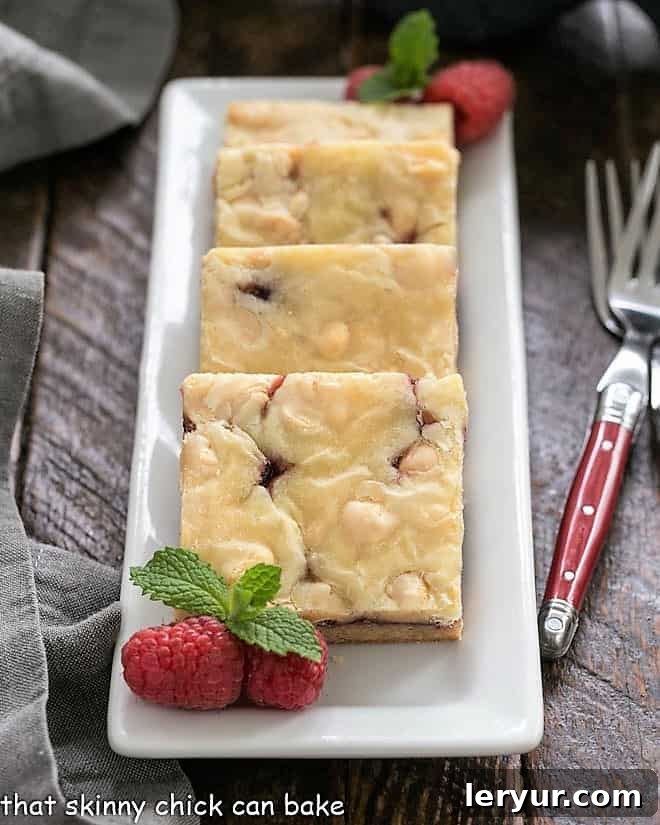
You May Also Love These Decadent Desserts:
If you’re a fan of the delightful combination of white chocolate and berries, or simply seeking more tempting bar recipes and chocolate creations, explore these fantastic options:
- White Chocolate Berry Pudding Cake from Inside BruCrew Life
- 5 Minute White Chocolate Fudge from Crazy for Crust
- Easy No-Bake White Chocolate Thin Mints from The View from Great Island
- Raspberry Crumb Bars
- Easy White Chocolate Easter Bark
- White Chocolate Bundt Cake
- White Chocolate Mousse with Frangelico
- Plus, hone your baking skills with my post on How to Cut Perfect Cookie Bars!
- Discover more delightful Chocolate Desserts.
Stay connected with us for more delicious recipes and baking inspiration! Follow along on social media @ Instagram, Facebook, and Pinterest. Don’t forget to tag me when you whip up one of my recipes! If you love the results and these White Chocolate Raspberry Bars become a new favorite, please consider leaving a 5-star rating in the recipe card below—it truly helps other bakers find these amazing treats.
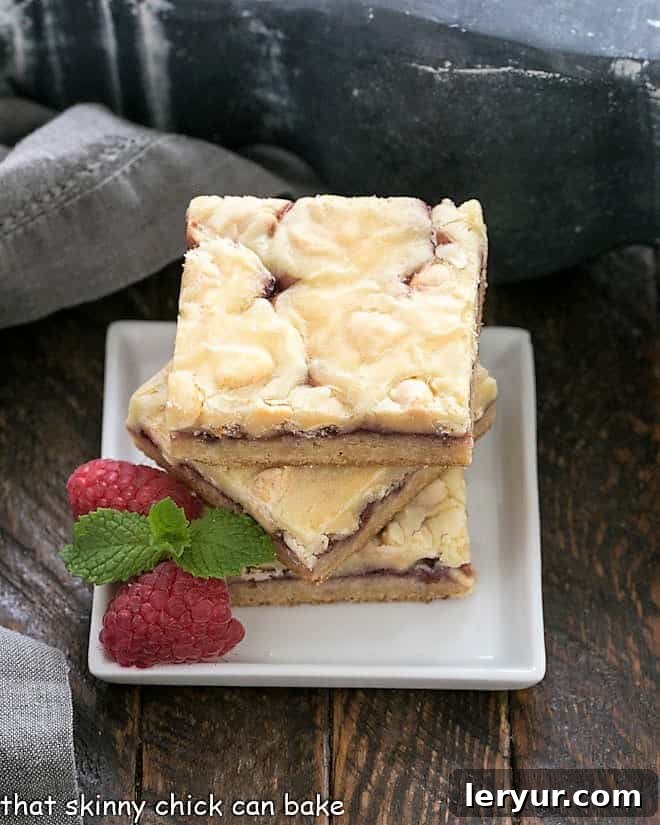
White Chocolate Raspberry Bars
20 minutes
47 minutes
1 hour 7 minutes
16 bars
Indulge in these delicious buttery raspberry bars, featuring a generous double dose of creamy white chocolate. This beloved recipe is perfectly adapted from Nestles via Hugs & Cookies XOXO, guaranteed to be a crowd-pleaser!
Ingredients for White Chocolate Raspberry Bars
- ½ cup (1 stick) unsalted butter
- 2 cups white chocolate chips, divided (high quality recommended)
- 2 large eggs
- ½ cup granulated sugar
- 1 cup all-purpose flour
- ½ teaspoon salt
- ½ teaspoon almond extract (or vanilla extract for a classic flavor)
- ½ cup quality raspberry jam (or your favorite jam flavor)
Step-by-Step Instructions
- Preheat your oven to 325°F (160°C). Prepare a 9-inch-square baking pan by buttering and sugaring it, or, for easiest removal and cleanup, line it with non-stick foil and lightly butter and sugar the foil.
- Melt the butter in a medium, microwave-safe bowl. Heat on HIGH (100%) power for about 1 minute (ensure it’s covered with plastic wrap to prevent splattering); stir until the butter is completely melted.
- Add 1 cup of white chocolate chips to the hot melted butter. Let it stand without stirring for a few minutes to allow the chocolate to soften in the residual heat. For best results, especially with larger chips, I recommend chopping them into smaller pieces for easier melting. Once softened, whisk the mixture until it is completely smooth and free of lumps.
- In a large separate bowl, beat the eggs until they become light and foamy. Gradually add the ½ cup of sugar, continuing to beat for approximately 5 minutes until the mixture is light lemon-colored and noticeably thicker. Gently fold in the smooth melted butter-chocolate mixture until everything is thoroughly combined.
- To the wet ingredients, add the 1 cup of flour, ½ teaspoon of salt, and ½ teaspoon of almond extract (or vanilla extract if preferred). Mix on low speed until the ingredients are just combined. Be careful not to overmix the batter. Spread about ⅔ of this delicious batter evenly into your prepared baking pan.
- Bake the first layer in the preheated oven for 15 to 17 minutes, or until the edges are beautifully light golden brown. The center may still appear soft. Remove the pan from the oven and place it on a wire rack to cool slightly. Keep the oven on for the next step.
- While the crust is still warm, prepare the jam layer. Heat the ½ cup of raspberry jam in a small, microwave-safe bowl on high power for about 30 seconds; stir it well until it’s smooth and easily spreadable. Carefully spread this warmed jam evenly over the warm, partially baked crust. Next, stir the remaining 1 cup of white chocolate chips into the remaining ⅓ of the batter. Drop spoonfuls of this final batter mixture over the jam layer. (A useful tip from a reader and recipe tester suggests that reserving ¾ cup of batter for this topping ensures perfect coverage.)
- Return the pan to the oven and bake for an additional 25 to 30 minutes, or until the edges are golden brown and the topping is set. Once baked, remove the pan from the oven and place it on a wire rack to cool completely. Allowing the bars to cool fully is essential for clean and perfect cuts. Once cool, cut into 16 uniform bars. Enjoy your homemade White Chocolate Raspberry Bars!
Chef’s Notes & Variations
Feel free to experiment with any favorite flavor of jam—strawberry, apricot, or blackberry would all be delightful. For an extra crunch, sprinkle a few slivered almonds on top before the final bake. Ensure white chocolate is fully melted and smooth for the best texture.
Recommended Baking Products
As an Amazon Associate and member of other affiliate programs, I earn from qualifying purchases, helping to support this blog.
- Essential 3-Piece Pyrex Mixing Bowl Set
- KitchenAid 9-Speed Digital Hand Mixer
- USA Pan Bakeware 9 x 9-inch Square Pan
Nutrition Information:
Yield:
16
Serving Size:
1 bar
Approximate Amount Per Serving:
Calories: 203Total Fat: 7gSaturated Fat: 4gTrans Fat: 0gUnsaturated Fat: 3gCholesterol: 28mgSodium: 97mgCarbohydrates: 32gFiber: 0gSugar: 24gProtein: 3g
HOW MUCH DID YOU LOVE THIS RECIPE?
We’d love to hear from you! Please leave a comment on the blog or share a photo of your beautiful White Chocolate Raspberry Bars on Pinterest. Your feedback and shares help our baking community grow!