
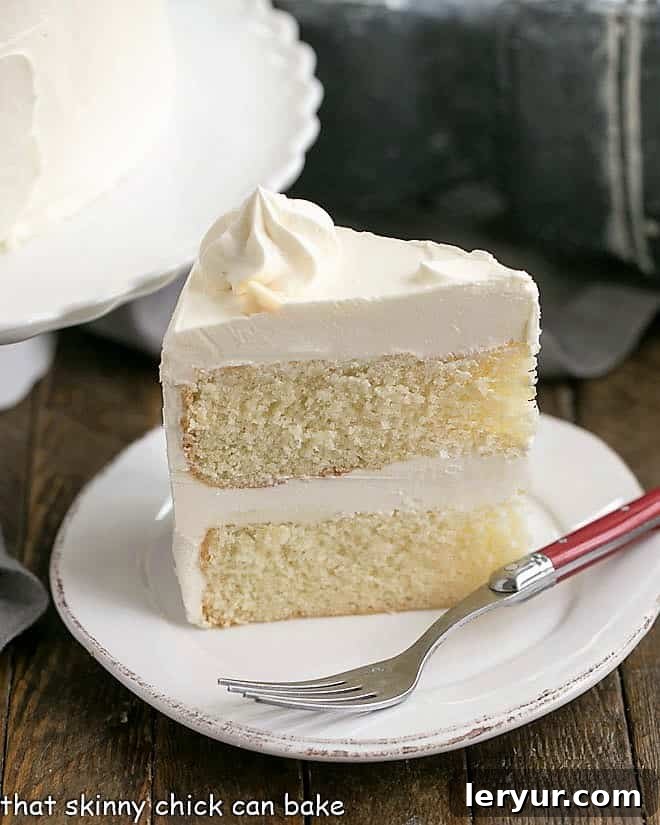
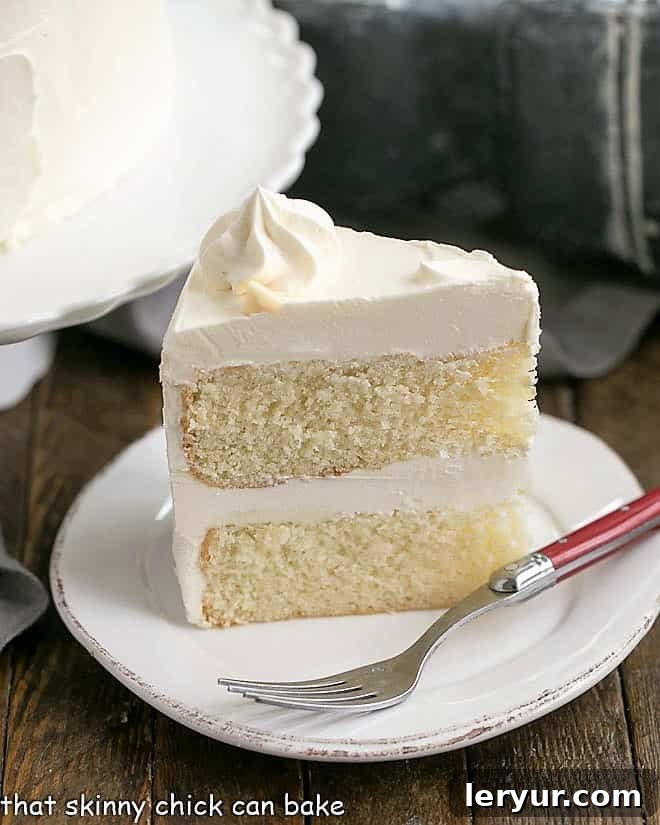
Prepare to be enchanted by this truly magnificent **Classic White Layer Cake**, exquisitely frosted with a rich, luscious **White Chocolate Swiss Meringue Buttercream**. This isn’t just any cake; it’s a celebration in every slice, a dessert so irresistibly tender and moist that you’ll find yourself reaching for “just one more sliver” again and again. It was the star of Bill’s birthday this year, and for good reason – its delicate crumb and luxurious frosting create an experience that’s impossible to forget.
Our perfected **White Cake Recipe** is designed to be effortlessly delicious, ensuring a perfectly light, fluffy, and tender texture every single time. And the accompanying **Swiss Meringue Buttercream**? It’s often hailed as the most divine frosting you’ll ever encounter! Unlike traditional buttercreams, it’s incredibly silky smooth, wonderfully buttery, and perfectly sweet without being cloying. The delicate infusion of premium white chocolate elevates this frosting to another level of pure decadence, making it the ideal partner for our pristine white cake layers.
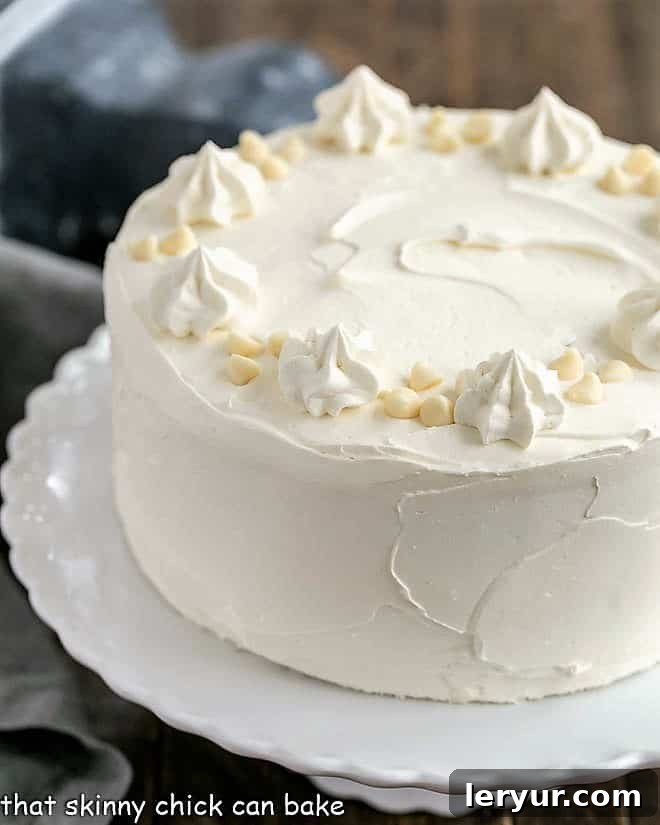
Why This Classic White Layer Cake Recipe Is a Must-Try
There are countless reasons why this particular white layer cake stands out and deserves a special place in your baking repertoire. It’s more than just a dessert; it’s an experience that combines elegance with unparalleled flavor and texture, guaranteed to impress at any gathering.
- Experience the Pinnacle of Frosting: Our White Chocolate Swiss Meringue Buttercream is truly the crowning glory of this cake. If you’ve never tasted this sophisticated style of frosting, prepare for a revelation. It boasts an incredibly light, airy texture that literally melts in your mouth, combined with a luxurious smoothness and a balanced sweetness that isn’t overpowering. While it requires a bit more technique than a simple American buttercream, the extraordinary, professional-level results make the extra effort absolutely worthwhile for special occasions. The addition of white chocolate creates a delicate richness that is simply divine.
- A Pure White Cake Masterpiece: This specific recipe has been my unwavering choice for a non-chocolate layer cake for many years. It is meticulously crafted using only egg whites, which ensures a pristine, pure white crumb that is both beautiful and distinctly different from yellow cakes that incorporate egg yolks. The outcome is a wonderfully tender, fine-crumbed cake that offers a delightful contrast to its rich frosting.
- The Quintessential Celebration Cake: Whether you’re planning a birthday, an anniversary, a holiday feast, a wedding shower, or simply desiring to bake something extraordinary for loved ones, this cake fits every festive bill. It is particularly ideal for those who appreciate a lighter, more delicate dessert experience compared to the intensity of dark chocolate, offering an equally indulgent and incredibly satisfying alternative. Its elegant appearance makes it a showstopper at any event.
- Irresistibly Addictive: Be warned, this is precisely the kind of dessert that will tempt you back for more, long after you’ve declared yourself satisfied. You might begin with a modest sliver, intending to be perfectly well-behaved, but its enchanting flavor and perfect texture often lead to multiple return trips to the cake stand. Fortunately, this recipe is baked in two standard 8-inch layer cake pans, making it a manageable size to be enjoyed and polished off relatively quickly among friends and family, leaving everyone with sweet memories.
Decoding the Ingredients: What You Need for Cake Perfection
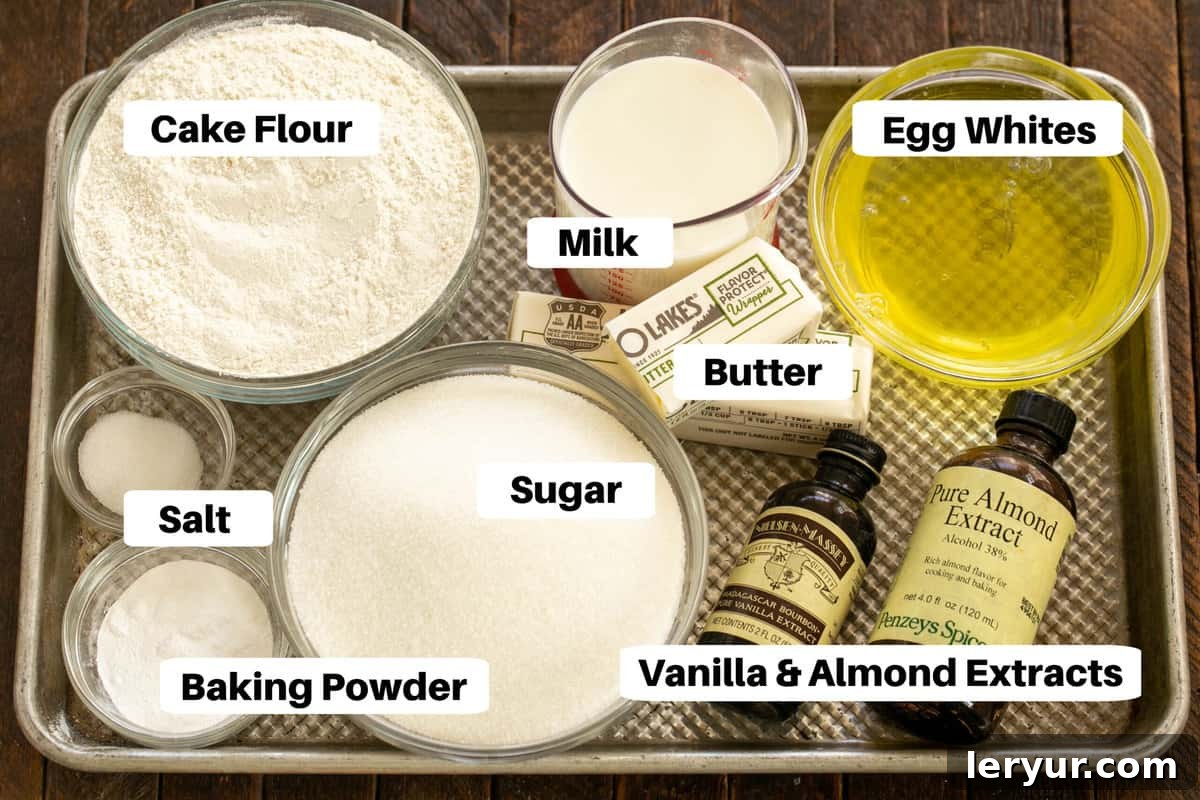
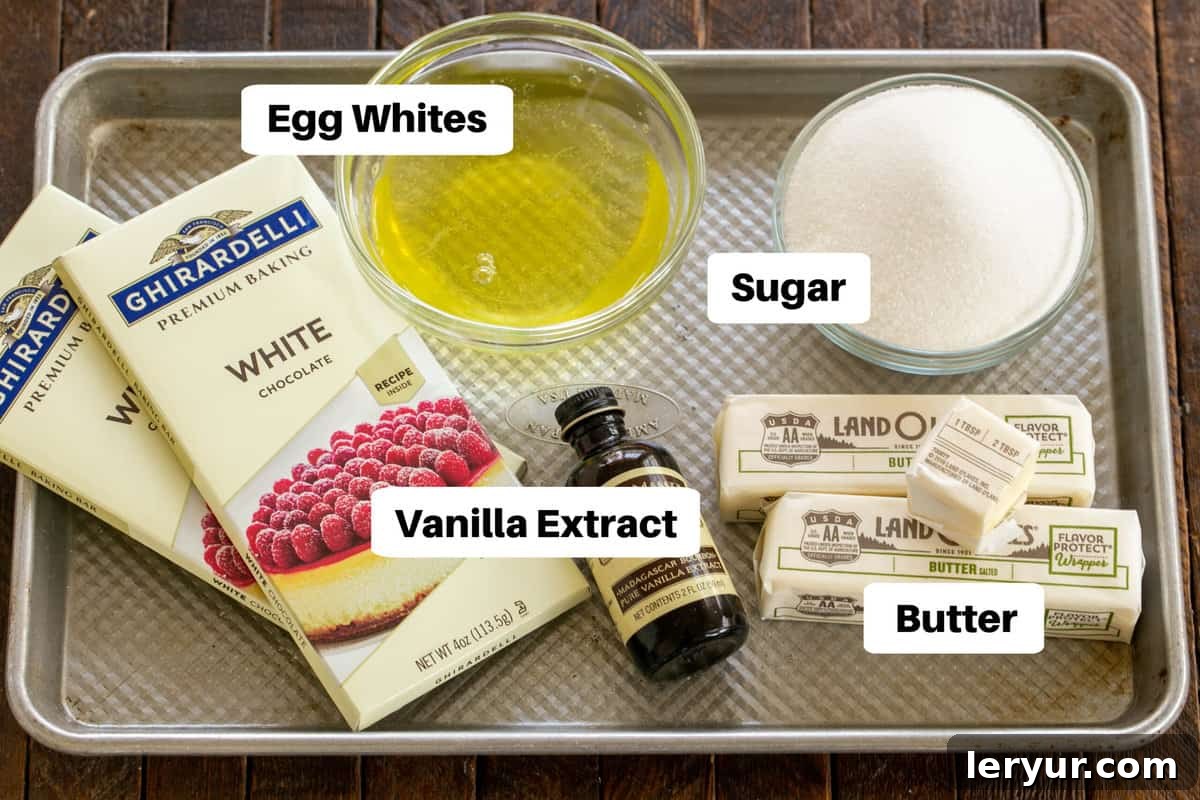
The success of your Classic White Layer Cake and its ethereal White Chocolate Swiss Meringue Buttercream hinges significantly on the quality and proper preparation of your ingredients. Here’s a detailed look at each key component and why its characteristics matter:
- Sugar: Beyond just sweetness, granulated **sugar** plays a critical role in the cake’s structure, contributing to a tender crumb and a moist texture by retaining moisture. In the buttercream, it’s heated with egg whites to create a stable meringue base.
- Salt: For baking, I consistently use fine **table salt** over kosher salt. Its smaller granules ensure it disperses more efficiently and uniformly throughout the batter and frosting, preventing concentrated pockets of saltiness and ensuring a perfectly balanced flavor profile.
- Cake Flour: This is arguably the most vital ingredient for achieving a truly tender, soft, and moist white cake with a delicate crumb. Cake flour possesses a lower protein content compared to all-purpose flour, which means less gluten development. Reduced gluten results in a finer, more delicate crumb that practically melts in your mouth. If you find yourself without cake flour, don’t fret! See our expert tips below for a simple, effective homemade substitute.
- Milk: It is imperative that your **milk** is at room temperature. Cold milk can cause the butter in your cake batter to seize and curdle, leading to an uneven texture and potential pockets of unmixed ingredients. Room temperature liquids emulsify more effectively with fats, creating a smoother, more homogeneous, and ultimately finer-textured batter.
- Egg Whites: For both the cake batter and the meringue, **egg whites** should be brought to room temperature. Room temperature whites have a lower surface tension, allowing them to whip up to a significantly greater volume and form a more stable foam than cold whites. A professional tip for easy separation: separate your eggs when they are cold, as the yolks are firmer and less prone to breaking. Then, allow the separated whites to sit out on the counter until they reach room temperature before proceeding with your recipe.
- Almond Extract: This extract introduces a subtle yet sophisticated flavor dimension, offering a delicate counterpoint to the vanilla. It enhances the overall aroma and taste profile of the white cake, adding a nuanced elegance without being overtly “almondy.”
- Vanilla Extract: Always, without exception, use **pure vanilla extract**, not imitation vanilla flavoring. The authentic extract makes an immense difference in the final taste of both the cake and the buttercream, contributing a warm, complex, and aromatic depth that artificial versions simply cannot replicate.
- Baking Powder: As a leavening agent, **baking powder** is absolutely essential for giving our white cake its beautiful rise, light structure, and airy texture. It is not interchangeable with baking soda. Baking powder has an expiration date, and using old powder will undoubtedly result in a flat, dense cake that fails to rise properly. To quickly test its freshness, place a teaspoon of baking powder in a small bowl of very hot water. If it bubbles vigorously and immediately, it’s fresh and active. If there’s little to no reaction, it’s time for a new can.
- Unsalted Butter: For the cake, use good quality **unsalted butter** that is at room temperature but still slightly cool to the touch. This allows it to cream properly with the sugar, creating air pockets that contribute to the cake’s lightness. For the Swiss meringue buttercream, the butter should be softened to a true room temperature (meaning it yields easily to a finger press) to ensure it incorporates smoothly into the meringue, creating a seamless, emulsified frosting.
- White Chocolate: I highly recommend using high-quality **white chocolate bars**, such as Ghirardelli, finely chopped. Avoid white chocolate chips, as they often contain stabilizers (like soy lecithin) that prevent them from melting smoothly and can lead to a grainy texture in your buttercream. Good quality white chocolate will yield a wonderfully creamy, rich, and truly decadent buttercream.
Mastering the Art of the Fluffy White Layer Cake
Baking this classic white cake is a gratifying process when you follow these steps with care and precision. The ultimate goal is to achieve a cake that is exceptionally light, exquisitely tender, and perfectly moist, forming the ideal foundation for our delicate buttercream.
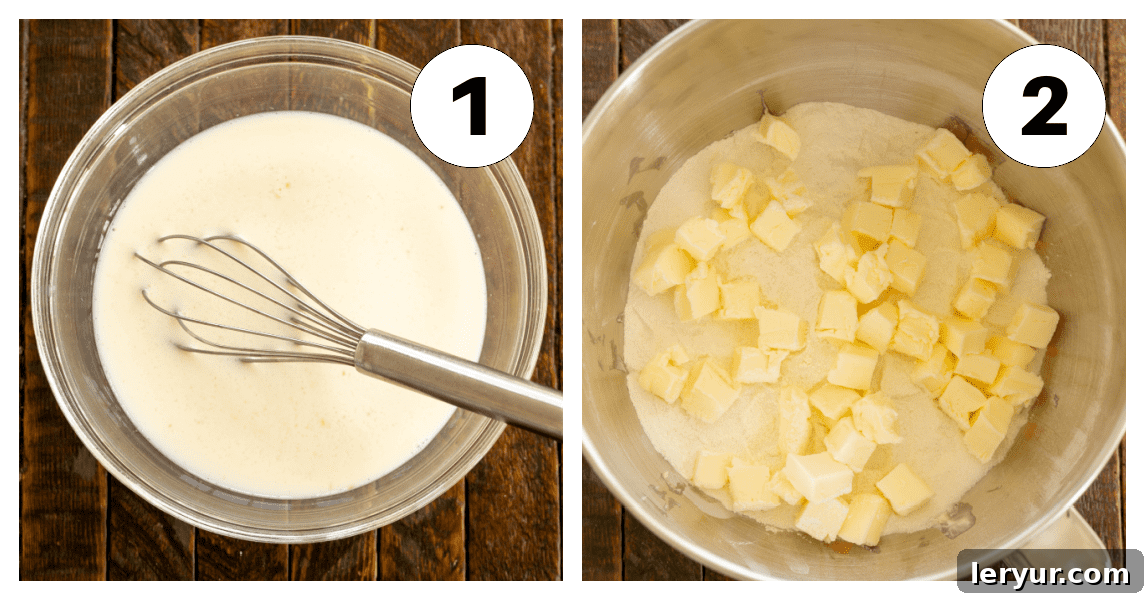
- Prepare Wet Ingredients: In a medium-sized bowl, gently combine your room temperature milk, separated egg whites, and both almond and vanilla extracts. Whisk them thoroughly until they are just combined and homogeneous. Setting this mixture aside ensures that all your liquid flavorings and components are evenly distributed before they are introduced to the dry ingredients, promoting uniform flavor and texture.
- Combine Dry Ingredients and Butter: In the bowl of your stand mixer, fitted with the paddle attachment, whisk together the cake flour, granulated sugar, baking powder, and salt. Once these dry ingredients are well combined, add the softened (but still slightly cool) unsalted butter, which you should have cut into small, manageable pieces. Mix on a low speed for a couple of minutes until the mixture resembles coarse sand or fine crumbs, with the butter fully and evenly incorporated into the dry ingredients. This “reverse creaming” method is a fantastic technique that helps coat the flour particles in fat, minimizing gluten development and resulting in an incredibly tender cake.
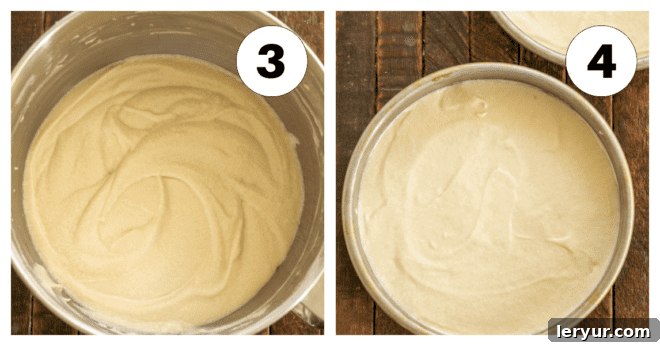
- Gradually Incorporate Wet into Dry: With the mixer running on medium-low speed, slowly and gradually add half of the prepared milk mixture to the flour-butter mixture. Beat until the batter is just combined and appears smooth. Remember to frequently scrape down the sides and bottom of the bowl to ensure even mixing. Next, add the remaining milk mixture and continue to beat for approximately one minute more, or until the batter is light, smooth, and uniform. It is crucial to avoid overmixing at this stage, as excessive agitation can over-develop gluten, leading to a tougher, less tender cake.
- Bake to Golden Perfection: Carefully divide the silky cake batter evenly between your two prepared 8-inch cake pans. Use a kitchen scale for precision if available, or eyeball it carefully for symmetrical layers. Bake in your preheated oven according to the recipe instructions until a wooden toothpick inserted into the very center of each cake comes out clean, or with just a few moist crumbs attached. This is the ultimate indicator that your cake is perfectly baked without being overdone. Once baked, allow the cakes to cool completely in their pans on a wire rack for about 10-15 minutes, then invert them onto the rack to finish cooling entirely. Cooling thoroughly is paramount for preventing crumbly cakes and ensuring your delicate frosting doesn’t melt upon application.
Crafting the Luxurious White Chocolate Swiss Meringue Buttercream
This exquisite frosting might initially seem a bit daunting, but by meticulously following these steps, you will achieve a silky, stable, and utterly delicious buttercream that provides the perfect delicate counterpoint to your fluffy white cake.
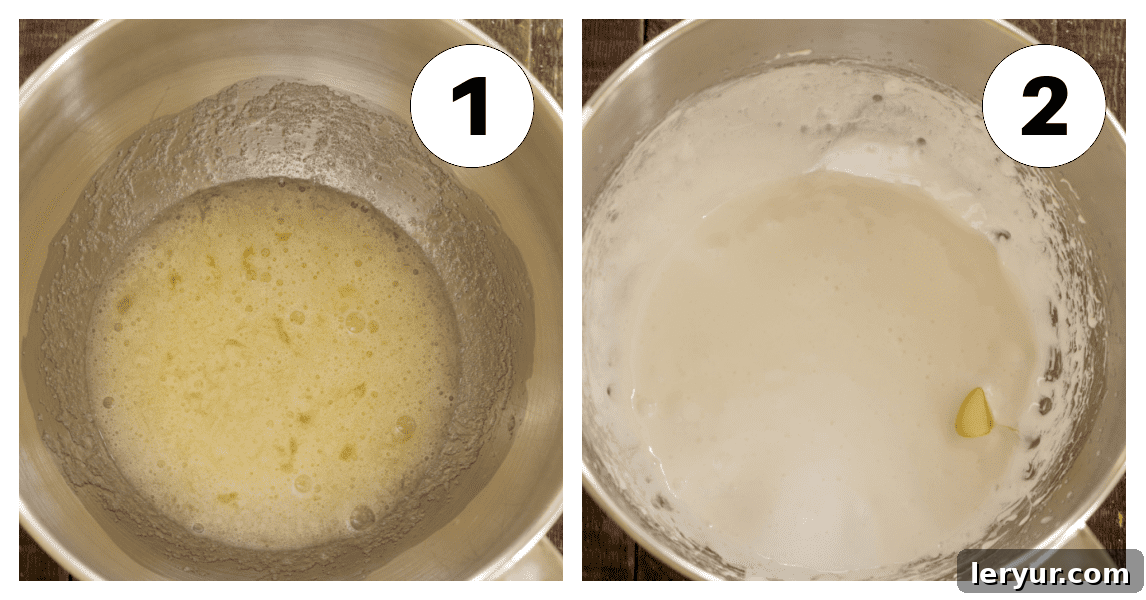
- Prepare the Meringue Base: In the heat-proof bowl of your stand mixer, combine the room temperature egg whites and granulated sugar. Place this bowl over a pot of simmering water (creating a classic double boiler setup), ensuring that the bottom of the bowl does not directly touch the simmering water. Continuously whisk the egg white and sugar mixture by hand until all the sugar crystals have completely dissolved and the mixture is hot to the touch (ideally reaching about 160°F or 71°C). This crucial pasteurization step not only ensures food safety but also properly dissolves the sugar, which is fundamental for a smooth meringue.
- Whip the Meringue to Stiff Peaks: Carefully remove the bowl from the heat and immediately attach it to your stand mixer, fitted with the whisk attachment. Begin whipping on high speed until the meringue becomes incredibly thick, glossy, and has cooled completely to room temperature. This process can take anywhere from 5 to 10 minutes, depending on your mixer and kitchen temperature. The bowl should feel entirely cool to the touch when the meringue is ready. This stable, voluminous meringue forms the essential backbone of your luxurious buttercream.
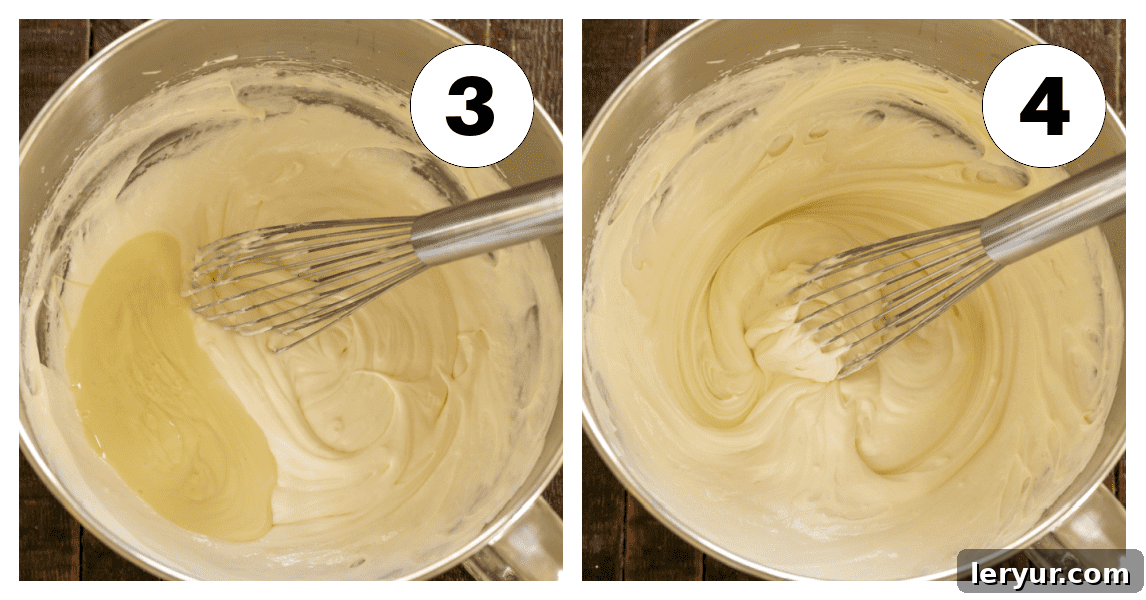
- Gradually Incorporate the Butter: Once the meringue is perfectly whipped and completely cooled, reduce the mixer speed to medium. Begin adding the softened, room temperature butter, one tablespoon at a time. It is vital to allow each addition of butter to fully incorporate into the meringue before adding the next. During this stage, the mixture might appear to curdle, look soupy, or even separate – **do not panic!** This is a completely normal phase in Swiss meringue buttercream production. Continue beating patiently, and after several minutes, it will miraculously come together into a beautifully smooth, fluffy, and stable buttercream.
- Add White Chocolate and Flavor: Once your buttercream has reached its smooth and fluffy consistency, add the cooled, melted white chocolate along with the pure vanilla extract. Mix on medium-low speed until all ingredients are thoroughly combined and the frosting is uniform in texture and color. If the frosting feels too soft or runny at this point (which can happen in a warm kitchen), simply place the entire bowl in the refrigerator for about 5-10 minutes. Then, re-whip it until it thickens to the desired consistency for effortlessly icing your cake.
Expert Tips for a Flawless White Chocolate Swiss Meringue Buttercream
Achieving that perfectly luxurious, silky-smooth Swiss meringue buttercream isn’t just about following steps; it’s about understanding the nuances of the technique. This frosting, made with carefully warmed egg whites whipped with sugar, then enriched with high-quality butter and melted white chocolate, truly is “to die for.” Here’s how to master it and avoid common pitfalls:
- Initial Egg White Temperature: A common misconception is that egg whites for meringue must be at room temperature before whipping. For Swiss meringue buttercream, because the egg whites are warmed over a double boiler with sugar, their initial temperature isn’t as critical for whipping volume. However, remember that eggs are easiest to separate when cold. So, separate your whites from yolks right out of the refrigerator, then proceed with the warming step.
- The Paramount Importance of Cleanliness: Any trace of egg yolk, fat, or grease in your egg whites will absolutely prevent them from whipping up properly into a stable meringue. Similarly, your mixing bowl and whisk attachment must be impeccably clean and absolutely grease-free. If you’ve hand-washed them, consider wiping all implements down with a piece of paper towel dampened with a bit of white vinegar or lemon juice. This helps to eliminate any lingering greasy residue, ensuring optimal meringue formation. This step is a common pitfall, so pay meticulous attention.
- Setting Up Your “Double Boiler”: You don’t need a specialized, official double boiler to execute this step. A large saucepan filled with about 1/3 water, brought to a gentle simmer, over which your stand mixer bowl can snugly fit without the bottom touching the water, will work perfectly. The steam gently cooks and warms the egg white and sugar mixture to the safe temperature needed.
- Patience During Butter Incorporation: This is a critical phase. When it’s time to add the butter, ensure it’s at true room temperature – soft enough to easily dent with your finger but not melted or greasy. Add it one tablespoon at a time, allowing each piece to fully incorporate into the meringue before adding the next. This patience is profoundly rewarded with a smooth, stable buttercream. If the mixture appears curdled, separated, or like cottage cheese, **do not lose hope!** Keep beating. It will eventually come together into a beautifully smooth, cohesive frosting. This phase can take longer than you expect, so trust the process.
- Adjusting Buttercream Consistency: Sometimes, particularly in warmer kitchen environments, your buttercream might turn out a bit too soft. This is easily remedied! Simply place the entire bowl (with the buttercream) into the refrigerator for 10-15 minutes to chill slightly, then re-whip it vigorously. It will firm up and become beautifully workable. Conversely, if your buttercream is too stiff after refrigeration, let it sit at room temperature for a while, then re-whip until it regains its creamy, spreadable consistency.
- Optimal Storage and Serving: Due to the raw egg whites (which are cooked over heat but still constitute a fresh ingredient) in the Swiss Meringue Buttercream, this cake (and any leftover frosting) must be stored in the refrigerator. Cover the cake loosely with plastic wrap or a cake dome to prevent it from drying out or absorbing any refrigerator odors. It will maintain its freshness for up to 3-4 days when properly stored. For the absolute best flavor and texture experience, always bring the cake to room temperature for at least 30-60 minutes before serving. This allows the butter in the buttercream to soften and become truly luscious, and the cake layers to regain their optimal moistness, ensuring an unforgettable eating experience.
- Yield Adjustment for Buttercream: The full recipe for this Swiss Meringue Buttercream typically yields a generous amount, often more than enough for a standard two-layer 8-inch cake. When I recently prepared this cake, I found that making two-thirds (⅔) of the frosting recipe was perfectly ample to frost both layers and the sides generously. The adjusted amounts for a smaller batch are conveniently noted in the recipe card below, allowing you to tailor the recipe precisely to your needs and minimize waste.
Insider Tips for Baking a Perfectly Moist and Fluffy White Layer Cake
Achieving a classic white layer cake with a consistently tender crumb and wonderful moistness is an art, but one that is easily mastered with a few key techniques and a careful approach. As with any baking endeavor, always start by thoroughly reading through the entire recipe before you begin and precisely measuring all your ingredients. These expert tips will guide you to a flawless finish, ensuring your cake is a resounding success every time.
- The Significance of Egg Whites: The exclusive use of egg whites, rather than whole eggs, is precisely what gives this cake its signature pure white color, preventing it from transforming into a yellow cake. These extra yolks are too valuable to waste! Save them to enrich other delightful recipes such as a creamy double chocolate pudding or a decadent classic crème brûlée, ensuring nothing goes to waste in your kitchen.
- Embrace the Power of Cake Flour: Cake flour is your ultimate secret weapon for achieving an unbelievably delicate crumb. Its inherently lower protein content results in significantly less gluten formation during mixing, which directly translates to a softer, more tender, and finer-textured cake. It creates a cake that practically melts in your mouth with every bite.
- PRO-Tip: Your Homemade Cake Flour Substitute: If you ever find yourself mid-recipe without cake flour on hand, don’t despair! You can easily create a suitable substitute at home with a couple of common kitchen staples. For every cup of cake flour required by the recipe, measure out one full cup of all-purpose flour. Then, remove precisely two tablespoons of that all-purpose flour and replace them with two tablespoons of cornstarch. Sift this mixture together thoroughly several times to ensure even distribution. The cornstarch helps to mimic the lower gluten structure of commercial cake flour, resulting in a significantly more tender baked good.
- Mindful Mixing for Optimal Texture: During the mixing process of your cake batter, it is crucial to frequently scrape down the bottom and sides of your mixing bowl. This seemingly small step ensures that all ingredients are uniformly incorporated into the batter, which in turn minimizes the total beating time required to achieve a smooth consistency. Less beating means less gluten development, and as we’ve learned, less gluten contributes directly to a more tender and delicate cake crumb.
- PRO-Tip: Achieve Perfectly Even Layers: For a visually stunning layer cake with uniform slices that look professionally baked, it’s essential to strive for perfectly even layers. I highly recommend using a kitchen scale to divide your batter precisely between the two cake pans. Simply place an empty prepared pan on the scale, tare it to zero, and then pour exactly half of your total batter weight into it. Repeat for the second pan. If a kitchen scale isn’t readily available, you can certainly eyeball it fairly accurately or use a few toothpicks to measure the depth of the batter in each pan, adjusting as needed until the levels appear roughly equal. This small but significant step makes a profound difference in the final presentation of your beautiful layer cake.
- The Golden Rule: Avoid Overbaking at All Costs: This is perhaps the single most crucial tip for ensuring your cake remains wonderfully moist. Bake your white layer cake only until a wooden toothpick inserted into the very center of the cake comes out completely clean or with just a few moist crumbs clinging to it. Overbaking, even by a few minutes, will inevitably lead to a dry, crumbly, and dense cake. Remember that all ovens vary significantly in temperature and baking efficiency, so the baking times provided in the recipe are merely general guidelines; always trust your oven and, most importantly, the reliable toothpick test.
Frequently Asked Questions About This Classic White Layer Cake
Buttercream frosting comes in several delightful varieties, each with unique characteristics and flavor profiles. The most common types include: **American Buttercream** (made with powdered sugar and butter, very sweet and simple), **French Buttercream** (made with egg yolks, rich and custardy), **Italian Meringue Buttercream** (made by slowly pouring hot sugar syrup into whipping egg whites, resulting in a very light, stable, and less sweet frosting), **Swiss Meringue Buttercream** (like the one in this recipe, made by warming egg whites and sugar over a double boiler before whipping, yielding an incredibly smooth, light, and less sweet frosting with a pronounced butter flavor), and **German Buttercream** (made by incorporating softened butter into a cooled pastry cream). Professionals often favor Swiss and Italian meringue buttercreams for their luxurious smooth texture, rich yet balanced butter flavor, and elegant stability, making them ideal for elaborate cake decorating and sophisticated palates who prefer less sweetness.
Achieving perfectly even cake layers is a key step for a professional-looking and beautifully balanced cake. The most precise method involves using a **kitchen food scale**. Simply place an empty prepared cake pan on your scale, tare it to zero, and then carefully pour exactly half of your total cake batter weight into it. Repeat this process for the second pan. This ensures each layer has an identical amount of batter. If you don’t have a kitchen scale, you can still aim for evenness using a visual method: divide the batter as evenly as possible between the pans, then insert a few clean toothpicks into the batter in each pan to gauge the depth. Adjust by adding or removing small amounts of batter from one pan to another until the toothpick marks indicate approximately the same batter level. Additionally, using cake strips (moistened fabric strips wrapped around the outside of your cake pans) can help the cakes bake more evenly, reducing doming and making leveling easier.
To frost a cake with a professional, smooth, and elegant finish, a few key tools are invaluable and will significantly elevate your decorating game. **Offset spatulas** (both small and large sizes) are absolutely essential for efficiently spreading and smoothing the frosting over the cake’s top and sides. A **cake turntable** (or revolving cake stand) is incredibly helpful, making the rotation of the cake effortless and allowing for continuous, even application of frosting without interruption. A **bench scraper** or a dedicated **cake smoother** is excellent for achieving perfectly straight, sharp edges and incredibly smooth sides on your frosted cake. For a pristine presentation, a clever trick is to tuck strips of **parchment paper** around the perimeter of your cake base or serving plate before you begin frosting. This prevents any excess frosting from getting onto your stand, ensuring a perfectly clean display once you pull the strips away.
Absolutely! Both the cake layers and the white chocolate Swiss meringue buttercream can be prepared in advance, which is fantastic for party planning. Baked cake layers, once completely cooled, can be wrapped tightly in several layers of plastic wrap (and then aluminum foil for extra protection) and stored at room temperature for up to 2 days, or frozen for up to 2 months. Thaw frozen layers overnight in the refrigerator before use. The Swiss Meringue Buttercream itself can be made up to 3 days in advance. Store it in an airtight container in the refrigerator. Before you plan to use it, bring it to room temperature for several hours and then re-whip it with the paddle attachment on your stand mixer until it becomes perfectly smooth, light, and fluffy again. If it’s too firm to whip, you can gently warm the bowl over a double boiler for a minute or two to soften the butter before re-whipping.
Due to the presence of egg whites in the Swiss Meringue Buttercream, this frosted cake requires refrigeration to maintain its freshness and safety. Cover the cake loosely with plastic wrap or place it under a cake dome to prevent it from drying out or absorbing unwanted odors from the refrigerator. Stored properly, the cake will remain fresh and delicious for approximately 3-4 days in the refrigerator. For the very best flavor and texture experience, it is highly recommended to allow the cake to come to room temperature for at least 30-60 minutes before serving. This gentle warming softens the butter in the buttercream, making it exquisitely creamy, and enhances the moistness and tenderness of the cake layers, ensuring an optimal and unforgettable eating experience.
Explore More Decadent Cake Creations from Our Kitchen
If you’ve fallen in love with the refined elegance and exquisite taste of this Classic White Layer Cake, you’ll surely appreciate our other meticulously crafted cake recipes. Each one is designed to bring immense joy and undeniable deliciousness to your table, catering to every palate, whether you’re a devout chocolate connoisseur or a passionate lover of vibrant citrus flavors.
- For the ultimate, deepest chocolate indulgence, our Chocolate Fudge Layer Cake is an absolute must-try. It’s a true labor of love that is undoubtedly worth every single bit of effort for its rich, intense flavor!
- Seeking a simpler yet equally satisfying chocolate option? The Triple Layer Cocoa Cake delivers profound chocolate flavor with less fuss, making it one of my personal favorite go-to chocolate cakes for everyday cravings.
- Citrus aficionados will absolutely adore our bright and zesty Lemon Layer Cake, featuring a delightful, tangy lemon curd filling that provides a refreshing burst of fresh, sunny flavor in every bite.
- For a timeless, comforting classic that always hits the spot with its spiced perfection, my first choice is consistently the Classic Carrot Cake. It’s hearty, aromatic, and utterly delicious with cream cheese frosting.
- Experience authentic Latin American sweetness and incredible moistness with our Tres Leches Cake Recipe – a rich, milky, and incredibly flavorful dessert that’s soaked to perfection.
- Don’t stop your baking adventure here! Be sure to explore my comprehensive recipe index for even more of the Best Cake Recipes, guaranteed to inspire your next baking project and satisfy every sweet tooth.
Stay connected and share your baking triumphs through social media! Follow me @ Instagram, Facebook, and Pinterest. Don’t forget to tag me when you try one of my recipes! Your creations inspire me. And if you absolutely love the results and enjoyed making this cake, please consider giving it a 5-star rating in the recipe card below – your valuable feedback truly means the world!
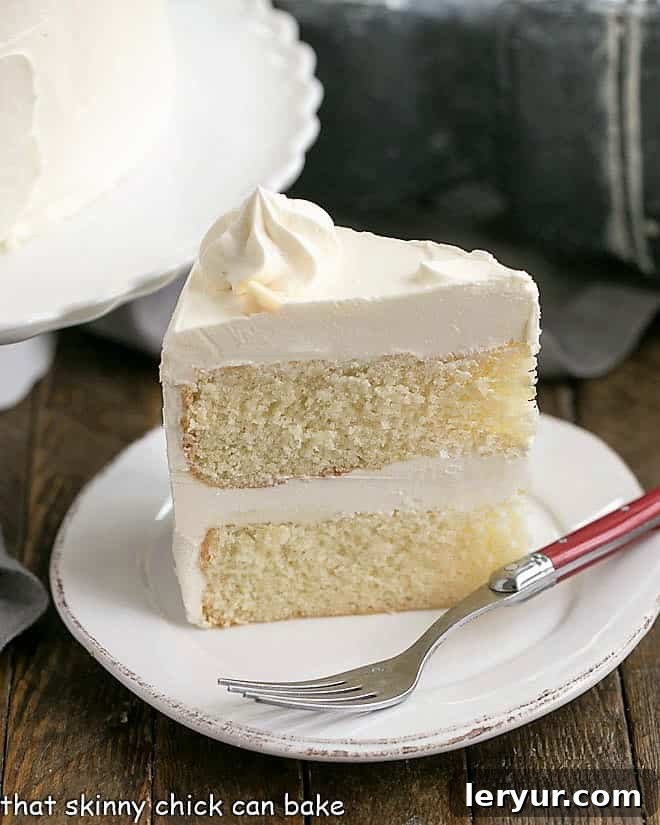
Classic White Layer Cake with White Chocolate Buttercream
45 minutes
30 minutes
1 hour 15 minutes
12
A tender white layer cake iced with an exquisite Swiss meringue buttercream!
Ingredients
For Cake:
- 2¼ cups cake flour
- 1 cup milk, at room temperature
- 6 egg whites, at room temperature
- 2 teaspoons almond extract
- 1 teaspoon vanilla
- 1¾ cups sugar
- 4 teaspoons baking powder
- ¾ teaspoon salt
- 1½ sticks of butter, at room temperature but still cool
For Buttercream:
- 9 ounces white chocolate, chopped
- 6 eggs whites
- 1½ cups plus 3 tablespoons sugar
- 1½ cups plus 3 tablespoons butter, at room temperature
- 2 teaspoons vanilla
Instructions
- Preheat oven to 350°. Prepare two 8-inch cake pans by spraying them with Baker’s Joy and line them with rounds of parchment.
- Make sure milk and eggs are at room temperature.
- Pour milk, egg whites, and extracts into a medium bowl and whisk to combine.
- Mix cake flour, sugar, baking powder, and salt in the bowl of an electric mixer at slow speed. Add butter, cut into small pieces, and beat for a couple more minutes.
- Add half of the milk mixture to the flour mixture and beat at medium speed for a couple of minutes. Add the remaining milk mixture and beat for about 1 minute.
- Pour batter evenly between two prepared cake pans.
- Bake until a toothpick inserted in the center comes out clean, 27 to 30 minutes.
- Allow cake to cool to room temperature.
- Melt the white chocolate in a microwave-safe bowl, gently in the microwave, using 15-30 second intervals, stirring until melted. Cool to room temperature.
- Combine the egg whites and sugar in the bowl of a mixer. Place the bowl over a pot of simmering water so that the water comes a third of the way up the bowl.
- Whisk the egg whites till just hot to the touch, about 1-2 minutes.
- Use a mixer on high to whip the eggs until thick and cooled to room temperature, about 5 minutes.
- Turn the mixer speed to medium and add butter by tablespoon, making sure butter is mixed in before adding the next tablespoon.
- Add the chocolate and vanilla and mix until smooth. If the icing is too runny, refrigerate briefly until it thickens.
- Frost the cake when cooled to room temperature.
Notes
Cake adapted from Cook’s Illustrated and frosting adapted from Ghirardelli.
You will have leftover buttercream. If you want to make ⅔ of a batch, use 6 ounces of white chocolate, 4 egg whites, 1 cup plus 2 tablespoons of sugar, 1 cup plus 2 tablespoons butter, and 1½ teaspoons vanilla.
Recommended Products
As an Amazon Associate and member of other affiliate programs, I earn from qualifying purchases.
- KitchenAid KSM150PSER Artisan Tilt-Head Stand Mixer with Pouring Shield, 5-Quart, Empire Red
- OXO Good Grips 11-Inch Better Balloon Whisk
- 8-inch Cake Pan
Nutrition Information:
Yield:
12
Serving Size:
1 slice
Amount Per Serving:
Calories: 520Total Fat: 24gSaturated Fat: 14gTrans Fat: 1gUnsaturated Fat: 8gCholesterol: 137mgSodium: 502mgCarbohydrates: 67gFiber: 0gSugar: 45gProtein: 9g
HOW MUCH DID YOU LOVE THIS RECIPE?
Please leave a comment on the blog or share a photo on Pinterest