
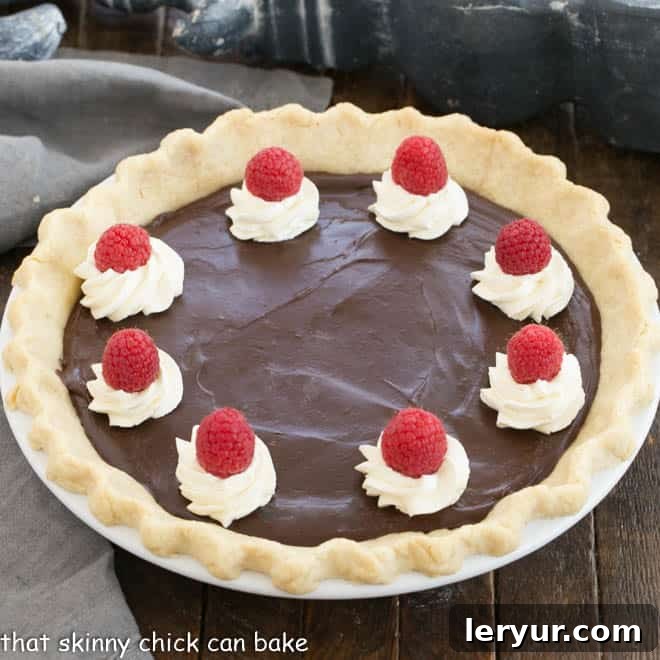
Prepare to be utterly captivated by this sensational Homemade Chocolate Pudding Pie, a timeless dessert masterpiece that promises a symphony of rich, velvety chocolate pudding nestled in a crisp, buttery pastry crust, all crowned with billows of light-as-air whipped cream. This isn’t just a pie; it’s an experience, a slice of pure chocolate heaven!
There’s something uniquely comforting and irresistibly delicious about a classic Chocolate Cream Pie. For our family, it’s more than just a dessert; it’s a cherished tradition, a staple at holiday gatherings, and a guaranteed crowd-pleaser for any family get-together. While the specific crust and filling variations might change from recipe to recipe, one thing remains constant: the star ingredient is always, unequivocally, chocolate. This particular recipe elevates the simple pleasure of chocolate pudding to an art form, creating a dessert that feels both nostalgic and utterly gourmet.
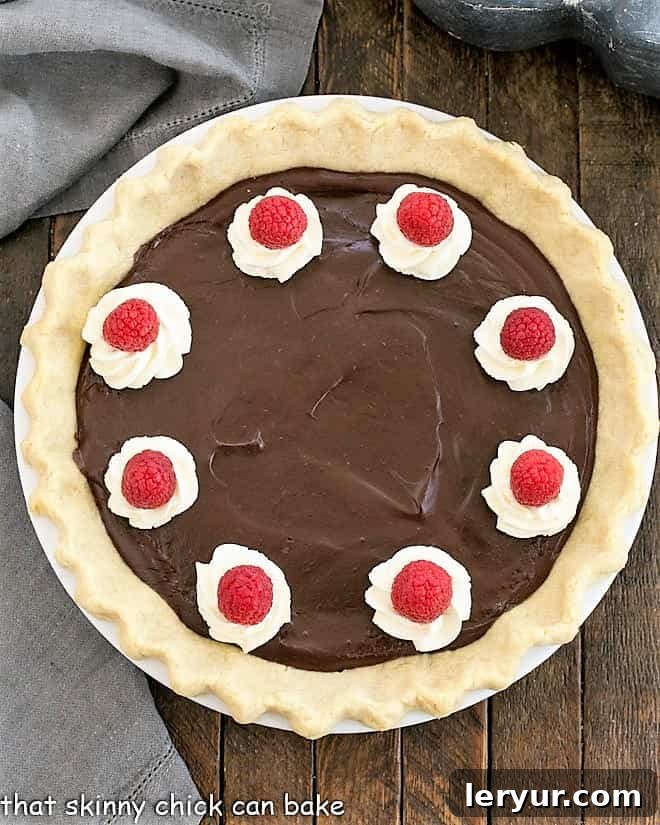
The Irresistible Allure of Homemade Chocolate Pudding Pie
Why should this decadent Chocolate Pudding Pie find its way to your kitchen? The reasons are as rich and satisfying as the pie itself:
- **A Pudding Lover’s Dream:** If your family, like mine, adores the creamy indulgence of pudding, then a homemade cream pie, especially one bursting with luscious chocolate, is an absolute must-make. It’s the ultimate upgrade to a beloved comfort food, transforming a simple bowl of pudding into an elegant dessert.
- **The Magic of Cream Pies:** At its heart, a cream pie is an ode to the humble yet extraordinary homemade pudding. Imagine that silky smooth, intensely flavored pudding generously piled into a perfectly baked pie crust and then crowned with a cloud of freshly whipped cream. It’s a textural masterpiece – the crispness of the crust, the creaminess of the filling, and the ethereal topping all combine for a truly divine bite.
- **Flexibility for Every Baker:** While crafting homemade pudding and a scratch-made pastry crust offers an unparalleled taste experience, this recipe is wonderfully adaptable to fit your schedule. If time is a constraint, don’t let it deter you! A store-bought graham cracker or chocolate cookie crust provides a fantastic shortcut without compromising on flavor. Alternatively, a refrigerated sheet of pie dough can be easily pressed into your own pie plate, blind-baked, and then filled once cooled, making this luxurious dessert accessible to all.
- **A Timeless Classic:** Chocolate pudding pie isn’t just a trend; it’s a dessert that has stood the test of time, evoking memories of grandma’s kitchen and simpler days. Bringing this classic to your table connects you to a rich culinary heritage, all while creating new, delicious memories.
I still fondly recall when I first married Bill and quickly learned about his unwavering food standards. He had a particular disdain for instant pudding, yet the boxes proudly labeled “Cook and Serve” were deemed perfectly acceptable. A true gourmand in his own right, wouldn’t you agree? It’s these little quirks and preferences that often lead to discovering and perfecting recipes that become family favorites for generations.
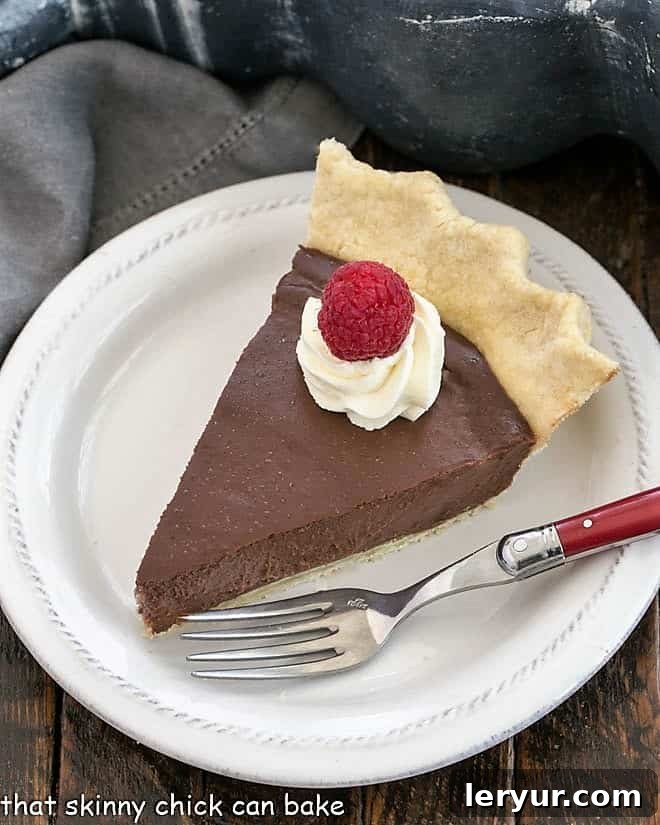
Mastering Your Chocolate Pudding Pie: Expert Tips for Perfection
Achieving pie perfection is simpler than you might think, especially with a few insider tips. Follow these guidelines to ensure your Chocolate Pudding Pie is nothing short of spectacular:
- **Choose the Right Pie Plate:** For this recipe, a standard 9-inch pie plate is ideal. My first attempt used a deep-dish pan, and while still delicious, it left me wishing for more filling to perfectly complement the crust ratio. A standard depth ensures a balanced and satisfying slice.
- **The Art of Blind-Baking:** If you opt for a traditional pastry crust, blind-baking is not just recommended, it’s essential. Since the filling isn’t baked, pre-baking your crust ensures it’s fully cooked, delightfully crisp, and won’t turn soggy once the rich pudding is added. This step forms the sturdy foundation for your creamy masterpiece.
- **Crust Choices Galore:** The beauty of this chocolate pudding filling lies in its versatility. It’s truly delicious in almost any pie crust! Depending on your mood, time, or dietary preferences, feel free to choose from a homemade or quality store-bought pastry crust, a crunchy graham cracker crust, or a rich chocolate cookie crust. Each option offers a unique textural and flavor contrast to the smooth pudding.
- **Proper Cooling is Key:** Always allow your baked pie crust to cool completely before filling it. This prevents the hot pudding from melting the butter in the crust, which could lead to a greasy or soggy bottom. As for the pudding itself, let it cool for about 5 minutes, stirring a few times to release steam and prevent a skin from forming, before scraping it into the prepared pie crust. This slight cooling helps it set more evenly.
- **Chill for Optimal Setting:** Patience is a virtue when it comes to pie. Chill your filled pie for a minimum of two hours (or ideally longer) before adding the whipped cream topping. This crucial chilling period allows the pudding to fully set and firm up, ensuring clean slices. Don’t be alarmed if small beads of moisture develop on the surface after the pie has been refrigerated; this is natural and will not affect the taste or quality of your pie.
- **Garnish with Flair:** Elevate the visual appeal of your pie with a beautiful garnish. Fresh raspberries add a bright, tart counterpoint to the rich chocolate, while elegant chocolate curls provide an extra layer of chocolatey indulgence and sophisticated texture. A dusting of cocoa powder or finely chopped nuts can also be delightful.
- **Make Ahead Magic:** This pie is an excellent candidate for making ahead! Prepare the pie, chill it thoroughly, and then add the whipped cream topping just before serving for the freshest look and texture. It stores beautifully in the refrigerator for up to 3-4 days.
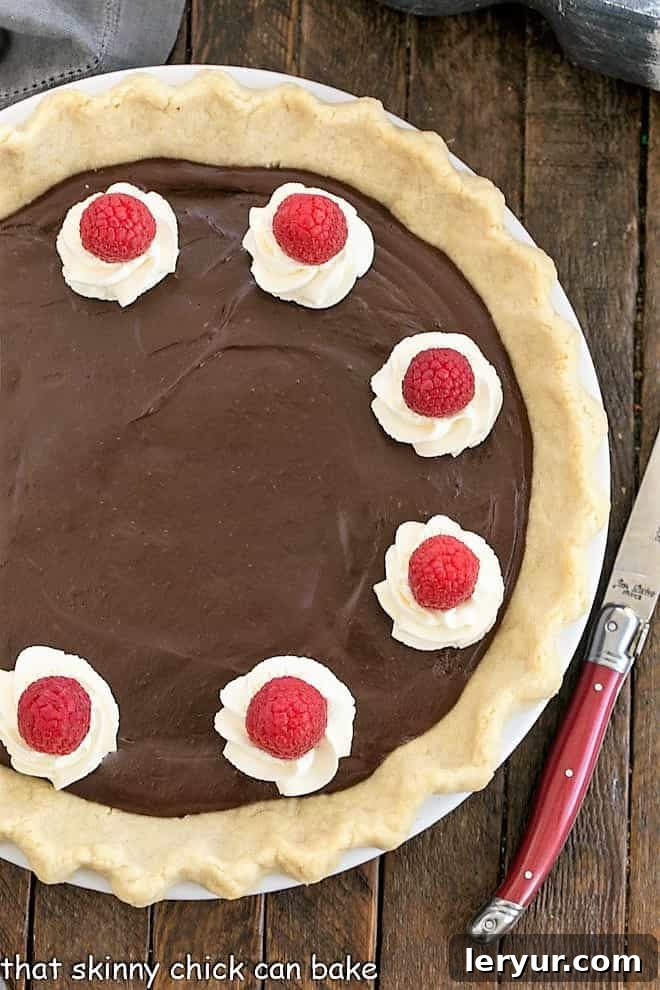
Crafting the Perfect Chocolate Pudding from Scratch
The heart and soul of this Chocolate Pudding Pie is, of course, the homemade chocolate pudding. Unlike instant varieties, pudding made from scratch offers unparalleled richness, depth of flavor, and a perfectly silky texture. Puddings of this caliber often rely on eggs as a primary thickener, alongside starch. The goal is to cook the eggs gently and thoroughly so they are seamlessly incorporated into the pudding, creating a luscious custard-like consistency, rather than ending up with unsightly bits of scrambled egg. Here’s how to achieve pudding perfection:
- **Prepare Your Dry Ingredients (and Your Pan):** Begin by whisking together the sugar, cornstarch, cocoa powder, and a pinch of salt in a heavy-bottom saucepan. The “heavy-bottom” is crucial here; a flimsy pan conducts heat unevenly, dramatically increasing the risk of the mixture scorching at the bottom. While you can use any pan you have, exercise extra vigilance and stir constantly if your pan is on the lighter side. Whisking the dry ingredients first ensures they are thoroughly combined and prevents lumps.
- **Incorporate the Egg Yolks:** Following the recipe precisely, whisk in the egg yolks until they are fully combined with the dry mixture. Egg yolks add incredible richness, color, and contribute significantly to the pudding’s luxurious, creamy texture. Remember to reserve the egg whites – they are culinary gold and can be used for delightful treats like meringue cookies, elegant pavlova, delicate macarons, or the iconic lemon meringue pie.
- **Slowly Add Liquids and Cook:** Gradually add the milk, followed by the cream, whisking continuously to ensure a smooth, homogenous mixture. Place the saucepan over medium-high heat. The key to successful pudding is constant whisking during this cooking phase. This prevents sticking, scorching, and ensures the eggs cook evenly without curdling. Continue whisking until the mixture comes to a boil and noticeably thickens. The moment it boils, cook and stir for one more minute to ensure the cornstarch is fully activated and the pudding reaches its optimal consistency.
- PRO-Tip for Perfect Corners: For an extra smooth pudding without any bits catching on the bottom, use a flat whisk. Its design allows it to scrape into the corners of the saucepan more effectively than a balloon whisk, ensuring no mixture is left unscorched or unstirred.
- **Finishing Touches:** Once the pudding has thickened to perfection, remove the saucepan from the heat. Immediately add the chopped semi-sweet chocolate and vanilla extract (and rum, if using). Whisk vigorously until the chocolate is completely melted and the pudding is gloriously smooth and glossy. The residual heat from the pudding will melt the chocolate beautifully, infusing every spoonful with deep chocolate flavor.
- **Pour and Chill:** Pour the warm chocolate pudding into your prepared (and cooled) pie shell. Gently smooth the top with a spatula. Now comes the hardest part: chilling! Allow the pie to chill in the refrigerator for at least two hours, or until it is thoroughly cold and set. This firm setting is crucial before you even think about adding that magnificent whipped cream topping.
Your Questions Answered: Chocolate Pudding Pie FAQ
While often used interchangeably, the primary difference between pudding and custard lies in their thickening agents and, consequently, their texture. Both utilize eggs, which contribute richness and a smooth consistency. However, pudding typically relies on a combination of eggs and a starch, such as cornstarch or flour, for its thickening power. This results in a lighter, sometimes slightly softer set. Custard, on the other hand, usually thickens primarily through eggs, sometimes with just a hint of starch or none at all, making it denser, richer, and often more robust. Both are incredibly versatile and frequently serve as delightful pie fillings, each bringing its own unique charm to the dessert table.
Blind baking, also known as pre-baking, is a crucial technique used when a pie crust is filled with an unbaked or pre-cooked filling, such as our chocolate pudding. It involves baking the pie crust by itself before any filling is added. The main reason for blind baking is to ensure that the crust is fully cooked and crisp, preventing it from becoming soggy once a moist, unbaked filling is poured in. Without blind baking, the crust beneath the filling would remain raw or absorb moisture, leading to a disappointing, chewy texture. It creates a robust, golden foundation ready to hold your delicious filling.
Blind baking a pie crust is a straightforward process that guarantees a perfect foundation for your pie. Here’s a step-by-step guide:
- **Prepare the Dough:** First, roll out your pie dough to the appropriate size and carefully fit it into your pie plate. Gently press it into the bottom and up the sides.
- **Trim and Flute:** Trim any excess dough around the edges, leaving about a half-inch overhang. Then, crimp or flute the edges decoratively to create a beautiful finish and help prevent shrinkage during baking.
- **Chill the Crust:** For best results, chill the unbaked pie crust in the refrigerator for at least 20-30 minutes. This helps the butter firm up, reducing shrinkage in the oven.
- **Preheat Oven and Line:** Preheat your oven to the temperature specified in your recipe (typically 375-425°F or 190-220°C). Line the chilled pie crust with a piece of parchment paper or aluminum foil, pressing it gently against the bottom and sides.
- **Add Pie Weights:** Place pie weights (which can be ceramic pie weights, dried beans, or even uncooked rice that you reserve for this specific use) evenly over the parchment paper. These weights prevent the bottom of the crust from puffing up and the sides from collapsing during baking, ensuring an even, flat surface.
- **Initial Bake:** Bake for 15-20 minutes, or until the edges begin to turn lightly golden.
- **Remove Weights and Continue Baking:** Carefully remove the parchment paper and pie weights. If the crust is still very pale, you can poke the bottom several times with a fork (a technique called docking). Docking allows steam to escape from under the crust, preventing large bubbles. Continue baking for another 5-10 minutes, or until the entire crust is golden brown and looks fully cooked.
- **Cool Completely:** Once the crust is baked, remove it from the oven and let it cool completely on a wire rack before filling. This prevents steam from softening the crust and prepares it for its delicious filling.
Explore More Decadent Desserts
- Magnolia Bakery Banana Pudding Recipe from Call me PMc
- Mississippi Mud Pie
- White Chocolate Pudding with Frangelico
- Fresh Peach Pudding Recipe
- Hot Fudge Pudding Cake
- Southern Banana Pudding
- More of the Best Dessert Recipes
We love connecting with fellow bakers and dessert enthusiasts! Stay in touch through social media @ Instagram, Facebook, and Pinterest. Don’t forget to tag me when you try one of my recipes! And if you absolutely love the results and this becomes your new favorite chocolate pie, please give it a 5-star rating in the recipe card below. Your feedback helps other dessert lovers find delicious recipes like this one!
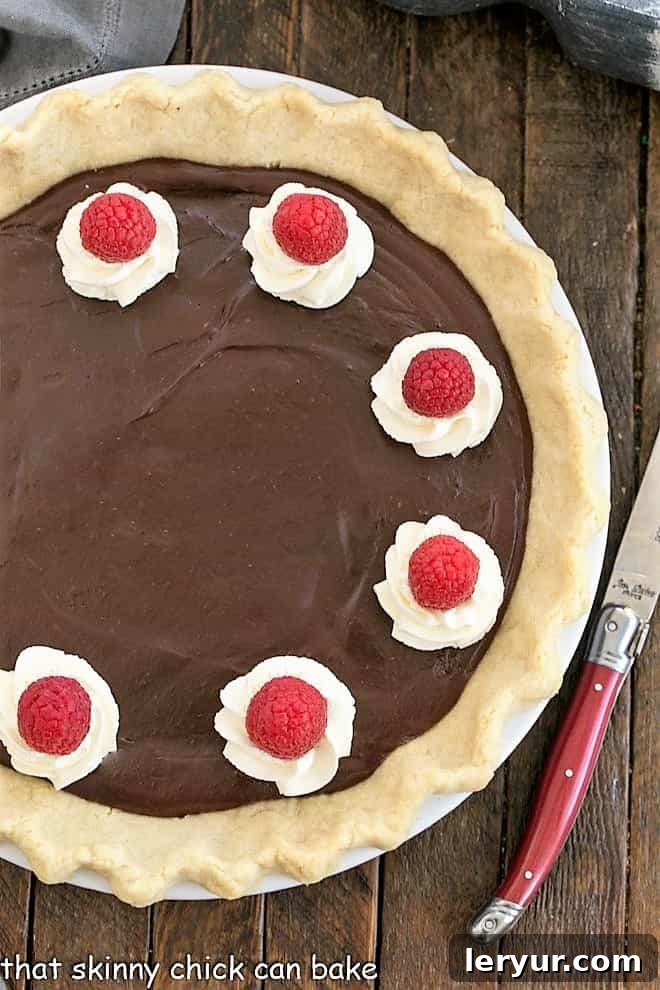
Chocolate Cream Pie Recipe
30 minutes
10 minutes
40 minutes
8 servings
A buttery pastry crust, creamy chocolate filling and whipped cream topping for a divine dessert!
Ingredients
Filling:
- ⅔ cup sugar
- ¼ cup cornstarch
- 2 tablespoon cocoa powder
- Pinch of salt
- 6 egg yolks
- 2 cups 2% milk
- ½ cup whipping cream
- 6 ounces semi-sweet chocolate, chopped
- 1 tablespoon dark rum
- 1 teaspoon vanilla
- 9-inch pie crust of your choice
Topping:
- 1 cup whipping cream
- ¼ cup powdered sugar
- ½ teaspoon dark rum
- ½ teaspoon vanilla
Instructions
- Whisk the sugar, cornstarch, cocoa powder, and salt together in a medium saucepan.
- Whisk in egg yolks till well combined.
- Slowly whisk in milk, then cream, and continue to whisk and cook over medium-high heat.
- Once the mixture comes to a boil, cook and stir for one more minute.
- Remove from heat and stir in chocolate. Whisk till smooth.
- Add rum and vanilla. Let rest for about 5 minutes, stirring occasionally, then pour into baked pie crust.
- Chill till cold, at least two hours.
- Beat together the topping ingredients till the mixture comes to firm peaks. Pile onto the middle of the pie or use an open star tip and pipe whipped cream over the top of the pie. Garnish as desired with berries or chocolate curls.
Notes
Adapted from Bon Appetit.
Total time does not include chilling time.
Recommended Products
As an Amazon Associate and member of other affiliate programs, I earn from qualifying purchases.
- Flat Whisk
- Egg separator
- Silicone Spatulas
Nutrition Information:
Yield:
8
Serving Size:
1
Amount Per Serving:
Calories: 528Total Fat: 33gSaturated Fat: 18gTrans Fat: 1gUnsaturated Fat: 13gCholesterol: 194mgSodium: 156mgCarbohydrates: 54gFiber: 2gSugar: 37gProtein: 8g
HOW MUCH DID YOU LOVE THIS RECIPE?
Please leave a comment on the blog or share a photo on Pinterest