
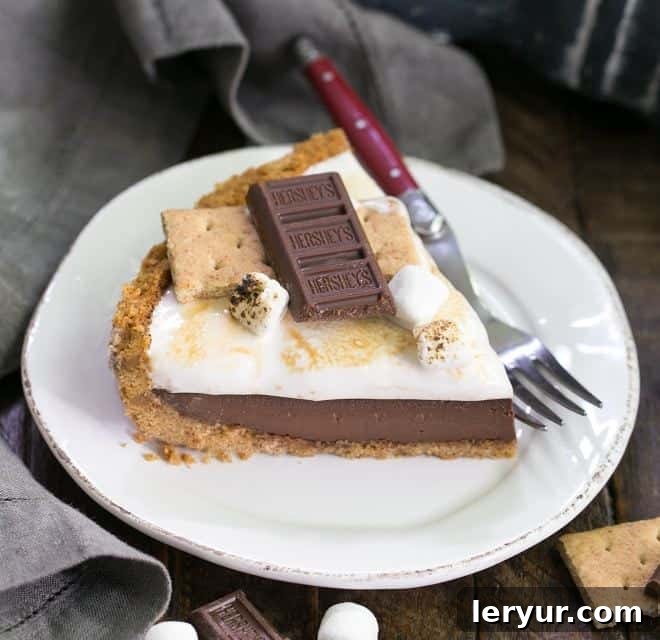
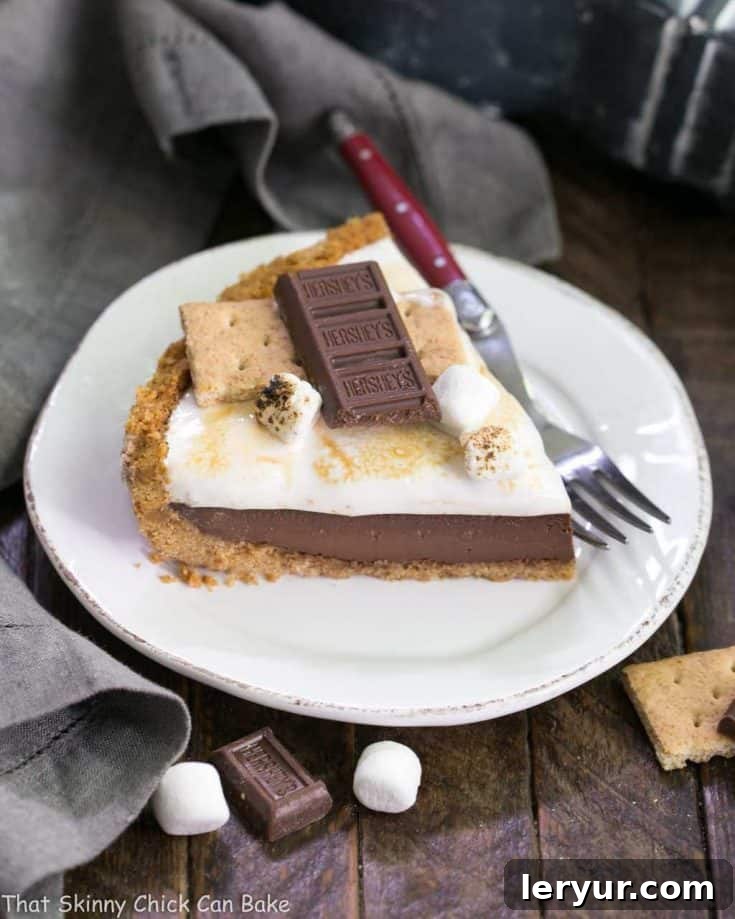
Indulge in the ultimate summer dessert with this irresistible S’mores Pie. Boasting a rich graham cracker crust, a luxuriously fudgy chocolate filling, and a crowning layer of perfectly toasted homemade marshmallow, this pie is destined to become a beloved tradition for your Independence Day celebrations and beyond! Forget the campfire and embrace this elegant, yet utterly comforting, S’mores experience.
While the classic campfire s’mores sandwich holds a special place in our hearts – with its perfectly charred marshmallow, melted chocolate, and crisp graham crackers – prepare for it to take a delightful back seat to this extraordinary pie. Our family, and every guest who tries it, absolutely adores this sophisticated S’mores dessert, proving that a beloved campfire treat can be elevated to gourmet status.
Why This S’mores Pie Is A Must-Make Dessert
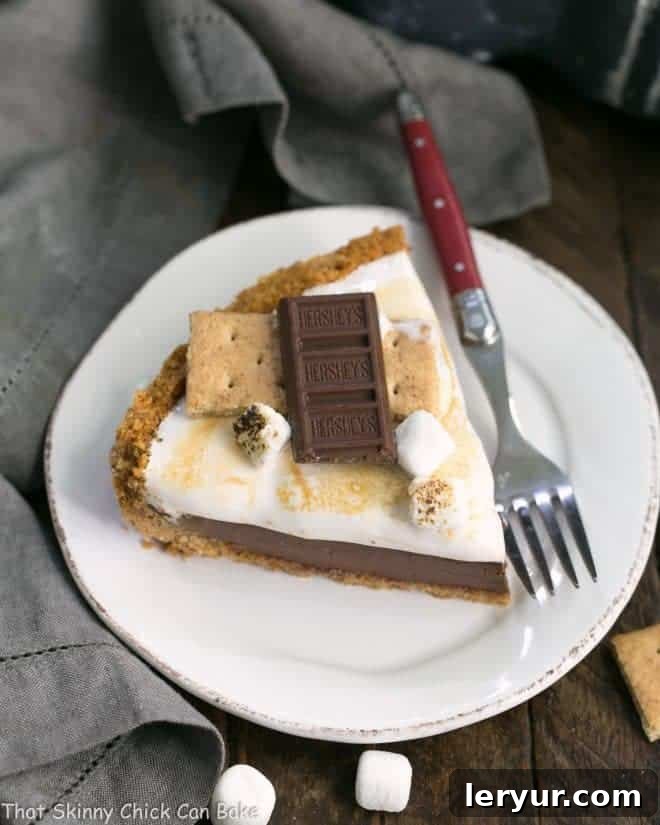
If the mere thought of s’mores around a crackling campfire fills you with joy, then you are in for an unparalleled treat with this pie. It encapsulates all the nostalgic flavors and textures you love, presented in a delightful, easy-to-serve format. Here’s why this S’mores Pie isn’t just a dessert, but an experience:
- Authentic Campfire Flavor, Elevated: This pie brings the cherished flavors of classic s’mores – the crumbly graham cracker, rich chocolate, and sweet, gooey marshmallow – into a harmonious, refined dessert. It’s all the fun without the sticky fingers or smoky clothes!
- Superior Homemade Marshmallow Topping: Unlike pies that rely on melted store-bought marshmallows, our recipe features a homemade marshmallow topping. Crafted with real vanilla extract, it boasts a light, airy texture and a depth of flavor that is far superior to anything you can achieve from a bag of melted mallows. Its silky consistency and delightful toastiness are truly a game-changer.
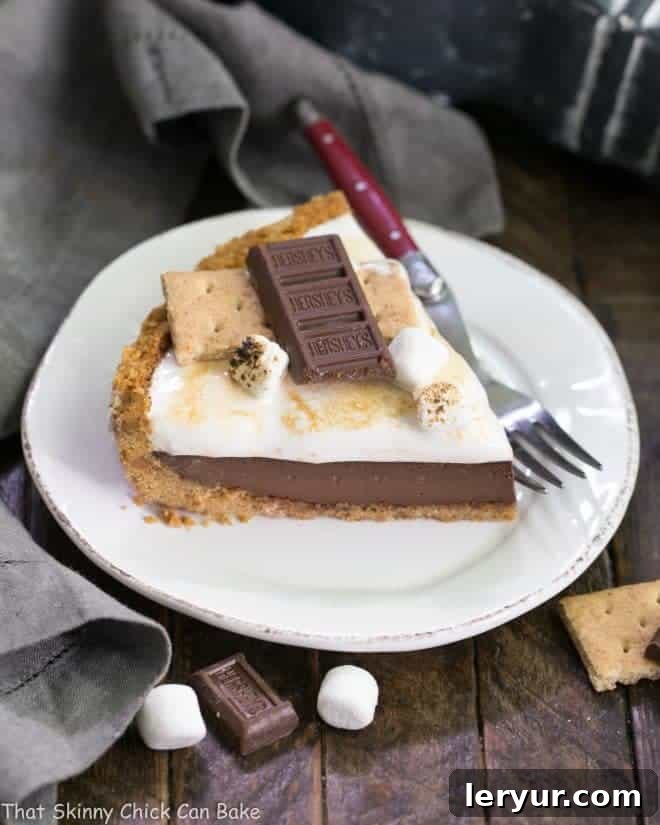
- Perfectly Balanced Classic Components: Every element of this pie is carefully considered to deliver the ultimate s’mores experience. From the buttery, spiced graham cracker crust that provides a delightful crunch, to the rich, fudgy baked chocolate custard that forms the heart of the pie, all crowned with that glorious, golden-brown marshmallow, each bite is a symphony of textures and tastes.
- Ideal for Entertaining: This pie offers an elegant solution for serving a crowd. Instead of individual s’mores construction, you can simply slice and serve this impressive dessert, making it perfect for picnics, barbecues, and celebratory gatherings.
As the Fourth of July approached each year, I often found myself pondering festive dessert ideas. While traditional red, white, and blue recipes are charming, my thoughts invariably drift back to this S’mores Pie, a creation that has now become a cherished annual tradition. S’mores, for me, evoke vivid memories of cherished summer holidays spent in Colorado. We’d embark on invigorating hikes to our favorite picnic spot, nestled serenely among fragrant pine trees along the banks of the Roaring Fork River.
After our hearty meal of grilled brats or burgers, the real adventure would begin: hunting for the perfect marshmallow-toasting sticks. It was a ritual filled with laughter and occasional minor disasters. We’d all inevitably lose at least one marshmallow to the hungry flames, or inadvertently incinerate another to a crisp, failing to achieve that coveted ideal — a perfectly golden-brown exterior yielding to a soft, gooey interior.
Yet, nestled between sweet graham crackers with a few squares of a classic Hershey’s milk chocolate bar, these campfire masterpieces were pure magic. My sisters and I would savor every single bite, truly appreciating the simple pleasures of summer. This S’mores Pie captures that very essence of Americana, but in a slightly more elegant and refined form, making it an ideal dessert to celebrate the birth of our nation or any summer occasion that calls for something special.
The Perfect 4th of July Dessert: A Timeless Favorite
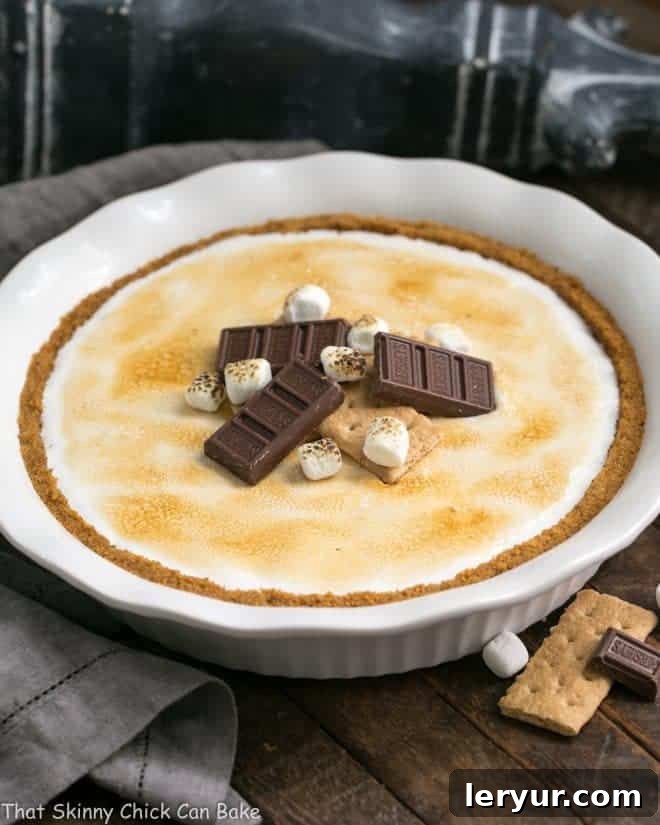
This exceptional recipe, which originally gained acclaim when it was published in Gourmet magazine back in 2006, has stood the test of time, proving its enduring appeal. It’s been well over a decade since I first introduced this spectacular pie at our annual 4th of July potluck dinner, and its charm has only grown. Even on its second, third, and countless subsequent appearances, my friends and family are consistently captivated by the harmony of its components: the perfectly crisp graham cracker crust, the deeply rich and fudgy chocolate filling, and especially the ethereal, homemade marshmallow layer crowning it all.
To achieve that quintessential toasted marshmallow look and flavor, I often employ my trusty kitchen torch. A few passes over the pillowy white topping transform it into a beautifully bruleed, golden-brown masterpiece, mimicking the rustic char of a campfire marshmallow. This attention to detail always makes an impact, and it’s no surprise that this S’mores Pie is consistently the first dessert to vanish from the dessert table at any gathering! Its sophisticated presentation combined with its comforting, familiar flavors makes it truly unforgettable.
Essential Expert Tips for S’mores Pie Perfection
While the graham cracker crust and the rich chocolate ganache filling are relatively straightforward to prepare, the homemade marshmallow topping can sometimes present a slight challenge. Don’t be intimidated, though! With these expert tips, you’ll be able to create a flawless batch of fluffy, toasted marshmallow that perfectly complements your S’mores Pie.
- The Importance of Unflavored Gelatin: The key to a stable, airy marshmallow topping lies in unflavored gelatin. Make sure to seek out and purchase plain, unflavored gelatin (we recommend a reliable brand like Knox) which is readily available at most major supermarkets. This ingredient provides the necessary structure and bounce to your homemade marshmallow, preventing it from collapsing.
- Proofing/Blooming the Gelatin: Before you combine it with other ingredients, the gelatin must be “proofed” or “bloomed.” This simply means sprinkling it over cold water and allowing it to sit for about a minute. This step rehydrates the gelatin, ensuring it dissolves smoothly and activates its gelling properties without clumps.
- Achieving the Perfect Sugar Syrup Temperature: Crafting the marshmallow involves making a hot sugar syrup. This requires heating a mixture of sugar, water, and corn syrup precisely to 260ºF (127ºC). An accurate candy thermometer is absolutely essential for this step. Monitoring the temperature closely ensures the syrup reaches the right consistency for a stable marshmallow; too low, and it might be too soft; too high, and it could crystallize or become brittle.
- Patience in Whipping: Homemade marshmallow topping requires a significant amount of whipping time. Be prepared for it to go from a frothy, transparent liquid to a thick, opaque, and brilliantly white cloud of marshmallow fluff. Using a stand mixer with a whisk attachment will make this process considerably easier, but a good quality hand mixer and a bit of patience will also yield excellent results. Don’t rush this step – the long whipping time incorporates air and creates that signature light texture.
- Torch for the Perfect Toast: To achieve that beautiful, golden-brown toasted marshmallow finish, a culinary torch is your best friend. It provides even browning and precise control. Alternatively, you can buy large marshmallows, slice them in half to create short rounds, cover the surface of the pie, and then carefully toast them under your oven’s broiler. If using the broiler, watch them like a hawk – marshmallows can go from perfectly golden to burnt in a matter of seconds! Keep a close eye on them to prevent burning.
Frequently Asked Questions About S’mores Pie
The whimsical name “S’mores” is a delightful contraction of the phrase “‘some more.” This iconic treat, known for its irresistible combination of toasted marshmallow, melted chocolate, and graham crackers, is widely attributed to the Girl Scouts, who popularized it as a campfire dessert decades ago. It’s a testament to its deliciousness that one bite almost always leaves you wanting “some more”!
Slicing through a pie with a sticky filling, especially one with a marshmallow topping, can sometimes be a challenge. For perfectly clean slices, the trick is to heat your knife. You can do this by dipping a large, sharp knife into very hot water for a few seconds, then quickly wiping it dry before each cut. Alternatively, carefully heating the blade briefly over an open flame (like a gas burner) will also work. The warm blade glides through the sticky layers with remarkable ease. Remember to clean and reheat your knife frequently between slices for the best results.
Homemade marshmallows are a revelation compared to their store-bought counterparts – far more flavorful and wonderfully soft. The primary ingredients typically include unflavored gelatin (for structure), granulated sugar and corn syrup (to create the sweet syrup base), vanilla extract (for flavor), and a dusting of powdered sugar and cornstarch (to prevent stickiness and aid in handling). A pinch of salt often balances the sweetness. The process involves blooming the gelatin, cooking the sugar syrup to a precise temperature, then whipping it with the gelatin and vanilla until it transforms into a light, airy, and fluffy cloud.
Hosting a s’mores party is a fantastic way to bring people together for a fun, interactive dessert experience. Setting up a dedicated s’mores station is key. Position a table laden with supplies conveniently near your heat source – whether it’s a backyard grill, a traditional campfire, or a contained fire pit.
The essentials for any s’mores party are:
- Long Sticks or Metal Skewers: Crucial for safe and effective marshmallow toasting.
- Graham Cracker Squares: The traditional base for your s’mores.
- Milk Chocolate Bars: Classic Hershey’s bars are always a favorite, but feel free to offer a variety.
- Large Marshmallows: The star of the show!
To truly elevate your s’mores party, consider offering a variety of additional ingredients and toppings. These can include:
- Chocolate Chip Cookies or Oreos (as an alternative to graham crackers)
- Reese’s Peanut Butter Cups, Dark or White Chocolate, Milky Way Bars
- Sliced Strawberries, Banana Slices
- Caramel Sauce, Nutella, Peanut Butter
- Even Homemade Marshmallows for an extra special touch!
Safety First: Always have a bucket of water or a fire extinguisher readily available near the heat source in case of accidental burns or small flare-ups. Remember, molten marshmallows can be incredibly hot and sticky, so exercise caution, especially with children.
Delicious Desserts You May Also Love:
- Chocolate Pie from Big Bear’s Wife – A classic, rich chocolate pie for the ultimate chocolate lover.
- THE Chocolate Chip Pie from The Food Charlatan – A truly decadent and beloved chocolate chip pie recipe.
- Homemade Chocolate Pudding Pie from Melanie Makes – A creamy, dreamy chocolate pudding pie made from scratch.
- Triple Chocolate Mousse Pie – Layers of rich chocolate mousse for an elegant dessert.
- Chocolate Velvet Pie with Meringue Crust – A luxurious chocolate pie topped with a delicate meringue.
- Beyond pies, I’ve explored the delightful world of s’mores in various forms, including s’mores cookies, an impressive s’mores cookie cake, and delightful s’mores fudge bars, each offering a unique take on this beloved flavor profile.
Stay connected with us through social media on Instagram, Facebook, and Pinterest. We’d love to see your creations! Don’t forget to tag us when you whip up one of our recipes. And if you’re thrilled with the delicious results, please consider giving it a 5-star rating in the recipe card below – your feedback means the world to us!
S’mores Pie
40 minutes
40 minutes
1 hour 20 minutes
8 servings
A buttery graham cracker crust, a rich and fudgy chocolate filling, and a fluffy, toasted homemade marshmallow topping combine to make this S’mores Pie the quintessential dessert for any celebration, especially for Independence Day!
Rating: 4.9 out of 5 stars based on 23 reviews.
Ingredients
For the Graham Cracker Crust:
- 8 tablespoons (1 stick) unsalted butter, melted
- 1 ¾ cups graham cracker crumbs (from about 12-14 full sheets)
- 2 tablespoons granulated sugar
For the Fudgy Chocolate Filling:
- 7 ounces quality semisweet chocolate, finely chopped
- 1 cup heavy cream
- 1 large egg, at room temperature
- Pinch of salt
For the Homemade Marshmallow Topping:
- 1 teaspoon unflavored gelatin (Knox brand recommended)
- ½ cup cold water, divided
- ¾ cup granulated sugar
- ¼ cup light corn syrup
- ½ teaspoon pure vanilla extract
- Pinch of salt
Instructions
- Prepare the Crust: Preheat your oven to 350ºF (175ºC). In a medium bowl, combine the melted butter, graham cracker crumbs, and 2 tablespoons of sugar until well mixed. Press this mixture firmly and evenly into the bottom and up the sides of a greased 9-inch pie plate.
- Bake the Crust: Bake the crust for 12 minutes, or until it is lightly golden brown. Remove from oven and let cool completely on a wire rack while you prepare the filling.
- Prepare for Filling: Once the crust is fully cooled, preheat the oven to 350°F (175°C) again. Place your finely chopped semisweet chocolate into a large, heatproof bowl.
- Make the Ganache Base: In a heavy saucepan, bring the heavy cream just to a boil over medium heat (alternatively, you can microwave it in a large Pyrex measuring cup until it starts to boil). Immediately pour the hot cream over the chopped chocolate.
- Whisk the Filling: Let the chocolate and cream mixture stand undisturbed for 1-2 minutes to allow the chocolate to melt. Then, whisk gently until the chocolate is fully melted and the mixture is smooth, glossy, and well combined.
- Add Egg and Pour: Whisk in the large egg and a pinch of salt until thoroughly combined with the chocolate mixture. Pour this rich chocolate filling evenly into the prepared and cooled graham cracker crust.
- Bake the Pie: Carefully cover the edge of the pie crust with aluminum foil to prevent it from over-browning. Bake for approximately 25 minutes, or until the chocolate filling is almost set but still slightly wobbly in the center. Remove the pie from the oven and transfer it to a wire rack to cool completely to room temperature, which will take about 1 hour.
- Bloom the Gelatin: To begin making the marshmallow topping, sprinkle the unflavored gelatin over ¼ cup of cold water in the metal bowl of your stand mixer (or a large heatproof bowl if you’re using a hand mixer). Let it stand for about 1 minute to soften or “bloom” the gelatin.
- Make the Sugar Syrup: In a separate heavy saucepan, combine ¾ cup of sugar, ¼ cup of light corn syrup, a pinch of salt, and the remaining ¼ cup of cold water. Bring this mixture to a boil over medium heat, stirring continuously until the sugar is completely dissolved. Continue to boil without stirring until the liquid reaches precisely 260ºF (127ºC) on an accurate candy thermometer.
- Combine Syrup and Gelatin: With your stand mixer (or hand mixer) set to medium speed, begin beating the bloomed gelatin and water mixture. Carefully and slowly pour the hot sugar syrup in a steady stream down the side of the bowl, avoiding the beaters as much as possible.
- Whip the Marshmallow: Once all the hot syrup has been added, increase the mixer speed to high. Continue beating for about 5 minutes. The mixture will transform from a transparent liquid into a thick, opaque, white, and wonderfully fluffy marshmallow topping.
- Add Vanilla and Finish: Add the vanilla extract to the whipped marshmallow and beat until it is just combined. Immediately spoon the marshmallow topping onto the center of the cooled chocolate pie. Gently spread it evenly to the edges using an offset spatula or the back of a spoon, creating a beautiful domed effect.
- Chill the Pie: Chill the pie, uncovered, in the refrigerator for 1 hour to allow the marshmallow to set slightly. After 1 hour, loosely cover the pie with plastic wrap that has been lightly sprayed with non-stick cooking spray (to prevent sticking to the marshmallow). Continue chilling for an additional 3 hours, or until thoroughly set.
- Toast Before Serving: To serve, achieve that perfect toasted marshmallow finish. You can use a handheld kitchen torch to brown the top to your desired golden hue. Alternatively, place the pie on a baking sheet, cover the sides with foil to protect the crust, and broil it about 4 inches from the element for approximately 3 minutes, or until the top is beautifully golden brown. Watch it carefully to prevent burning!
- Cool and Slice: Allow the pie to cool for about 10 minutes after toasting before attempting to slice.
- For Easy Slicing: For the cleanest slices, dip a large, sharp knife into hot water and dry it quickly before each cut. Repeat this process for every slice.
Notes
The homemade marshmallow topping, while utterly delicious, can be a bit finicky for some. If you prefer a quicker alternative without sacrificing the classic s’mores charm, simply cut large store-bought marshmallows in half crosswise. Arrange these marshmallow halves over the cooled chocolate filling, covering the entire surface. Then, use a culinary torch to brown them to a beautiful golden perfection just before serving. This method still delivers that wonderful toasted marshmallow flavor and aesthetic with less effort.
Nutrition Information:
Yield:
8
Serving Size:
1 slice
Amount Per Serving:
Calories: 527
Total Fat: 32g
Saturated Fat: 19g
Trans Fat: 1g
Unsaturated Fat: 11g
Cholesterol: 87mg
Sodium: 203mg
Carbohydrates: 61g
Fiber: 2g
Sugar: 49g
Protein: 4g
Thatskinnychickcanbake.com occasionally offers nutritional information for recipes contained on this site. This information is provided as a courtesy and is an estimate only. This information comes from online calculators. Although thatskinnychickcanbake.com attempts to provide accurate nutritional information, these figures are only estimates.
Varying factors such as product types or brands purchased can change the nutritional information in any given recipe. Also, many recipes on thatskinnychickcanbake.com recommend toppings, which may or may not be listed as optional and nutritional information for these added toppings is not listed. Other factors may change the nutritional information such as when the salt amount is listed “to taste,” it is not calculated into the recipe as the amount will vary. Also, different online calculators can provide different results.
To obtain the most accurate representation of the nutritional information in any given recipe, you should calculate the nutritional information with the actual ingredients used in your recipe. You are solely responsible for ensuring that any nutritional information obtained is accurate.
HOW MUCH DID YOU LOVE THIS RECIPE?
Please leave a comment on the blog or share a photo on Pinterest – your feedback helps us grow and inspires others!