
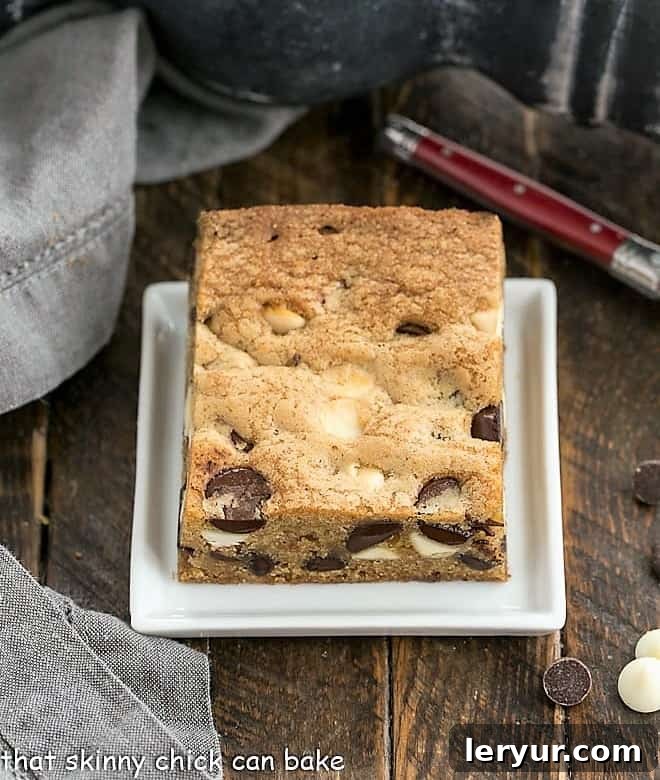
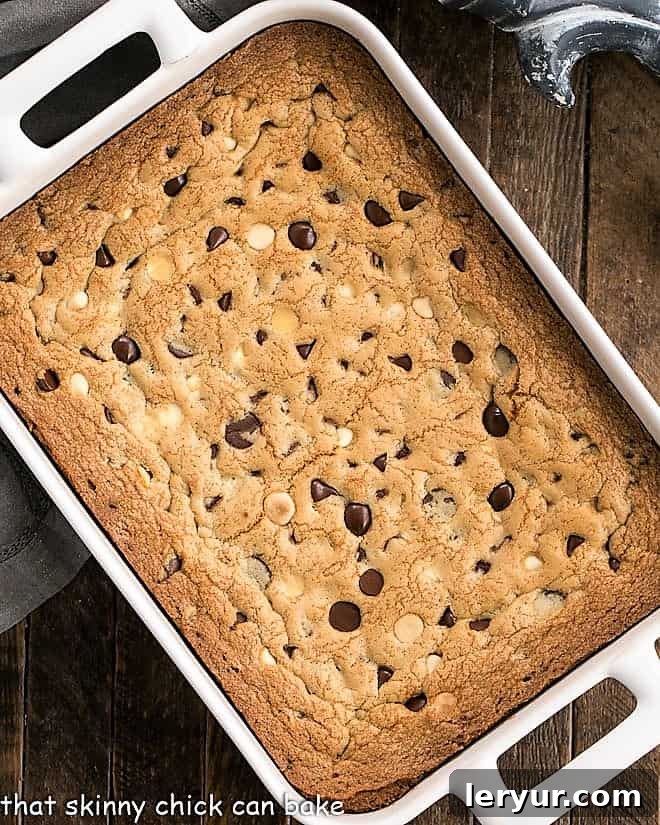
Chocolate Chip Cookie Bars offer all the irresistible flavors of classic chocolate chip cookies but with a fraction of the effort. Crafted from readily available pantry ingredients, these bars are incredibly straightforward, making them the perfect project for both seasoned bakers and complete beginners alike. Say goodbye to the endless scooping and multiple baking sheets – these delightful bars are designed for ultimate ease and maximum enjoyment.
Imagine a warm, gooey chocolate chip cookie, rich with melted chocolate and a perfectly chewy texture, but in a convenient bar form. These Cookie Bars are exactly that! Ideal for those moments when time is precious, or when little hands are eager to help (or impatiently waiting for a treat), this one-bowl, one-pan recipe is a game-changer. Beyond the classic chocolate chips, feel free to customize them with your favorite mix-ins like various chips (white chocolate, milk chocolate, butterscotch), chopped nuts, dried fruit (though some purists might protest!), or even crunchy toffee bits to create your signature treat.
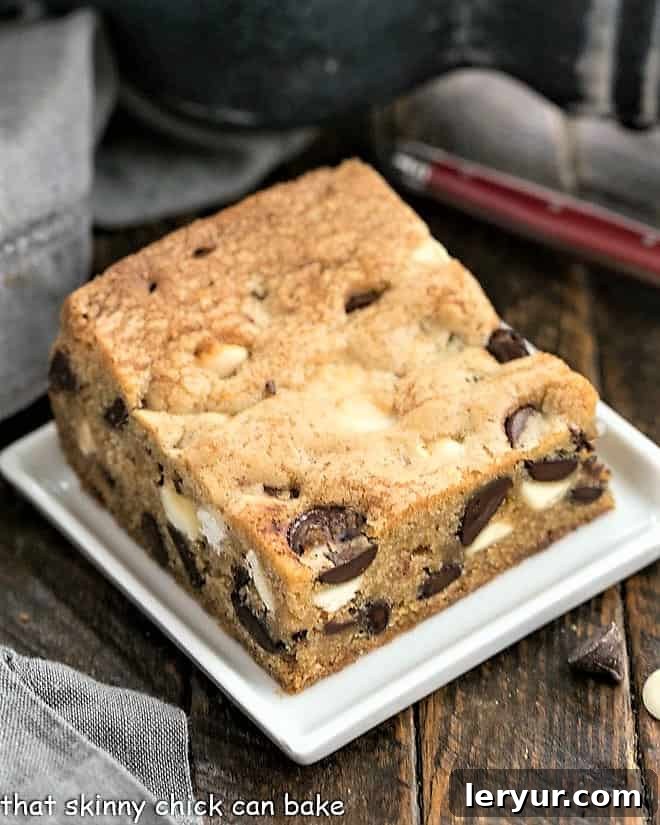
Why You Must Make These Irresistible Chocolate Chip Cookie Bars
If you’re a fan of the timeless chocolate chip cookie but often find yourself short on time, these cookie bars are your new best friend. Here’s why they deserve a permanent spot in your recipe collection:
- Effortless Baking Experience: The primary reason to embrace cookie bars is the unparalleled convenience. Forget the tedious process of chilling dough, rolling individual cookies, and baking in multiple batches. With this recipe, you simply spread the dough into a single pan and bake. It’s a true time-saver, perfect for busy weeknights, spontaneous gatherings, or when you need a delicious dessert in a flash.
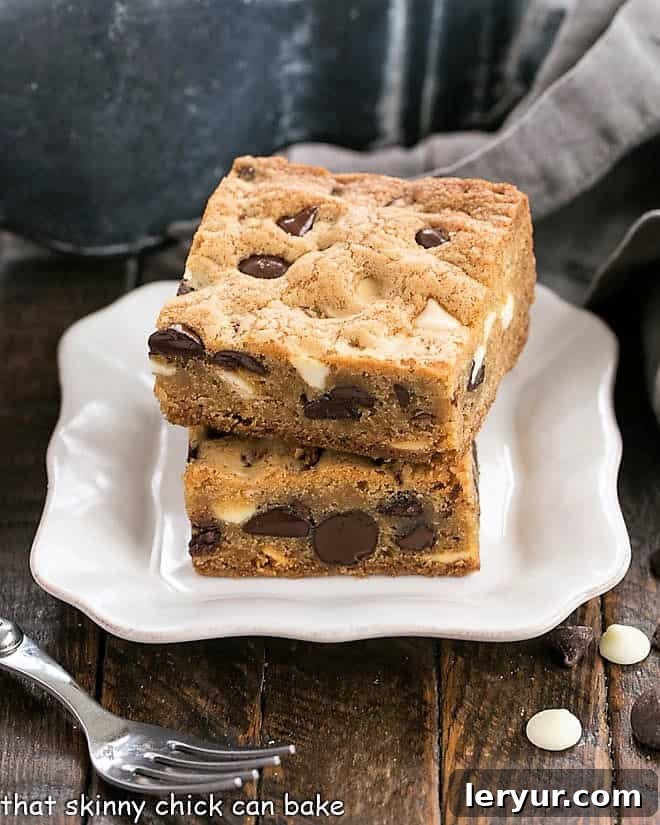
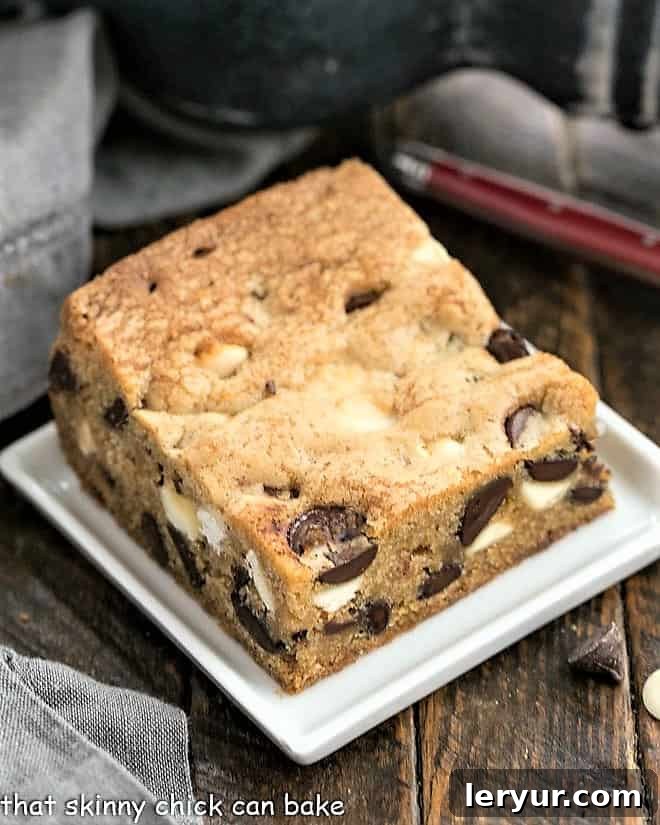
- Captivating Classic Flavor: Despite their simpler preparation, these chewy chocolate chip cookie bars deliver the exact same beloved flavor profile as your favorite traditional chocolate chip cookies. Each bite offers that perfect balance of sweet, buttery goodness and rich, melted chocolate. The edges are delightfully chewy, while the center remains wonderfully soft and gooey, creating a textural experience that is utterly satisfying.
- A Guaranteed Family Favorite: From the very first batch, these bars are destined to become a household staple. In our family, they were affectionately dubbed “chippy bars,” a testament to their instant appeal, especially with the younger crowd. They’re the kind of treat that disappears quickly and is always requested for potlucks, lunchboxes, or simply as an after-dinner indulgence.
- Customization at Your Fingertips: While classic chocolate chips are fantastic, these bars are a canvas for creativity. You can easily adapt the recipe to suit different tastes or whatever you have on hand. This versatility makes them exciting to bake repeatedly, never getting boring.
The genesis of this pan cookie recipe was born out of a desire for convenience, pure and simple. My family, with my husband leading the charge, has always harbored an immense love for classic chocolate chip cookies. However, when our three children were young and constantly underfoot, the traditional cookie-making routine felt like a monumental task: scooping, baking small batches, waiting for them to cool, and then repeating the whole process. It was a delightful but often time-consuming endeavor. Spreading the entire batch of dough into a single cake pan emerged as the perfect, ingenious solution for a quick, easy, and undeniably delicious dessert. It allowed us to enjoy that beloved chocolate chip cookie flavor without the fuss, making sweet memories (and less mess!) along the way.
Ingredient Notes and Variations
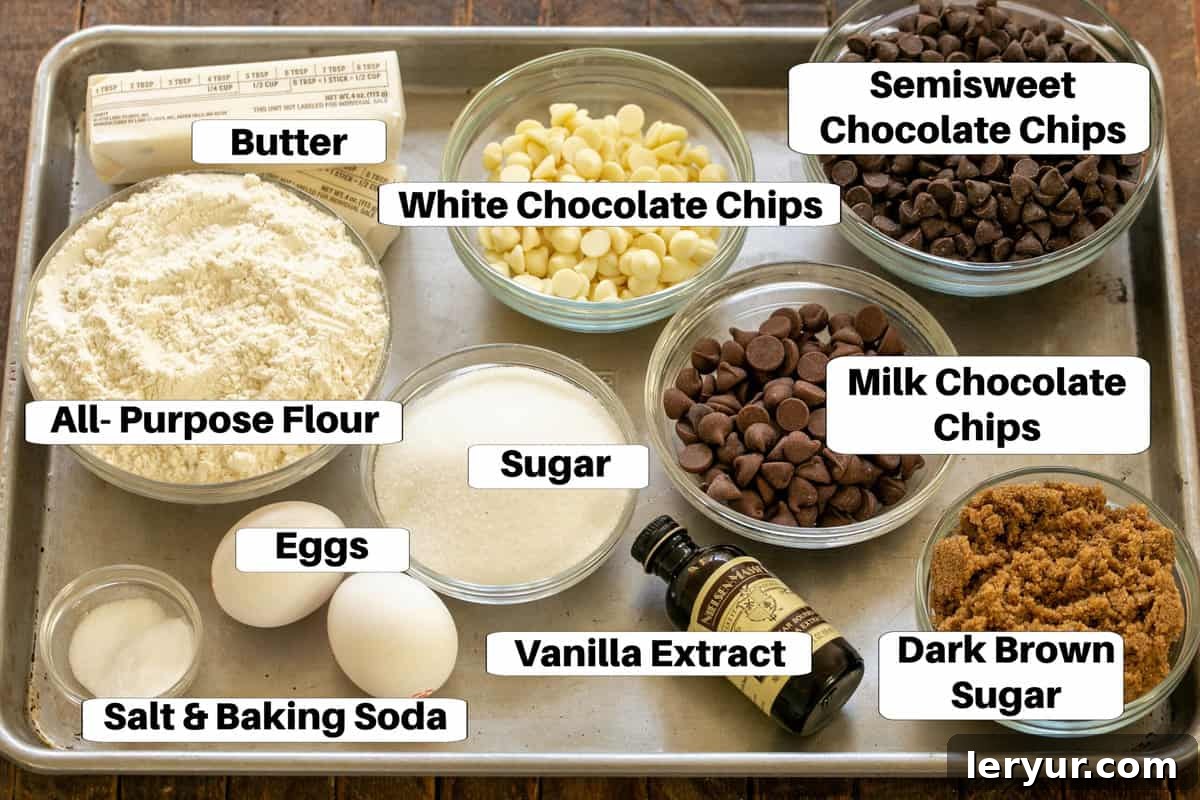
Crafting perfect Chocolate Chip Cookie Bars begins with understanding the role each ingredient plays and how slight variations can impact the final delicious outcome. Here’s a closer look at the components that make these bars so special:
- Kitchen Staples: Sugar, Flour, Baking Soda, Salt – These foundational ingredients are the backbone of almost any baked good.
- All-Purpose Flour: Provides structure to the bars. Measure it correctly by spooning it into your measuring cup and leveling off to avoid a dense or dry result.
- Baking Soda: Acts as a leavening agent, helping the bars rise slightly and contributing to their chewy texture. Ensure it’s fresh for optimal performance.
- Salt: A crucial flavor enhancer that balances the sweetness and brings out the rich chocolate notes. Don’t skip it!
- Butter – Use unsalted butter for better control over the salt content. It should be at room temperature, which means it’s soft enough to indent with your finger but not melted. Room temperature butter creams beautifully with sugar, incorporating air and creating a light, fluffy base for your dough. This leads to a more tender and evenly textured bar.
- Brown Sugar – You can use either light or dark brown sugar, with each offering a slightly different nuance. Brown sugar is vital for moisture and chewiness due to its molasses content. Dark brown sugar, with its higher molasses concentration, will yield an even moister bar with richer, deeper caramel undertones. If you only have light brown sugar on hand and desire that dark brown sugar depth, check out our pro tip in the FAQ section below on how to make your own. Both varieties work equally well, so choose based on your preference for chewiness and caramel flavor intensity.
- Eggs – Like butter, eggs should be at room temperature. This allows them to emulsify more easily with the creamed butter and sugar, resulting in a smoother, more homogenous batter. Eggs add richness, act as a binder, and contribute to the structure and tenderness of the bars.
- Vanilla Extract – Always opt for real vanilla extract over artificially flavored alternatives. The pure, warm, and aromatic notes of real vanilla significantly elevate the overall flavor of your cookie bars, complementing the chocolate and butter beautifully.
- Semisweet Chocolate Chips – The quintessential choice for chocolate chip cookies and bars. Their balanced sweetness and rich chocolate flavor are universally loved. However, don’t limit yourself! For an exciting twist, try a combination: 1 cup semisweet chocolate chips blended with ¾ cup white chocolate chips and ¾ cup milk chocolate chips. This trio creates a dynamic chocolate experience with varying levels of sweetness and creaminess. For a truly bakery-worthy appearance, reserve a handful of extra chocolate chips and carefully press them into the bars immediately after they come out of the oven. The residual heat will slightly melt them, creating inviting pools of chocolate on top.
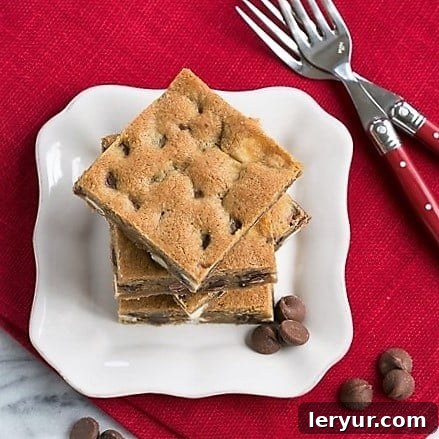
How to Make These Simple Chocolate Chip Cookie Bars
Making these chocolate chip cookie bars is a straightforward process that yields incredibly rewarding results. Follow these simple steps to create a batch of delightful, chewy bars that your family will adore. The beauty of this recipe lies in its ease, proving that exceptional flavor doesn’t require complicated techniques.
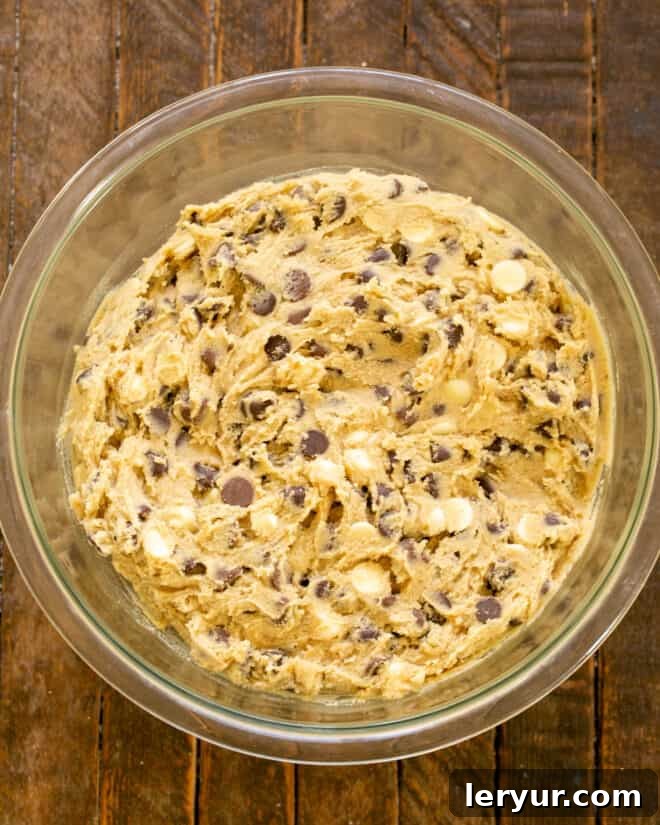
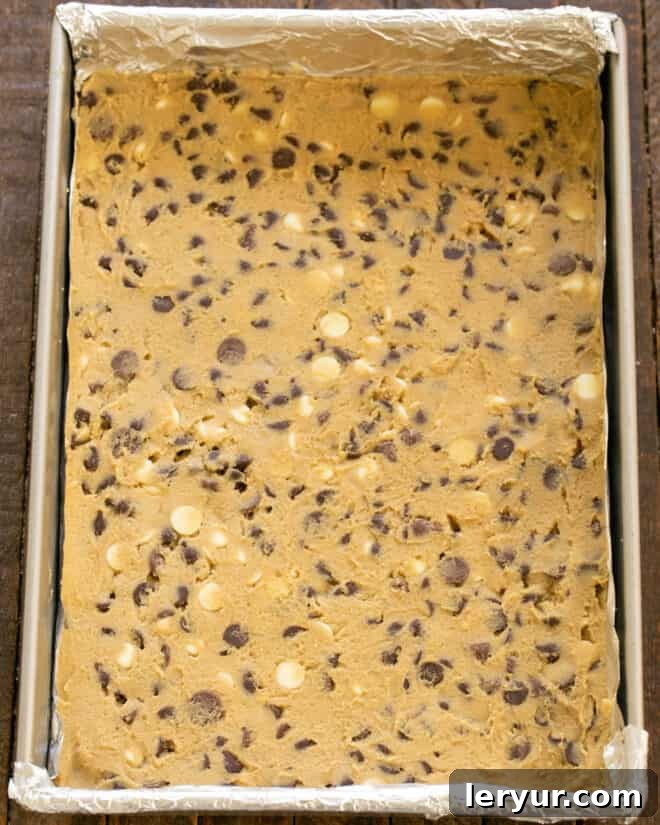
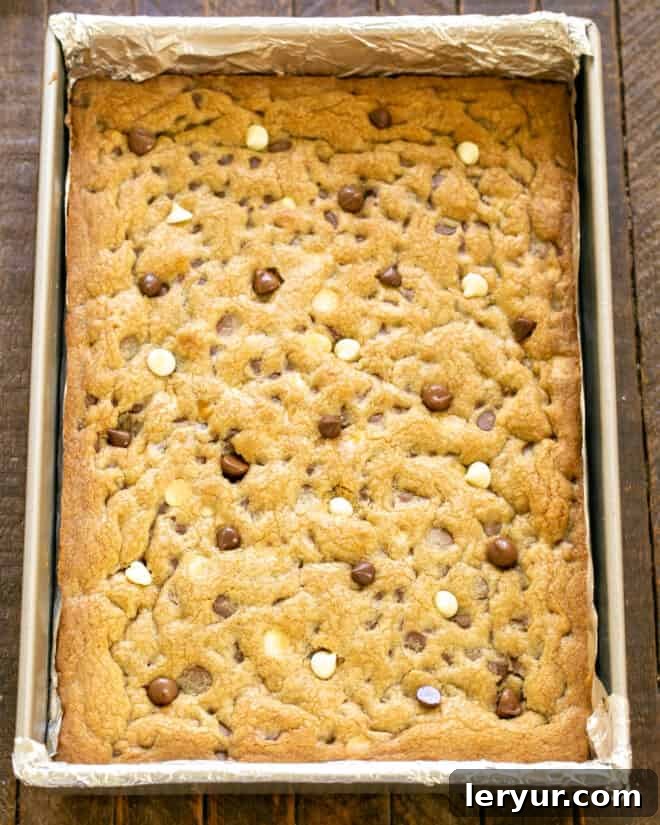
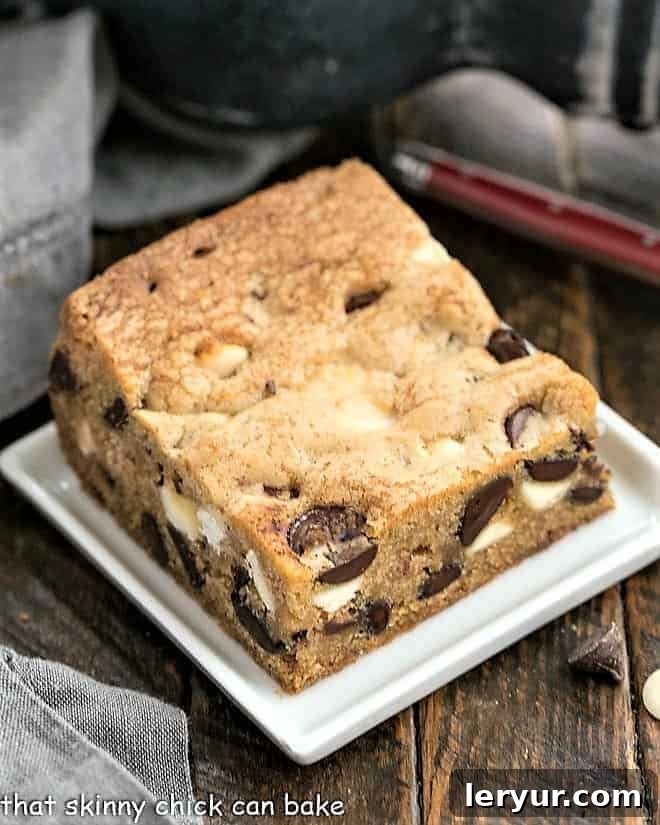
Expert Tips for Flawless Chocolate Chip Cookie Bars
Having made this dessert more times than I can count, I’ve honed the process to perfection, transforming these bars from mere ingredients into a delightful experience that takes only about an hour from start to finish. This is significantly quicker and less fussy than baking individual cookies, and the outcome is always met with enthusiastic appreciation. My family, like many, is happy to dive into these chocolate chip cookie bars while they’re still warm and wonderfully gooey straight from the oven. Wouldn’t you be? I sincerely hope these easy cookie bars become as cherished a treat in your home as they are in ours. To help you achieve the best possible results, I’m sharing a few of my top tips for making bar cookies truly exceptional.
- PRO-Tip: Room Temperature Ingredients are Key! About an hour before you plan to bake, take your eggs and butter out of the refrigerator and let them come to room temperature on the counter. This step is crucial because both ingredients will incorporate much more easily and evenly into the batter if they’re not ice cold. Room temperature butter creams better with sugar, trapping more air, which leads to a lighter, fluffier texture in your finished bars. Room temperature eggs also blend more smoothly, creating a homogeneous batter without curdling.
- Line Your Pan for Easy Release and Perfect Slices: While simply greasing your pan works, lining it with non-stick foil or parchment paper is a game-changer. This not only prevents the bars from sticking but also creates a “sling” that allows you to easily lift the cooled bar cookies out of the pan and onto a cutting board. This method is invaluable for cutting neat, even bars with clean edges, especially when presentation matters. Non-stick foil is particularly effective as it peels away effortlessly.
- Unleash Your Inner Chocolatier with Chip Choices: Semisweet chocolate chips are a classic and delicious choice, but don’t hesitate to experiment! My personal favorite combination is a mix of milk chocolate, semisweet chocolate, and white chocolate chips, which adds layers of flavor and visual appeal. You could also try butterscotch chips, peanut butter chips, or even a fun blend of M&Ms with half chocolate chips for a festive touch.
- The Magic of Brown Sugar: I typically use light brown sugar for a balanced flavor, but if you’re aiming for extra chewy, moist blondies with a richer depth, dark brown sugar is the way to go. Its higher molasses content not only provides additional moisture, making the bars incredibly tender, but also imparts a more pronounced, complex caramel flavor.
- PRO-Tip: DIY Dark Brown Sugar in a Pinch: Ran out of dark brown sugar? No problem! You can easily make your own. For each cup of dark brown sugar required, simply mix 1 tablespoon of molasses into 1 cup of light brown sugar. Stir until thoroughly combined, and voilà – you have a perfect substitute!
- Achieve a Smooth Surface with an Offset Spatula: After spreading the dough into the pan, an offset spatula is your secret weapon for achieving a beautifully smooth and level surface. This ensures even baking and a professional finish for your cookie bars.
- The Art of Slight Underbaking for Ultimate Chewiness: The key to incredibly moist and chewy chocolate chip cookie bars (or blondies) is to slightly underbake them. You want the edges to be set and lightly golden brown, but the very center should still look a little soft. However, be careful not to make them raw in the middle! Baking times can vary significantly based on your oven’s calibration and your specific pan. I recommend following the recipe’s suggested baking time initially, then observing closely. If you prefer them chewier, adjust the time down slightly on your next batch. Trust me, you’ll want to make them again!
- Garnish Like a Pro for Picture-Perfect Bars: To truly bake like a pro and enhance the visual appeal, reserve a small handful of chocolate chips. Immediately after the bars come out of the oven, *carefully* press these extra chips onto the warm surface. The residual heat will soften them slightly, creating inviting, shiny pools of chocolate that look absolutely irresistible. (Remember, the pan will be very hot!) While my family focuses purely on taste, this little trick is fantastic if you’re making these chocolate chip bars to share with friends or for a special presentation.
Frequently Asked Questions About Chocolate Chip Cookie Bars
Proper pan preparation is crucial for easy removal and clean slices. You can certainly grease your 9×13-inch baking pan with a cooking spray like Pam, but for the best results and effortless handling, I strongly recommend lining your pan with foil – specifically non-stick foil. The foil serves a dual purpose: it prevents sticking and acts as a convenient “sling.” Once the bars are completely cooled, you can use the foil overhang to easily lift the entire slab out onto a cutting board. This makes it significantly easier to neatly cut them into perfect bars, especially important if you’re serving them to guests. Regular foil works for the sling, but non-stick foil peels off the bars much more cleanly. For even more detailed tips on achieving impeccable slices, refer to my post on How to Cut Perfect Cookie Bars.
While most cookie bars bake at a similar temperature to individual cookies (typically around 350-375°F or 175-190°C), they require a longer baking time due to their thicker, more substantial form. For these chocolate chip cookie bars, the baking time is generally around 24-25 minutes. However, it’s important to remember that all ovens can vary slightly in temperature, and your pan size will also influence the baking duration. If you use a slightly smaller pan, your bars will be thicker and may need an additional few minutes in the oven. For instance, while I typically use a 9×13-inch pan, a thicker batch baked in an 8½x12-inch pan might require an extra 5-10 minutes. Always keep an eye on them and use the visual cues discussed in the next question.
Determining doneness for chocolate chip cookie bars, often referred to as blondies, differs slightly from cakes. Since these bars are dense and chewy, not cakey, a simple toothpick test might not be the most reliable indicator (it works better for cake-like textures). Instead, look for visual cues: the edges should be set and lightly golden brown, and the center should appear mostly set but still have a slight softness or moistness to it. You don’t want them jiggly and raw, but also not overbaked and dry. A wonderful sign that your bars are nearing perfection is when your kitchen fills with an incredibly delicious aroma just before they are fully cooked. The first batch you make is often a “test batch,” so make a mental note or mark your recipe with the exact time it took for your oven to bake them to your preferred level of doneness. This valuable information will ensure consistently perfect results for every future batch!
The beauty of chocolate chip bars lies in their adaptability! Beyond the classic chocolate chips, the possibilities for add-ins are virtually endless. If you enjoy a textural contrast, consider adding chopped and toasted pecans or walnuts for a delightful crunch and nutty flavor. You can also vary the chocolate experience by using just one type of chocolate chip (e.g., all milk chocolate or all white chocolate) or by substituting one of the chocolate chip varieties with other fun additions. Try M&Ms for a colorful and candy-like twist, toffee bits for a buttery crunch, or even pretzels for a sweet and salty surprise. For a touch of fruitiness, dried cranberries or cherries can be a delicious addition.
These chewy chocolate chip bars are remarkably resilient and easy to store. At room temperature, they will remain fresh and delicious for 3 to 4 days. To prevent them from drying out and to maintain their delightful chewiness, make sure to store them in an airtight container or cover the top of the pan tightly with foil. Unlike some other bar desserts, such as lemon bars or cheesecake bars (which are moister and require refrigeration to prevent spoilage), chocolate chip bars are perfectly happy on your counter. For longer storage, these versatile cookie bars can also be frozen. Simply place them in an airtight container or freezer-safe bag for up to 3 months. When you’re ready to enjoy them, defrost them overnight in the refrigerator, and then let them come to room temperature before serving for the best texture and flavor.
You May Also Like:
If you loved the simplicity and deliciousness of these chocolate chip cookie bars, you’ll be thrilled to discover more easy and satisfying bar cookie recipes. These treats are perfect for any occasion, offering variety and convenience without sacrificing flavor:
- Peanut Butter and Jelly Bars from Saving Room for Dessert
- Raspberry Filled White Chocolate Bars
- Coconut Macadamia Nut Bars
- Mounds Bars
- Dark Chocolate Mousse Bars
- More Easy Bar Cookies
Stay in touch through social media @ Instagram, Facebook, and Pinterest. Don’t forget to tag me when you try one of my recipes! And if you love the results, please give it a 5-star rating in the recipe card below.
Chocolate Chip Cookie Bars
10 minutes
24 minutes
34 minutes
24 bars
An easy and delicious way to enjoy the classic flavors of chocolate chip cookies without all the traditional work! These chewy bars are perfect for any occasion.
Ingredients
- 1 cup unsalted butter (2 sticks), softened to room temperature
- ¾ cup light or dark brown sugar, packed (dark brown sugar adds more chewiness)
- ¾ cup granulated sugar
- 2 large eggs, at room temperature
- 1 ½ teaspoon pure vanilla extract
- 1 teaspoon baking soda
- ½ teaspoon salt
- 2 ¼ cups all-purpose flour
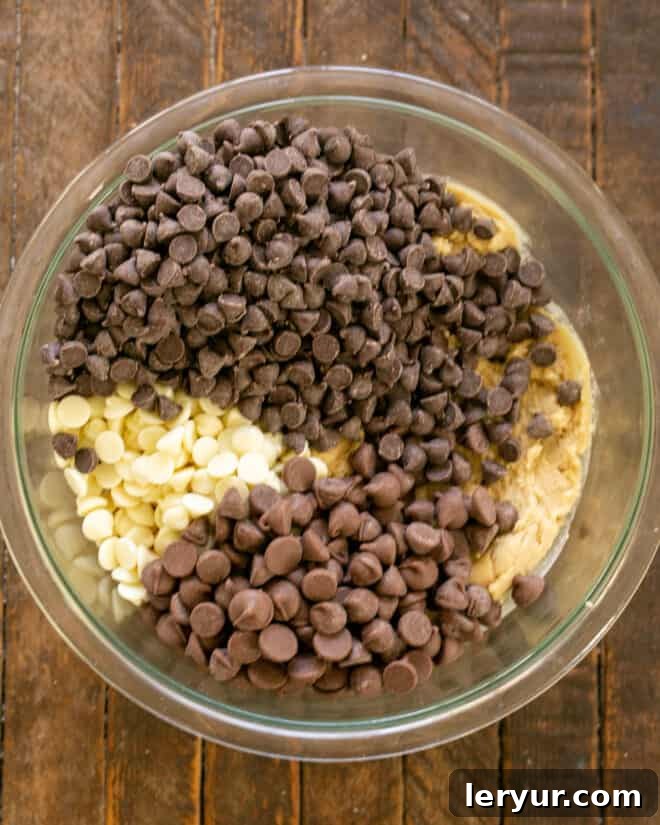
- 2 cups semisweet chocolate chips (or a delightful mix of 1 cup semisweet, ¾ cup white, and ¾ cup milk chocolate chips for varied flavor)
Instructions
- Preheat your oven to 375ºF (190ºC). Prepare a 9×13-inch baking pan by lining it with non-stick foil or parchment paper, leaving an overhang on the sides for easy lifting.
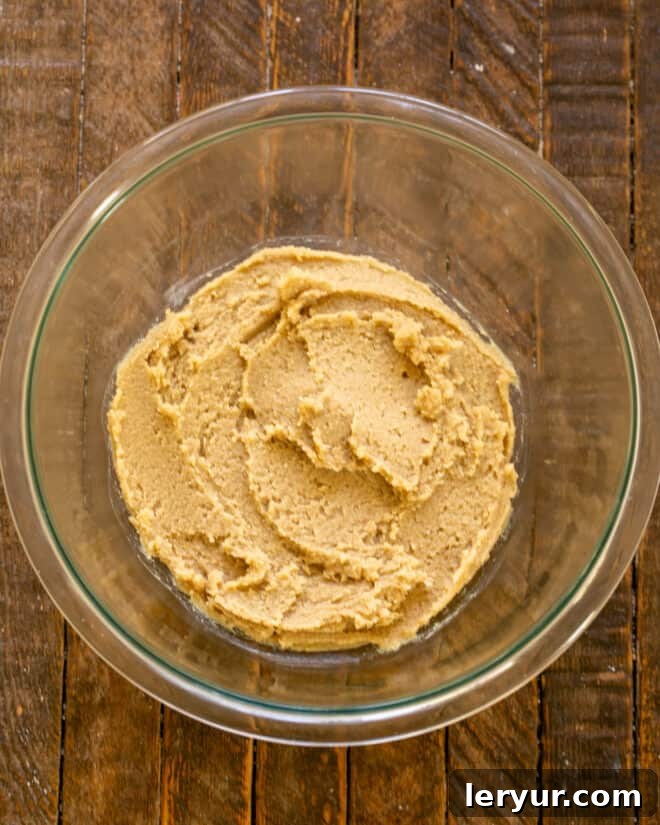
- In a large mixing bowl, cream together the softened butter, brown sugar, and granulated sugar until the mixture is light and fluffy. This usually takes about 2-3 minutes with an electric mixer.
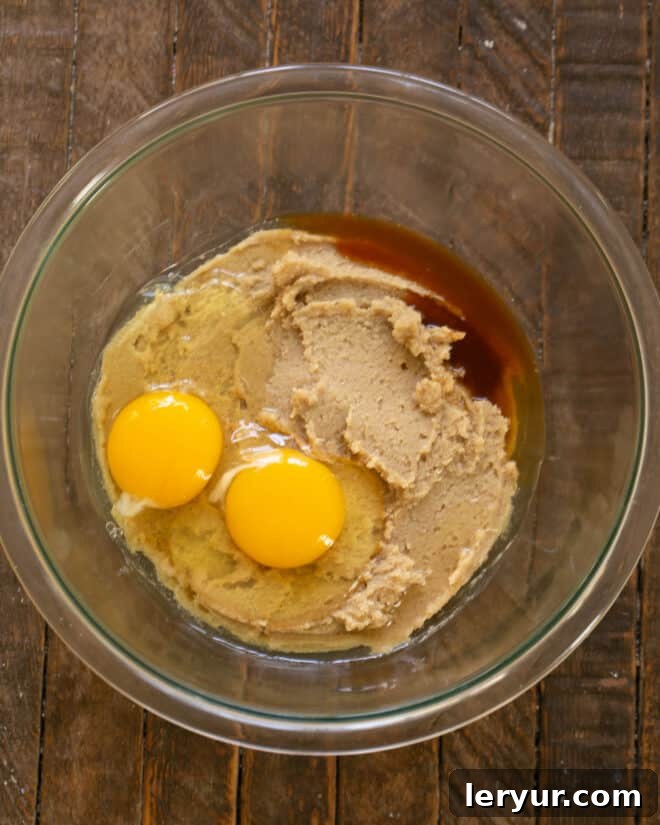
- Beat in the room temperature eggs one at a time, ensuring each is fully incorporated before adding the next. Stir in the pure vanilla extract.
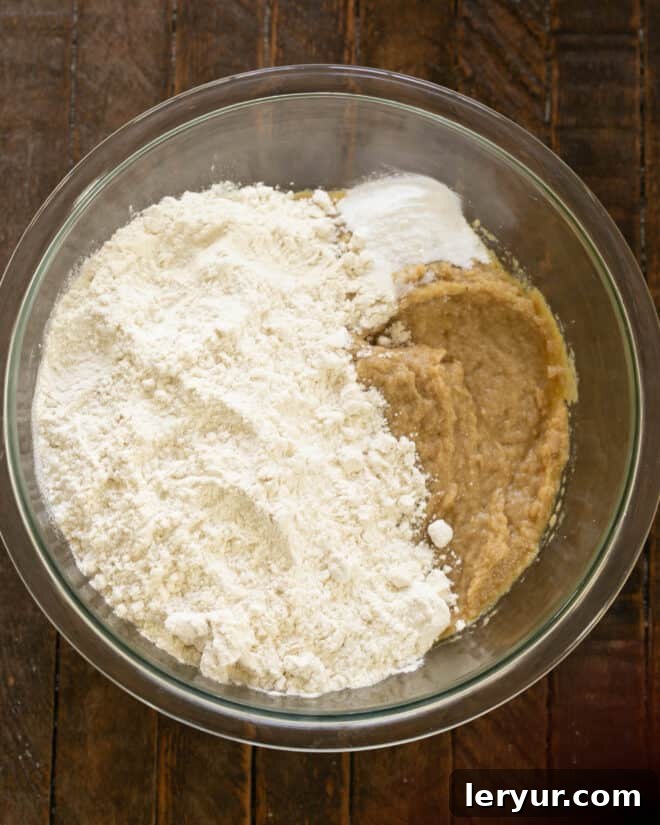
- In a separate bowl, whisk together the flour, baking soda, and salt. Gradually add the dry ingredients to the wet ingredients, mixing on low speed until just combined. Be careful not to overmix; overmixing can develop gluten and lead to tougher bars. A wooden spoon or spatula works well for the final few stirs.
- Fold in the chocolate chips until they are evenly distributed throughout the dough.
- Press the cookie dough evenly into the prepared 9×13-inch pan. An offset spatula can help create a smooth, level surface.
- Bake for approximately 24 minutes, or until the edges are golden brown and the center is mostly set but still slightly soft. If using an 8½x12-inch pan for thicker bars, you may need to add an extra 5-10 minutes to the baking time.
- Once baked, remove the pan from the oven and let the bars cool completely in the pan on a wire rack before lifting them out using the foil sling. This ensures they set properly and are easier to slice.
- Slice into 24 bars and serve.
Notes
To prevent over-mixing, which can lead to a tougher texture due to gluten formation, I recommend mixing the dry ingredients into the wet ingredients with a wooden spoon or spatula. For added flair and flavor, feel free to use a variety of chocolate chips (like milk, white, or dark) or even M&Ms instead of solely semisweet chips. This recipe is adapted from a classic Nestlé Toll House version. For a beautiful, bakery-style presentation, reserve a handful of chocolate chips and carefully press them into the warm, freshly baked bars immediately after they come out of the oven. The residual heat will slightly melt them, creating inviting chocolate pools on top.
Recommended Products
As an Amazon Associate and member of other affiliate programs, I earn from qualifying purchases.
- 3 Pyrex Mixing Bowls
- Nonstick Foil
- 9 x 13 Baking Pan
Nutrition Information:
Yield:
24
Serving Size:
1 bar
Amount Per Serving:
Calories: 324Total Fat: 18gSaturated Fat: 11gTrans Fat: 0gUnsaturated Fat: 6gCholesterol: 38mgSodium: 176mgCarbohydrates: 41gFiber: 2gSugar: 30gProtein: 3g
HOW MUCH DID YOU LOVE THIS RECIPE?
Please leave a comment on the blog or share a photo on Pinterest