
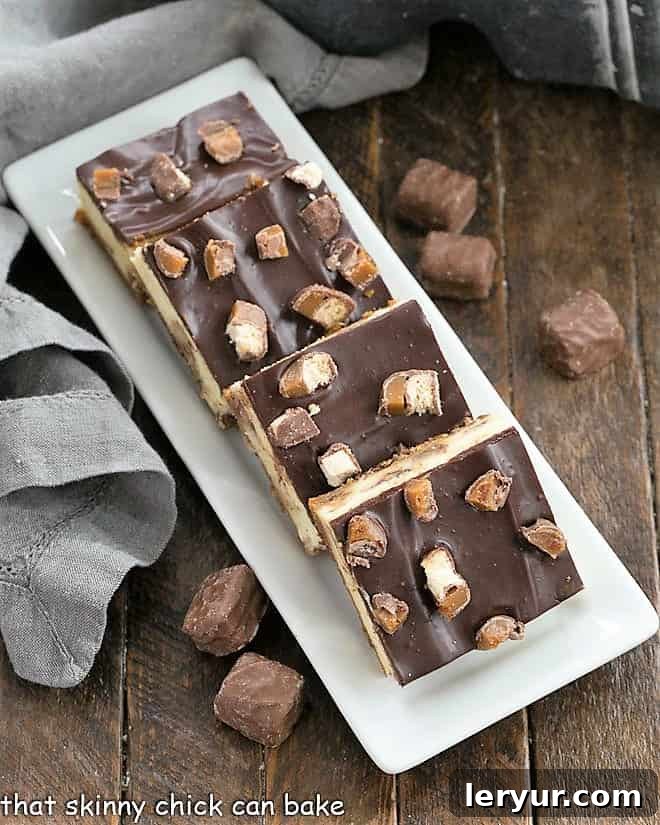
Twix Cheesecake Bars: The Ultimate Decadent Dessert
Prepare to tantalize your taste buds with these absolutely luscious Twix Cheesecake Bars. This recipe offers a delightful and convenient way to enjoy the rich, creamy goodness of homemade cheesecake without the fuss of a traditional springform pan. It’s the perfect fusion of two beloved treats: the classic cheesecake and the irresistible Twix candy bar. Each bite delivers a symphony of textures and flavors that will undoubtedly leave you craving another piece, making it a perfect dessert for any occasion, from casual gatherings to special celebrations.
Our journey to cheesecake bliss begins with a perfectly golden, buttery graham cracker crust, providing a delightful crunch at the base. This foundational layer cradles a sumptuously rich and sweet cheesecake batter, generously studded with generous chunks of chopped Twix bars – a medley of crunchy shortbread, gooey caramel, and smooth milk chocolate. The grand finale is a glossy, opulent chocolate ganache, draped luxuriously over the cheesecake, creating an eye-catching finish that is as delicious as it is beautiful. This dessert isn’t just a treat; it’s an experience. Are you ready for pure dessert euphoria? Dive into the detailed recipe below.
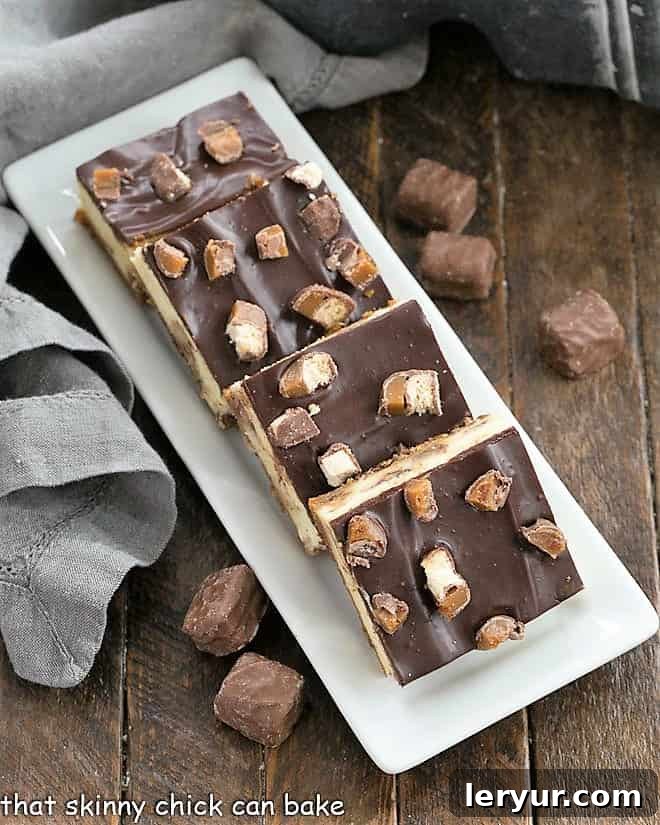
Why These Twix Cheesecake Bars Are a Must-Make
Cheesecake holds a special place in the hearts of dessert lovers, but a whole cheesecake can often be a daunting endeavor, both in preparation and in consumption for smaller families or gatherings. That’s where these exquisite cheesecake bars come to the rescue! They offer all the luxurious flavor of a traditional cheesecake in perfectly portioned, easy-to-serve squares, making them ideal for sharing, transporting, or simply enjoying one at a time. Here’s why these bars will become your new go-to dessert:
- Perfect Portions, Less Guilt: While we adore a decadent cheesecake, a full-sized dessert can be overwhelming. These bars provide individual servings, making it easier to manage portions and cater to varying appetites. You can cut them into larger or smaller squares depending on your preference, offering flexibility for any event.
- Irresistible Layered Delight: From the crunchy graham cracker base to the impeccably smooth and luscious vanilla cheesecake filling, every layer contributes to an extremely enticing dessert. The added texture and flavor from the chopped Twix bars throughout the filling, crowned with a rich, glossy chocolate ganache topping, elevates these bars from simple cheesecake to a truly unforgettable dessert experience.
- The Ultimate Candy Bar Infusion: The inclusion of chopped Twix mini bars is nothing short of brilliant. Their unique combination of shortbread cookie, soft caramel, and milk chocolate introduces a delightful chewiness and a burst of familiar candy flavor that perfectly complements the creamy cheesecake. For an extra touch of crunch and visual appeal, crushed or chopped Twix pieces are also sprinkled over the ganache topping, ensuring that the Twix experience is present in every single bite.
- Versatility and Customization: While the Twix bars are a star, this recipe also serves as a fantastic base for customization. You can easily swap out the Twix for other favorite candy bars, nuts, or even fresh fruits, allowing you to tailor the bars to different tastes or seasonal availability.
For those unfamiliar with the iconic Twix bar, it features a delightful shortbread biscuit base, generously topped with a layer of sweet, chewy caramel, all encased in a smooth coating of milk chocolate. They are typically found in stick form, making them distinctively narrower than most candy bars. If you’re a devoted Twix enthusiast, you might also enjoy my classic Twix Cheesecake, which has consistently been one of the most popular recipes on the blog. It’s another fantastic way to celebrate your love for this classic candy bar, perfect for any special occasion or just because.
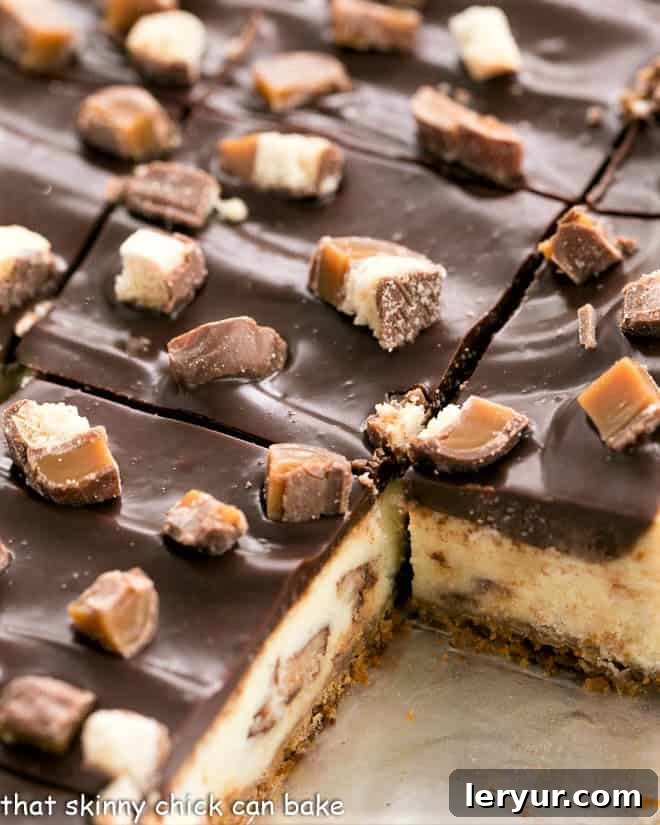
Essential Tips for Crafting Perfect Cheesecake Bars
Achieving bakery-quality cheesecake bars at home is easier than you think, especially with a few key techniques and tips. Follow these guidelines to ensure your Twix Cheesecake Bars turn out perfectly creamy, smooth, and utterly delicious every single time:
- Homemade Graham Cracker Crumbs: If you find yourself without pre-crushed graham cracker crumbs but have whole graham crackers on hand, don’t fret! Simply break the graham cracker sheets into smaller pieces and pulse them in your food processor until fine, uniform crumbs are formed. This method ensures freshness and often results in a better texture for your crust.
- Achieving a Uniform Crust: Once your graham cracker crumb mixture is ready, press it firmly and evenly into the prepared pan. A neat trick for a perfectly level and compact crust is to use the flat bottom of a measuring cup or a glass. This helps to create a solid foundation that won’t crumble when sliced.
- Room Temperature Ingredients are Key: This is a golden rule for any cheesecake recipe. Always ensure your cream cheese and eggs are at room temperature before mixing. Cold ingredients do not emulsify properly, leading to a lumpy batter and a less silky, smooth filling. Taking them out of the refrigerator at least an hour before you start baking makes a significant difference in the final texture of your cheesecake.
- Choose the Right Mixer Attachment: For the silkiest, most dense, and delicious cheesecake filling, the paddle attachment on your stand mixer is your best friend. It gently combines the ingredients without incorporating too much air. Using a whisk attachment, while great for whipping cream, will incorporate excessive air into the batter, which can cause your cheesecake to puff up too much during baking and then crack as it cools.
- Baking Low and Slow: Cheesecake benefits from a gentle baking process. Baking at a lower temperature for a longer period helps prevent cracking and ensures an evenly cooked, creamy texture throughout. The gradual cooling process within the oven after it’s turned off is also crucial for preventing cracks and achieving that signature smooth finish.
- The Power of the Water Bath (Optional for Bars): While not strictly necessary for bars, a water bath (bain-marie) can be used to provide an even more moist and crack-free cheesecake. If opting for this, wrap your pan thoroughly with heavy-duty foil before placing it in a larger pan filled with hot water.
- Cooling and Chilling Patience: Resist the urge to rush the cooling process. Allow the cheesecake bars to cool completely at room temperature before transferring them to the refrigerator. Chilling for at least 4-6 hours, or preferably overnight, is essential for the cheesecake to fully set, making it easier to slice and enhancing its flavor and texture.
- Endless Flavor Possibilities: While Twix is amazing, feel free to customize! For plain cheesecake bars, simply omit the Twix bits in the filling and on top of the ganache. Instead, you could add mini chocolate chips, sprinkles, fruit zest, or even a swirl of fruit preserves for a completely different yet equally delicious treat.
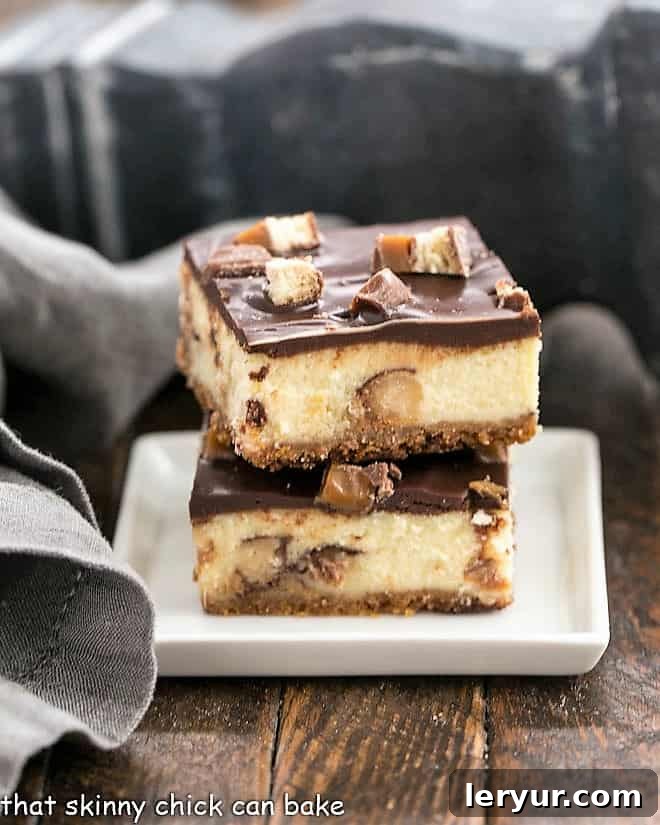
The Anatomy of a Perfect Twix Cheesecake Bar
Every element of these Twix Cheesecake Bars plays a crucial role in creating a harmonious and unforgettable dessert. Understanding the purpose and contribution of each layer will not only deepen your appreciation but also help you achieve perfection in your baking. Let’s break down the components:
The Golden Graham Cracker Crust
The foundation of any great cheesecake bar is its crust, and for these Twix-infused delights, a simple yet sturdy graham cracker crust is ideal. Made with crushed graham crackers, melted butter, and a touch of sugar, this crust provides a slightly sweet, buttery, and crunchy counterpoint to the creamy filling. It’s pressed firmly into the pan and pre-baked briefly to ensure it holds its shape and prevents a soggy bottom, creating a robust base that can support the decadent layers above.
The Creamy Twix-Speckled Cheesecake Filling
This is where the magic happens. The cheesecake filling is a dream of velvety smoothness, crafted from full-fat cream cheese for richness, sugar for sweetness, a hint of flour for stability, and sour cream for tanginess and moisture. Eggs are incorporated one at a time to bind everything together without over-mixing, and vanilla extract adds a classic warmth. The star here, of course, are the generous chunks of chopped Twix bars folded into the batter. As the cheesecake bakes, these Twix pieces soften slightly, releasing their caramel and chocolate goodness while still retaining a hint of their shortbread crunch, creating pockets of delightful surprise in every forkful.
The Luxurious Chocolate Ganache Topping
To crown these magnificent bars, a homemade chocolate ganache is absolutely essential. This simple yet elegant topping is made from just two ingredients: heavy cream and semi-sweet chocolate. When heated cream is poured over chopped chocolate and then whisked until smooth, it transforms into a glossy, rich, and intensely chocolatey glaze. This ganache not only adds another layer of deep chocolate flavor but also provides a beautiful, polished finish. It sets perfectly firm when chilled, making the bars easy to cut and handle, and providing an ideal surface for a final sprinkle of extra Twix crumbles for ultimate indulgence.
Serving Suggestions and Storage
Once your Twix Cheesecake Bars are perfectly chilled and set, the moment of truth arrives: slicing and serving. For the cleanest cuts, use a sharp knife warmed under hot water and wiped dry between each slice. This will prevent the ganache and cheesecake from sticking. These bars are best served chilled, making them a refreshing treat. They are ideal for potlucks, parties, or as a decadent after-dinner dessert. For an extra flourish, you can serve them with a dollop of whipped cream or a scoop of vanilla bean ice cream.
To store any leftover bars, place them in an airtight container in the refrigerator for up to 3-4 days. For longer storage, Twix Cheesecake Bars freeze beautifully. Wrap individual bars tightly in plastic wrap, then place them in a freezer-safe bag or container. They can be frozen for up to 1-2 months. Thaw them in the refrigerator overnight before serving for the best texture and flavor.
Frequently Asked Questions (FAQ)
Q: Can I use different types of candy bars in this recipe?
A: Absolutely! While Twix bars offer a unique combination of cookie, caramel, and chocolate, you can certainly experiment with other candy bars like Snickers (for nuts and nougat), Milky Way (for nougat and caramel), or even Reese’s peanut butter cups for a peanut butter twist. Just ensure they are chopped into small, manageable pieces.
Q: Why did my cheesecake crack on top?
A: Cheesecake cracks are often caused by sudden changes in temperature or over-mixing the batter. Ensure your ingredients are at room temperature, avoid over-beating the cream cheese mixture (this incorporates too much air), and allow the cheesecake to cool gradually in the oven after baking, then slowly at room temperature, before chilling in the refrigerator.
Q: How can I ensure my graham cracker crust is not soggy?
A: The key to a non-soggy crust is to pre-bake it for the recommended time (typically 10 minutes) until it’s slightly golden and firm. Also, make sure to press it firmly into the pan to create a dense base.
Q: Can I make these ahead of time for an event?
A: Yes, these cheesecake bars are perfect for making ahead! They need ample chilling time to set properly, so preparing them the day before an event is ideal. This allows the flavors to meld and the texture to become perfectly firm.
More Decadent Cheesecake Recipes
If you’ve fallen in love with these Twix Cheesecake Bars and are eager to explore more creamy, dreamy dessert options, here are some other fantastic cheesecake recipes to add to your baking repertoire. From classic flavors to innovative twists, there’s a cheesecake for every craving:
- Cannoli Cheesecake Bars from Snappy Gourmet: A delightful blend of two Italian-inspired desserts.
- Triple Chocolate Cheesecake: For the ultimate chocolate lover, rich and indulgent.
- Instant Pot Cheesecake: A surprisingly easy and foolproof method for a perfectly creamy cheesecake.
- Hot Fudge Brownie Cheesecake: Combining two dessert titans for an explosion of flavor.
- White Chocolate Cheesecake: Elegant and sophisticated, with a hint of hazelnut liqueur.
- Blackberry Cheesecake Bars: A refreshing and fruity take on cheesecake bars.
- Chocolate Peanut Butter Cheesecake Bars: The classic pairing of chocolate and peanut butter in a bar format.
- Explore even more tips and creative ideas for Unique Homemade Cheesecake Desserts.
This delightful recipe is part of an ongoing collaboration with my dear blogger friend, Danielle, from Hugs and Cookies. Be sure to check out her unique spin on this Twix Cheesecake Bar recipe and give her a follow on social media for more inspiring baking ideas!
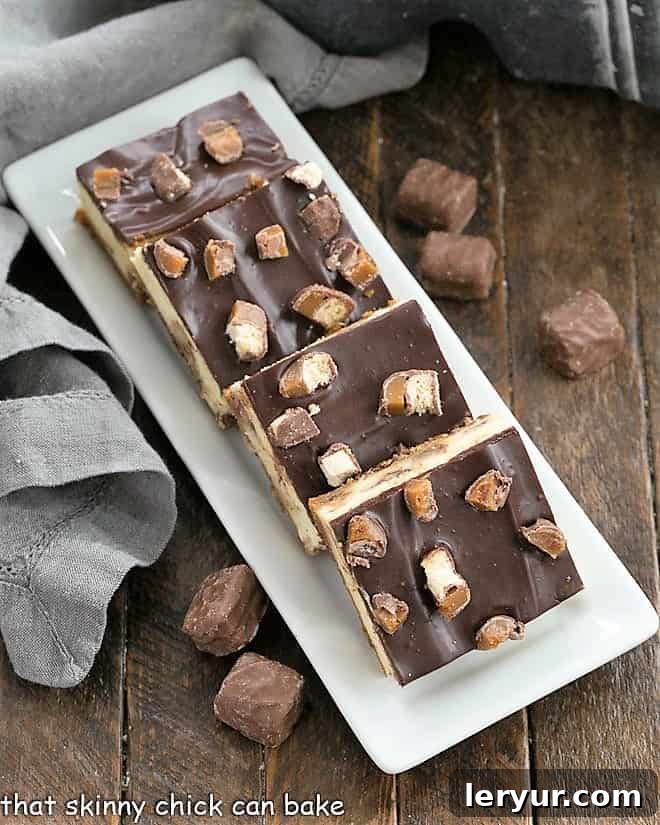
Twix Cheesecake Bars
30 minutes
1 hour 10 minutes
1 hour (cooling/chilling)
2 hours 40 minutes
24 bars
Luscious Ganache Topped Cheesecake Bars studded with bits of Twix Bars – a truly unforgettable dessert experience.
Average Rating: 4.9/5 from 17 reviews
Ingredients
Crust
- 1¼ cups graham cracker crumbs
- 5 tablespoons butter, melted
- 5 tablespoons sugar
Cheesecake Filling
- 24 ounces cream cheese, at room temperature
- 1 cup sugar
- 3 tablespoons all-purpose flour
- 1 cup sour cream
- 4 large eggs, at room temperature
- 1 teaspoon vanilla extract
- 1 package of Twix mini bars, smashed or chopped (approx. 9.7 ounces), yielding about 2 cups when measured
- 3 extra mini Twix bars to crumble for top garnish (optional)
Chocolate Ganache
- ½ cup heavy cream
- 6 ounces semi-sweet chocolate bars, finely chopped
Instructions
- Preheat oven to 325°F (160°C).
- In a medium bowl, mix together the graham cracker crumbs, melted butter, and 5 tablespoons of sugar for the crust. Press the mixture firmly into the bottom and slightly up the sides of a 9×13 inch baking pan, preferably lined with nonstick foil for easy removal. Bake for 10 minutes, then remove from oven and let cool completely.
- Lower the oven temperature to 300°F (150°C).
- Using the paddle attachment of your stand mixer (or a hand mixer), beat the room temperature cream cheese and 1 cup of sugar on low speed until just combined and smooth. Scrape the bottom and sides of the bowl with a spatula a couple of times during the process to ensure no lumps remain.
- Add the flour to the cream cheese mixture and mix until just incorporated. Then, add the sour cream and mix gently until smooth.
- Add the eggs one at a time, mixing on low speed until each egg is just combined before adding the next. Do not over-mix. Finally, stir in the vanilla extract. Gently fold in the chopped Twix pieces using a spatula.
- Pour the cheesecake batter evenly over the cooled graham cracker crust. Gently tap the pan on the counter a few times to release any trapped air bubbles.
- Carefully place the pan in the preheated 300°F (150°C) oven. Bake for 1 hour.
- After 1 hour, turn off the oven, but leave the cheesecake in the oven with the door closed for an additional 30 minutes. This gradual cooling prevents cracking. Do not open the oven door during this time.
- Remove the cheesecake from the oven and transfer it to a wire cooling rack to cool completely at room temperature. Once cool, cover loosely and chill in the refrigerator for at least 4-6 hours, or preferably overnight, until thoroughly set.
- Once the cheesecake is chilled and firm, prepare the ganache. In a microwave-safe bowl, heat the heavy cream until it is almost at a boil (it should be steaming and show small bubbles around the edges).
- Remove the hot cream from the microwave and immediately add the finely chopped semi-sweet chocolate. Cover the bowl with a plate or a paper towel for 2 minutes to allow the chocolate to melt.
- After 2 minutes, whisk the mixture until it is completely smooth and glossy.
- Pour the prepared ganache evenly over the cold, set cheesecake bars. Use an offset spatula to gently spread the ganache across the top if needed, ensuring an even layer.
- While the ganache is still slightly wet and tacky, sprinkle the reserved chopped Twix pieces (from the 3 extra mini bars) over the top for garnish.
- Return the cheesecake bars to the refrigerator until the ganache is completely set, which usually takes another 30-60 minutes.
- Once set, slice into bars and serve. Enjoy!
Notes
For the best, creamiest cheesecake, always ensure your cream cheese and eggs are at room temperature. This helps them incorporate smoothly into the batter, preventing lumps and ensuring a silky texture.
Using the paddle attachment on your stand mixer is highly recommended for mixing the cheesecake filling. It minimizes air incorporation, which is key to a dense, crack-free cheesecake. Avoid using the whisk attachment.
Recommended Products
As an Amazon Associate and member of other affiliate programs, I earn from qualifying purchases.
- Silicone Spatula
- KitchenAid KSM150PSER Artisan Tilt-Head Stand Mixer
- 9 x 13 Baking Pan
Nutrition Information:
Yield:
24
Serving Size:
1 bar
Amount Per Serving (estimated):
Calories: 362
Total Fat: 24g
Saturated Fat: 15g
Trans Fat: 0g
Unsaturated Fat: 7g
Cholesterol: 79mg
Sodium: 183mg
Carbohydrates: 34g
Fiber: 1g
Sugar: 27g
Protein: 5g
This nutritional information is provided as a courtesy and is an estimate only. Calculations are based on online databases and may vary depending on specific brands, product types, and measurement accuracy. This information should not be considered a substitute for professional nutrition advice. You are solely responsible for verifying the accuracy of any nutritional information for your specific dietary needs.
HOW MUCH DID YOU LOVE THIS RECIPE?
Please leave a comment on the blog or share a photo on Pinterest – we’d love to see your creations!