
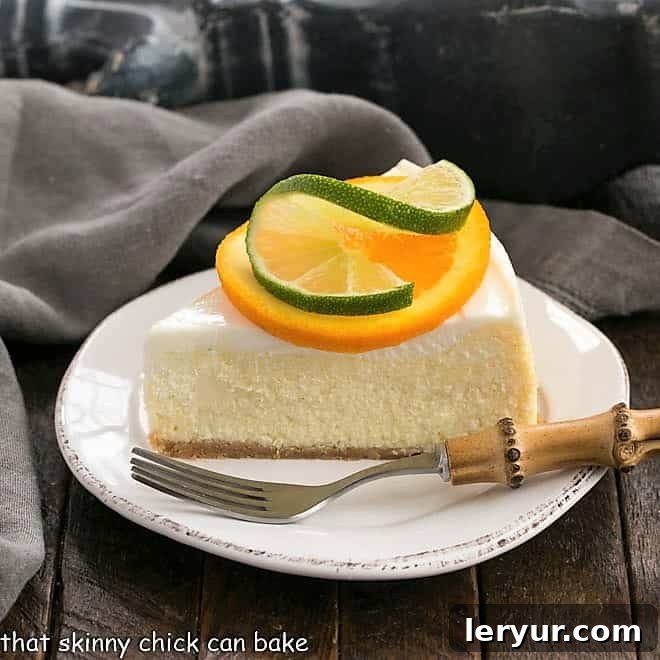
Indulge in the Ultimate Citrus Delight: Margarita Cheesecake Recipe
Experience the vibrant and refreshing taste of a classic Margarita cocktail, perfectly captured in this extraordinary Margarita Cheesecake. This luscious, creamy, and irresistibly delicious homemade cheesecake is a showstopper, ideal for any celebration or simply as a refreshing treat to brighten your day. Get ready to impress your guests and tantalize your taste buds with every zesty, tequila-kissed bite.
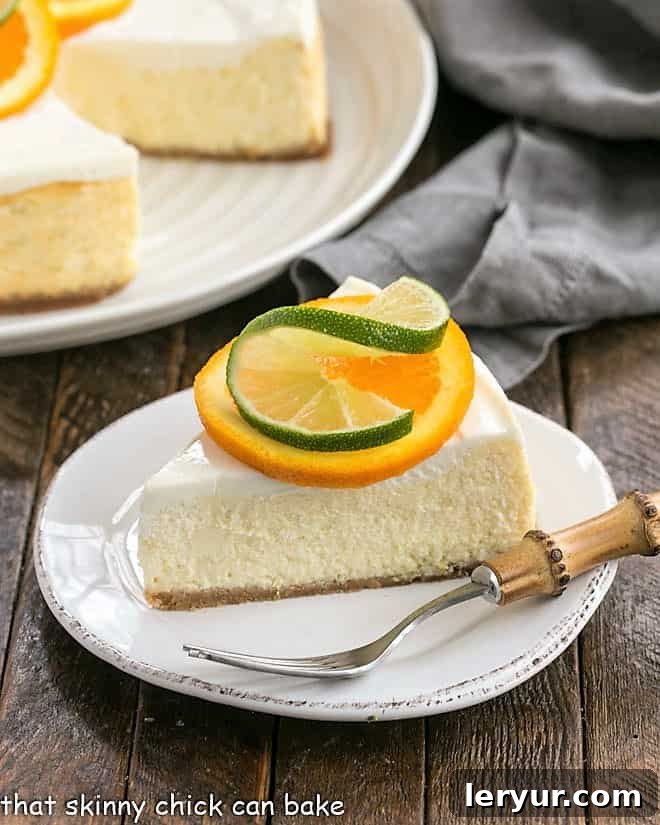
Why This Margarita Cheesecake is a Must-Try
Just the mere thought of a tangy Key lime pie, a frosty, slushy margarita, or this exquisite Margarita Cheesecake is enough to make any dessert lover’s mouth water. This particular cheesecake transcends ordinary desserts, offering a truly unique flavor profile that balances sweetness with a delightful citrus punch and a subtle alcoholic warmth. It’s more than just a cheesecake; it’s an experience.
- Perfectly Balanced Flavors: The tartness of fresh lime is expertly balanced with just the right amount of sugar, creating a harmonious symphony of flavors that invigorates the palate without being overwhelmingly sour. Each forkful delivers a refreshing burst that keeps you coming back for more.
- Signature Margarita Infusion: Beyond the traditional cream cheese, eggs, and sugar, this cheesecake is masterfully flavored with the quintessential components of a classic margarita. Freshly squeezed lime juice provides acidity and brightness, while fine lime zest offers an intense aromatic citrus oil. The addition of premium Grand Marnier (or another orange liqueur) and a touch of tequila elevates this dessert, infusing it with the sophisticated and celebratory essence of its cocktail namesake.
- Flavor Enhancement from Alcohol: Much like salt, alcohol acts as a powerful flavor enhancer in baking. The modest amount of Grand Marnier and tequila used in this recipe doesn’t overpower the cheesecake; instead, it subtly amplifies the existing citrus notes and adds a layer of depth and complexity that makes this dessert truly unforgettable. It creates a nuanced warmth and a sophisticated finish.
Every ingredient in this recipe plays a crucial role in creating a dessert that is sweet, tangy, and wonderfully lime-infused. It’s the ideal finale for any Tex-Mex themed gathering, a vibrant centerpiece for Cinco de Mayo celebrations, or simply a sophisticated treat to share with friends and family on a warm evening. This recipe promises a memorable dessert that’s both comforting and exhilarating.
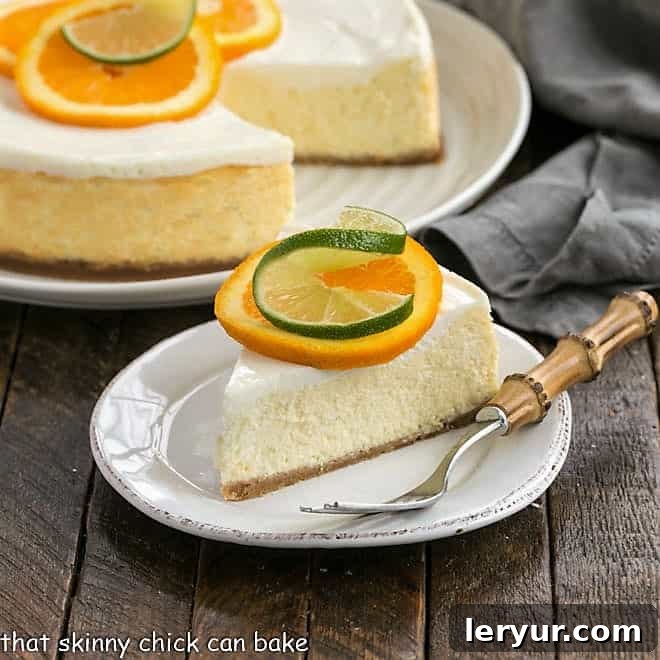
Expert Tips for Crafting a Flawless Margarita Cheesecake
Achieving a consistently creamy, crack-free, and perfectly flavored cheesecake requires a few tried-and-true techniques. Follow these golden rules to ensure your Margarita Cheesecake turns out spectacular every time, rivaling those from the finest bakeries.
- Invest in a Quality Springform Pan: A springform pan is absolutely non-negotiable for cheesecake baking. Its removable sides allow for effortless release and beautiful, intact slices without any risk of damage. Attempting to cut and remove slices from a regular cake pan is practically impossible without compromising the cheesecake’s structure. Opt for a 9-inch springform pan for best results.
- Room Temperature Ingredients are Key: For the creamiest, smoothest cheesecake batter, it is crucial that your cream cheese, eggs, and sour cream are at room temperature. Take them out of the refrigerator at least an hour (and no more than two hours) before you plan to prepare the filling. This ensures that all ingredients blend together seamlessly, preventing lumps and creating a uniformly emulsified batter. Cold ingredients will lead to a lumpy mixture and a denser, less airy texture.
- Choose the Right Mixer Attachment: When preparing the cheesecake batter, always use the paddle attachment on your stand mixer. The paddle attachment gently mixes the ingredients, keeping the batter dense and preventing excessive air incorporation. Using a whisk or whip attachment can introduce too much air, which can lead to a soufflé-like rise and subsequent collapse, often resulting in cracks during baking and cooling.
- Incorporate Eggs One at a Time: To maintain the delicate balance of your cheesecake batter and prevent overmixing, add your eggs one at a time. Beat each egg just until it is fully blended into the batter before adding the next. This ensures even distribution and minimizes the risk of incorporating too much air, which is detrimental to a smooth, dense cheesecake.
- Fresh Lime Zest for Maximum Flavor: Always zest your own limes for this recipe, aiming for a very fine zest. The zest contains concentrated oils that deliver a far more intense and aromatic citrus flavor than lime juice alone. Avoid the white pith beneath the green skin, as it can impart a bitter taste.
- PRO-Tip: Enhance Lime Flavor by Rubbing Zest into Sugar: For an extra boost of vibrant lime flavor, try this clever trick I learned from baking expert Dorie Greenspan. Before adding the sugar to your mixer, combine it with the lime zest in a bowl and rub them together with your fingers. This action helps to release the essential oils from the lime zest, infusing the sugar with an incredible aroma and intensifying the citrus notes in the final cheesecake. This optional step truly makes a difference.
- Bake in a Bain-Marie (Water Bath) to Prevent Cracks: If you desire a perfectly smooth, crack-free cheesecake, baking it in a bain-marie, or water bath, is highly recommended. This method provides a moist, even heat environment, ensuring the cheesecake cooks gently and uniformly. To set up a water bath, place your springform pan (wrapped tightly in several layers of heavy-duty aluminum foil to prevent water leakage) into a larger roasting pan. Fill the roasting pan with about an inch or two of hot water, ensuring the water level comes about halfway up the sides of the springform pan.
- When a Water Bath is Optional: While a water bath is excellent for presentation, it’s not strictly necessary if you plan to cover your cheesecake with a topping. If your recipe includes a sour cream topping, fruit compote, or whipped cream, any minor cracks that might form during baking will be beautifully hidden. So, if time or effort is a concern, you can sometimes skip the water bath without sacrificing the overall deliciousness.
- Plan Ahead for Optimal Chilling: For the absolute best flavor and texture, plan to make your cheesecake at least one day before you intend to serve it. Allowing it to chill overnight in the refrigerator gives the flavors ample time to meld and intensify, and the cheesecake itself will firm up beautifully, resulting in that dense, creamy consistency everyone loves. Rushing the chilling process can lead to a less firm and less flavorful dessert.
Frequently Asked Questions
A water bath, also known as a bain-marie, is a pan of water in which you place your cheesecake before baking it in the oven. The surrounding water and the steam it generates create a consistent, humid baking environment. This gentle, even heat helps the cheesecake cook slowly, preventing the edges from baking faster than the center, which is a common cause of cracks. It also keeps the cheesecake from drying out and helps achieve that signature silky-smooth texture. While highly recommended for a perfectly smooth surface, if your cheesecake will be topped with sour cream, fruit, or whipped cream, any potential cracks will be hidden, making the water bath an optional step in those cases. However, for a pristine, unadorned cheesecake, it’s a game-changer.
Properly stored, a baked cheesecake can last for 3-4 days in the refrigerator. To ensure its freshness and prevent it from absorbing other odors, cover it tightly with plastic wrap or store it in an airtight container. It’s crucial that the cheesecake has not been left out at room temperature for longer than two hours, as this can encourage bacterial growth and compromise food safety. Always refrigerate promptly after cooling to room temperature.
Yes, cheesecakes freeze exceptionally well, making them perfect for preparing ahead or storing leftovers. For best results, allow the cheesecake to cool completely and chill in the refrigerator until firm. Then, wrap individual slices or the entire cheesecake securely first in plastic wrap, then in a layer of heavy-duty aluminum foil. This double-layer protection prevents freezer burn. Frozen cheesecake can be stored for up to 2-3 months. When ready to enjoy, defrost the cheesecake overnight in the refrigerator. Note that if your cheesecake has a delicate topping (like fresh fruit or certain glazes) that doesn’t freeze well, the defrosted cheesecake might not be as aesthetically pleasing as when freshly made, though the taste will likely still be excellent.
Knowing when a cheesecake is perfectly done is often a matter of touch rather than appearance. A cheesecake will continue to cook and set from residual heat after it’s removed from the oven. The best indicator is the “jiggle test”: gently shake the pan. The edges should appear set, but the center (a circle about a quarter or 50-cent coin in size) should still have a slight, delicate jiggle, like gelatin. If the entire cheesecake jiggles significantly, it needs more time. If there’s no jiggle at all, it might be overbaked. If you prefer to use a thermometer, the internal temperature of the center should register 150 degrees Fahrenheit (approximately 65 degrees Celsius) when inserted into the middle of the cheesecake. Remove it from the oven at this point, and it will firm up perfectly as it cools.
Absolutely! You can easily adapt this Margarita Cheesecake recipe to be alcohol-free without sacrificing much of its signature flavor. For the Grand Marnier, simply substitute it with an equal amount of orange extract (use a high-quality one for best flavor) or even a splash of orange juice mixed with a tiny bit of orange zest for concentrated flavor. For the tequila, you can omit it entirely, or add a very small amount of a non-alcoholic tequila alternative if you can find one, or even a tiny splash of vanilla extract to round out the flavors. The primary “margarita” flavor comes from the abundant fresh lime juice and zest, so the cheesecake will still be wonderfully tangy and refreshing.
Pairings and Complementary Recipes
While this Margarita Cheesecake stands gloriously on its own, it also pairs beautifully with a variety of Tex-Mex inspired dishes and other refreshing beverages. Consider serving it as the grand finale to a festive meal alongside these delicious options:
- Cheddar, Olive, Tomato Savory Madeleines – A savory bite before the sweet.
- Mexican Chopped Salad with Creamy Cilantro Lime Dressing – A fresh, light side.
- Creamy Hatch Green Chile and Cheese Soup – For a comforting and spicy start.
- Epic Creamy Chicken Enchiladas – A hearty main course.
- Grilled Margarita Shrimp – Seafood with a similar vibrant flavor profile.
- Homemade Tortillas – Perfect for any Tex-Mex feast.
- Tex Mex Rice with Bacon – A flavorful and satisfying side dish.
- Vegetable Fajitas – A healthy and colorful option.
- Pinto Beans with Fresh Tomato Relish – A classic side with a fresh twist.
- Frozen Virgin Strawberry Margarita – A non-alcoholic drink to complement the dessert.
- Beergaritas – Another cocktail to keep the party going.
- Mexican Spiced Chocolate Flan – For those who love a different kind of sweet finish.
- Mini Margarita Cheesecakes – A bite-sized version for individual servings.
- Plus, explore all my Best Cheesecake Recipes for more delightful creations.
Stay connected and share your culinary adventures! Follow me on Instagram, Facebook, and Pinterest. Don’t forget to tag me when you try one of my delicious recipes! If you love the results, please consider leaving a 5-star rating in the recipe card below to help other home bakers discover this amazing dessert. Your feedback is truly appreciated!
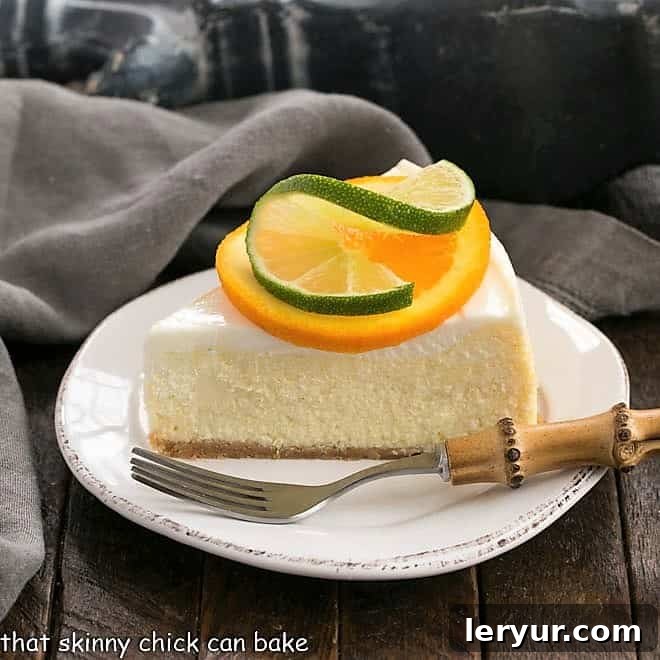
Margarita Cheesecake Recipe
20 minutes
50 minutes
1 hour 10 minutes
12 servings
A dreamy, vibrant cheesecake boasting all the festive and zesty flavors of a classic Margarita cocktail. Perfect for celebrations or a delightful everyday treat.
Ingredients
- 1 ¼ cups vanilla wafer cookie crumbs
- ¼ cup butter, melted
- 3 8-ounce packages of cream cheese, at room temperature
- 2 cups sour cream
- 1 ¼ cups sugar
- 3 tablespoons Grand Marnier, or another orange liqueur
- 3 tablespoons tequila
- 3 tablespoons freshly squeezed lime juice
- 2 teaspoons lime zest
- 4 eggs, at room temperature
- Very thin orange and lime slices, to garnish, optional
Instructions
- Prepare the Crust: Preheat your oven to 350ºF (175ºC). In a medium bowl, thoroughly mix the vanilla wafer cookie crumbs with the melted butter until well blended and moist. Press this mixture firmly onto the bottom and about 1-inch up the sides of a 9-inch springform pan. This creates a sturdy foundation for your cheesecake. Place the prepared crust in the refrigerator to chill and set while you prepare the filling.
- Mix the Cream Cheese Base: Using a stand mixer fitted with the paddle attachment, beat the room temperature cream cheese on medium speed until it is light, fluffy, and completely smooth, with no lumps. Gradually add 1 cup of sour cream, 1 cup of sugar, Grand Marnier, tequila, lime juice, and lime zest. Continue to beat on low to medium speed until all ingredients are just well blended and the mixture is smooth and creamy. Avoid overmixing.
- Incorporate the Eggs: Add the eggs to the cream cheese mixture one at a time. After adding each egg, beat just until it is incorporated and blended into the batter, then add the next. Be careful not to overmix at this stage, as incorporating too much air can cause cracks. Once all eggs are blended, remove the bowl from the mixer and use a rubber spatula to scrape down the sides and bottom of the bowl, ensuring the batter is uniformly mixed.
- Bake the Cheesecake: Pour the luscious cheesecake filling evenly into the chilled cookie crust. Carefully place the springform pan (preferably wrapped in foil and placed in a water bath, see “Expert Tips”) into the preheated oven. Bake for approximately 50 minutes, or until the edges are set and the center of the cheesecake still has a slight, delicate jiggle (about a quarter-sized area).
- Add the Sour Cream Topping: While the cheesecake is baking, prepare the topping. In a small bowl, whisk together the remaining 1 cup of sour cream, ¼ cup of sugar, and 1 tablespoon of lime juice until smooth. Once the cheesecake has baked for 50 minutes, carefully remove it from the oven (if using a water bath, leave it in the water). Gently pour the sour cream mixture over the hot cheesecake, using a spatula to smoothly spread it to the edges.
- Final Bake and Chill: Return the cheesecake to the oven and bake for an additional 5 minutes to set the topping. After this final bake, carefully remove the pan from the oven and from the water bath (if used). Place the cheesecake on a wire rack and allow it to cool completely to room temperature. Once cooled, transfer the cheesecake to the refrigerator and chill thoroughly for at least 4 hours, or preferably overnight, to allow it to fully set and for the flavors to deepen.
- Garnish and Serve: Once well-chilled, carefully run a thin knife around the inner edge of the springform pan to loosen the cake from the sides. Release and remove the pan sides. Garnish your beautiful Margarita Cheesecake with very thin slices of fresh orange and lime, or a sprinkle of extra lime zest, just before serving. Slice with a hot, clean knife for perfect portions.
Notes
This recipe has been adapted from a classic cheesecake foundation found on The Food Network, with delightful Margarita-inspired modifications.
For an intensified lime flavor, remember the pro-tip: rub the finely grated lime zest into the sugar with your fingers before adding it to the cream cheese mixture. This technique extracts more of the essential oils from the zest, infusing the sugar with a potent citrus aroma and flavor that will shine through in your finished cheesecake.
Recommended Products
As an Amazon Associate and member of other affiliate programs, I earn from qualifying purchases, helping to support this blog at no extra cost to you.
- Silicone Spatulas
- 9-inch Springform Pan
- KitchenAid Artisan Stand Mixer
Nutrition Information:
Yield:
12
Serving Size:
1 slice
Amount Per Serving (estimated):
Calories: 466
Total Fat: 34g
Saturated Fat: 19g
Trans Fat: 0g
Unsaturated Fat: 11g
Cholesterol: 152mg
Sodium: 278mg
Carbohydrates: 34g
Fiber: 1g
Sugar: 28g
Protein: 7g
This nutritional information is an estimate provided as a courtesy. Varying factors such as specific product types or brands used can significantly alter the nutritional values. To obtain the most accurate representation, it is recommended to calculate the nutritional information with the actual ingredients used in your recipe. This site occasionally provides estimated nutritional data, but its accuracy cannot be guaranteed. Toppings, if optional, are generally not included in these estimates.
HOW MUCH DID YOU LOVE THIS RECIPE?
Please leave a comment on the blog or share a photo on Pinterest and tag me!