

There’s a unique comfort that only freshly baked bread can offer, and our Whole Wheat Country Bread delivers it in abundance. This January, treat yourself to a loaf with an undeniably hearty crust, a marvelously tender crumb, and a flavor profile that speaks of rustic tradition. Imagine a warm slice, gently yielding to a pat of cold butter – a truly heavenly experience that will capture your heart from the very first bite. This isn’t just bread; it’s an invitation to savor the simple, wholesome pleasures of homemade goodness.
Discovering the Heart of Country Bread
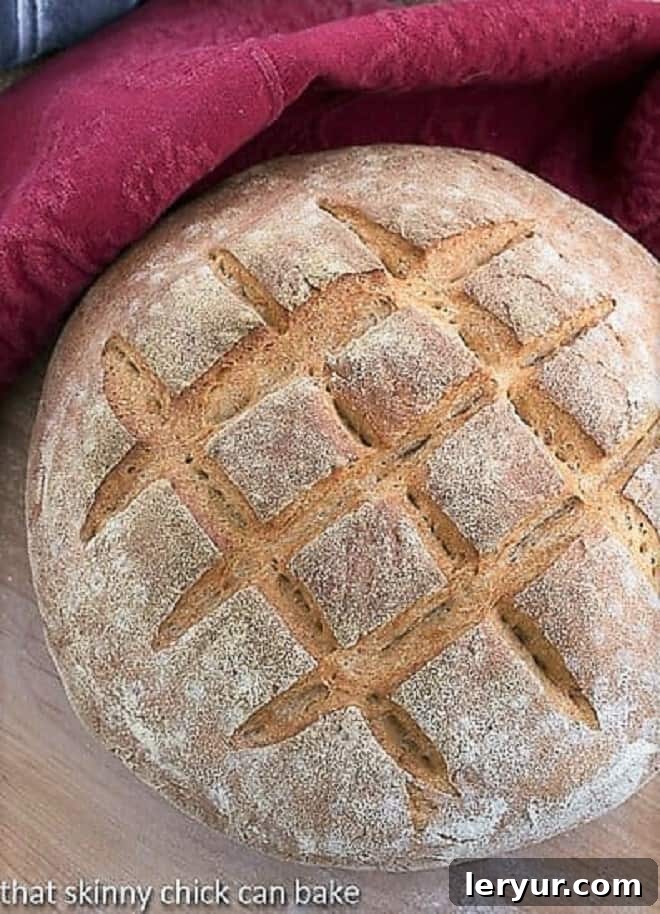
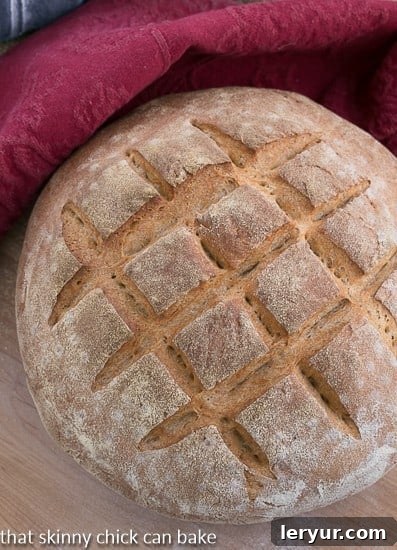
Our culinary journey this year kicked off with a delightful challenge: baking a hearty Country Bread, an assignment from the renowned “Tuesdays with Dorie” baking group. This particular recipe, yielding a substantial, rustic loaf with an impressive thick crust, comes courtesy of contributing baker Joe Ortiz. While some bakers might choose elaborate decorating techniques – perhaps an outer braid, a delicate wheat stalk motif, or intricate star and grape clusters – I opted for a simpler, yet equally charming approach. Without step-by-step visual guides for those complex designs, a straightforward crosshatch pattern felt much more approachable and perfectly suited the rustic character of the bread. This simplicity allows the bread’s intrinsic beauty and texture to truly shine, highlighting the artisanal quality of a truly homemade loaf.
The beauty of country bread lies in its honest, straightforward character. It’s a celebration of basic ingredients transformed into something extraordinary through time and technique. This isn’t a bread that relies on excessive sweetness or richness; instead, its flavor is derived from the thoughtful combination of flours and the magic of fermentation. The process, while requiring patience, is deeply rewarding, culminating in a loaf that isn’t just food, but a testament to traditional baking methods. Every baker, regardless of skill level, can achieve a beautiful and delicious loaf by embracing the simplicity and understanding the fundamentals. This recipe provides an excellent foundation for anyone looking to delve deeper into the art of bread making, offering a truly authentic experience.

Mastering the Art of the Pre-Ferment: How to Make a Flavorful Sponge
There’s nothing quite like spending a snowy day indoors, the kitchen filled with the promise of warm, baking bread. Last week, as sub-zero wind chills kept us happily confined, I seized the opportunity to bake this incredible Whole Wheat Country Bread. The journey began the night before with the creation of a “sponge” – a crucial pre-ferment. This concoction, a simple yet powerful mixture of active dry yeast, a blend of white, rye, and whole wheat flours, and water, is the secret to unlocking profound flavors and enhancing the bread’s texture.
After being mixed, the sponge was tucked away in the refrigerator overnight to slowly ferment. This extended, cool fermentation process is a game-changer. It not only allows the yeast to work its magic over a longer period but also develops a nuanced, slightly tangy “sourdough” kick, even though it’s not a true sourdough starter. This slow development of flavor contributes immensely to the complexity and depth of the final loaf, differentiating it from quick-rise breads. The acids produced during fermentation tenderize the gluten, making the dough more extensible and the resulting crumb more open and airy. It’s an easy step that yields a disproportionately large return in terms of taste and quality, transforming simple flour and water into a foundation of rich, aromatic bread. This patient approach is what truly elevates a good loaf to a great one, laying the groundwork for a truly memorable baking experience.
Preparing the Dough and Its Leisurely Rises
The following morning, after the sponge had matured overnight, the main dough assembly began. My trusty KitchenAid mixer, equipped with a dough hook, proved invaluable, handling the intensive 10-minute kneading period with ease. This dough recipe itself is beautifully minimalist: yeast, water, flour (including the flavorful sponge), and salt. The simplicity of the ingredients belies the complexity of the flavors achieved through proper technique and ample rising time.
With plenty of time on my hands due to the weather, I embraced the unhurried nature of bread making. The second and third rises were a truly leisurely process, allowing the dough to fully develop its structure and flavor. Rushing these crucial proofing stages is a common mistake that can compromise the final texture and taste of the bread. Allowing the dough to rise slowly at room temperature, sometimes even overnight for the first rise, gives the yeast ample opportunity to produce more carbon dioxide and flavor compounds, resulting in a lighter, airier crumb and a more robust taste. This patience is integral to achieving a truly artisanal Whole Wheat Country Bread that is both flavorful and beautifully structured.
During this baking adventure, I also encountered a new term: banneton. This round proofing basket, traditionally made of wicker or cane, is specifically designed to support the dough during its final rise, helping it maintain its shape and often imparting a lovely spiral pattern on the crust. But fear not if you don’t have one of these specialized items. Necessity is the mother of invention in the kitchen! I simply lined my colander with a heavily floured linen towel, and it worked like an absolute charm. The flour prevents sticking, and the towel absorbs excess moisture, contributing to a better crust. A few precise razor slashes across the top of the loaf just before baking allow for controlled expansion (known as “oven spring”), while tossing a few ice cubes into the oven during the initial baking phase creates steam, which is essential for a truly crispy, golden crust. A preheated hot baking stone in the oven provides intense, even heat from below, ensuring a perfectly developed bottom crust and maximum oven spring. These simple tricks helped create a picture-perfect Whole Wheat Country Bread, demonstrating that you don’t always need fancy equipment to achieve professional results.
The Irresistible Aroma and the Final Taste of Homemade Whole Wheat Bread
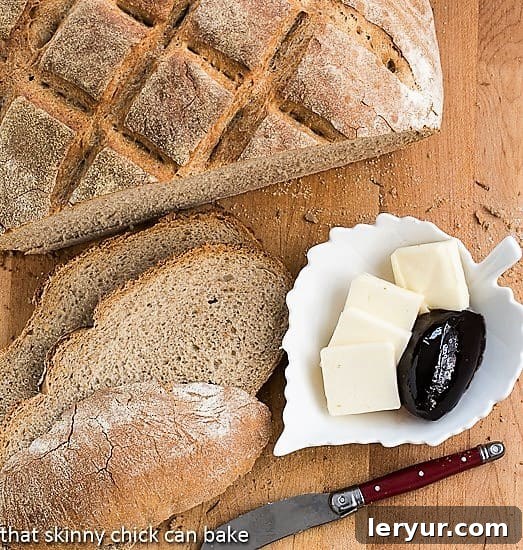
The incomparable aroma of baking bread is perhaps one of life’s most enticing sensory pleasures. As this rustic loaf spent a full hour transforming in the oven, my family, particularly Bill and Nick, were practically “chomping at the bit” in anticipation of their first slices. The house filled with a warm, nutty fragrance that promised wholesome goodness. But the wait wasn’t over yet; the loaf then required an additional hour cool-down period. This step, often overlooked by eager bakers, is absolutely critical. Allowing the bread to cool completely allows the internal structure to set, the moisture to redistribute evenly, and the flavors to fully mature. Cutting into a hot loaf can result in a gummy texture and a less defined flavor. Once cooled, it was finally time to indulge.
They both enjoyed a generous, thick slab with dinner and immediately made plans to incorporate it into their breakfast menu the next morning. To be candid, this particular loaf, being a traditional country-style bread, lacks the sugar, butter, and eggs that might be found in richer, softer sandwich breads, and I admit I missed those elements initially. However, judging it for what it truly is – a lean, country-style loaf – it absolutely hit the mark. Its simple, unadulterated ingredients, combined with its lovely, open crumb and wonderfully crusty exterior, perfectly embodied the essence of rustic baking. It’s a bread that stands proudly on its own, showcasing the pure, earthy flavors of whole wheat and rye, making it an excellent choice for savory meals or as a sturdy base for toppings. It teaches a valuable lesson in appreciating the diverse world of bread, where every style offers its own unique charm and appeal.
This authentic Country Bread recipe from Joe Ortiz is a treasured classic. You can explore the full details by following the instructions below or find it in the widely acclaimed cookbook, Baking with Julia (affiliate link), a testament to Julia Child’s enduring influence on home baking. For optimal results, I consistently rely on Red Star Yeast (affiliate link) for both the initial sponge and the main bread dough, ensuring consistent and robust fermentation that contributes to the bread’s excellent rise and texture.
Helpful Tools for Your Rustic Baking Adventure
While passion and good ingredients are paramount, a few key tools can significantly enhance your bread-making experience, especially when crafting a rustic loaf like this Whole Wheat Country Bread. These items aren’t strictly mandatory (as demonstrated by the colander hack!), but they do make the process smoother and often yield more consistent results. Consider adding these to your kitchen arsenal:
- Banneton (Proofing Basket): This specialized basket provides crucial support for your dough during its final rise, helping it maintain its shape and encouraging a beautiful, even expansion. Many bannetons also impart a lovely spiral pattern to the crust, adding to the artisanal appeal.
- Colander: An excellent, readily available alternative to a banneton. When lined with a floured linen towel, it effectively mimics the function of a proofing basket, supporting the dough and preventing it from spreading too much during its final rise.
- Baking Stone or Steel: A preheated baking stone or steel is a game-changer for rustic breads. It provides a burst of intense, even heat from below, promoting exceptional “oven spring” (the rapid rise of the dough when it first hits the hot oven) and contributing to an incredibly crisp bottom crust.
- Lame or Sharp Razor Blade: Essential for scoring your loaf before baking. Precise slashes allow the bread to expand in a controlled manner, preventing uncontrolled tearing and creating beautiful, intentional patterns on the crust.
- Spray Bottle or Ice Cubes: To create steam in your oven. Steam is vital during the first few minutes of baking as it keeps the crust soft, allowing the loaf to expand fully before the crust hardens, resulting in a thinner, crispier, and more golden exterior.
This recipe was proudly featured on Yeastspotting, a testament to its quality and appeal within the baking community. We encourage you to explore other inspiring bread creations. You can also view all the other wonderful Country Bread posts and discover more about communal baking endeavors via the Tuesdays with Dorie site, a fantastic resource for home bakers.
Expand Your Baking Horizons: More Delightful Bread Recipes
If you’ve enjoyed the process of crafting this rustic Whole Wheat Country Bread, you’ll love exploring other yeast bread recipes that offer a similar sense of accomplishment and delicious rewards. Baking bread at home is a journey of discovery, offering endless variations in flavor, texture, and technique. Here are a few other fantastic recipes to inspire your next baking project, each promising to fill your home with an irresistible aroma and your table with wholesome goodness:
- Whole Wheat Dinner Rolls: Perfect for complementing any meal, these rolls offer the wholesome goodness of whole wheat in a soft, tender package.
- Classic Oatmeal Bread: A comforting and hearty loaf, rich with the texture and subtle sweetness of oats, ideal for sandwiches or toast.
- Honey Oatmeal Bread: Elevates the classic with a touch of natural sweetness from honey, creating a wonderfully moist and flavorful loaf.
- Japanese Milk Bread: Known for its incredibly soft, fluffy texture, this bread uses a unique tangzhong (water roux) method to achieve an unparalleled lightness.
- More Yeast Bread Recipes: Dive into our extensive collection of yeast bread recipes, ranging from simple weeknight bakes to more elaborate weekend projects.
Country Bread
1 hour 15 minutes
1 hour 10 minutes
2 hours 25 minutes
1 large loaf
A crusty whole wheat bread with a delicious nutty flavor, perfect for any meal.
Ingredients
Sponge
- 1 ½ cups water (105 to 115 degrees F) plus more to warm the mixing bowl
- 2 ½ teaspoons active dry yeast (1 full packet)
- 1 cup all-purpose unbleached flour
- 1 cup rye flour
Dough
- 1 teaspoon dry active yeast
- 1 cup water (105 to 115 degrees F)
- The sponge
- 3 ½ to 4 ½ cups unbleached, all-purpose flour
- 1 cup whole wheat flour
- 1 tablespoon coarse Kosher salt
Instructions
- **Prepare the Mixer Bowl:** Pour additional warm water into your mixer’s bowl and let it sit for a few minutes to warm the surfaces. Pour the water out. Add approximately 1/2 cup of the warm water (specified for the sponge) into the now-warmed bowl.
- **Activate the Yeast:** Sprinkle the active dry yeast over the warm water. Gently stir to combine. Allow the yeast to bloom and turn creamy, indicating it’s active, before proceeding to add the remaining water.
- **Combine Flours:** Meanwhile, in a separate, clean bowl, combine the all-purpose unbleached flour and rye flour. Mix them thoroughly to ensure an even distribution.
- **Form the Sponge:** Add the remaining warm water to the yeast-water mixture in the mixer bowl. Gradually add the combined flours, mixing together with a heavy spoon until smooth. The consistency should resemble thick pancake batter.
- **Ferment the Sponge:** Cover the bowl loosely with plastic wrap. Let the sponge ferment at room temperature for 6 to 8 hours for optimal flavor development. Alternatively, for a more profound “sourdough” note, place it in the refrigerator overnight. If refrigerated, pull it out and let it sit at room temperature for at least one hour before using.
- **Prepare Dough Flours:** In a separate large bowl, combine the 3 ½ cups of unbleached all-purpose flour with the whole wheat flour and coarse Kosher salt. Mix well.
- **Set Up Mixer:** Attach the dough hook to your stand mixer. Place the mixer bowl containing the prepared sponge onto the machine.
- **Dissolve Second Yeast:** In a small separate bowl, dissolve the remaining 1 teaspoon of dry active yeast in ½ cup warm water.
- **Begin Dough Mixing:** Turn the mixer on low to medium speed. Pour the other ½ cup water into the sponge. Gradually add 2 cups of the mixed flour (from step 6) to the sponge. Mix for about 3 minutes until well combined.
- **Final Dough Mixing and Kneading:** Add the dissolved yeast mixture and beat to fully incorporate it into the dough. Continue to gradually work in the remaining flour mixture. Add additional flour, a tablespoon at a time, only if needed, until the dough begins to clean the sides of the bowl. Mix for a full 10 minutes. The resulting dough should be moist, satiny, but still slightly sticky to the touch.
- **First Rise (Bulk Fermentation):** Lightly oil a large, clean bowl. Turn the dough into the oiled bowl, ensuring it’s coated. Cover the bowl tightly with plastic wrap. Let the dough proof at room temperature for at least 2 to 3 hours, or even overnight in a cool place, until it has at least doubled in size.
Final Rise and Bake
- **Prepare Proofing Basket:** While the dough is completing its first rise, prepare your resting spot for the dough’s final proof. If using a banneton, heavily rub flour into its liner. If using a colander, line it with a clean linen towel and generously flour the towel. Set aside.
- **Shape the Loaf:** Gently turn the risen dough out onto a lightly floured work surface. Using your fingers and palms, gently pat the dough into a flat round shape, being careful not to deflate it too much.
- **Build Surface Tension:** To create a tight, round loaf, fold the edge of the dough inward towards the center, then press down firmly with the heel of your hand to seal. Rotate the dough slightly and repeat this folding and pressing process around the entire circumference. Continue this process for up to four more times, forming the dough into a tight, smooth ball. This builds surface tension, crucial for a good rise.
- **Second Rise (Proofing):** Turn the shaped loaf over so the smooth side is facing down. Carefully place it into your prepared, flour-lined basket or colander.
- **Final Proof:** Cover the basket loosely with plastic wrap or a kitchen towel. Let the loaf rise for another 2 to 3 hours at room temperature, or until it has nearly doubled in size and feels light and airy.
- **Preheat Oven & Baking Stone:** Approximately 30 minutes before you plan to bake, place a baking stone (or an inverted heavy baking sheet) on the bottom third of your oven. Preheat the oven to 425°F (218°C). This ensures the stone is thoroughly heated for maximum oven spring.
- **Prepare for Baking:** If you don’t have a baking stone, place a piece of nonstick foil or sprinkle cornmeal onto a regular baking sheet. Carefully invert the proofed loaf from its basket onto the baking sheet or a piece of parchment paper on a baker’s peel, being very careful not to compress or deflate the delicate dough.
- **Score the Loaf:** Using a sharp razor blade or a bread lame, make 3 long slashes about ½ inch deep across the top of the loaf, or create a decorative crosshatch pattern. This allows for controlled expansion during baking.
- **Egg Wash (Optional):** For a slightly glossier, richer brown crust, mix one egg with 2 tablespoons of water to create an egg wash. Gently brush this mixture over the top of the bread.
- **Bake with Steam:** Carefully slide the bread onto the preheated baking stone (or place the baking sheet into the oven). Immediately reduce the oven heat to 400°F (204°C). If you want to create steam, quickly toss a few ice cubes onto the bottom of the oven or into a hot pan on the oven floor, then quickly close the door. If baking one large loaf, bake for 60 to 70 minutes. The internal temperature of the bread should reach 200°F (93°C) when tested with an instant-read thermometer.
- **Cool and Serve:** Remove the golden-brown loaf from the oven. Transfer it to a wire rack and allow it to cool completely for at least 1 to 2 hours. This cooling period is crucial for the internal structure to set and for the flavors to fully develop. Once cooled, slice, serve, and watch your magnificent homemade bread be devoured!
Nutrition Information:
Yield:
12
Serving Size:
2 slices
Amount Per Serving:
Calories: 766Total Fat: 7gSaturated Fat: 2gTrans Fat: 0gUnsaturated Fat: 4gCholesterol: 0mgSodium: 612mgCarbohydrates: 152gFiber: 8gSugar: 1gProtein: 21g
HOW MUCH DID YOU LOVE THIS RECIPE?
Please leave a comment on the blog or share a photo on Pinterest