
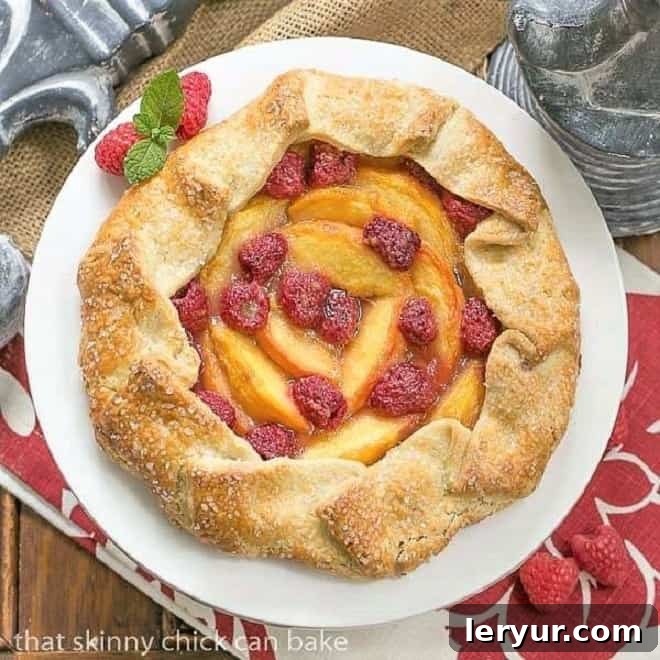
Experience the rustic charm and irresistible flavors of summer with this sublime Peach Raspberry Galette. Far simpler to master than a traditional pie, this free-form tart beautifully showcases the vibrant sweetness of ripe peaches perfectly complemented by the tangy burst of fresh raspberries. It’s a stunning yet unfussy dessert that’s guaranteed to impress your guests, making it a perfect addition to any seasonal gathering or a delightful treat for your family.
Have you ever shied away from baking a pie due to its intricate crust work? The galette is your culinary liberation! This versatile, rustic tart offers all the deliciousness of a classic fruit pie without the fuss of crimping and lattice tops. You simply pile sweetened, juicy fruit onto a round of buttery pastry dough and elegantly fold up the edges, creating a charmingly imperfect dessert. Once you embark on the journey of making this gorgeous Peach Galette with Raspberries, its ease and exquisite taste will surely make it a beloved staple in your baking repertoire, one you’ll be eager to recreate time and again.
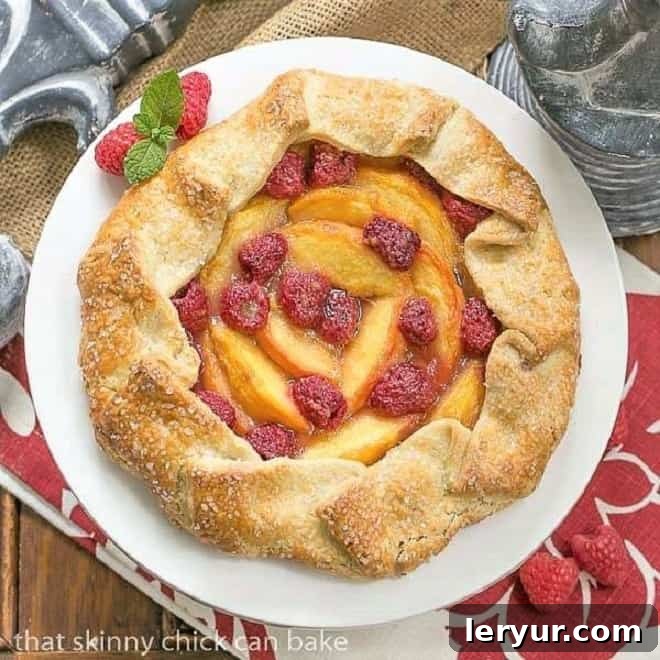
Why This Peach Raspberry Galette Will Be Your New Favorite Summer Dessert
- Effortless Elegance: This rustic peach tart boasts a flaky pastry crust and a luscious peach filling, much like a traditional pie, but it’s remarkably easier to assemble. There’s no need for perfect precision; its charm lies in its free-form, “rustic” appearance, making it approachable for bakers of all skill levels.
- Showcase Seasonal Perfection: If you’re fortunate enough to acquire some fresh, perfectly ripe peaches during the peak of summer, a galette is arguably the ideal way to let their natural sweetness and fragrance shine. The simple preparation allows the quality of the fruit to take center stage.
- An Irresistible Flavor Pairing: For those who haven’t yet experienced the magical combination of peaches and raspberries in a baked dessert, prepare to be utterly captivated. The succulent, honeyed notes of peaches intertwine with the bright, tart zing of raspberries, creating a harmonious symphony of flavors that is truly unforgettable from your very first bite.
- Versatile and Customizable: While peaches and raspberries are a match made in heaven, the galette concept is incredibly flexible. It’s an open canvas for experimenting with other seasonal fruits or even savory fillings, ensuring you can enjoy a galette year-round.
- Impressive Simplicity: Despite its unassuming preparation, a freshly baked galette emerges from the oven looking incredibly sophisticated and appealing. It’s the kind of dessert that looks like you spent hours crafting it, yet it’s wonderfully straightforward, allowing you to impress guests with minimal stress.
My husband, Bill, hails from a family where pie baking is a revered art form, a tradition passed down through generations. His grandmother and mother were renowned for their tender, impossibly flaky crusts, often made with lard—a secret weapon for achieving such delicate texture. When I married into the family, I felt the delicious weight of those culinary expectations! My inaugural taste of homemade raspberry pie was at their Thanksgiving table many years ago. It was a revelation.
Bill’s brother wasn’t a fan of pumpkin pie, so a glorious, ruby-red raspberry pie was always a required second option. Packed to the brim with juicy, vibrant raspberries, each slice was a dreamy, sweet-tart experience. Fast forward a decade or so, and I found myself in a baking dilemma. I was preparing to bake a peach pie but realized I had misjudged my peach supply; I simply didn’t have enough for a full two-crust pie. What’s a resourceful baker to do in such a predicament?
A quick glance in the fridge revealed a carton of plump, crimson raspberries, perfectly ripe and begging to be used. Since I was already a huge admirer of both classic peach pie and luscious raspberry pie, I thought, “How could combining these two exquisite fruits possibly go wrong?” With a hopeful shrug, I tossed the raspberries into the peach mixture. Hours later, as the aroma of baking fruit and buttery crust filled the kitchen, a new favorite emerged: this rustic peach tart with raspberries. The unexpected marriage of these fruits was an exquisite surprise—the peaches’ mellow sweetness provided a wonderful base for the raspberries’ invigorating tartness, all encased in a perfect crust. This delightful combination quickly became a cherished summer tradition, eagerly anticipated and frequently requested, especially by Bill, who declared himself its biggest fan!
Essential Ingredients for Your Rustic Galette
- Kitchen Staples: You’ll need pantry basics like all-purpose flour for the structure of the crust and as a thickener for the filling, granulated sugar and brown sugar for sweetness, and a pinch of salt to enhance all the flavors. Milk is crucial for bringing the dough together, contributing to its tenderness.
- Unsalted Butter: The cornerstone of a truly flaky pastry crust. It’s imperative that your butter is very cold and cut into small pieces. These cold butter pockets create steam during baking, forming tiny air gaps that result in an incredibly light and flaky texture.
- Egg: A single egg plays a dual role. The egg yolk enriches the pastry dough, adding tenderness and a lovely golden hue. The reserved egg white is then used as a wash to brush over the crust before baking, helping it achieve a beautiful golden-brown color and allowing coarse sugar to adhere for a sparkling finish.
- Fresh Peaches: The star of the show! Select peaches that are ripe, fragrant, and slightly soft to the touch. They should be peeled and sliced. Before you begin, always sample a piece of your peach; if it lacks sweetness and robust flavor, your galette will unfortunately fall short of its potential. Quality fruit makes all the difference!
- Fresh Raspberries: These jewel-toned berries bring a delightful tartness that perfectly balances the peaches’ sweetness. Look for plump, firm, unblemished, and vividly colored berries. Their bright acidity is key to cutting through the richness of the pastry.
- Coarse Sanding Sugar: While granulated sugar works, coarse sanding sugar is highly recommended for sprinkling over the crust. It adds a beautiful sparkle, a delightful crunch, and an extra touch of sweetness that elevates the galette’s rustic appearance and taste.
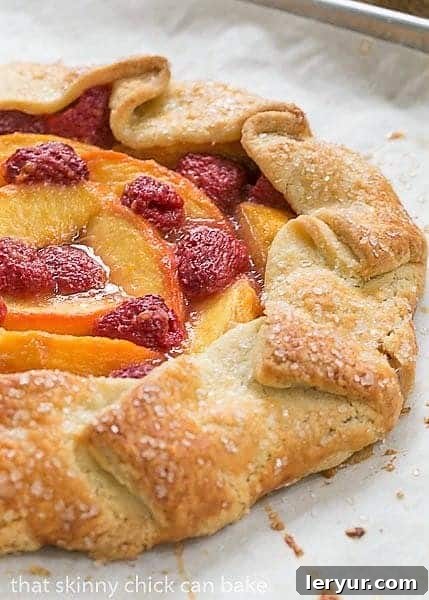
Expert Baking Tips for a Perfectly Flaky Galette
- Effortless Peach Peeling: To make peeling peaches a breeze, gently drop them into a pot of boiling water for a short duration, typically 30-60 seconds. Immediately transfer them to a bowl of ice water to stop the cooking process. The skins should then slip off easily with your fingers or a paring knife. This method is incredibly efficient, provided your peaches are ripe. Under-ripe peaches will be more stubborn, which is a good indicator they might not be ideal for baking anyway.
- Pre-Blanching Prep: For even easier peeling, consider scoring a shallow “X” on the base of each peach before blanching. This simple step helps the skin to loosen and peel away without tearing the delicate flesh.
- The Golden Rule of Cold Butter: The secret to a perfectly flaky, tender pastry crust lies in keeping your dough ingredients, especially the butter, as cold as possible. As the galette bakes in the hot oven, the tiny, cold bits of butter within the dough melt and release steam. This steaming action creates delicate pockets of air, resulting in that coveted flaky texture that makes a galette so satisfying. Warm butter will integrate too much, leading to a tough, dense crust.
- Rolling with Confidence: If you’re aiming for a perfectly round galette (though its rustic nature embraces imperfection), use a 12-inch bowl or plate as a guide. Place it on a piece of parchment paper and trace around it to create a template. Roll your dough out to this guideline, ensuring an even thickness.
- Parchment Paper is Your Friend: Always line your baking sheet with parchment paper. This not only prevents sticking but also makes cleanup incredibly easy, especially if any delicious fruit juices happen to bubble over. A rimmed baking sheet is also highly recommended to contain any potential drips, saving your oven from sticky messes.
- Chill Out Your Dough: If your galette dough becomes too warm or soft while you’re assembling it, don’t hesitate to pop the entire prepared galette (on its baking sheet) into the refrigerator or even the freezer for 10-15 minutes before baking. Re-chilling the dough helps the crust maintain its shape during baking and further promotes that desirable flakiness.
- Don’t Overwork the Dough: When mixing your crust ingredients, particularly in a food processor, pulse just until the dough comes together. Overmixing develops the gluten, leading to a tough crust. A light hand and minimal handling are key to tenderness.
- Visual Cues for Doneness: Your galette is perfectly baked when the crust turns a beautiful golden brown, and the fruit filling is visibly bubbling and tender. The bubbling juices indicate that the fruit is thoroughly cooked and has released its delicious flavors.
- Patience is a Virtue (for Cooling): While it’s tempting to cut into a warm galette straight from the oven, allowing it to cool for at least 10-15 minutes on the baking sheet helps the fruit juices set. This prevents the filling from running excessively when sliced, ensuring a more cohesive and enjoyable dessert experience.
Frequently Asked Questions About Peach Raspberry Galettes
A galette is a delightful French term referring to a flat, round, often free-form cake or pastry. In the context of baking, it typically involves a single round of pastry dough, artfully folded and pleated over a sweet or savory filling, most commonly fresh fruit. Unlike a traditional two-crust pie, a galette requires less precision and is celebrated for its rustic, imperfect edges, making it a much more accessible and less intimidating option for home bakers. It’s often affectionately called a “rustic tart” due to its charmingly unpolished appearance. You can definitely leave your perfectionist tendencies behind when making a galette!
Folding the galette dough is simpler than it seems and contributes to its signature rustic look. After arranging your fruit filling in the center, leave an uncovered border of about 1 to 1.5 inches. Then, systematically fold sections of this outer crust up and over the perimeter of the fruit filling. As you work your way around, gently pleat the dough as needed to accommodate the circle of fruit, ensuring a somewhat even border. Once folded, brush the exposed pastry with a beaten egg white for a beautiful sheen, and sprinkle with coarse or sanding sugar for added sparkle and texture.
Absolutely! Galettes are incredibly versatile and can be made with a wide array of your favorite fruits. Popular choices include apples, berries (blueberries, blackberries, strawberries), plums, cherries, or even a mixed fruit medley. Remember that the amount of sugar in the filling may need to be adjusted based on the sweetness or tartness of the fruit you choose. For very juicy fruits, you might also want to increase the amount of flour or add a tablespoon of cornstarch to the filling to help thicken the juices. Beyond sweet variations, savory galettes are equally delicious! Imagine fillings with spinach and feta, roasted mushrooms and goat cheese, artichokes, or zucchini and herbs. When making savory versions, I would suggest significantly decreasing or entirely eliminating the sugar from the crust recipe.
To maintain its freshness and flavor, store your leftover Peach Raspberry Galette loosely covered at room temperature for up to 2 days, especially if your kitchen isn’t too warm. For longer storage, or if your kitchen is particularly warm, refrigerate it for up to 4 days. Before serving, you can gently reheat slices in a toaster oven or conventional oven at 300°F (150°C) for about 10-15 minutes to crisp up the crust and warm the fruit.
Yes, you can use frozen peaches and raspberries for your galette, especially if fresh seasonal fruit isn’t available. However, there are a few considerations: do not thaw the fruit before mixing with sugar and flour, as thawing can make them excessively watery. You may also need to increase the amount of flour or add cornstarch (1-2 tablespoons) to the filling to absorb the extra moisture released by frozen fruit during baking. The baking time might also be slightly longer to ensure the fruit is fully cooked and the juices are thick.
Perfect Serving Suggestions for Your Peach Raspberry Galette
This rustic Peach Raspberry Galette is utterly delightful served warm, allowing the sweet fruit juices to mingle beautifully with the buttery crust. For an elevated experience, pair each slice with a generous scoop of premium vanilla bean ice cream; the contrast of hot and cold, and the creamy richness against the tart fruit, is simply divine. Alternatively, a dollop of freshly whipped cream, perhaps infused with a hint of vanilla or almond extract, makes for a lighter yet equally luxurious accompaniment. A light dusting of powdered sugar just before serving adds a touch of elegance. Enjoy it as a comforting dessert after a family meal, or as a relaxed treat during a summer afternoon gathering!
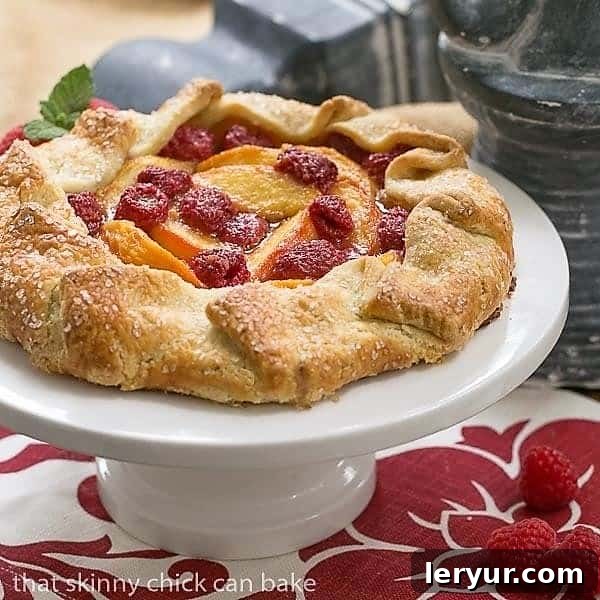
More Delicious Fruit Desserts You’ll Love
- Peach-Bourbon Upside Down Cake from Creative Culinary
- Raspberry Crisp
- Streusel Topped Peach Tart
- Lattice Topped Peach Raspberry Pie
- Plus all my Pie and Tart Recipes
Stay connected with us for more delightful recipes and baking inspiration! Follow us on social media via Instagram, Facebook, and Pinterest. Don’t forget to tag us when you create one of our delightful recipes; we love seeing your culinary masterpieces! And if you cherish the results, please consider leaving a 5-star rating in the recipe card below to share your wonderful experience and help other bakers discover this recipe.
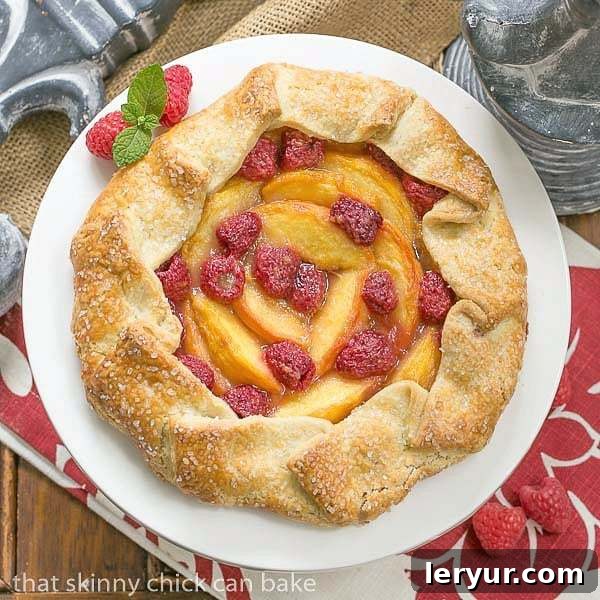
Peach Raspberry Galette
30 minutes
50 minutes
1 hour 20 minutes
6 servings
A rustic, free-form tart bursting with the sweet-tart goodness of ripe peaches and fresh raspberries, nestled in a buttery, flaky pastry crust. This impressive yet easy-to-make dessert is perfect for any summer gathering.
Rated 4.9 out of 5 stars by 69 reviewers.
Ingredients
Crust:
- 1 ½ cups all-purpose flour, plus extra for rolling
- 1 tablespoon granulated sugar
- ¼ teaspoon salt
- 11 tablespoons cold unsalted butter, cut into ½ tablespoon pieces
- 1 large egg yolk (reserve the egg white for glazing the dough)
- 3 tablespoons cold milk
Filling:
- 2 cups peeled and thinly sliced fresh peaches (approximately 1 pound or 3-4 medium peaches)
- 1 cup fresh raspberries
- ¼ cup packed light brown sugar
- 2 tablespoons all-purpose flour (acts as a thickener)
- Pinch of fine sea salt
- 1 large egg white, lightly beaten (for brushing the crust)
- 2 tablespoons coarse sanding sugar (or granulated sugar for sparkling crust)
Instructions
- Prepare the Dough: In a food processor, combine the 1 ½ cups flour, 1 tablespoon sugar, and ¼ teaspoon salt. Pulse briefly to mix.
- Incorporate the Butter: Add the cold butter pieces to the flour mixture. Pulse repeatedly until the butter is broken into small, pea-sized pieces and the mixture resembles coarse cornmeal.
- Add Liquids: In a small bowl, whisk together the egg yolk and milk. Pour this liquid mixture into the food processor with the flour-butter mixture.
- Form the Dough: Pulse until the dough just comes together into a cohesive mass. Avoid overmixing. Turn the dough out onto a piece of plastic wrap, gently flatten it into a 1-inch thick disk, wrap tightly, and chill in the refrigerator for at least 30 minutes (or up to 2 days).
- Preheat Oven & Prep Sheet: Preheat your oven to 350°F (175°C). Line a rimmed baking sheet with parchment paper; set aside.
- Prepare the Fruit Filling: In a large bowl, gently toss the peeled and sliced peaches with the fresh raspberries. Add the brown sugar, 2 tablespoons flour, and a pinch of salt, tossing carefully to coat the fruit without crushing the raspberries.
- Roll Out the Dough: On a lightly floured surface or directly on a large piece of parchment paper, roll out the chilled dough into a 12-inch round. Carefully transfer the dough, still on the parchment paper, to your prepared baking sheet.
- Assemble the Galette: Arrange the fruit filling evenly in the center of the rolled-out dough, leaving a generous 1 to 1.5-inch border around the perimeter. Gently fold the outside edge of the dough up and over the fruit, pleating the dough as needed to create a rustic, free-form crust.
- Glaze and Sugar: Brush the exposed pastry crust with the lightly beaten egg white. Generously sprinkle the coarse sanding sugar over both the glazed crust and the fruit filling for added sparkle and sweetness.
- Bake: Bake the galette for about 50 minutes, or until the crust is beautifully golden brown and the fruit filling is bubbly and tender.
- Cool and Serve: Allow the galette to cool on the baking sheet for at least 10-15 minutes before carefully transferring it to a wire rack or serving platter. This allows the juices to set slightly. Slice and serve warm, ideally with a dollop of fresh whipped cream or a scoop of vanilla bean ice cream.
Notes
This recipe for Peach Raspberry Galette is a delicious adaptation from the trusted techniques found in Fine Cooking. Enjoy experimenting with seasonal fruits for endless variations!
Recommended Kitchen Tools
As an Amazon Associate and member of other affiliate programs, I earn from qualifying purchases, helping to support this blog.
- Reynolds Cookie Baking Sheets Non-Stick Parchment Paper, 25 Sheet, 4 Count
- USA Pan Bakeware Half Sheet Pan
- Food Processor
Nutrition Information:
Yield:
6
Serving Size:
1 slice
Amount Per Serving:
Calories: 410Total Fat: 23gSaturated Fat: 14gTrans Fat: 1gUnsaturated Fat: 7gCholesterol: 87mgSodium: 295mgCarbohydrates: 47gFiber: 3gSugar: 19gProtein: 6g
This nutritional information is an estimate only, provided as a courtesy. Varying factors like specific product brands or ingredient amounts can alter these figures. Toppings are not included unless specified, and different online calculators may yield varied results. For the most accurate nutritional data, please calculate with the exact ingredients you use. You are solely responsible for verifying the accuracy of any nutritional information.
HOW MUCH DID YOU LOVE THIS RECIPE?
Please leave a comment on the blog or share a photo on Pinterest