
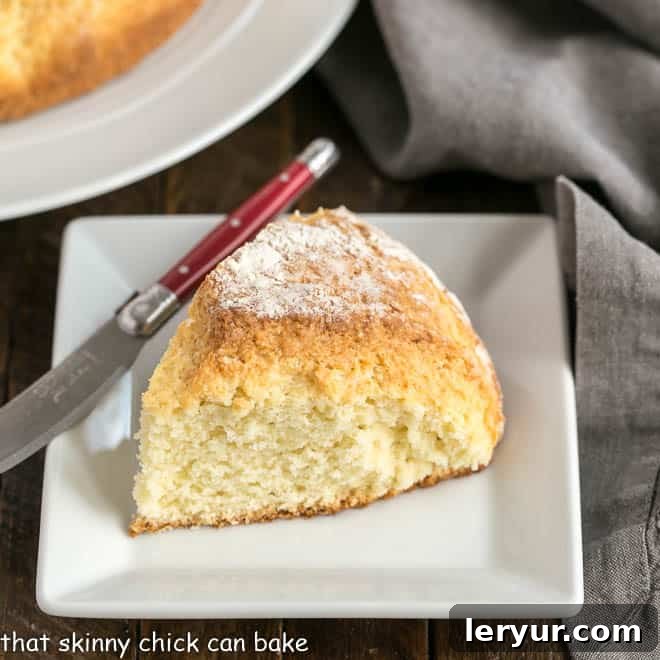
Welcome to the wonderfully comforting world of Irish Soda Bread! This classic, rustic loaf is celebrated for its simplicity, speed, and incredibly tender texture. While it’s an absolute staple for any St. Patrick’s Day celebration, its quick preparation and delicious flavor make it a beloved addition to your table all year long. Forget the yeast and the waiting – this recipe delivers homemade bread in under an hour, perfect for busy weeknights or a spontaneous craving.
At its heart, Irish Soda Bread is a remarkable quick bread, relying on the magic of baking soda as its primary leavening agent. Unlike traditional yeast breads that require extensive proofing times, soda bread comes together with astonishing speed. The key to its signature rise and soft crumb lies in the chemical reaction between alkaline baking soda and acidic buttermilk. This dynamic duo creates carbon dioxide bubbles, which are trapped within the dough, giving the bread its lift without any fuss. Occasionally, a touch of baking powder might be included in some recipes, but the name “soda bread” distinctly highlights the star ingredient. The delightful tang and moistness contributed by buttermilk not only aid in leavening but also impart a unique depth of flavor that defines authentic Irish soda bread.
Why This Easy Irish Soda Bread Recipe is a Must-Try
Having explored various bread recipes, including my own Irish brown bread, I can confidently say that this simple Irish Soda Bread stands out for its unparalleled ease and delicious results. My journey with this particular loaf involved adapting a classic recipe, enhancing it with just a few tablespoons of sugar to introduce a subtle sweetness, though traditionalists might opt to omit it entirely. What makes this recipe truly extraordinary is its minimalist approach to ingredients. You’ll only need four pantry staples: flour, baking soda, salt, and buttermilk. It’s so straightforward, you won’t even need a shopping list!
- Minimal Ingredients, Maximum Flavor: This streamlined recipe truly shines with just four core ingredients: all-purpose flour, baking soda, salt, and good quality buttermilk. It’s perfect for beginner bakers or anyone looking for a no-fuss bread option.
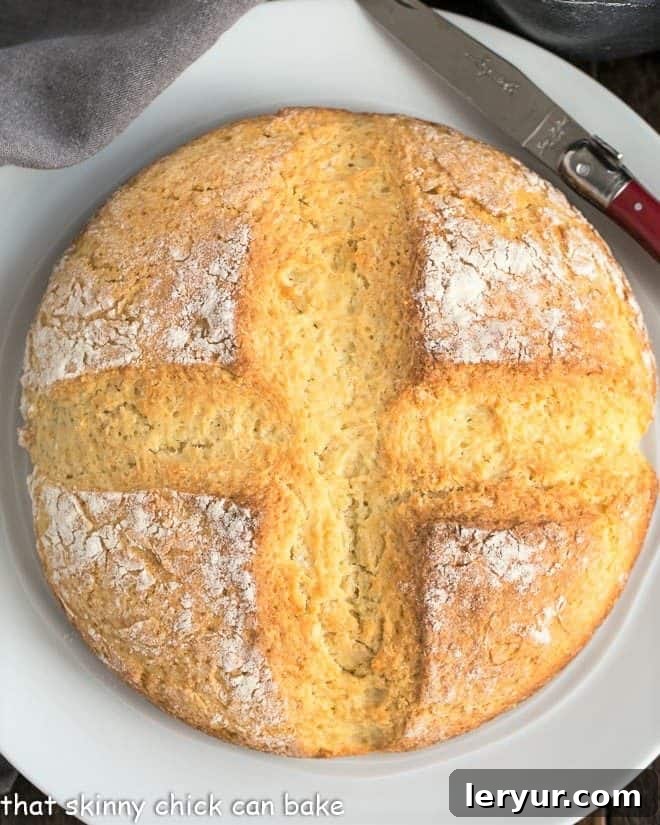
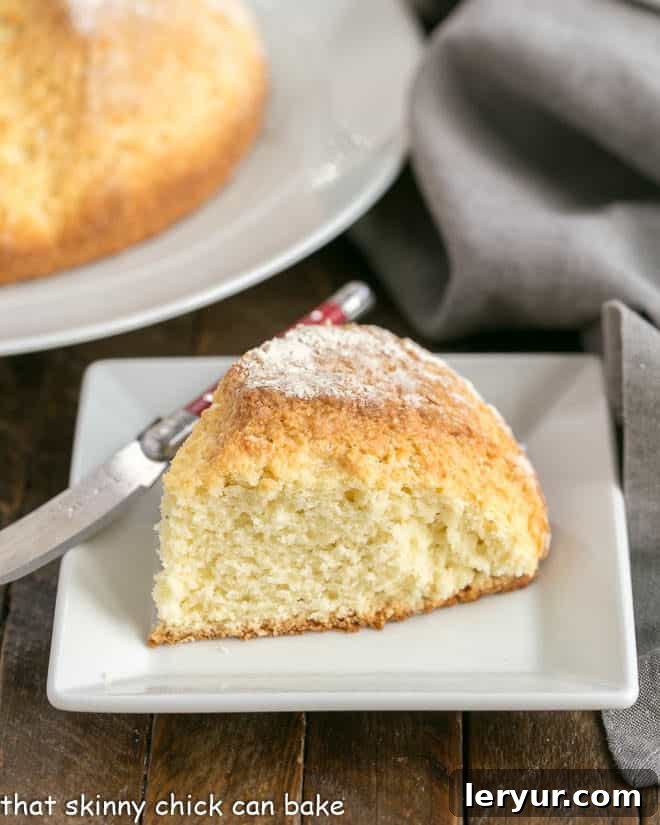
- A Loaf of Rustic Perfection: After just 50 minutes in the oven, you’ll be rewarded with a beautiful, dense loaf boasting a wonderfully chewy, golden-brown crust. The texture is hearty yet tender, making it incredibly satisfying.
- Effortless Elegance: Don’t let its rustic appearance fool you; this bread offers incredible flavor and texture for such minimal effort. The positive feedback, like “this is really, really good,” when serving it to family and friends, truly speaks volumes about its undeniable appeal.
- A Trusted Culinary Legacy: This exceptional soda bread recipe comes from the renowned cookbook author and food writer, Marion Cunningham, ensuring a reliable and authentic baking experience that has been cherished by many.
- Year-Round Comfort: While a St. Patrick’s Day favorite, its comforting simplicity makes it ideal for everyday enjoyment. Serve it with soups, stews, or simply toasted with butter and jam.
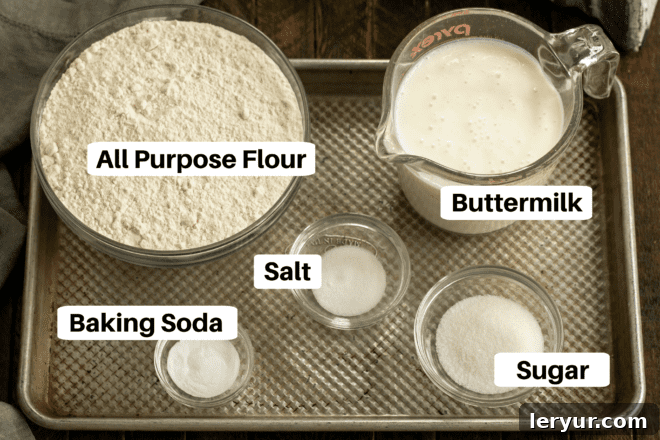
Essential Irish Soda Bread Ingredients Explained
Understanding the role of each ingredient is key to mastering the art of Irish Soda Bread. Each component contributes uniquely to the bread’s texture, flavor, and signature rise.
- Flour: Standard all-purpose flour is ideal for this recipe. Its moderate protein content provides enough structure without making the bread too tough, ensuring a tender crumb. Avoid high-protein bread flour, as it can lead to a chewier, denser loaf than desired for soda bread.
- Baking Soda: This is the star leavening agent. Sodium bicarbonate, an alkaline compound, reacts with the acid in buttermilk to produce carbon dioxide gas, which creates air pockets and causes the bread to rise quickly. Ensure your baking soda is fresh for optimal results.
- Salt: A crucial ingredient for balancing flavors and enhancing the overall taste of the bread. Table salt works perfectly, distributing evenly throughout the dough.
- Sugar (Optional, but Recommended for a Slightly Sweet Loaf): While not traditionally included in rustic Irish soda bread, adding a few tablespoons of granulated sugar can impart a lovely, subtle sweetness that many find appealing. If you prefer a truly savory loaf, feel free to omit it.
- Buttermilk: The cornerstone of authentic Irish Soda Bread. Buttermilk’s acidity is essential for activating the baking soda, driving the leavening process. Beyond its chemical role, it contributes a distinct tangy flavor and helps to keep the bread moist and tender. For the best results, real buttermilk is always preferred. However, if you don’t have it on hand, you can easily make a substitute: simply mix 1 tablespoon of white vinegar or lemon juice with 1 cup of regular milk (whole or 2% work well), let it sit for 5-10 minutes until it slightly curdles, then proceed with the recipe. You’ll need 2 cups of buttermilk, so adjust your substitute accordingly.
- Dried Fruit (Optional – Currants, Cherries, or Cranberries): For a richer, more celebratory loaf, dried fruits are a delightful addition. Currants are classic and provide a traditional touch, but any dried fruit like chopped cherries, cranberries, or raisins will be delicious. These additions add bursts of sweetness and texture, transforming a simple loaf into a more indulgent treat. Be sure to chop larger fruits if needed for even distribution.
Simple Steps: How to Make Irish Soda Bread
Making Irish Soda Bread is incredibly straightforward, even for novice bakers. Follow these easy steps to bake a perfect loaf every time.
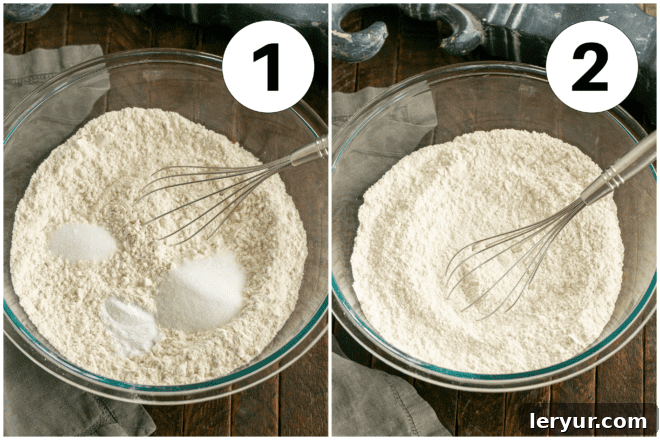
- Prepare Your Baking Environment: Begin by preheating your oven to 375°F (190°C). This ensures the oven is at the correct temperature for immediate baking once the dough is ready, which is crucial for quick breads. Lightly grease an 8-inch pie plate or a baking sheet. Preparing your pan beforehand means you can transfer the dough without delay, preventing the leavening agents from losing their potency.
- Combine Dry Ingredients: In a large mixing bowl, measure out your flour, baking soda, and salt. If you’re including sugar or any dried fruits, add them to the bowl at this stage as well. Using a whisk, thoroughly combine these dry ingredients. This step is important to ensure that the baking soda and salt are evenly distributed, leading to an even rise and consistent flavor throughout the loaf.
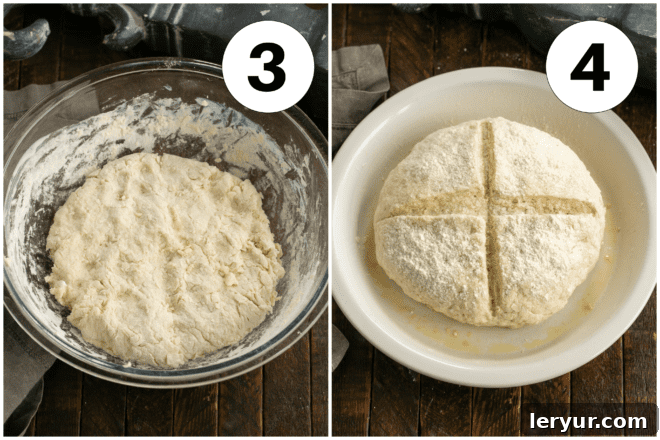
- Incorporate Wet Ingredients: Create a well in the center of your dry ingredients and pour in the buttermilk. Mix the ingredients with a spoon or your hands until a shaggy dough just begins to form. The key here is to mix until just combined; overmixing will activate the gluten too much, resulting in a tough bread. The dough will look rustic and a bit sticky, which is perfectly normal.
- Shape and Prepare for Baking: Lightly flour a clean work surface. Turn the dough out onto it and gently knead for just about a minute. The goal is simply to bring the dough together into a cohesive ball, not to develop gluten like in yeast breads. Shape the dough into a round, 6-inch ball. Place it onto your prepared baking pan. Using a sharp knife, cut a deep ‘X’ across the surface of the dough, extending almost to the edges. This traditional cut not only gives the bread its iconic look but also helps it bake more evenly and allows the “devil’s spirits” to escape, according to old Irish folklore. Finally, bake as directed until golden brown.
Expert Recipe Tips for Perfect Irish Soda Bread Every Time
Achieving a perfectly tender and flavorful Irish Soda Bread is easy with a few insider tips. These recommendations will help you navigate common baking challenges and ensure a delicious outcome.
- The Art of Mixing: My dear Italian friend, Ann, swears by mixing the dough with your hands. She believes this approach lends the bread a wonderfully light and airy consistency. Her personal recipe often includes a stick of butter, yielding a richer, even more flavorful loaf! While hands are great, using a sturdy whisk or a wooden spoon is also perfectly acceptable and effective for combining ingredients.
- Avoid Overworking the Dough: This is perhaps the most crucial tip for any quick bread, and Irish Soda Bread is no exception. The dough should be mixed just until the ingredients are combined, appearing somewhat shaggy. Overmixing develops the gluten in the flour too much, which can lead to a tough, dense bread with undesirable “tunnels” in its texture. A light hand ensures a tender crumb.
- Dough Consistency is Key: The ideal soda bread dough should be heavy and cohesive, yet still slightly sticky, not too wet or too dry. If your dough feels excessively dry and crumbly, gradually add a little more buttermilk, a tablespoon at a time, until it reaches the right consistency. Conversely, if it’s too wet to handle, dust your hands with a bit more flour.
- Flour Your Hands for Shaping: When it comes time to shape the dough into a round loaf, lightly dusting your hands with flour will prevent stickiness and make the process much easier, allowing you to create a neat, uniform shape.
- The Traditional “X” Cut: The iconic deep ‘X’ cut on top of the loaf serves multiple purposes. Ann uses the blunt end of a fork to make this cut, but a sharp knife works just as well. This cut is not merely decorative; it’s believed to release steam during baking, ensuring the loaf bakes more evenly. In Irish folklore, it was also thought to ward off evil spirits or bless the bread. For a more pronounced ‘X,’ dust the top of the loaf with a little extra flour just before making the cut.
- Embrace Dried Fruit Variations: While the basic soda bread is delicious on its own, adding dried fruit is a popular and traditional option, especially for a slightly sweeter loaf. Raisins are a classic choice and widely appreciated. However, feel free to experiment with your favorites; I’ve added dried cherries in the past, finding their tartness a delightful contrast, though they might not be everyone’s cup of tea! Other options include cranberries or even a mix of candied peel.
- Choosing Your Baking Vessel: You can bake your Irish Soda Bread in a standard cake pan or on a baking sheet. However, a cast iron skillet is often recommended as it can help the bread achieve a better, more even rise and a wonderfully crispy crust due to its excellent heat retention.
- Testing for Doneness: To ensure your bread is perfectly cooked through, insert a sharp knife or a wooden skewer into the thickest part of the loaf at the end of the suggested baking time. If it comes out clean, your bread is done. You should also observe a golden-brown crust and a widened ‘X’ cut.
On one occasion, I made a second loaf, a half batch, with the delightful addition of 1/3 cup of dried cherries. This smaller Irish soda bread loaf baked beautifully in just 35 minutes, demonstrating the flexibility of the recipe. While Soda Bread with Raisins is the more traditional option, I personally adore the tart-sweet burst of cherries. I truly hope you had a marvelous St. Patrick’s Day filled with delicious food and good cheer. Erin Go Bragh!
Frequently Asked Questions About Irish Soda Bread
The cross cut on Irish soda bread is steeped in tradition and symbolism. Historically, in the 1800s, it was believed that cutting a cross would allow the Devil or evil spirits to escape from the bread as it baked, ensuring a pure loaf. Beyond folklore, it’s also considered a symbol of giving thanks, particularly for good harvests, and offers protection to the home. Practically, the cross also helps the dense loaf bake more evenly by allowing steam to escape and encourages the bread to expand properly.
Determining doneness is crucial for perfectly baked Irish Soda Bread. First, always use the recipe’s baking time as a primary guide. Beyond that, look for visual cues: the loaf should be beautifully golden brown on top and around the sides. The slash (the ‘X’ you cut) should have visibly expanded and deepened. For a definitive test, insert a thin, sharp knife or a wooden skewer into the center of the loaf. If it comes out clean with no wet dough clinging to it, your soda bread is fully cooked.
Irish Soda Bread is best enjoyed warm or at room temperature. It’s essential to let it cool completely before slicing to allow the crumb to set properly, preventing it from becoming gummy or crumbling. Serve it plain to appreciate its simple, rustic flavor, or elevate it with a generous spread of softened butter. For a truly delightful experience, add your favorite jam, marmalade, or honey. It pairs wonderfully with hearty stews, soups, or as part of a traditional Irish breakfast or tea spread.
To keep your Irish Soda Bread fresh, wrap it tightly in plastic wrap or aluminum foil, or store it in an airtight container at room temperature. Due to its low fat content, soda bread tends to dry out relatively quickly, making it truly best enjoyed on the day it’s baked. If you have leftovers, they are still delicious the next day, though they might be slightly firmer. You can gently warm slices in a toaster or oven to soften them up, or use them for toast or bread pudding.
Yes, Irish soda bread freezes very well! To freeze, ensure the loaf has completely cooled. Wrap it tightly in plastic wrap, then an additional layer of aluminum foil to prevent freezer burn. It can be stored in the freezer for up to 2-3 months. To thaw, simply unwrap the frozen loaf and let it sit at room temperature for several hours, or gently reheat it in a low oven (around 300°F/150°C) until warmed through. This is a great way to enjoy fresh-tasting soda bread whenever the craving strikes!
You May Also Like These Recipes
If you’ve enjoyed making this simple Irish Soda Bread, you might also like to explore these other comforting and delicious recipes:
- St. Patrick’s Day Desserts from Hoosier Homemade – for a sweet finish to your Irish feast.
- Sunflower Whole Wheat Bread – another hearty and healthy bread option.
- Homemade Pita Bread – perfect for dipping and wraps.
- Irish Cream Pots de Creme – a decadent, creamy dessert with a hint of Irish flair.
- Irish Chocolate Mousse Cake – an indulgent treat for chocolate lovers.
- Plus, explore all my Best Bread Recipes for more baking inspiration!
Stay connected with us through social media! Follow @ Instagram, Facebook, and Pinterest for more recipes and inspiration. Don’t forget to tag me when you try one of my delicious creations! And if you love the results, please consider leaving a 5-star rating in the recipe card below – your feedback means the world to me!
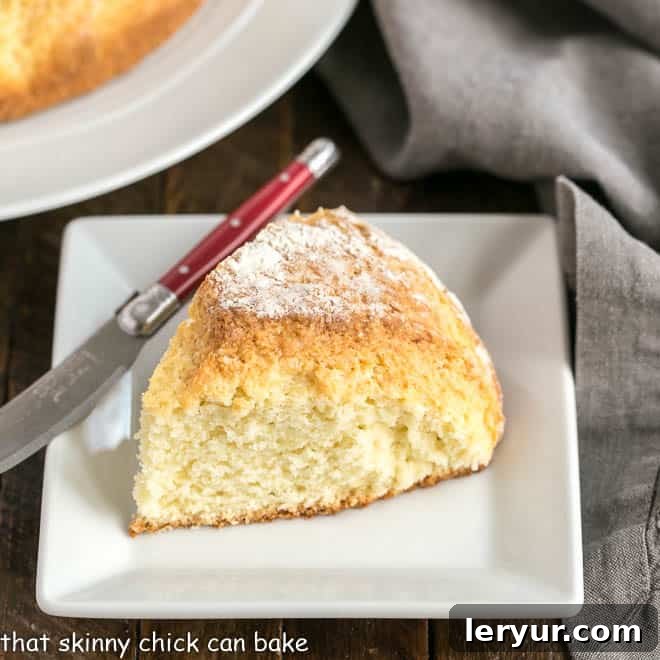
Irish Soda Bread Recipe
15 minutes
50 minutes
1 hour 5 minutes
6 servings
A classic, easy-to-make loaf of Irish soda bread, perfect for any occasion!
Rated 5 out of 5 stars by 29 happy bakers!
Ingredients
- 4 cups all-purpose flour
- 1 teaspoon baking soda
- 1 ½ teaspoons salt
- 2 tablespoons granulated sugar (optional, for a sweeter loaf)
- 2 cups buttermilk*
- ⅓ to 1 cup dried cherries, currants, or raisins (optional)
Instructions
- Prepare Oven and Pan: Position a rack in the center of your oven and preheat to 375°F (190°C). Lightly grease an 8-inch pie plate or a baking sheet. This ensures the bread doesn’t stick and bakes evenly.
- Combine Dry Ingredients: In a large mixing bowl, whisk together the flour, baking soda, and salt. If you are using sugar, add it now. If incorporating dried cherries or other dried fruit, add them to the dry mix and toss to coat evenly.
- Add Buttermilk and Form Dough: Pour the buttermilk into the dry ingredients. Mix with a spoon or your hands until the dough just comes together. Be careful not to overmix; the dough should be shaggy but cohesive.
- Knead, Shape, and Slash: Turn the dough out onto a lightly floured surface. Gently knead for just about a minute, bringing it into a soft, malleable ball. Pat it into a round, 6-inch dough ball and place it in your prepared pan. Using a sharp knife, cut a deep ‘X’ across the top of the loaf, extending almost to the edges.
- Bake and Cool: Bake for 50 minutes, or until the loaf is golden brown, the ‘X’ has widened, and a knife inserted into the center comes out clean. Once baked, transfer the bread to a wire rack and allow it to cool completely before slicing and serving. Cooling is crucial for the crumb to set.
Notes
This recipe is adapted from Marion Cunningham’s “Baking with Julia” for its authentic simplicity.
*Buttermilk Substitute: If you don’t have buttermilk on hand, you can easily make your own. For 2 cups of buttermilk, measure 2 tablespoons of white vinegar or lemon juice into a liquid measuring cup, then fill the rest of the way to the 2-cup mark with regular milk (whole or 2% is best). Stir gently and let it sit for 5-10 minutes until it slightly thickens and curdles. Then, use it as directed in the recipe.
Dried Fruit Variations: Feel free to experiment with different types of dried fruit. Traditional options include raisins or currants, but dried cranberries or chopped apricots also make wonderful additions. Toss them with the dry ingredients to prevent them from sinking to the bottom of the loaf.
Best Served Fresh: Irish Soda Bread is best enjoyed on the day it’s baked, as its lack of fat means it can dry out quickly. If you have leftovers, store them wrapped tightly at room temperature, and consider warming slices before serving on subsequent days.
Recommended Products
As an Amazon Associate and member of other affiliate programs, I earn from qualifying purchases.
- Measuring Spoons
- 10-Inch Wire Whisk
- Ceramic pie plate
Nutrition Information:
Yield:
6
Serving Size:
1 slice
Amount Per Serving (approximate values):
Calories: 441Total Fat: 2gSaturated Fat: 1gTrans Fat: 0gUnsaturated Fat: 1gCholesterol: 3mgSodium: 899mgCarbohydrates: 93gFiber: 3gSugar: 26gProtein: 12g
HOW MUCH DID YOU LOVE THIS RECIPE?
Please leave a comment on the blog or share a photo on Pinterest