
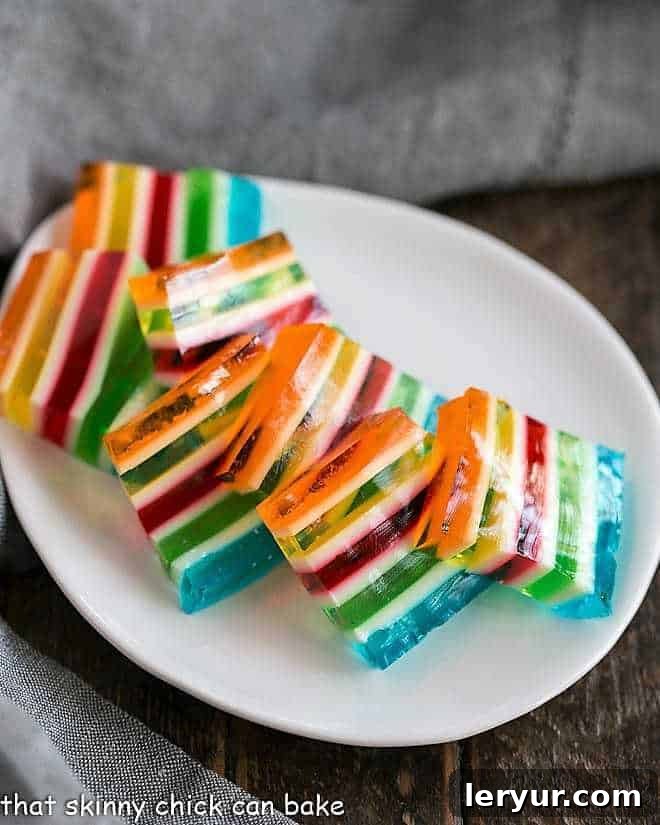
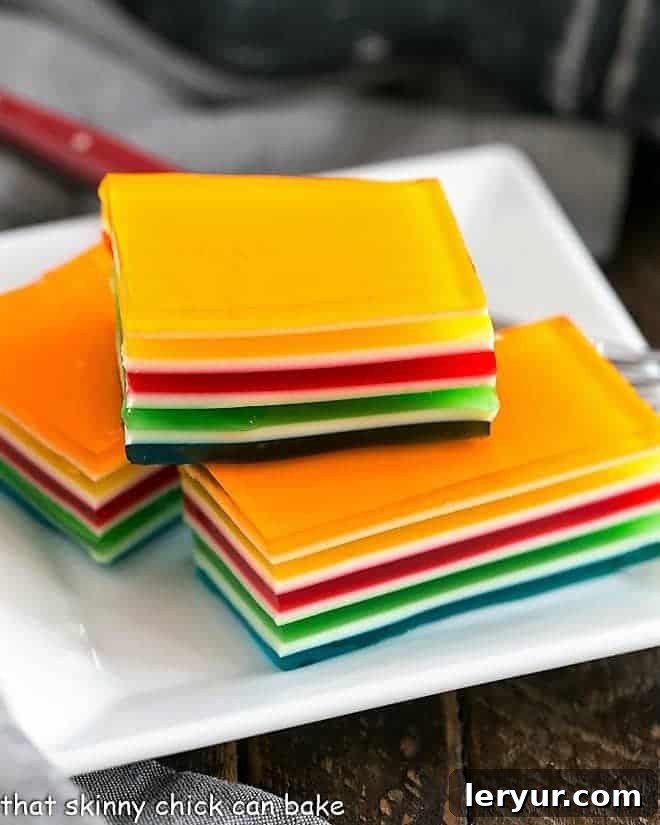
This stunning Layered Jello Rainbow Salad is more than just a dessert; it’s a vibrant spectacle that brightens any table. A cherished holiday tradition in many homes, its eye-catching colors make it perfect for any celebration. Imagine it with rich reds, deep greens, and pure whites for Christmas, or patriotic hues for the Fourth of July – the possibilities are truly endless. This visually captivating dessert is guaranteed to leave a lasting impression on your guests!
Creating this magnificent Ribbon Jello salad requires only a few simple ingredients: flavored gelatin, unflavored gelatin, sweetened condensed milk, and water. While the process is straightforward and doesn’t demand advanced culinary skills, it does require a bit of patience due to the chilling time needed for each distinct layer. But trust us, the breathtaking result is well worth every moment of anticipation.
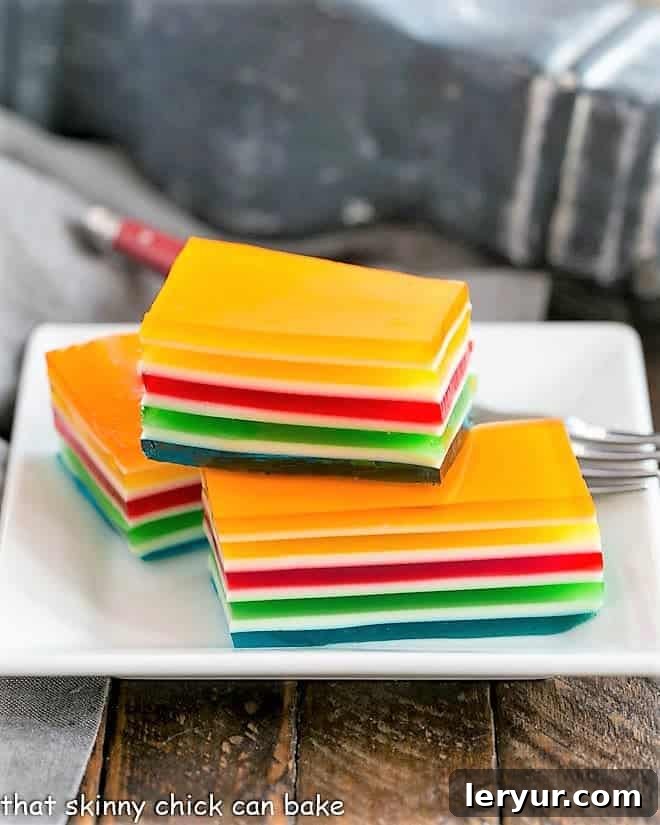
Why You Must Make This Spectacular Jello Creation
This isn’t just another dessert; it’s an experience waiting to unfold in your kitchen and on your dining table. Here’s why the Layered Jello Rainbow Salad is an absolute must-make:
- Simplicity Meets Spectacle: Despite its elaborate appearance, this recipe is surprisingly easy. The true challenge lies not in complexity, but in patiently allowing each layer to set, transforming simple ingredients into a dazzling culinary masterpiece.
- Minimal Ingredients, Maximum Impact: You only need a handful of readily available ingredients – flavored Jello, unflavored gelatin, sweetened condensed milk, and water – to create this show-stopping dessert. It’s an economical yet incredibly impressive treat.
- A Guaranteed Crowd-Pleaser: Prepare for gasps of delight! Children and adults alike will be utterly captivated by the vibrant layers. It’s a fantastic way to add a touch of whimsy and wonder to any gathering, making it particularly memorable for kids and grandkids.
- Fun, Whimsical & Customizable: This isn’t just food; it’s edible art. Its playful nature allows for endless customization. Cut it into traditional squares, or get creative with cookie cutters for stars, hearts, or any fun shape that suits your occasion. It’s perfect for adding a personalized touch to themed parties or holiday events.
- Prepare Ahead Ease: The layered Jello salad is an ideal make-ahead dessert. You can prepare it a day or two before serving, freeing up your valuable time on the day of your event. Just dedicate a relaxed afternoon to its creation – perhaps while enjoying your favorite book or binge-watching a series – and then enjoy the anticipation of serving your stunning creation.
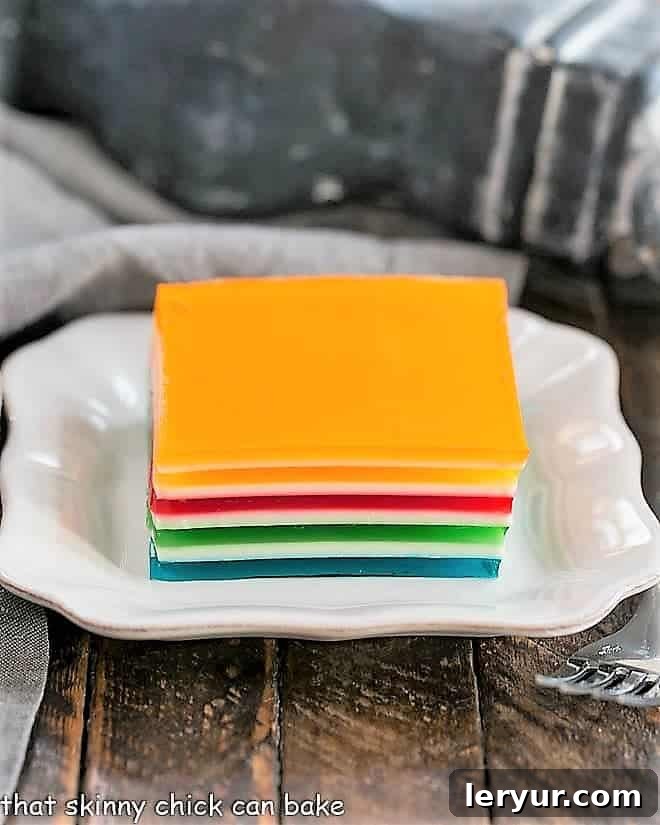
I still fondly recall the joy when my mom made her classic 1-2-3 Jello when I was a child. Years later, I decided to recreate that magic, but with an elevated twist. Instead of just three layers, this incredible Jello rainbow salad, often affectionately known as ribbon salad, boasts an impressive nine distinct strata of color and creamy sweetness, creating an even more spectacular visual treat!
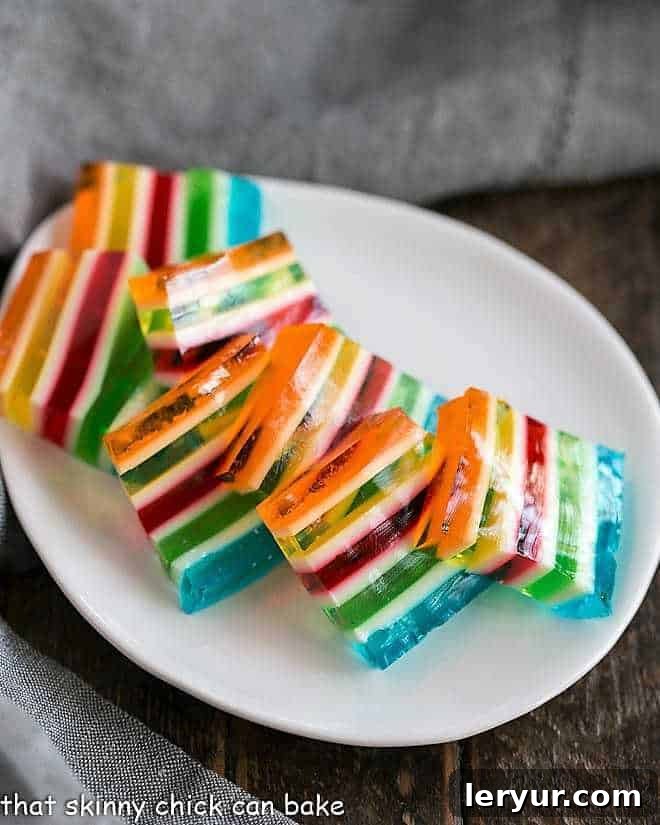
Expert Tips for a Perfect Layered Jello Rainbow Salad
Crafting this beautiful dessert is straightforward, but a few insider tips can elevate your creation from good to absolutely perfect. Here’s what I’ve learned over the years to ensure a flawless and stunning Jello salad every time:
- Strategic Color Choices: The beauty of this recipe lies in its versatility. For a classic festive touch, consider using only red and green Jello for Christmas, or opt for red, white, and blue for a patriotic Fourth of July celebration. Tailor the colors to match school events, birthdays, or any special occasion. The visual impact of carefully chosen colors is truly magnificent.
- Individual Servings for Elegance: While a large pan offers a dramatic centerpiece, you can also create elegant individual servings. Layer the Jello in parfait glasses, highball glasses, or clear dessert cups. This not only looks sophisticated but also makes serving a breeze.
- Understanding Unflavored Gelatin: Unflavored gelatin, like the popular Knox brand, is crucial for giving the sweetened condensed milk layers their firm, delightful texture. You’ll typically find it conveniently located on the baking aisle, often right next to the flavored Jello boxes.
- Precision in Measurement is Key: To ensure you have enough of the creamy white mixture for all your layers, accurate measurement is paramount. Don’t eyeball it! Precision helps maintain the integrity of each layer and prevents running short mid-process.
- PRO-Tip: Use Liquid Measuring Cups: For liquids, always use liquid measuring cups. These are designed with a spout and clear markings for accurate readings at eye level, unlike dry measuring cups which are meant for precise measurement of solid ingredients. This small detail can make a big difference in the consistency of your layers.
- Read Through, Then Begin: Before you even start boiling water, take a moment to read through the entire recipe directions at least once, or even twice. With multiple steps and crucial chilling times, understanding the flow from start to finish will prevent errors and ensure a smooth preparation process.
- Start with a Color: For the most visually appealing result, always begin with a vibrant colored Jello layer. This creates a striking base for your alternating colored and creamy white layers.
- Achieving a True Rainbow (ROY-G-BIV): If your goal is an authentic rainbow, remember the mnemonic ROY-G-BIV: Red, Orange, Yellow, Green, Blue, Indigo, Violet. While this specific recipe features five colors (Blue, Green, Red, Yellow, Orange), you can use ROY-G-BIV as a guide for ordering your chosen Jello flavors to achieve a harmonious and natural color progression.
- Re-liquefying the White Mixture: Should your sweetened condensed milk mixture begin to gel while you’re waiting for a previous layer to set, don’t fret! Simply place the measuring cup or bowl containing the mixture into a larger bowl of warm water. Stir gently, and it will quickly return to a pourable liquid state.
- Temperature Control for Perfect Layers: When pouring a new layer, ensure the Jello mixture has cooled sufficiently but hasn’t begun to gel. Pouring hot Jello will melt the layer beneath it, creating a muddled appearance. Conversely, if it cools too much, it will start to set before you pour it. Aim for a lukewarm temperature. A good trick is to have a teapot of hot water on hand, allowing you to quickly reheat and measure out the necessary amounts for each colorful batch.
- Alternative White Layers: While I prefer the simplicity and creamy sweetness of sweetened condensed milk, some recipes suggest using sour cream sweetened with sugar, or even sour cream tinted with a bit of dry Jello powder for the white layers. Feel free to experiment if you prefer a tangier profile, but the sweetened condensed milk offers an unparalleled smooth texture and taste that perfectly complements the fruit-flavored Jello.
- Clean Slices, Every Time: For neat, defined squares or shapes, use a straight-edged knife, not a serrated one. Wipe the knife clean with a damp cloth after each cut to prevent colors from smudging into one another, ensuring crisp, beautiful lines between layers.
Helpful Tools and Essential Ingredients
To embark on your layered Jello rainbow salad adventure, gather these key items. Having the right tools and ingredients makes the process smoother and more enjoyable:
- 9 x 13-inch Pyrex Dish – (Affiliate Link) A clear glass dish is highly recommended. It not only provides ample space for all nine layers but also beautifully showcases the stunning stripes of color from every angle.
- Five Varieties of 3-Ounce Boxes of Jello – (Affiliate Link for product visualization) The flavors and colors you choose will dictate your theme. While this link is provided for reference, you’ll generally find Jello boxes much more affordably priced at your local grocery store. Select a range of vibrant colors for the best rainbow effect.
- Knox Unflavored Gelatin – (Affiliate Link) This is an indispensable ingredient for ensuring your creamy white layers made with sweetened condensed milk set perfectly firm. Look for it in the baking aisle, typically near the flavored Jello.
- Sweetened Condensed Milk – (Affiliate Link) This rich, sweet milk forms the foundation of your opaque, white layers. It’s important to use sweetened condensed milk, not evaporated milk, as they are not interchangeable in this recipe.
- Liquid Measuring Cups – Essential for accurate measurement of water and liquid Jello mixtures.
- Whisk or Spoon – For thoroughly mixing gelatin and water.
- Teapot or Saucepan – For easily heating and pouring boiling water as needed for each layer.
Frequently Asked Questions About Layered Jello
This is a common and fascinating question! My dear mother-in-law, a registered nurse from the 1950s, used to advocate for gelatin as a decent source of protein, especially for growing children. She often hinted at its origins. Intrigued, I decided to delve deeper into the science behind this wiggly dessert.
Jello typically consists of four primary ingredients: gelatin, water, sweeteners, and food coloring. The key component, gelatin, is a processed form of collagen. Collagen is a fibrous protein found abundantly in the connective tissues, bones, and skin of animals, providing structure and elasticity. While it was once commonly believed (or joked) that gelatin came from horse hooves, this is a myth. According to most modern sources, the vast majority of commercial gelatin today is derived from pigskin, followed by cattle bones and hides. So, in a way, my mother-in-law was somewhat on the right track about its animal origins! The remarkable ability of gelatin to “set” comes from the unique structure of collagen strands. When heated, these strands break apart, and then, as the mixture cools, they reassemble into their characteristic triple helix formation, giving Jello its familiar jiggly texture – a neat bit of food chemistry!
So, to summarize, yes, gelatin (and thus Jello) is derived from animal products, making it non-vegan. It does contain amino acids, which are the building blocks of protein, but it’s important to note that it is an “incomplete” protein source, meaning it lacks some essential amino acids that a complete protein would provide. And for the record: Jello was never made from horse hooves.
The actual “hands-on” preparation time for this Ribbon Jello recipe is surprisingly short, probably only about 20-30 minutes. However, the recipe relies heavily on chilling time for each layer to set properly. With each of the nine layers requiring approximately 30 minutes to chill, plus an essential overnight refrigeration period at the end for the entire dessert to fully firm up, the total “hands-off” time can add up to around 12-14 hours. It’s a perfect project for a day you’ll be home, allowing you to attend to other tasks between chilling cycles.
To maintain its freshness, perfect texture, and vibrant appearance, Ribbon Jello should always be kept well-chilled in the refrigerator. After the final layer has set overnight and before serving, make sure to cover the pan. Aluminum foil works perfectly for this, or you can use plastic wrap. If using plastic wrap, be mindful that direct contact with the Jello surface can sometimes mar its smooth finish if it loosens and falls into the dish. Properly stored, this delightful Jello salad will remain safe to eat and delicious for 3-5 days.
Yes, you can absolutely use sugar-free Jello for the colored layers in this recipe. The setting properties of sugar-free gelatin are similar to those of regular gelatin, so it will still form distinct layers. This is a great option if you’re looking to reduce the sugar content of the dessert. The sweetened condensed milk in the white layers will still contribute sugar, but it will overall be less.
There are a few common reasons why Jello layers might not set. Firstly, ensure you are using boiling water to dissolve the gelatin powder thoroughly. If the water isn’t hot enough, the gelatin won’t fully dissolve, preventing it from setting correctly. Secondly, make sure your refrigerator is cold enough. Lastly, be careful not to add too much additional liquid beyond what the recipe specifies, as this can dilute the gelatin and weaken its setting power. If a layer seems particularly stubborn, try chilling it for an extra 15-30 minutes before pouring the next.
Have you ever had the pleasure of making or enjoying this spectacular layered Jello creation? We’d love to hear about your experiences! What vibrant colors and delicious flavors did you combine? And what do you call this festive dessert in your household – is it a Jello rainbow salad, a Jello ribbon salad, or something else entirely? Share your stories and tips with us!
You May Also Like These Delightful Desserts
- Dr. Pepper Jello Salad from Spend with Pennies
- Strawberry Panna Cotta
- 1-2-3 Jello
- Broken Glass Jello
- 5 Minute Whipped Chocolate Mousse
- Explore more of the Best Dessert Recipes
Stay connected and get inspired! Follow us on social media: Instagram, Facebook, and Pinterest. Don’t forget to tag us when you create one of our recipes! Your beautiful creations motivate us, and if you adore the results, please consider leaving a 5-star rating on the recipe card below.
Layered Jello Rainbow Salad Recipe
20 minutes
20 minutes
12 servings
A truly vibrant and impressive layered Jello salad that promises to delight and impress guests of all ages!
Rated 4.8 out of 5 stars based on 94 reviews.
Ingredients
- 5 3-ounce packages of Jello, in various appealing colors and flavors
- 4-5 envelopes (approx. 1 oz total) Knox unflavored gelatin
- 1 14-ounce can sweetened condensed milk
- Boiling water, as directed
Instructions
- Prepare First Jello Layer: In a medium bowl, combine the first flavor of Jello with 1 teaspoon of unflavored gelatin. Add 1 cup of boiling water and stir until both gelatins are completely dissolved. Allow this mixture to cool slightly – it doesn’t need to be completely cold, but not piping hot. Pour this into a 9 x 13-inch pan (a clear Pyrex pan is ideal for viewing the beautiful layers).
- Chill First Layer: Carefully transfer the pan to the refrigerator and chill for a minimum of 30 minutes, or until the Jello is firm but still slightly sticky to the touch. This crucial step ensures the layers remain distinct.
- Prepare First White Layer Mixture: While the first Jello layer chills, prepare the creamy white mixture. In a separate bowl, mix 1 envelope of unflavored gelatin with ½ cup of boiling water, stirring until fully dissolved. Add half a can of sweetened condensed milk (approximately ½ cup plus 2 tablespoons) and another ½ cup of boiling water. Stir well until all ingredients are thoroughly combined and smooth.
- Pour First White Layer: Once the first colored layer is sufficiently chilled and firm, gently pour ¾ cup of the prepared sweetened condensed milk mixture evenly over the top. Return the pan to the refrigerator. Chill for another 30 minutes while you prepare your next colored Jello layer.
- Prepare and Pour Second Jello Layer: Following the same procedure as Step 1, prepare your second colored Jello flavor (with 1 teaspoon unflavored gelatin and 1 cup boiling water). Allow it to cool. Once the white layer (layer two) has chilled and set, carefully pour this second colored Jello layer over the top. Chill for another 30 minutes.
- Pour Second White Layer: After the third layer (second colored layer) is firm, pour the remaining sweetened condensed milk mixture (from the first batch you made in Step 3) evenly over the top. Chill for 30 minutes. As a proactive measure, start preparing your third colored Jello layer while this chills.
- Re-liquefying White Mixture (If Needed): If the sweetened condensed mixture happens to gel while you’re waiting between layers, simply place the measuring cup in a bowl of warm water for a few minutes and stir gently until it returns to a liquid consistency.
- Prepare Third White Layer Mixture: Since you’ve used the first batch of sweetened condensed milk, you’ll need to prepare a fresh batch for the subsequent white layers. Mix ½ cup boiling water with 1 envelope of unflavored gelatin until dissolved. Then, stir in the remaining half of the sweetened condensed milk from the can, followed by another ½ cup of boiling water. Mix well.
- Continue Layering Process: Repeat the pattern, alternating between colored Jello layers (prepared with 1 teaspoon unflavored gelatin and 1 cup boiling water, cooled) and white sweetened condensed milk layers (using the newly prepared batch, or making a fresh batch if needed for the final white layer). Continue until all 5 boxes of Jello and all the sweetened condensed milk have been used, creating a beautiful multi-layered dessert.
- Final Chill and Serve: After the very last layer has been poured, cover the pan tightly with plastic wrap and refrigerate the entire Jello salad overnight. This extended chilling time is crucial for all the layers to fully set and bond. When ready to serve, cut the Jello into neat squares or use fun cookie cutters to create festive shapes.
Notes
*Half a can of sweetened condensed milk is approximately ½ cup plus 2 tablespoons.
Total time listed in the recipe card is active preparation time and does not include the extensive chilling time required between layers and overnight.
Recommended Products
As an Amazon Associate and member of other affiliate programs, I earn from qualifying purchases.
- 9 x 13-inch Pyrex casserole dish
- Pyrex Measuring Cups
- Unflavored Knox Gelatin
Nutrition Information:
Yield:
12
Serving Size:
1 slice
Amount Per Serving (estimated):
Calories: 73Total Fat: 2gSaturated Fat: 1gTrans Fat: 0gUnsaturated Fat: 1gCholesterol: 8mgSodium: 29mgCarbohydrates: 12gFiber: 0gSugar: 12gProtein: 2g
Thatskinnychickcanbake.com occasionally offers nutritional information for recipes contained on this site. This information is provided as a courtesy and is an estimate only. This information comes from online calculators. Although thatskinnychickcanbake.com attempts to provide accurate nutritional information, these figures are only estimates.
Varying factors such as product types or brands purchased can change the nutritional information in any given recipe. Also, many recipes on thatskinnychickcanbake.com recommend toppings, which may or may not be listed as optional and nutritional information for these added toppings is not listed. Other factors may change the nutritional information such as when the salt amount is listed “to taste,” it is not calculated into the recipe as the amount will vary. Also, different online calculators can provide different results.
To obtain the most accurate representation of the nutritional information in any given recipe, you should calculate the nutritional information with the actual ingredients used in your recipe. You are solely responsible for ensuring that any nutritional information obtained is accurate.
HOW MUCH DID YOU LOVE THIS RECIPE?
Please leave a comment on the blog or share a photo on Pinterest