
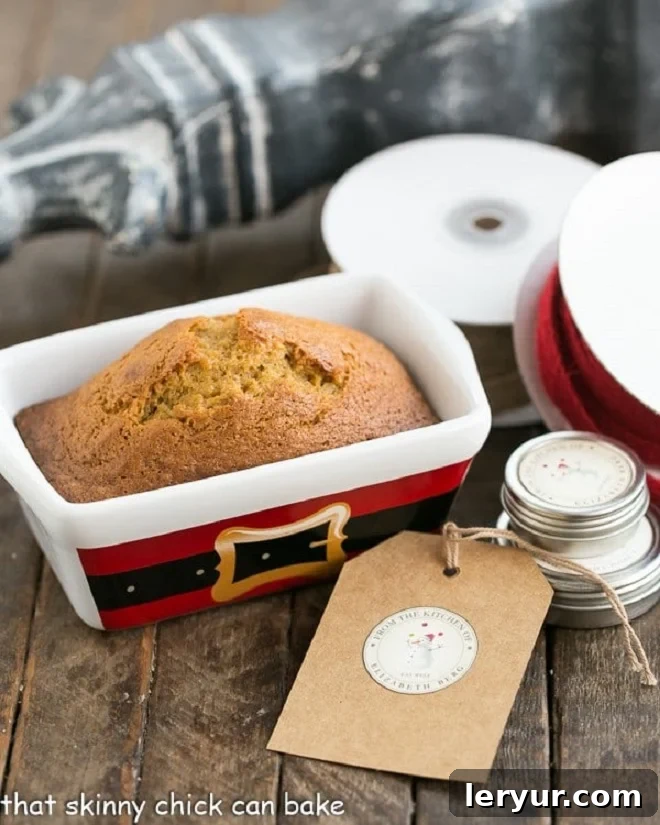
Welcome to the cozy world of holiday baking, where the aroma of warm spices fills the air and homemade treats become cherished gifts. Among the pantheon of festive delights, mini pumpkin breads stand out as truly special. This incredibly easy quick bread recipe isn’t just about baking; it’s about crafting edible expressions of warmth and affection, perfect for the holiday season. Imagine presenting your loved ones with these delightful loaves, dense, moist, and bursting with the classic flavors of fall. They are, without a doubt, among the best food holiday gifts you can create.
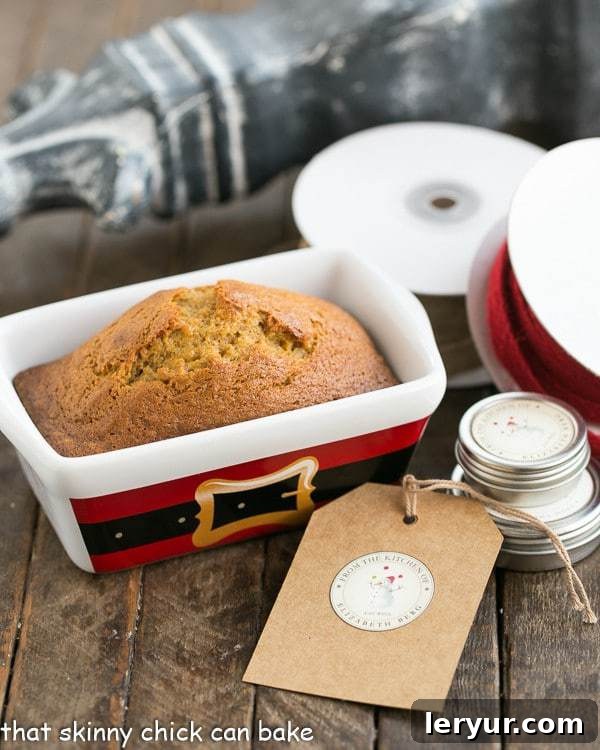
There’s a unique charm in giving a gift made with your own hands, especially when it comes from the heart of your kitchen. Every December, my book club friends and I participate in a gift exchange, and year after year, my contribution is a homemade confection. This past year, I opted for these enchanting mini pumpkin loaves, baked using a time-honored family recipe that never fails to impress. These small loaves of bread weren’t just gifts; they were little bundles of joy, perfectly sized for sharing and spreading holiday cheer.
Why You Must Bake This Classic Pumpkin Bread
This isn’t just another pumpkin bread recipe; it’s *the* pumpkin bread recipe you’ll want to revisit every year. Here’s why this particular recipe is an absolute must-try for your holiday baking repertoire:
- Timeless Perfection: This recipe delivers a truly classic pumpkin bread – dense, wonderfully moist, and deeply infused with the comforting essence of warm spices. You won’t find the need for chocolate chips or streusel here (though those variations have their place); this bread is exquisite in its pure, unadulterated form. It’s the epitome of simple sophistication.
- A Taste of Tradition: For decades, this very pumpkin bread has been a beloved staple in my home, reminiscent of the delicious loaves a dear neighbor would bring over every Christmas. We’d eagerly slather thick slices with butter, and half the loaf would vanish within minutes. This bread carries with it a sense of nostalgia and the warmth of cherished memories, making it more than just a treat—it’s a tradition.
- Unmatched Reliability: I’ve been perfecting and baking this exact recipe for years, and it has consistently yielded perfect results. If you’re still searching for that one, tried-and-true pumpkin bread recipe that you can count on, look no further. This recipe is a proven winner, guaranteeing success every time. Pin it, save it, and make it your go-to!
- Incredible Aroma: Beyond its taste, the experience of baking this pumpkin bread fills your home with an irresistible aroma that instantly signals the arrival of the holiday season. The fragrant blend of cinnamon, cloves, and allspice creates an inviting atmosphere, making your kitchen the heart of festive cheer.
- Versatile Enjoyment: While perfect for gifting, these loaves are also ideal for a multitude of occasions. Enjoy them for a delightful breakfast with coffee, as a comforting afternoon snack, or even as a simple dessert after a holiday meal. Their versatility makes them a fantastic addition to any festive gathering.
Ingredient Notes for the Perfect Mini Pumpkin Breads
Achieving the perfect texture and flavor for your pumpkin bread starts with understanding your ingredients. While this recipe uses common pantry staples, a few key considerations will elevate your baking:
- Kitchen Staples: Gather your foundational ingredients: granulated sugar, vegetable oil (such as canola oil, which has a neutral flavor that lets the pumpkin and spices shine), all-purpose flour, water, salt, and baking soda. Ensure your flour is fresh and not compacted; lightly spoon and level for accurate measurement.
- Eggs: For optimal incorporation and a smoother batter, always bring your large eggs to room temperature before mixing. Cold eggs can cause the batter to seize and affect the bread’s texture. If you forget, a quick trick is to place them in a bowl of warm (not hot!) water for 5-10 minutes while you gather other ingredients.
- Pumpkin Puree: This recipe specifically calls for pure pumpkin puree, not pumpkin pie filling. Pumpkin pie filling contains added spices and sweeteners, which will alter the flavor profile of your bread. You’ll only need one cup, so you might have some left over – perfect for another fall recipe!
- Baking Powder & Baking Soda: This recipe cleverly utilizes both leavening agents to achieve its perfect rise and texture. It’s crucial to check the freshness of your baking powder, as it often loses its potency before its expiry date. You can test its efficacy by stirring a spoonful into a cup of hot water; if it bubbles vigorously, it’s still good. Baking soda generally has a longer shelf life, but it’s still wise to ensure it’s not ancient. These agents work together to create a light, airy crumb without being overly dense.
- Warm Spices (Cloves, Allspice, Cinnamon): The soul of pumpkin bread lies in its spice blend. This recipe features a harmonious mix of cloves, allspice, and cinnamon. Spices can lose their vibrancy over time, so if your jars have been lingering in the pantry for several years, consider replacing them for a more aromatic and flavorful bread. Freshly ground spices, if you have them, will yield an even more intense flavor. You might also consider adding a pinch of ground ginger or nutmeg for an extra layer of warmth, though the classic blend is wonderful on its own.
How to Package Holiday Breads for Gifting with Flair
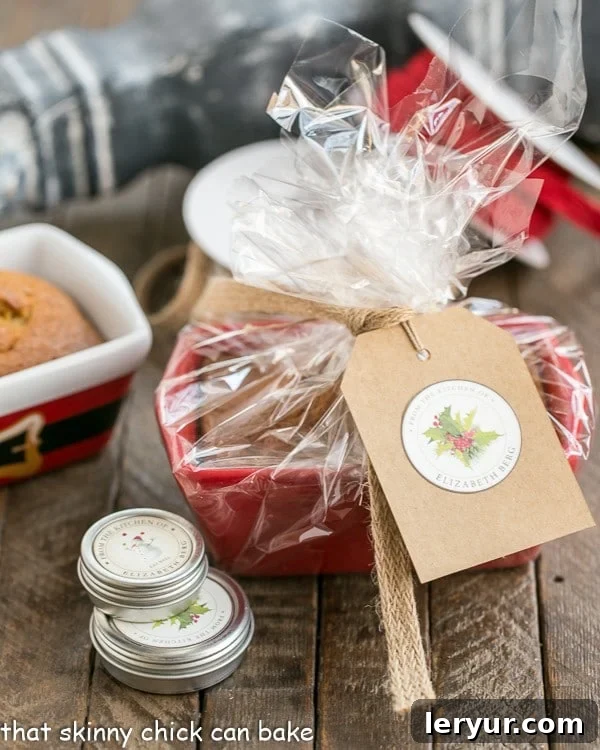
Transforming your delicious mini pumpkin breads into stunning holiday gifts is all about the presentation. A thoughtful package elevates a homemade treat from simple baked goods to a truly memorable present. Here’s how to package your festive loaves with flair:
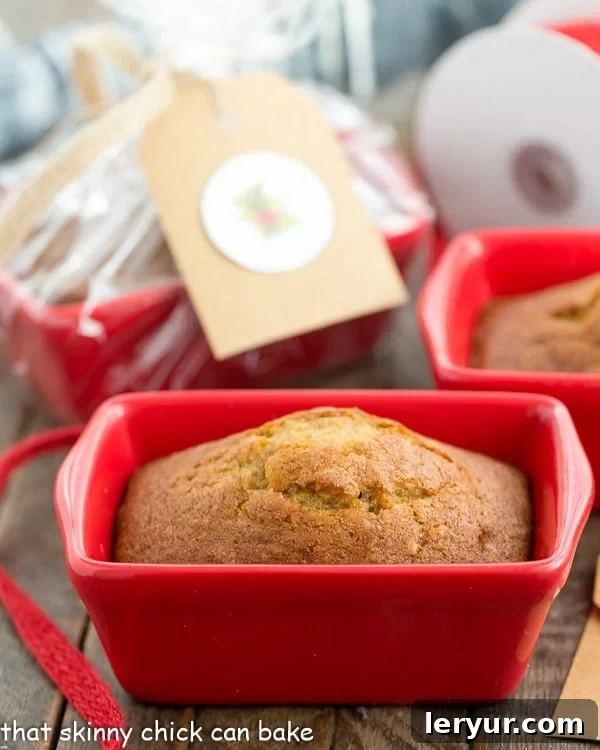
- Charming Containers: Consider baking directly in small, inexpensive ceramic dishes, as my blogger friend Julie did with her Sweet Orange Bread. These reusable dishes add an extra touch of thoughtfulness to your gift. I found a delightful selection of plain red ceramic loaf pans, and even a white one with a Santa belt design, at my local craft store (like Michael’s). I always keep an eye out for plain white versions during the off-season to stock up for various gifting opportunities throughout the year. For a simpler approach, you can bake in disposable mini loaf pans or wrap cooled loaves beautifully in parchment paper and then a festive tea towel.
- Food-Safe Wrapping: Once your bread is completely cooled, wrap each loaf tightly in food-safe cellophane or clear plastic wrap. This step is crucial for maintaining freshness and moisture. Ensure it’s sealed well to prevent any air from drying out your delectable bread.
- Festive Ribbons and Twine: Add a touch of elegance with a beautiful ribbon or rustic twine. Choose colors that complement the holiday season – think deep reds, forest greens, shimmering golds, or classic white. Tie a simple bow around the wrapped loaf or dish.
- Personalized Gift Tags: A handwritten gift tag is the perfect finishing touch. It allows you to convey a personal message and clearly identify the delicious contents. For an extra special touch, I adore splurging on elegant Felix Doolittle Chef Medallions to affix to my gift tags. These small details show genuine effort and make the recipient feel truly special. You can also include a small recipe card with the ingredients list for those who appreciate knowing what they’re enjoying.
- Creative Embellishments: Consider adding a small sprig of fresh rosemary, a cinnamon stick, or a dried orange slice under the ribbon for an aromatic and visual appeal. For a themed gift basket, pair the mini bread with a gourmet coffee blend, a festive tea, or a jar of homemade jam.
- Storage for Gifting: If you’re preparing gifts ahead of time, remember to store your wrapped and packaged loaves in an airtight container at room temperature for up to 3-4 days, or freeze them for longer storage (up to 3 months). Always make sure the bread is completely cool before wrapping and storing to prevent condensation and sogginess.
Recipe Tips for Baking Flawless Quick Bread
Quick breads and muffins are renowned for their ease of preparation, but a few expert tips can ensure your mini pumpkin breads turn out perfectly moist, tender, and irresistibly delicious every time.
- Thorough Pan Preparation is Key: Don’t underestimate the importance of properly prepping your pans. I highly recommend using a flour-oil spray like Baker’s Joy, which creates a non-stick coating and helps with easy release. For an extra layer of security, especially with more intricate loaf pans, cut a rectangle of greased parchment paper to fit the bottom of each pan. This guarantees the entire loaf slides out without any sticking, preserving its beautiful shape for gifting.
- Patience During Cooling: Once baked, resist the urge to immediately remove the loaves from their pans. Allow the bread to cool in the pans for at least 10-15 minutes on a wire rack. This crucial cooling period allows the bread to set and firm up, making it much easier to remove without breaking. Any longer, however, and the bread can start to stick. For gifting, after the initial cooling, carefully remove the loaves, clean the pans, and then return the completely cooled bread to the clean pans for presentation.
- PRO-Tip: Room Temperature Ingredients: This tip is worth repeating: ensure your eggs and any other refrigerated ingredients are at room temperature before you begin mixing. Room temperature ingredients emulsify more effectively, creating a smoother, more uniform batter that bakes evenly and results in a lighter, more tender crumb.
- Quick Chill Break: If you find you’ve forgotten to bring your eggs to room temperature, don’t fret. Simply place them in a bowl of warm (not boiling, which could cook them!) water for about 10 minutes while you measure out your other ingredients. This will quickly take the chill off.
- PRO-Tip: Do Not Overmix: This is perhaps the most critical rule for quick breads. Overmixing develops the gluten in the flour, leading to a tough, dry bread with unsightly “tunnels” or holes. Mix only until the dry ingredients are *just* incorporated into the wet ingredients. If using a stand mixer, opt for the paddle attachment on a low speed. Often, a wooden spoon or spatula is even better for ensuring you don’t overmix.
- Scrape and Combine: After adding the dry ingredients, mix gently until barely combined. Use a rubber spatula to give the bottom and sides of the bowl a good scrape to ensure there are no hidden pockets of unmixed flour. Then, immediately divide the batter among your prepared pans.
- PRO-Tip: Don’t Overfill Your Pans: Aim to fill your mini loaf pans about two-thirds of the way up the sides. Overfilling can cause the batter to overflow during baking, creating a messy situation and potentially affecting the bread’s structure. Conversely, underfilling can lead to a dryer loaf. Remember that mini loaf pans come in various sizes, so be prepared to adjust baking times slightly. Once you discover the perfect baking time for your specific pans, make a note of it on your recipe card for consistent future batches.
- Monitor Baking Time: Begin checking your bread about 5-10 minutes before the recommended baking time. Your nose is often the first indicator – when you start smelling that delicious baked pumpkin aroma, it’s time to check. All ovens bake differently, and you want to avoid overbaking, which can result in a dry loaf. Insert a toothpick into a few spots across the middle of a loaf; if it comes out clean with no wet batter attached, your bread is done. A few moist crumbs are acceptable, but liquid batter means it needs more time.
- Cool Completely Before Storing or Gifting: For the best texture and to prevent condensation, ensure the loaves are completely cool before wrapping them for storage or gifting. This can take several hours on a wire rack.
Frequently Asked Questions About Mini Pumpkin Breads
Can Fresh Pumpkin Puree Be Used for this Pumpkin Bread?
While the idea of using fresh pumpkin puree is appealing, it’s generally not recommended for this specific recipe unless you are absolutely certain its consistency precisely matches that of canned pumpkin puree. Freshly made pumpkin puree often contains more water, which can significantly alter the batter’s hydration and prevent the loaves from baking up properly or achieving the desired moist density. If you’re an adventurous baker and willing to experiment with a batch, you might try reducing other liquids slightly, but for consistent results, canned pumpkin puree is best.
Can Nuts or Chocolate Chips Be Added to this Pumpkin Bread?
Absolutely! Both nuts and chocolate chips would make delicious additions to this pumpkin bread, adding extra texture and flavor. For nuts, toasted pecans or walnuts are fantastic choices. For chocolate, semi-sweet or dark chocolate chips complement the pumpkin and spices wonderfully. Try stirring in about 1 to 1½ cups of your chosen add-ins (nuts, chocolate chips, or a combination) right before you divide the batter into the pans. Be careful not to overmix them in.
Can the Batter Be Mixed Ahead of Time?
Unfortunately, preparing the batter ahead of time is not advisable for quick breads that use baking soda and baking powder. Once these leavening agents come into contact with the wet ingredients, they begin to activate and release gas. If the batter sits too long, the leavening power will diminish, causing the loaves to not rise properly when baked. For the best rise and texture, it’s essential to mix the batter, fill the pans, and bake the loaves as soon as possible after combining the wet and dry ingredients.
How Should I Store Mini Pumpkin Breads for Freshness?
To keep your mini pumpkin breads fresh and moist, store them in an airtight container at room temperature for up to 3-4 days. For longer storage, you can refrigerate them for up to a week. For extended freshness, individual loaves can be wrapped tightly in plastic wrap and then aluminum foil, and frozen for up to 3 months. Thaw frozen loaves overnight in the refrigerator or at room temperature, or gently reheat in a low oven for a “freshly baked” feel.
Can I Turn This Recipe into Pumpkin Muffins?
Yes, this recipe can easily be adapted for pumpkin muffins! Simply prepare the batter as directed, then divide it among a greased or paper-lined muffin tin, filling each cup about two-thirds full. The baking time will be significantly shorter for muffins, typically around 20-25 minutes, but always check for doneness with a toothpick inserted into the center of a muffin. Adjust as needed based on your oven and muffin size.
You May Also Like: More Homemade Food Gift Ideas
The holiday season is truly the perfect time to embrace the joy of giving homemade food gifts. Beyond these delightful mini pumpkin breads, there’s a vast world of culinary creativity waiting to be explored. From comforting quick breads to delectable cookies, indulgent candies, and even sophisticated homemade liqueurs, the possibilities for heartfelt, edible gifts are endless!
For an abundance of inspiration and even more fantastic recipes to share with friends and family, be sure to explore my extensive Food Gifts Pinterest Board. It’s packed with ideas for every kind of foodie and every festive occasion!
- Pumpkin Bread with Apples
- Cinnamon Crusted Pumpkin Bread
- Classic Banana Walnut Bread
- Zucchini Bread
- Sour Cream Pear Bread
- Chocolate Chip Toffee Banana Bread
- Cranberry Orange Walnut Bread
- Southern Peach Bread
- More Bread Recipes
- More Food Gift Recipes
Stay connected and share your baking adventures through social media! Find me @ Instagram, Facebook, and Pinterest. Don’t forget to tag me when you try one of my recipes! If you love the results, please consider leaving a 5-star rating in the recipe card below. Your feedback means the world!
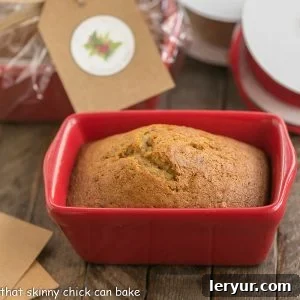
Mini Pumpkin Bread
20 minutes
40 minutes
1 hour
1 large loaf or 5 mini loaves
A classic pumpkin bread recipe that’s always a hit. Make mini loaves for hostess or holiday gifts!
Rated 4.5 out of 5 stars based on 76 reviews.
Ingredients
- 1 ½ cup sugar
- ½ cup oil (such as canola or vegetable oil)
- 2 large eggs, at room temperature
- 1 cup pure pumpkin puree (not pie filling)
- 1 ¾ cups all-purpose flour
- ¼ teaspoon baking powder
- 1 teaspoon salt
- 1 teaspoon baking soda
- ¼ teaspoon ground cloves
- ¼ teaspoon ground allspice
- ½ teaspoon ground cinnamon
- ⅓ cup water
Instructions
- Preheat oven to 350ºF (175ºC). Thoroughly grease and flour your loaf pans. For mini loaves, you might also line the bottom with a small piece of greased parchment paper for easy release.
- In a large mixing bowl, combine the granulated sugar and vegetable oil. Mix until well incorporated.
- Whisk in the room temperature eggs one at a time, ensuring each is fully incorporated before adding the next. Then, stir in the pure pumpkin puree until smooth.
- In a separate medium bowl, whisk together the all-purpose flour, baking powder, salt, baking soda, ground cloves, ground allspice, and ground cinnamon. Ensure all dry ingredients are evenly distributed.
- Gradually add the dry ingredient mixture to the wet pumpkin mixture. Mix on low speed (if using a mixer with a paddle attachment) or with a wooden spoon until just combined. Be careful not to over-mix, as this can lead to a tough bread. Scrape down the sides and bottom of the bowl with a rubber spatula to ensure no dry pockets remain.
- Stir in the water until the batter is smooth. Divide the batter evenly between your prepared mini loaf pans, filling each approximately two-thirds full.
- Bake for 35-40 minutes for small loaves. If you are using a standard full-size loaf pan, start checking for doneness at about 60 minutes; thicker pans may take up to 75 minutes.
- To check for doneness, insert a toothpick into the center of a loaf. If it comes out clean or with a few moist crumbs attached, the bread is done. Avoid overbaking.
- Allow the loaves to cool in their pans on a wire rack for 10-15 minutes before carefully removing them to cool completely on the rack. Ensure they are fully cooled before wrapping for gifting or storing.
Notes
My mini ceramic pans typically measure 5 x 3 x 2 inches. These can often be found at craft stores like Michaels, especially during the holiday season.
While I haven’t specifically tested these mini loaves with the addition of chocolate chips, you can certainly try it! Start by folding in about 1 cup of chocolate chips into the batter before pouring into pans, and add up to another ½ cup if desired.
For best flavor, ensure your spices are fresh and not expired.
Nutrition Information:
Yield:
10 servings
Serving Size:
1 slice
Amount Per Serving:
Calories: 315
Total Fat: 12g
Saturated Fat: 1g
Trans Fat: 0g
Unsaturated Fat: 11g
Cholesterol: 37mg
Sodium: 365mg
Carbohydrates: 48g
Fiber: 1g
Sugar: 31g
Protein: 4g
HOW MUCH DID YOU LOVE THIS RECIPE?
Please leave a comment on the blog or share a photo on Pinterest.