
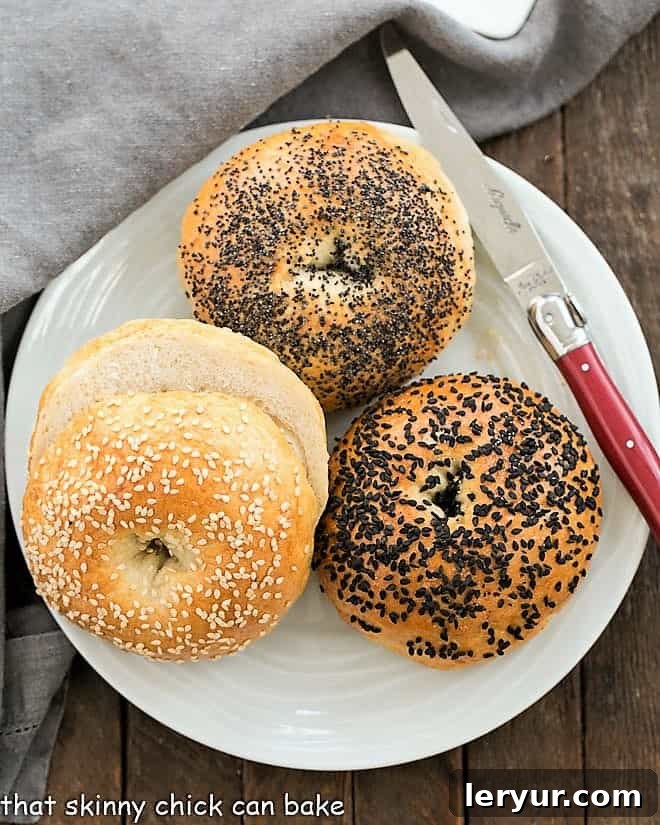
Experience the unparalleled joy of baking your own bagels with this ultimate recipe for dense, chewy, and perfectly textured homemade bagels. Forget store-bought; these freshly baked delights, sprinkled with your favorite seeds, promise an enchanting aroma throughout your home and a breakfast or brunch treat beyond compare. Slather them with rich cream cheese, sweet jam, or savory butter for an unforgettable start to your day.
There’s a unique satisfaction that comes with crafting bagels from scratch. It’s an accomplishment that will elevate your baking prowess and fill your kitchen with a most alluring fragrance as these golden rings emerge from your oven. This comprehensive guide will walk you through every step to achieve bagel perfection.
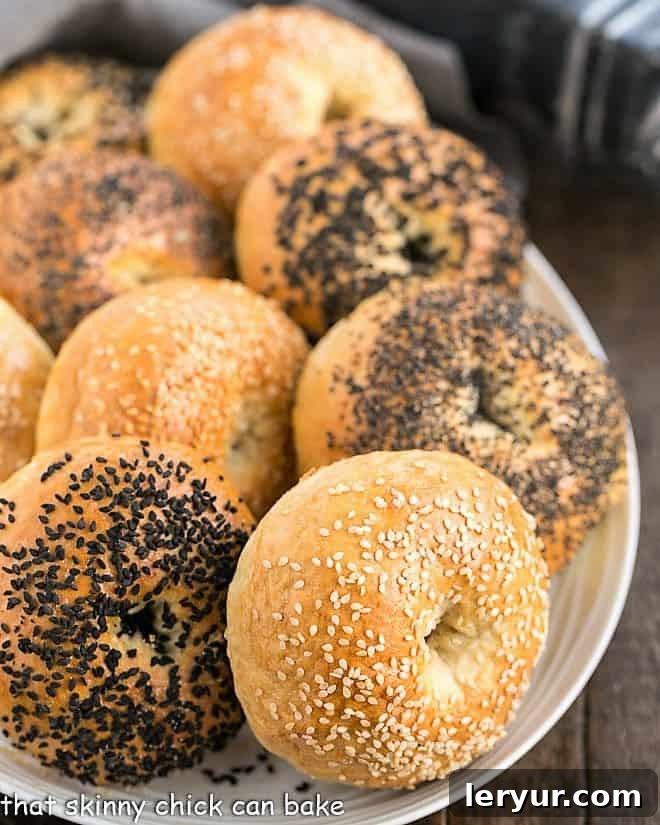
Why You Must Try Making Bagels From Scratch
The last time I embarked on this bagel-making journey was back in 2012, and while the dough recipe proved manageable, the ensuing kitchen chaos was a testament to the labor of love involved. Baking sheets, bowls, utensils, counters, and tea towels seemed to multiply, creating quite the mess. Yet, as every person who tasted the final product raved enthusiastically, I quickly realized the effort was undeniably worth it.
- **An Aromatic Awakening:** There’s truly nothing quite like the comforting, wholesome scent of yeast bread baking, especially when it’s bagels, permeating every corner of your home. It’s an experience for the senses that no store-bought bagel can replicate.
- **Unmatched Freshness:** These won’t just be fresh; they will be the freshest bagels you have ever savored. Warm, straight from the oven, with a perfectly crisp crust and soft, chewy interior – a gourmet experience at home.
- **Personalized Perfection:** Bring out all your favorite toppings – from classic cream cheese and smoked salmon to avocado and everything bagel seasoning – and customize each bite to your heart’s content. The possibilities are endless, making every bagel a unique culinary adventure.
My original foray into bagel baking was inspired by a delightful group of bloggers who were meticulously working their way through Dorie Greenspan’s highly acclaimed cookbook, *Baking with Julia*. This culinary masterpiece compiles recipes from America’s finest bakers. It was the exceptional Lauren Groveman, a contributing baker, who generously shared this remarkable recipe and technique, enabling home bakers like us to create terrific, authentic bagels from scratch.
Essential Ingredient Notes for Perfect Bagels
Crafting the perfect bagel begins with understanding the role each ingredient plays. While many items are kitchen staples, a few specifics can make all the difference in achieving that signature dense and chewy texture.
- Kitchen Staples: Keep your pantry stocked with granulated sugar, baking soda, and salt. Shortening, such as Crisco, is also an important component for dough texture.
- Melted Butter: Used to grease the rising bowl and brush the dough, melted butter adds a subtle richness and helps prevent the dough from drying out.
- Active Dry Yeast: This is the leavening agent that makes your bagels rise. I consistently use Red Star Yeast, known for its reliability. Ensure your yeast is fresh by checking the expiration date and proofing it correctly before beginning.
- Tepid Water: The ideal temperature for activating yeast is crucial. Tepid water, generally around 105° F (40° C), should feel slightly warmer than your body temperature but not hot. A good rule of thumb is two parts cold water to one part boiling water, but using a thermometer is best. Overly hot water can kill the yeast, while water that’s too cold won’t activate it properly.
- Bread Flour (or Unbleached All-Purpose Flour): Bread flour is highly recommended due to its higher gluten content, typically around 99.8% hard wheat flour. This elevated gluten level is what contributes to the characteristic chewiness and structure of bagels. It often contains a small amount of malted barley flour and ascorbic acid (Vitamin C) or potassium to assist with rising. If bread flour is unavailable, unbleached all-purpose flour can be used, though the final texture may be slightly less chewy.
- Salt: Far more than just a seasoning, salt is absolutely necessary for the flavor development of any bread. Without it, your bagels will taste flat and bland. It also helps to control yeast activity, ensuring a steady, even rise.
- Eggs & Seeds: Egg whites, whisked with a little water, create a beautiful, glossy glaze for your bagels. This egg wash also acts as an excellent “glue” for your chosen toppings, such as sesame, poppy, or everything bagel seasoning, ensuring they adhere perfectly during baking.
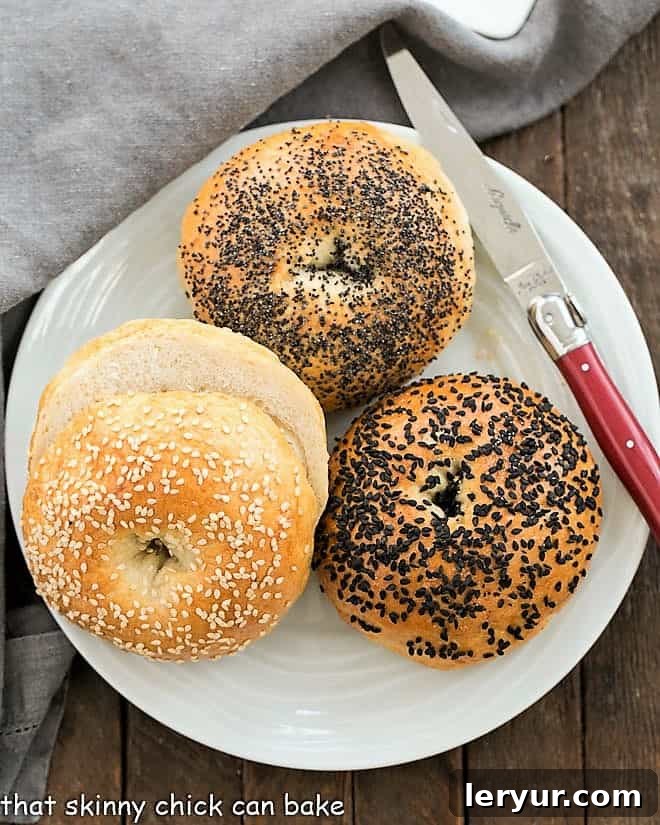
Expert Tips for Making Phenomenal Bagels from Scratch
While some purists might argue that “New York City water” is the secret to authentic bagels (a point my New York-raised friend playfully highlighted), I assure you that with these tips, you can create darn tasty, soft, and wonderfully chewy homemade bagels right in your own kitchen, no matter your location. The key lies in attention to detail and understanding the dough.
- Choosing the Right Flour for Chewiness: While you can certainly use all-purpose flour, opting for bread flour or another high-gluten flour will dramatically improve the texture of your bagels, giving them that coveted chewiness. The higher protein content in bread flour develops more gluten, which is essential for the bagel’s structure. Many pizzerias use high-gluten flour for their pizza dough, so if you frequent a local establishment, they might even sell you some, offering a convenient source for premium flour.
- Ensure Your Yeast is Alive and Kicking: Fresh yeast is paramount for a successful rise. Always check the expiration date on your yeast package before you begin. When you combine the yeast with tepid water and a pinch of sugar, it should become visibly creamy and bubbly within 5-10 minutes. If it doesn’t, your yeast might be old or inactive, and it’s best to start with a fresh packet. Tepid water, around 105°F (40°C), is ideal for activating yeast gently. While many yeast bread recipes call for warmer water (110-120°F), the tepid water in this recipe ensures a slow, steady activation, perfect for dense bagel dough.
- The Importance of a Robust Rise: After all the effort of preparing, shaping, and eventually baking your bagel dough, you want to guarantee that your yeast is at 100% of its capacity. A well-proofed dough is key to achieving light, airy pockets within the dense, chewy crumb. Be patient during the rising times; rushing this step can result in flat or overly dense bagels.
- The Power of an Egg White Wash: A simple egg white wash, typically whisked with a touch of cold water, serves two vital purposes. Firstly, it imparts a beautiful, glossy sheen to your baked bagels, giving them that professional, bakery-quality appearance. Secondly, it acts as the perfect adhesive, ensuring that your chosen seed toppings stick firmly to the dough throughout the boiling and baking process, preventing them from falling off.
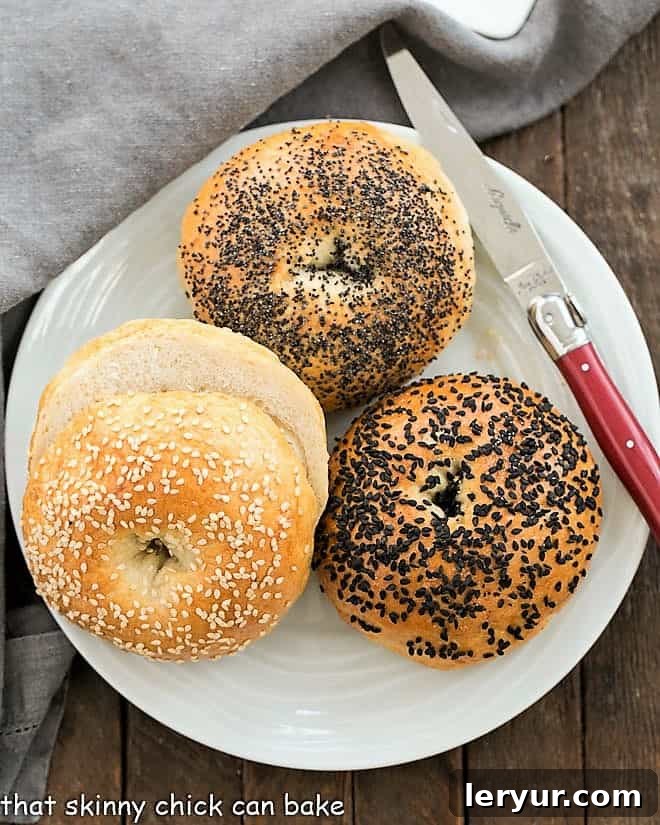
- Topping Your Bagel Masterpiece: While I’m a staunch fan of sesame seed bagels, the world of bagel toppings is vast and exciting. Black sesame seeds, easily found at specialty retailers like Penzey’s, offer a striking visual contrast and nutty flavor. Poppy seeds are a classic choice, and for those who love variety, a pre-made “Everything Bagel Topping” blend (typically a mix of sesame seeds, poppy seeds, dried garlic, dried onion, and salt) is incredibly popular and adds a burst of flavor to every bite. Feel free to experiment with coarse sea salt, caraway seeds, or even grated Parmesan cheese for savory options.
- Creating the Steamy Environment: A steamy oven environment is critical during the initial phase of baking. This steam helps to create a thin, crispy crust before the interior fully sets. If you have an electric oven with a heating element on the bottom, you can add ice cubes to a shallow pan on a shelf below your bagels. For gas ovens, place a sturdy, oven-safe pan on the bottom rack before preheating, and then carefully toss the ice cubes into this hot pan to generate steam, being careful not to extinguish the flame.
- Don’t Rush the Cold Fermentation: The recipe calls for a period of refrigeration. This “cold fermentation” is not merely about convenience; it’s a crucial step for developing a deeper, more complex flavor profile and improving the dough’s texture. The chilled dough is also much easier to handle and shape, resulting in more uniform bagels.
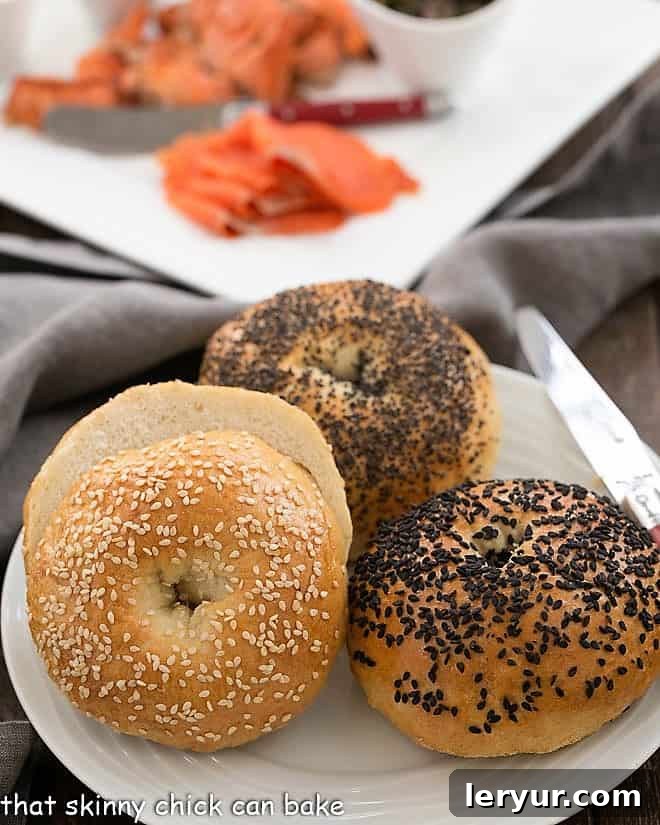
The Art of Making Bagels: A Step-by-Step Guide
Making bagels involves a few distinct stages: kneading the dough, shaping the rings, a crucial boil, and finally, baking to perfection. Each step contributes to the classic bagel texture and flavor.
Kneading Bagel Dough to Perfection
Kneading is where the magic happens, developing the gluten responsible for the bagel’s chewiness. This dense dough requires thorough kneading.
- Using a Stand Mixer: I find my KitchenAid stand mixer, fitted with the dough hook, to be an invaluable tool for this task. My 7-quart mixer, boasting the largest available motor, handles the dense bagel dough with ease. If you’re using a smaller-sized mixer (which most home bakers will), it’s essential to monitor the motor closely as it kneads. Feel the housing for heat and listen for unusual noises. If it starts to feel hot or you detect a burning smell, stop the mixer immediately and allow the motor to cool down. Overheating can damage your appliance.
- The Therapeutic Art of Hand Kneading: Alternatively, kneading the bagel dough by hand can be a truly therapeutic and rewarding experience. Use the heels of your hands to firmly press the dough away from you, then fold it in half towards you, rotate slightly, and press again. Repeat this rhythmically, over and over, for 15-20 minutes until the dough transforms into a smooth, elastic, and resilient ball. This continuous action fully activates the gluten, giving your bagels their signature chew. Hand kneading always brings back fond memories of my mom, who, as a child, famously practiced kneading on her grandmother’s soft, fleshy arm!
- Checking for Gluten Development: Regardless of your kneading method, a good test for sufficient gluten development is the “windowpane test.” Pinch off a small piece of dough and gently stretch it. If you can stretch it thin enough to see light through it without tearing, your gluten is well-developed.
Mastering Bagel Shaping Techniques
Shaping is arguably the most fun part, turning a simple ball of dough into the iconic bagel form. Consistency in size is key for even baking.
- Achieving Uniformity: I rely on my digital kitchen scale to divide the bagel dough precisely. Each piece of dough typically weighs around 150 grams. This consistency ensures that all your bagels will finish baking at roughly the same time, preventing some from being over or undercooked.
- Preventing Dryness: As you work with one portion of dough, always keep the remaining dough balls covered with a clean kitchen towel. This prevents them from drying out and forming a crust, which can make them difficult to shape smoothly.
- Creating the Perfect Ball: The first step is to transform your portion of dough into a round, tightly packed ball. Achieve this by drawing the edges of the dough up from the bottom, stretching it gently, and then pinching it together at the top center. Repeat this process of pulling the dough up and pinching until you have a smooth, round ball with a small “top knot” or pleat at the very apex. This ensures a tight surface tension.
- Forming the Hole: Next, flip the dough ball over so the pinched seam (the knot) is against your work surface. Then, using your index finger, carefully poke it through the center of that knot and out the other side, creating the bagel’s characteristic hole.
- The Crucial Hole Expansion: This is a PRO-Tip you won’t want to miss: You must stretch the hole to a generous width of 2 to 2½ inches at this stage. It will seem surprisingly large, but this space will inevitably reduce and shrink significantly during both the boiling and baking processes. A smaller initial hole will result in a barely visible dimple, or no hole at all, in your finished bagels.
- Lauren Groveman’s Expert Method: Renowned baker Lauren Groveman offers an excellent description for perfecting the bagel hole: “Wiggle your finger around in the hole to stretch it, then lift the bagel, hook it over the thumb of one hand and the index finger of the other, and start rotating the dough, circling your thumb and finger to elongate the dough.” This rotating motion helps create an evenly stretched and stable ring.
The Science and Art of Baking Bagels
The final stages involve boiling to create the crust and baking to cook through, resulting in that classic chewy texture.
- Mindful Proofing: Be careful not to overproof your bagels. This means letting them rise for too long or in an excessively warm environment before baking. Overproofing can lead to a host of problems: your bagels might collapse in the oven, develop a coarse texture, or only rise minimally after baking. The dough should roughly double in size during its bulk fermentation; anything significantly larger suggests it’s been left to rise for too long.
- Preparing the Baking Surface: Always place your uncooked bagels on a baking sheet generously lined with cornmeal. The cornmeal serves a dual purpose: it prevents the bagels from sticking to the sheet and imparts a delightful, slightly crunchy bottom crust, adding another layer of texture.
- The Power of Steam in Baking: Adding ice cubes to the oven floor just before you shut the door creates a steamy environment. This burst of steam is critical. It gelatinizes the starch on the surface of the bagels, setting the crust while keeping it pliable, which allows for maximum oven spring before the crust hardens. This process contributes significantly to the shiny, crackly exterior and the chewy interior.
- Oven Temperature Cycle: Bagels often benefit from a two-stage baking temperature. Starting at a high temperature helps achieve initial oven spring and crust development, then reducing the heat allows the interior to cook through without burning the exterior.
The Bagel Recipe Verdict: A Rewarding Culinary Journey
Let me be upfront: this is no quick-fix recipe. The instructions in the original cookbook spanned three full pages, detailing every nuance. The second rise of the dough, specifically a crucial overnight stint in the refrigerator, is absolutely essential for the best flavor development and easier handling. Then comes the meticulous shaping, the critical boiling bath, and finally, the careful baking. My kitchen transformed into a baker’s workshop, with two baking sheets covered in parchment and cornmeal, one draped with a kitchen towel, and another with a heavily floured kitchen towel, all waiting for their turn in the process.
My dough, thankfully, rose beautifully (a moment of genuine relief!). My only moment of trepidation arose after pulling the somewhat lumpy-looking dough rings from their hot water bath, wondering if they would ever achieve that smooth, perfect bagel appearance. There was, however, no need to worry. These bagels baked up wonderfully smooth, adorned with a gorgeous sheen from the egg wash. The instructions proved absolutely right about making the initial holes quite large, 2 to 2½ inches, to ensure they would still be visible after baking. Despite my best efforts, mine kept shrinking back a bit, resulting in most having a charming little dimple rather than a full hole. But in the grand scheme of things, it was no big deal at all; they tasted absolutely incredible, and I was immensely pleased with the outcome! Watching my family enthusiastically devour every single one of these wonderful homemade bagels was the ultimate reward, making every bit of effort and every dirty dish completely worthwhile.
Frequently Asked Questions About Homemade Bagels
Boiling homemade bagels is the critical step that creates their iconic thick, shiny, and chewy crust, distinct from any other bread. This process, known as gelatinization, causes the starch granules on the surface of the dough to swell and burst, forming a firm, glossy skin. The longer you boil, the thicker and chewier the crust will become. An optimal boiling time of 30-60 seconds per side is generally recommended; you don’t want the crust to be excessively thick. This boiling also “sets” the size and shape of the bagels, preventing further expansion in the oven and contributing to the classic dense, chewy interior texture. Often, additives like barley malt, lye (or its safer substitute, baking soda), honey, or sugar are added to the boiling water. These ingredients not only enhance the browning of the crust during baking but also contribute to the distinctive, subtle sweetness and flavor profile of a traditional bagel.
The versatility of homemade bagels means there are endless serving options! For a classic approach, simply slice your warm bagels and spread them generously with butter and your favorite jam or preserves. Elevate your breakfast or brunch with a sophisticated smoked salmon platter, complete with thinly sliced lox, cream cheese (plain or flavored), capers, red onion, and fresh dill. You could also create a delicious variation of avocado toast by mashing ripe avocado onto your sliced bagel and topping it with everything bagel seasoning, chili flakes, or a drizzle of olive oil. For a heartier meal, enjoy your bagels alongside fluffy scrambled eggs, a fresh fruit salad, or even transform them into savory breakfast sandwiches with eggs, cheese, and bacon or sausage. Sweet options include cinnamon sugar butter, Nutella, or even peanut butter with banana slices. Don’t be afraid to experiment and discover your favorite combinations!
For optimal freshness, homemade bagels are best enjoyed on the day they are baked. If you have leftovers, they can be stored at room temperature in a paper bag for up to one day. For longer storage, which is highly recommended to preserve their texture, allow the bagels to cool completely, then place them in airtight plastic bags and freeze for up to one month. To enjoy, thaw them, still wrapped, at room temperature, then slice and toast for a nearly fresh-baked experience.
Absolutely! This recipe incorporates a crucial cold fermentation step, which allows the dough to be refrigerated for 4 hours, or even up to 2 days. This not only makes the dough easier to handle but also develops a more profound, nuanced flavor in your bagels. Preparing the dough in advance is an excellent way to break up the bagel-making process and enjoy freshly baked bagels with less effort on the morning you plan to serve them.
You May Also Like These Recipes
- Dilled Gravlax
- Smoked Salmon Platter
- Whole Wheat Bagel
- Homemade Croissants
- All my Best Bread Recipes

This post was first shared in 2012. The text, recipe, and photos were updated in 2019 and 2024 to provide clearer instructions and enhanced information.
Stay in touch through social media @ Instagram, Facebook, and Pinterest. Don’t forget to tag me when you try one of my recipes! And if you love the results, please give it a 5-star rating in the recipe card.
Homemade Bagels
40 minutes
40 minutes
1 hour 20 minutes
10 bagels
Achieve bagel shop quality bagels right in your own kitchen with this detailed and rewarding recipe!
Ingredients
Bagel Dough
- 2 tablespoons butter, melted
- 2 ¼ teaspoons active dry yeast
- 2 ¼ cups tepid water
- 2 tablespoons sugar
- 3 tablespoons shortening
- 1 tablespoon salt
- 5 ½ cups bread flour, or unbleached all-purpose flour (you may need to add another ½ cup)
Water Bath
- ¼ cup sugar
- 1 teaspoon baking soda
The Glaze and Toppings
- Non-stick cooking spray and cornmeal, to coat baking sheets
- 2 large egg whites
- 1 teaspoon cold water
- Sesame, poppy, or black sesame seeds, or Everything Bagel Topping
Instructions
- Brush the inside of a large bowl with some of the melted butter; set aside. Reserve the remaining melted butter for brushing the top of the dough.
- In the bowl of your stand mixer, whisk ¼ cup of the tepid water with the active dry yeast. Add a pinch of sugar and let the mixture sit for 5-10 minutes until the yeast dissolves and becomes creamy and foamy. This indicates your yeast is active.
- Fit the stand mixer with the dough hook. Add the remaining 2 cups of tepid water and the shortening to the bowl. Pour in the activated yeast mixture, along with 2 tablespoons of sugar and the salt. Mix on low speed for 1-2 minutes to thoroughly blend these ingredients.
- With the machine still on low, gradually add 5 ½ to 6 cups of the bread flour, incorporating it slowly. Mix for 2 to 3 minutes, or until all the ingredients are well blended and a shaggy dough forms.
- Increase the mixer speed to medium and knead the dough for approximately 6 minutes. During this process, add additional flour, one tablespoon at a time, only if the dough is excessively sticky, until it becomes smooth, elastic, and pulls away cleanly from the sides of the bowl.
- Transfer the well-kneaded dough to the buttered mixing bowl. Lightly brush the top of the dough with any remaining melted butter, then cover the bowl securely with buttered plastic wrap, and finally, drape a clean kitchen towel over the top.
- Allow the dough to rise at room temperature for about 1 hour, or until it has visibly doubled in bulk.
- Gently deflate the risen dough by pressing it down. Recover the bowl as before (buttered plastic wrap and kitchen towel), and refrigerate for a minimum of 4 hours, or ideally, up to 2 days for optimal flavor development and easier handling.
- When you are ready to bake your bagels, position an oven rack in the lower third of your oven and preheat the oven to a high 500°F (260°C). Spray two rimmed baking sheets with non-stick cooking spray and generously dust them with cornmeal.
- While the oven preheats, fill a large, wide pot (like a Dutch oven) with water and bring it to a rapid, rolling boil. Prepare two additional baking sheets: line one with a clean kitchen towel, and line the other with a kitchen towel that has been generously rubbed with flour.
- Remove the chilled dough from the refrigerator. Gently deflate it and place it on a lightly floured work surface.
- Divide the dough in half. Cover and return one piece of the dough to the refrigerator to keep it chilled while you work with the first half.
- Cut the first half of the dough into 5 equal pieces. Keep these individual pieces covered with a towel, removing one at a time to shape.
- Take one of the dough pieces. Draw the dough up from the bottom, stretching it slightly, and then firmly pinch it at the top center. Continue this process of pulling the dough up and pinching it until you achieve a perfectly round, tightly packed ball of dough with a small knot or pleat at the very top. This creates surface tension.
- Turn the dough ball over so the pinched knot is against your work surface. Push your index finger firmly into the center of the dough, piercing through to the other side to create a hole.
- Wiggle your finger around the hole to stretch it. Then, using both thumbs or a combination of thumb and index finger, gently rotate the dough to open and elongate the hole to a diameter of 2 to 2 ½ inches. The hole should appear quite large; remember it will shrink during boiling and baking.
- Place the shaped bagel onto the baking sheet lined with the floured towel. Cover it with another clean towel to prevent drying while you shape the remaining bagels.
- Shape the remaining 4 pieces of dough from the first half into bagels following the same process. (Keep the other half of the dough in the refrigerator for now). Add ¼ cup sugar and 1 teaspoon baking soda to the rapidly boiling water in the pot.
- Using a large slotted spoon or spatula, carefully lower the bagels, one at a time, into the boiling water. Do not overcrowd the pot; ensure there is ample space between each bagel. The bagels will initially sink, then rise to the surface after about a minute.
- Once the bagels have surfaced, boil them for approximately 1 minute on each side. Carefully flip them over with your slotted spoon to ensure even cooking.
- Remove the boiled bagels, allowing any excess water to drip back into the pot through the slotted spoon. Place them on the baking sheet with the unfloured towel, ensuring the smoothest side of each bagel faces upwards. Keep the boiling water in the pot for the next batch.
- Once all the boiled bagels are on the towel-lined sheet, promptly begin transferring them to the cornmeal-covered baking sheet prepared earlier, again with the smoothest side up. Do not wait too long at this stage, as the bagels may stick to the towel.
- In a small bowl, whisk the 2 large egg whites with 1 teaspoon of cold water until the whites are broken up and frothy. Generously brush each bagel with this glaze. Apply a second coat of glaze for extra shine. If using a topping (or multiple toppings), sprinkle it evenly over the glazed bagels immediately.
- At this point, your bagels may not appear perfectly smooth or round, but rest assured, they will achieve a much more appealing appearance after baking.
- Place 4 ice cubes into a 1-pint measuring cup and add ¼ cup of cold water. Carefully place the baking sheet of bagels into the preheated oven. Immediately and swiftly, toss the ice cubes and water directly onto the oven floor (or into the preheated pan on the bottom rack if using a gas oven).
- Quickly close the oven door to trap the steam. Immediately reduce the oven temperature to 450°F (230°C) and bake the bagels for 25 minutes.
- After 25 minutes, turn off the oven but leave the bagels inside with the door closed for an additional 5 minutes. Then, open the oven door slightly and leave the bagels in the cooling oven for another 5 minutes. This helps to set the crust and prevent them from becoming too soft.
- Transfer the baked bagels to a wire rack to cool completely.
- Before baking the second batch of bagels (using the remaining dough from the refrigerator), be sure to bring the oven temperature back up to 500°F (260°C). Remember to lower the oven temperature to 450°F (230°C) once you place the bagels in.
- While the first batch of bagels is baking and cooling, retrieve the remaining dough from the refrigerator. Cut, shape, boil, glaze, and bake these bagels exactly as you did the first batch.
- Cooled bagels can be stored for 1 day in a paper bag at room temperature. For longer preservation, pack them into airtight plastic bags and freeze for up to 1 month. To enjoy frozen bagels, thaw them, still wrapped, at room temperature, then slice and toast.
Notes
Adapted from *Baking with Julia* by Dorie Greenspan, with techniques from Lauren Groveman.
Total time listed does not include the essential cold fermentation (proofing) time in the refrigerator.
Nutrition Information:
Yield:
10
Serving Size:
1 bagel
Amount Per Serving:
Calories: 498Total Fat: 10gSaturated Fat: 4gTrans Fat: 0gUnsaturated Fat: 5gCholesterol: 8mgSodium: 845mgCarbohydrates: 88gFiber: 4gSugar: 9gProtein: 14g
HOW MUCH DID YOU LOVE THIS RECIPE?
Please leave a comment on the blog or share a photo on Pinterest