
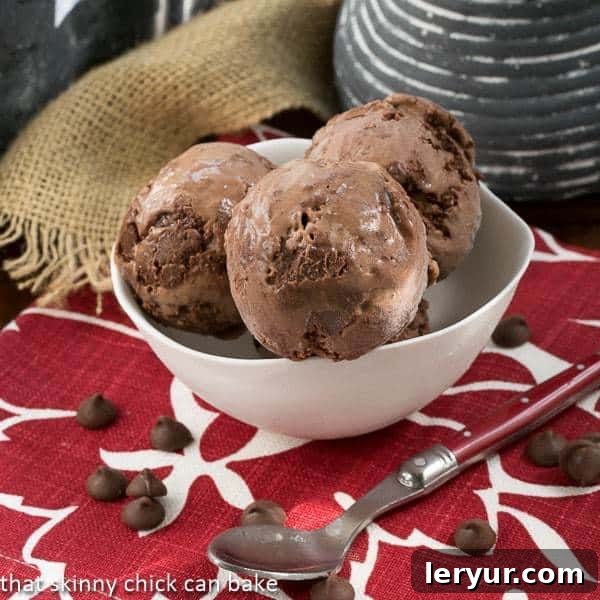
Chocolate Truffle Ice Cream: Dive into a world of rich, velvety chocolate with this exquisite homemade ice cream. Crafted with luxurious homemade chocolate truffle bits and a deep, luscious homemade chocolate liquor, this recipe transcends ordinary frozen desserts. It’s an unparalleled experience, specifically designed for the die-hard chocoholic seeking the ultimate indulgence!
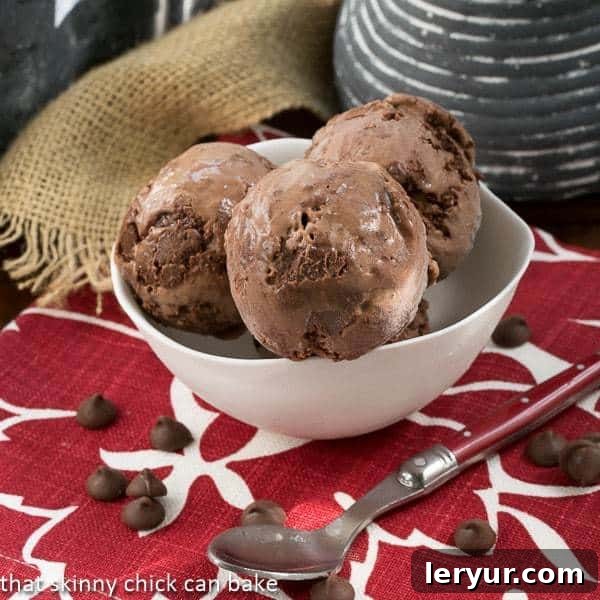
Heavenly Chocolate Truffle Ice Cream: A Culinary Journey into Deep Chocolate
There’s a unique magic to homemade ice cream, especially when the summer heat reaches its peak. In Indianapolis, where the sweltering August-like temperatures and humidity arrive early, the craving for a truly exceptional frozen treat becomes undeniable. This was the perfect setting to delve into the pages of a culinary treasure: Scoop Adventures: The Best Ice Cream of the 50 States by the incredibly talented Lindsay Clendaniel. Her book isn’t just a collection of recipes; it’s a passport to the finest ice cream parlors across the nation, alongside her own brilliantly crafted frozen delights.
As a home cook always on the lookout for a show-stopping dessert, my eyes immediately landed on this extraordinary Chocolate Truffle Ice Cream on Lindsay’s blog. Knowing my family’s profound and unwavering love for all things chocolate, I instinctively knew this recipe was destined to become a household favorite. What truly sets this recipe apart is its commitment to a multi-layered chocolate experience, elevating it beyond a simple chocolate ice cream. From the rich, dark chocolate liquor crafted from scratch to the decadent, melt-in-your-mouth truffle pieces swirled throughout, every component is designed to deliver an astonishing depth of flavor and luxurious texture that promises to captivate even the most discerning chocoholic.
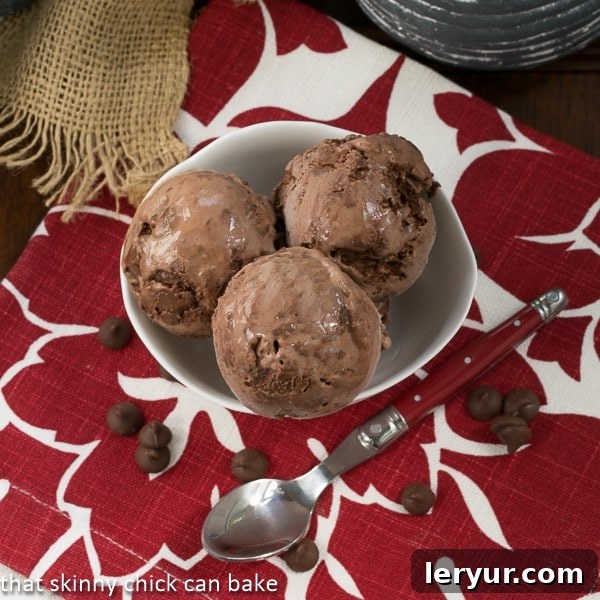
A Winning Chocolate Ice Cream Recipe That Converts Even Vanilla Lovers
I’ll readily admit, for a significant portion of my life, I considered myself a dedicated “vanilla girl.” My dessert preferences often leaned towards the subtle elegance of vanilla bean over the bold intensity of chocolate. However, this Chocolate Truffle Ice Cream was not just a dessert; it was a revelation. With just one hesitant nibble of this sinfully rich, homemade creation, my vanilla allegiance was instantly challenged, and ultimately, happily overthrown. I was completely sold by its unparalleled double dose of chocolate decadence, a testament to Lindsay’s culinary genius.
The magic begins with the foundational homemade chocolate liquor, which infuses the creamy base with a deep, resonant cocoa flavor. This is then perfectly complemented by the luscious, velvety truffles, generously dispersed throughout the ice cream. The texture is a dream: a velvety smooth base that melts beautifully on the tongue, interspersed with satisfying, chewy chunks of rich chocolate. This delightful contrast of smooth and textural elements, combined with the profound chocolate notes, was enough to win over even this self-proclaimed plain Jane vanilla enthusiast. It wasn’t just good; it was dreamy, sophisticated, and utterly unforgettable.
The true seal of approval, however, came during a recent Sunday dinner. I offered my oldest son a selection of three homemade desserts, eager to hear his verdict. After careful deliberation and savoring each option, the Chocolate Truffle Ice Cream was unequivocally declared the winner. His enthusiastic vote confirmed what I already knew: this recipe possesses an undeniable charm and an irresistible allure that resonates deeply with anyone who appreciates exceptional quality and flavor. It truly is a testament to the power of well-crafted, intensely chocolatey indulgence.
The Art of Homemade Perfection: Crafting Each Component from Scratch
One of the most satisfying aspects of preparing this Chocolate Truffle Ice Cream lies in the meticulous process of crafting its key components from scratch. This dedication to homemade elements elevates the final product from merely good to truly gourmet. The homemade chocolate liquor, for instance, is far more than a simple flavoring agent. It’s a foundational layer of deep, complex chocolate essence, achieved by carefully combining cocoa powder, water, and sugar, then enriching it with quality bittersweet chocolate. This process allows you to develop a robust, full-bodied chocolate flavor that commercial substitutes simply cannot replicate, setting a magnificent stage for the entire ice cream.
Equally transformative are the homemade chocolate truffles. These aren’t just an afterthought; they are luxurious, melt-in-your-mouth bites of ganache that provide a delightful textural contrast to the smooth ice cream. By heating heavy cream and gently melting premium chocolate chips, you create these delectable morsels, giving you complete control over their richness, sweetness, and consistency. When chilled and then swirled into the ice cream, these truffles maintain a soft, pliable texture even when frozen, ensuring that every spoonful is a harmonious blend of creamy ice cream and tender, intense chocolate pieces. This homemade approach ensures a superior quality that is palpable in every bite.
Embracing the from-scratch method also offers unparalleled customization. You have the freedom to adjust the sweetness levels, choose between bittersweet or semisweet chocolate based on your preference for intensity, and ensure that only the finest ingredients are used. This control over quality and flavor profile not only guarantees a superior product but also makes the entire culinary endeavor a deeply rewarding experience. It’s a true celebration of artisanal ice cream making, promising immense satisfaction for both the creator and anyone fortunate enough to savor this exquisite dessert.
Expert Tips for Crafting Flawless Homemade Ice Cream
Achieving the perfect scoop of homemade ice cream, especially one as decadent as this Chocolate Truffle variant, is a rewarding endeavor that can be easily accomplished with a few key techniques. Attention to these details will ensure your efforts result in a truly luscious, creamy dessert every time:
- Thoroughly Chill Your Ice Cream Base: This is arguably the most critical step for optimal texture. A well-chilled base (ideally for at least 4 hours, or even better, overnight) will churn more efficiently, incorporating air and preventing the formation of large ice crystals. This leads to a significantly smoother, creamier, and more luxurious final product.
- Invest in Quality Ingredients: Given that chocolate is the undeniable star of this recipe, the quality of your cocoa powder, bittersweet chocolate, and chocolate chips will profoundly impact the flavor. Opt for the best quality you can afford; the difference in richness and depth will be distinctly noticeable in your final ice cream.
- Follow Your Ice Cream Maker’s Instructions: Every ice cream machine operates slightly differently. Always refer to your manufacturer’s specific guidelines regarding pre-freezing the bowl (if applicable), maximum capacity, and recommended churning times to ensure the best results for your particular model.
- Do Not Overfill the Churner: Remember that ice cream expands as it churns and incorporates air. Ensure you leave adequate space in your ice cream maker bowl to prevent overflow and allow for proper aeration, which contributes to a lighter, softer texture.
- Achieve the Perfect Truffle Consistency: When preparing the chocolate ganache for the truffles, refrigerate it until it’s firm enough to easily roll into small balls, but not so hard that it becomes difficult to work with. This ensures they maintain their delightful, chewy texture within the frozen ice cream.
- Layering for a Beautiful Swirl: When transferring the churned ice cream and truffles to a freezer-safe container, layer them gently. Alternate thin layers of ice cream with sprinkles of truffle balls. You can use a spoon to lightly swirl the layers, creating an attractive marbled effect without overmixing or breaking up the truffles too much.
- Patience During the Freezing Stage: After churning, your ice cream will typically have a soft-serve consistency. It requires a final “ripening” period in the freezer to firm up to a scoopable texture. Allow at least 4 hours, or preferably overnight, for the ice cream to freeze properly and for the flavors to fully meld and deepen. This patience is key to unlocking its full potential.
Celebrating Culinary Adventures: The Legacy of “Scoop Adventures”
This exquisite Chocolate Truffle Ice Cream recipe was originally shared as part of a vibrant culinary event, where a group of passionate food bloggers, including myself, came together to celebrate the art of ice cream making. We collectively explored the inspiring pages of Lindsay Clendaniel’s “Scoop Adventures,” showcasing our unique interpretations and favorite recipes from this remarkable cookbook. It was a fantastic opportunity to highlight the incredible diversity and boundless creativity that exists within the world of homemade frozen desserts, from timeless classics to innovative and daring flavor combinations.
While the original event may have included a giveaway, the enduring value lies in the shared enthusiasm for culinary exploration and the endless possibilities that homemade ice cream offers. “Scoop Adventures” continues to serve as an incredible resource, guiding aspiring ice cream makers through a delightful journey of flavors, bringing the experience of America’s best ice cream parlors right into your home kitchen. It stands as a testament to the fact that with a little creativity, quality ingredients, and the right guidance, you can indeed recreate gourmet dessert experiences that are truly unforgettable.
Explore More Delicious Creations from Fellow Ice Cream Enthusiasts:
- Berry Goat Cheese Sherbet from Kimberly at Hungry Goddess
- Red Velvet Ice Cream Sundae from Kim at Cravings of a Lunatic
- Chocolate Sesame Brittle Ice Cream from Jenni at Pastry Chef Online
- S’Mores Ice Cream Sandwiches with Toasted Marshmallow Malt Ice Cream from Kirsten at Comfortably Domestic
- Chocolate Truffle Ice Cream from Liz at That Skinny Chick Can Bake (That’s this very recipe you’re enjoying!)
- Hops and Nuts Ice Cream from Sophia at NY Foodgasm
- Blueberry Mojito Ice Cream from Barb at Creative Culinary
- Chocolate Coconut Macadamia Ice Cream from Betsy at Desserts Required
- Peanut Butter Ice Cream from Donna at Cookistry
- Thai Coconut Ice Cream from Stacy at Food Lust People Love
- Dark Chocolate Orange Ice Cream from Allison at Decadent Philistines Save the World
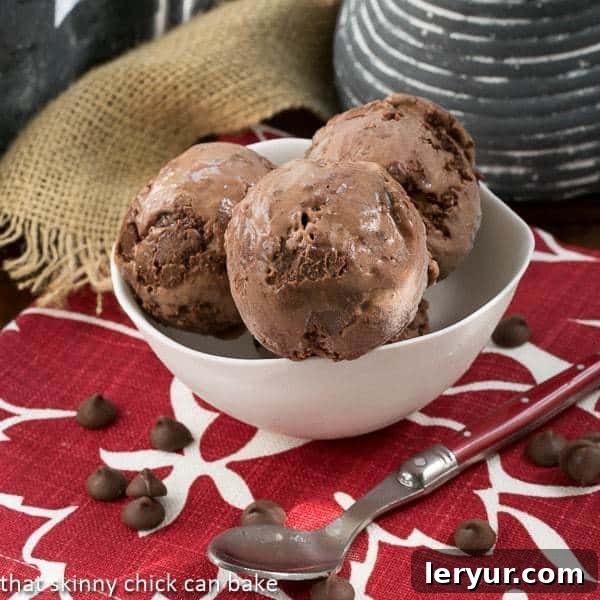
Chocolate Truffle Ice Cream
30 minutes
12 minutes
42 minutes
1 quart (approx. 8 servings)
This triple chocolate ice cream recipe is the ultimate indulgence for the die-hard chocoholic, featuring homemade chocolate liquor and decadent truffle bits for an unparalleled flavor experience.
Ingredients
For the Chocolate Liquor:
- ⅓ cup unsweetened cocoa powder
- ⅓ cup water
- ⅓ cup granulated sugar
- 1 ounce bittersweet chocolate (or semisweet, based on preference)
For the Ice Cream Base:
- 1 ½ cups milk, divided
- 1 tablespoon cornstarch
- 1 ¾ cups heavy cream
- ½ cup granulated sugar
- ¼ teaspoon salt
For the Truffles:
- ½ cup heavy cream
- 6 ounces bittersweet chocolate chips (or semisweet, based on preference)
Instructions
- Prepare an Ice Bath: Fill a large bowl with ice water and set it aside. This will be used to rapidly cool your chocolate mixture.
- Make the Chocolate Liquor: In a medium saucepan, combine the cocoa powder, ⅓ cup water, and ⅓ cup sugar. Bring this mixture to a low boil over medium heat, whisking constantly to prevent any lumps and ensure a smooth consistency.
- Finish the Liquor: As soon as you see small bubbles, remove the pan from the heat. Add the 1 ounce of bittersweet (or semisweet) chocolate. Let it sit undisturbed for 2 minutes to allow the chocolate to melt completely. Then, whisk vigorously until the liquor is smooth and well combined. Whisk this chocolate liquor with the salt in a separate medium bowl and set aside.
- Prepare the Ice Cream Base: In a small bowl, whisk together 2 tablespoons of the milk and the cornstarch to create a smooth slurry; set this aside. In another saucepan, combine the remaining milk (1 ½ cups minus 2 tablespoons), 1 ¾ cups heavy cream, and ½ cup sugar. Bring this mixture to a low boil over medium heat, stirring continuously until the sugar fully dissolves, which should take approximately 3 minutes.
- Thicken and Chill the Base: Remove the milk-cream mixture from the heat. Slowly whisk in the cornstarch slurry. Return the saucepan to the heat and bring it back to a boil, cooking for about 1 minute until the mixture thickens slightly. Immediately pour this thickened mixture into the bowl containing the chocolate liquor and whisk thoroughly to combine. Place this bowl into the prepared ice water bath to cool it quickly for about 20 minutes, whisking occasionally. Once cooled, cover the bowl tightly with plastic wrap and refrigerate until the base is thoroughly chilled, ideally for at least 4 hours or, for best results, overnight.
- Make the Truffles: In a microwave-safe bowl, heat ½ cup heavy cream for 30 seconds to 1 minute, or until it is hot but not boiling. Add the 6 ounces of chocolate chips to the hot cream. Allow the mixture to sit undisturbed for a few minutes to let the chocolate melt from the residual heat. Stir until the mixture is completely smooth and forms a rich ganache. Refrigerate this ganache until it is firm enough to handle, typically 1-2 hours.
- Churn the Ice Cream: Once the ice cream base is fully chilled, pour it into your ice cream maker. Process it according to your manufacturer’s instructions until it reaches a soft-serve consistency.
- Layer the Truffles: Remove the firm ganache from the refrigerator. Roll small truffle balls (about ½ inch in diameter). Take a freezer-safe container and sprinkle a small, even layer of these truffle balls at the bottom. Lightly spoon a layer of the freshly churned ice cream on top.
- Continue Layering and Swirling: Continue to alternate layers of truffle balls and ice cream until the container is full. You can gently swirl the layers with a spoon for a beautiful marbled effect.
- Final Freeze: Cover the container and freeze until the ice cream is firm and scoopable. This will take at least 4 hours, or preferably overnight, for the optimal texture and flavor development. Enjoy your homemade decadent treat!
Notes
Total preparation time, including the crucial chilling and freezing periods, is approximately 12 hours for the best texture and flavor.
This outstanding recipe is proudly reprinted with permission from Lindsay Clendaniel, the esteemed author of “Scoop Adventures,” a must-have for all ice cream enthusiasts.
Nutrition Information:
Yield:
8 servings
Serving Size:
1 serving
Amount Per Serving:
Calories: 527Total Fat: 40gSaturated Fat: 24gTrans Fat: 1gUnsaturated Fat: 13gCholesterol: 80mgSodium: 133mgCarbohydrates: 37gFiber: 5gSugar: 23gProtein: 8g
How Much Did You Love This Recipe?
Please leave a comment on the blog or share a photo on Pinterest.
This irresistible Chocolate Truffle Ice Cream recipe was originally shared by the acclaimed Lindsay Clendaniel on her renowned blog, Scoop Adventures, a fantastic resource for all ice cream enthusiasts and home bakers.
Disclosure: I received a complimentary copy of “Scoop Adventures” for the purpose of review. My appreciation and opinions expressed about this incredible cookbook and its recipes are entirely my own, reflecting my genuine culinary experience and enthusiasm.