
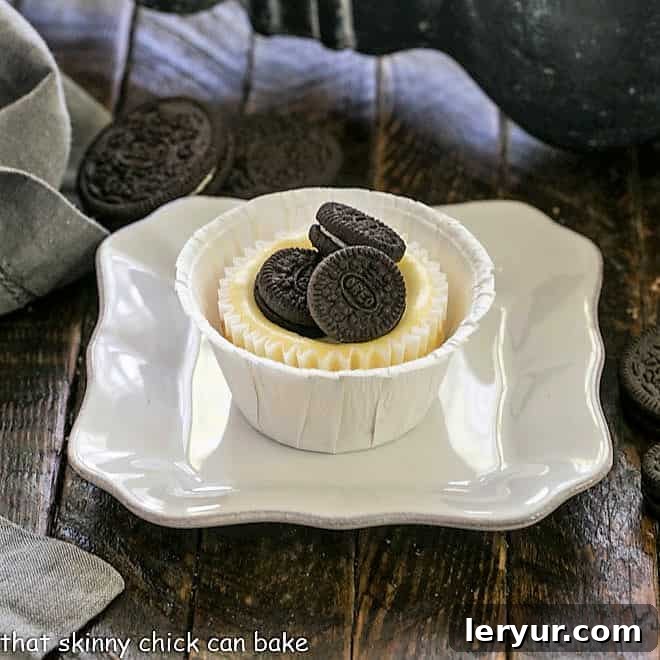
Indulge in the irresistible charm of these Mini Oreo Cheesecakes, a delightful and effortlessly delicious way to create personalized desserts! Every Oreo enthusiast will undoubtedly fall head over heels for this incredible mini cheesecake recipe, designed for maximum flavor and minimal fuss.
The iconic Oreo cookie holds a cherished spot in countless pantries, particularly the Double Stuf variety for its extra creamy filling. The brilliance of this recipe lies in its simplicity: using a whole Oreo as the base for each crust transforms these Individual Cheesecakes into a dream to prepare. Forget the tedious process of crushing cookies and mixing crumbs; a single Oreo provides the perfect foundation, setting the stage for a truly remarkable dessert experience.
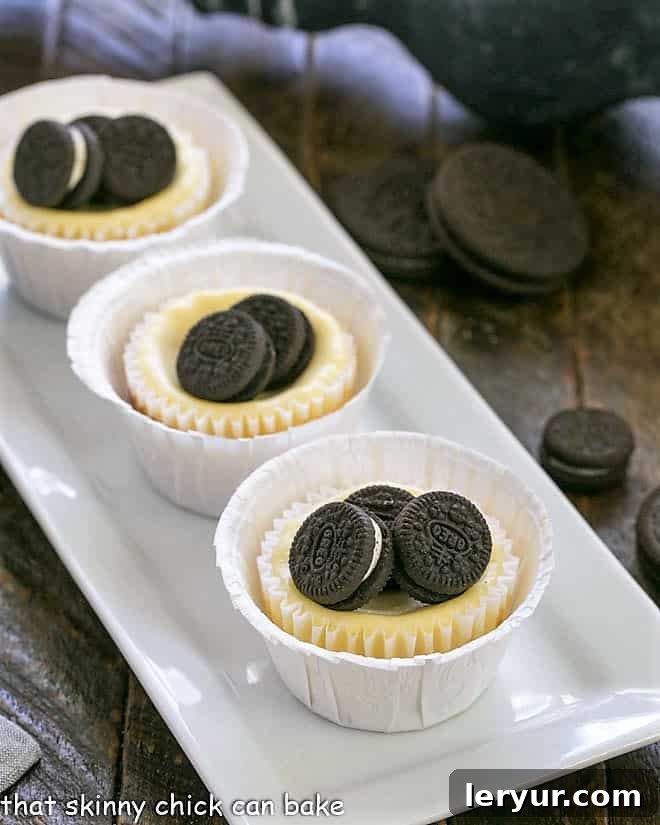
Why These Mini Oreo Cheesecakes Are a Must-Make
These individual cheesecakes aren’t just a treat; they’re a revelation in convenience, flavor, and presentation. Here’s why this recipe deserves a permanent spot in your baking repertoire:
- Effortless Elegance for Entertaining: Whether you’re hosting a casual get-together or a sophisticated dinner party, these mini cheesecakes serve as the perfect amuse-bouche, offering a gourmet touch without the stress. They’re ideal for impressing friends or family with your baking prowess, even if you’re just learning the ropes of cheesecake making.
- Streamlined Baking Process: The innovative use of a whole Oreo as the crust dramatically simplifies preparation. This ingenious shortcut means you can whip up these delectable treats in a fraction of the time compared to traditional crumb crusts, allowing you to enjoy more time with your guests or simply relax.
- Built-In Portion Control and Guilt-Free Indulgence: Each mini cheesecake is perfectly portioned, offering a satisfying dessert without the temptation of overindulging. This makes them a fantastic option for managing calorie intake or simply enjoying a single, perfectly sized treat. Plus, knowing you have a personal cheesecake waiting is a small luxury everyone can appreciate.
- Versatility in Customization: While delicious on their own, these mini cheesecakes serve as a blank canvas for various toppings and flavors. From different Oreo varieties to a myriad of drizzles and fresh fruits, the customization possibilities are endless, ensuring they can be tailored to any taste or occasion.
- Irresistible Flavor and Texture Combination: The creamy, smooth vanilla cheesecake filling perfectly complements the crunchy, chocolatey Oreo crust. This delightful contrast in textures and the harmonious blend of flavors create a dessert that is truly addictive and memorable.
Expert Tips for Crafting Flawless Mini Oreo Cheesecakes
Achieving cheesecake perfection is simpler than you think, especially with a few insider tips:
- PRO-Tip: Room Temperature Ingredients are Paramount: For the silkiest, smoothest cheesecake filling, it’s crucial that your cream cheese and eggs are at room temperature. Cold ingredients don’t emulsify properly, leading to a lumpy batter and a higher risk of cracks in your baked cheesecake. If you’re short on time, you can gently speed up the process by placing foil-wrapped cream cheese and eggs (still in their shells) in a bowl of warm (not boiling) water for about 15-20 minutes. Ideally, take them out of the refrigerator 1-2 hours before you plan to start mixing.
- Choose Your Mixer Wisely: When using a stand mixer, opt for the paddle attachment over the whisk. The paddle attachment incorporates ingredients without adding too much air, which is essential for a dense, creamy cheesecake texture and helps prevent cracking during baking and cooling. Mix just until combined; overmixing can introduce excess air, leading to a “soufflé” effect where the cheesecake puffs up and then dramatically sinks.
- Embrace Muffin Liners for Convenience and Presentation: Using paper or foil muffin liners makes cleanup an absolute breeze and ensures easy removal of your mini cheesecakes from the pan. For an extra touch of elegance, consider serving them in a second, decorative liner or even small ramekins. This simple step elevates their presentation, making them look even more professional.
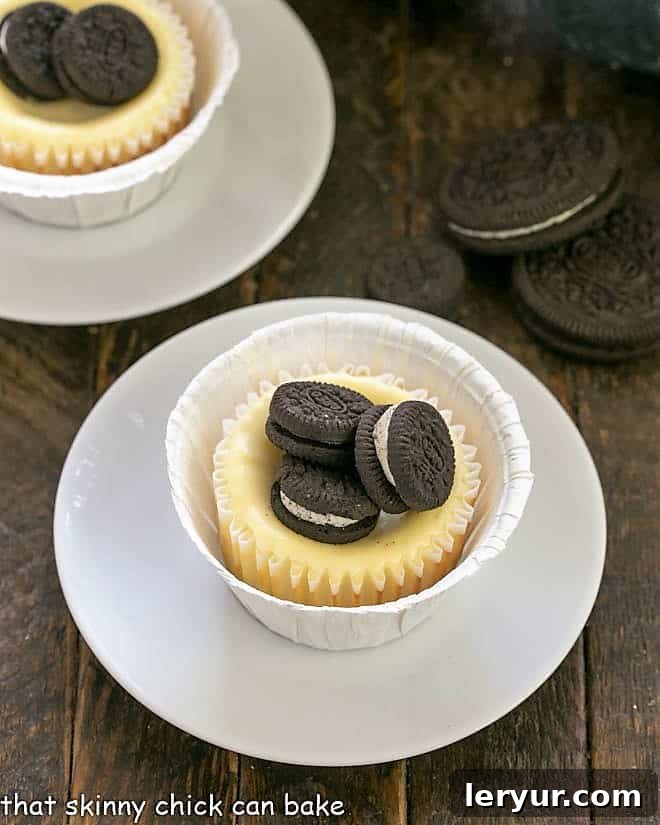
- Don’t Fear the Dip: It’s perfectly normal for these individual cheesecakes to bake up with a slight dip or indent in their centers. Far from being a flaw, this gentle hollow is the ideal spot to place your chosen garnish. Think 2-3 mini Oreos, a generous sprinkle of chopped full-sized Oreos, a dollop of whipped cream, or a fresh berry for a picture-perfect finish.
- PRO-Tip: Patience Pays Off – Chill Overnight: Like all cheesecakes, these mini versions taste exponentially better after a proper chill. Refrigerating them overnight allows the flavors to meld and deepen, and the texture to firm up to its ideal creamy consistency. Resist the urge to dive in too soon!
- Serve at the Optimal Temperature: For the ultimate creamy indulgence, let your chilled mini cheesecakes sit at room temperature for about an hour before serving. This gentle warming period intensifies their velvety texture and unlocks their full flavor potential, making them far more luxurious than serving them straight from the refrigerator.
- Avoid Overbaking: Mini cheesecakes bake quickly. Watch them carefully! They are done when the edges appear set and firm, but the very center still has a slight jiggle. This slight movement indicates that they are cooked through but will continue to set as they cool. Overbaking leads to dry, cracked cheesecakes.
- Cool Gradually: Once baked, turn off the oven and prop the oven door open slightly, allowing the cheesecakes to cool gradually inside for about 15-20 minutes. This slow transition helps prevent cracking due to sudden temperature changes. Then, transfer them to a wire rack to cool completely before refrigerating.
Frequently Asked Questions About Mini Oreo Cheesecakes
It’s incredibly easy and efficient! First, line your standard muffin or cupcake pan with paper or foil liners. This prevents sticking and makes serving simple. For the crust, either place a whole Oreo at the bottom of each liner or press about a tablespoon of a mixed cookie crumb crust firmly into the base. Then, carefully spoon your cheesecake batter into each cup, filling them about two-thirds full. Bake as directed until the centers look mostly set but might still have a slight jiggle. The carryover heat will finish the cooking process as they cool.
Determining doneness for individual cheesecakes is similar to a full-sized one, but quicker. The edges of the cheesecakes should appear set and firm, with a slight golden hue, while the very center should still have a subtle jiggle when you gently shake the pan. This indicates that the cheesecake is cooked through but still moist. They are definitely not done if the middles look wet, raw, or liquidy. Remember, cheesecakes continue to set as they cool, so a slight jiggle is perfectly fine and often desirable.
Once your mini cheesecakes have completely cooled to room temperature, they should be stored in an airtight container in the refrigerator. They will maintain their freshness and delicious taste for 3-4 days. For longer storage, these cheesecakes freeze beautifully for up to 3 months. To freeze, arrange them on a baking sheet until solid, then transfer to a freezer-safe bag or container. When ready to enjoy, defrost them slowly in the refrigerator overnight, and then let them sit at room temperature for about an hour before serving for the best possible texture and flavor.
Even with careful mixing and proper baking, it’s quite common for mini cheesecakes to develop a slight dip or divot in the middle as they cool. This is often due to the rapid cooling of the smaller portion. However, this isn’t a flaw but rather a fantastic opportunity! That perfect little divot makes an excellent spot to fill with a variety of delicious garnishes, such as a drizzle of rich fudge or luscious caramel sauce, a scattering of mini cookies, fresh berries, or even a dollop of whipped cream. I always embrace a nice garnish to enhance both flavor and presentation!
Packaging individual cheesecakes makes them ideal for gifting, bake sales, or party favors. For a charming presentation, place each mini cheesecake (still in its paper wrapper) into a second, more decorative paper wrapper or a small cupcake box. Then, gently slide it into a clear cellophane bag and tie it with a pretty ribbon. Ensure they are kept refrigerated until you’re ready to gift or serve them to maintain their freshness and structural integrity.
Absolutely! The beauty of this recipe is its adaptability. Feel free to experiment with different Oreo flavors for the crust and even as toppings. Mint Oreos would be fantastic for a refreshing twist, Golden Oreos offer a vanilla-on-vanilla experience, or even Peanut Butter Oreos for an added nutty depth. Each flavor variation will bring a unique and exciting element to your mini cheesecakes!
Beyond chopped Oreos or a simple chocolate drizzle, the possibilities for toppings are endless! Consider fresh berries like strawberries, raspberries, or blueberries for a burst of freshness and color. A dollop of homemade whipped cream, a swirl of caramel sauce, a sprinkle of chocolate shavings, or even a few toasted nuts can elevate your mini cheesecakes to a new level of deliciousness. Get creative and tailor them to your personal preferences or the occasion!
Delicious Variations and Customization Ideas
While the classic Mini Oreo Cheesecake is a masterpiece on its own, don’t hesitate to get creative and explore these exciting variations:
- Flavorful Oreo Crusts: Beyond the original, try Mint Oreos for a refreshing zest, Golden Oreos for a delightful vanilla base, or Peanut Butter Oreos for a rich, nutty foundation. These swaps can dramatically alter the cheesecake’s profile.
- Swirled Beauties: Before baking, gently swirl a spoonful of melted chocolate, caramel, or even a fruit compote into the cheesecake batter for an elegant marbled effect and an extra layer of flavor.
- Fruity Freshness: Top your baked and cooled cheesecakes with a vibrant array of fresh berries, thinly sliced kiwi, or mango for a light, tangy contrast to the creamy filling. A simple fruit coulis or jam can also add a gourmet touch.
- Decadent Drizzles and Sauces: Instead of just a chocolate drizzle, experiment with white chocolate ganache, a rich caramel sauce, or a tangy raspberry coulis. For an extra treat, sprinkle with toasted coconut flakes or chopped nuts.
- Add-Ins to the Batter: Fold in mini chocolate chips, finely chopped nuts, or even a small amount of an alternative cookie crumb into your cheesecake batter for texture and flavor surprises within the creamy filling.
- Seasonal Themes: Adapt your toppings for holidays! Red and green M&Ms for Christmas, pastel sprinkles for Easter, or candy corn for Halloween can make these mini cheesecakes festive and fun.
You May Also Like: More Irresistible Oreo and Chocolate Desserts
If you’re a fan of these Mini Oreo Cheesecakes, you’ll love exploring these other decadent recipes:
- Oreo Earthquake Cake from I Am Baker – A stunning dessert with hidden pockets of cream cheese and Oreos.
- No-Bake Oreo Cheesecake – For those days you want cheesecake without turning on the oven.
- Oreo Cheesecake with Oreo Cookie Crust – The classic full-sized version for a crowd.
- Cookies and Cream Fudge – A simple, sweet treat perfect for gifting.
- Easy Oreo Truffles – Just three ingredients for bite-sized deliciousness.
- Double Decker Oreo Fudge – Layers of chocolate and Oreo goodness.
- Oreo Cheesecake Brownies – The best of both worlds in one incredible dessert.
- Discover more Homemade Chocolate Recipes to satisfy your cravings.
Stay connected and share your culinary adventures! Follow me on social media: Instagram, Facebook, and Pinterest. Don’t forget to tag me when you try one of my delicious recipes! If you love the results, please consider giving this recipe a 5-star rating in the recipe card below – your feedback is invaluable!
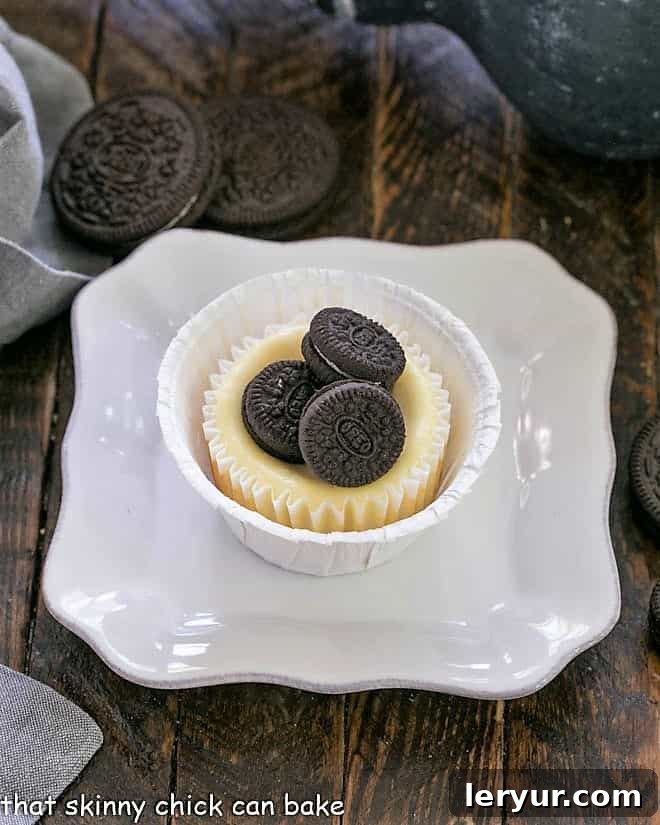
Mini Oreo Cheesecakes
20 minutes
25 minutes
45 minutes
12 cheesecakes
These mini cheesecakes, elegantly topped with Oreos, offer a fun and individual dessert experience made incredibly easy by utilizing a whole Oreo as the ready-made crust!
Ingredients
For the Crust:
- 12 whole Oreos (or 12 Nabisco Famous Wafers*, crushed with 2 tablespoons melted butter and 1 tablespoon sugar)
For the Cheesecake Filling:
- 6 Oreo cookies, chopped (for topping or mixing into batter)
- 2 (8-ounce) packages cream cheese, at room temperature
- ½ cup granulated sugar
- 1 teaspoon pure vanilla extract
- 2 large eggs, at room temperature
For Optional Chocolate Drizzle:
- ½ cup semi-sweet chocolate chips
- 2 teaspoons shortening (or coconut oil)
Instructions
- Prepare Your Muffin Tin: Line a standard 12-cup muffin tin with paper or foil baking cups. Alternatively, grease the tin thoroughly with a non-stick baking spray (like Baker’s Joy). Preheat your oven to 325ºF (160ºC).
- Craft the Crust: If using whole Oreos, simply place one entire Oreo cookie at the bottom of each prepared muffin cup. If making a crumb crust, combine crushed cookies (if using Famous Wafers or other cookie crumbs), melted butter, and 1 tablespoon of sugar in a small bowl. Place about 1 tablespoon of this mixture into each muffin cup, pressing down firmly with your fingers, the back of a spoon, or a cupcake tamper to create a compact base.
- Mix the Cheesecake Filling: In a medium-sized bowl, using an electric mixer (paddle attachment if using a stand mixer), beat the room temperature cream cheese, granulated sugar, and vanilla extract together until the mixture is completely smooth and free of lumps. Scrape down the sides of the bowl as needed.
- Incorporate the Eggs: Add the eggs one at a time, mixing on low speed just until each egg is blended into the batter. Be careful not to overmix, as too much air can cause the cheesecake to crack.
- Fill and Garnish: Spoon the cheesecake batter evenly into the prepared muffin cups, filling each approximately two-thirds full over the Oreo crusts. If desired, sprinkle a portion of the chopped Oreos over the top of each cheesecake before baking.
- Bake to Perfection: Bake for about 25 minutes, or until the edges of the cheesecakes are set and the centers have only a slight jiggle. Avoid overbaking.
- Cooling Process: Once baked, turn off the oven and prop the oven door open slightly, allowing the cheesecakes to cool in the oven for about 15-20 minutes. This gradual cooling helps prevent cracking. Then, remove them from the oven and transfer the muffin tin to a wire rack to cool completely to room temperature.
- Chill Thoroughly: For the best flavor and texture, refrigerate the cooled mini cheesecakes for at least 4 hours, preferably overnight, in an airtight container.
- Optional Chocolate Drizzle or Topping: If adding a chocolate drizzle, melt the semi-sweet chocolate chips and shortening together in a microwave-safe bowl, stirring every 30 seconds until smooth. Drizzle over the chilled cheesecakes using a spoon or a zip-top bag with a corner snipped off. Alternatively, top each cheesecake with a few mini Oreos or additional chopped Oreos just before serving.
Notes
*Please note that Nabisco Famous Wafers have been discontinued. If you wish to make a traditional crumb crust, you can purchase boxed Oreo/chocolate cookie crumbs found in the baking aisle of most large supermarkets. You will need slightly more than ½ cup of cookie crumbs for the crust portion of this recipe.
This delightful recipe is adapted from my talented friend, Erica.
Recommended Products
As an Amazon Associate and member of other affiliate programs, I earn from qualifying purchases.
- KitchenAid 9-Speed Digital Hand Mixer
- Tassie Tamper
- Cupcake Tin
Nutrition Information:
Yield:
12
Serving Size:
1 cheesecake
Amount Per Serving:
Calories: 337
Total Fat: 23g
Saturated Fat: 12g
Trans Fat: 0g
Unsaturated Fat: 7g
Cholesterol: 75mg
Sodium: 229mg
Carbohydrates: 31g
Fiber: 1g
Sugar: 23g
Protein: 4g